Sizes and who each item is for
Your booking page can ask who each item is for while the customer shops, show who each size fits, and let a customer who doesn't know their size book now and get sized when they pick up.
Ask who each item is for
By default, the booking page asks for each person's details at checkout. You can ask as each item is added instead, so every item in the booking belongs to a named person.
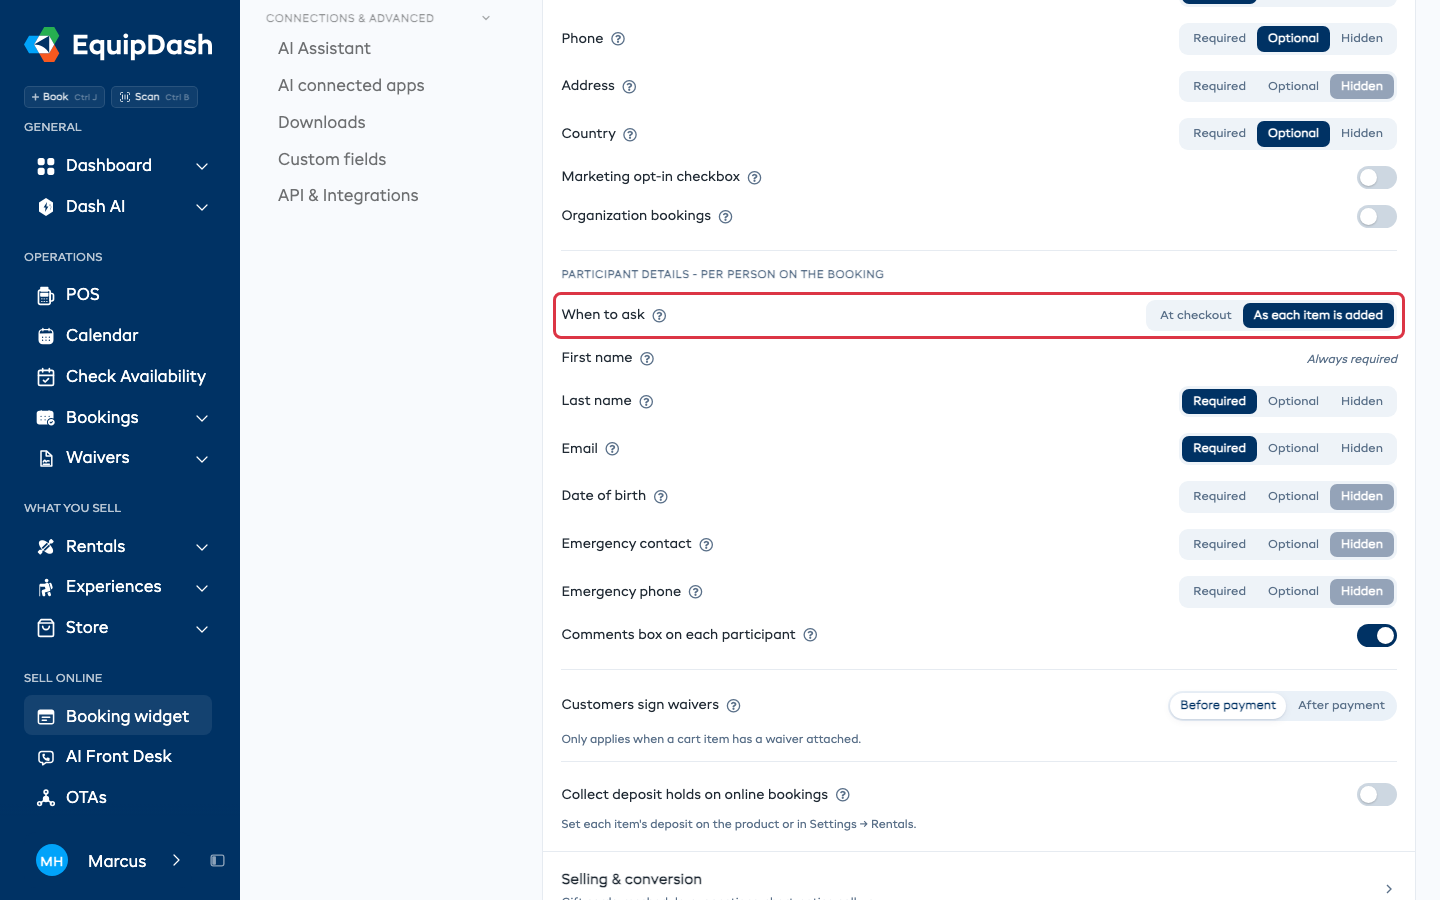
- Go to Settings > Booking widget > Widget settings tab > Checkout & customer details.
- Under Participant details, find When to ask and click As each item is added. Click At checkout to go back.
There's no Save button. The change saves as you make it.
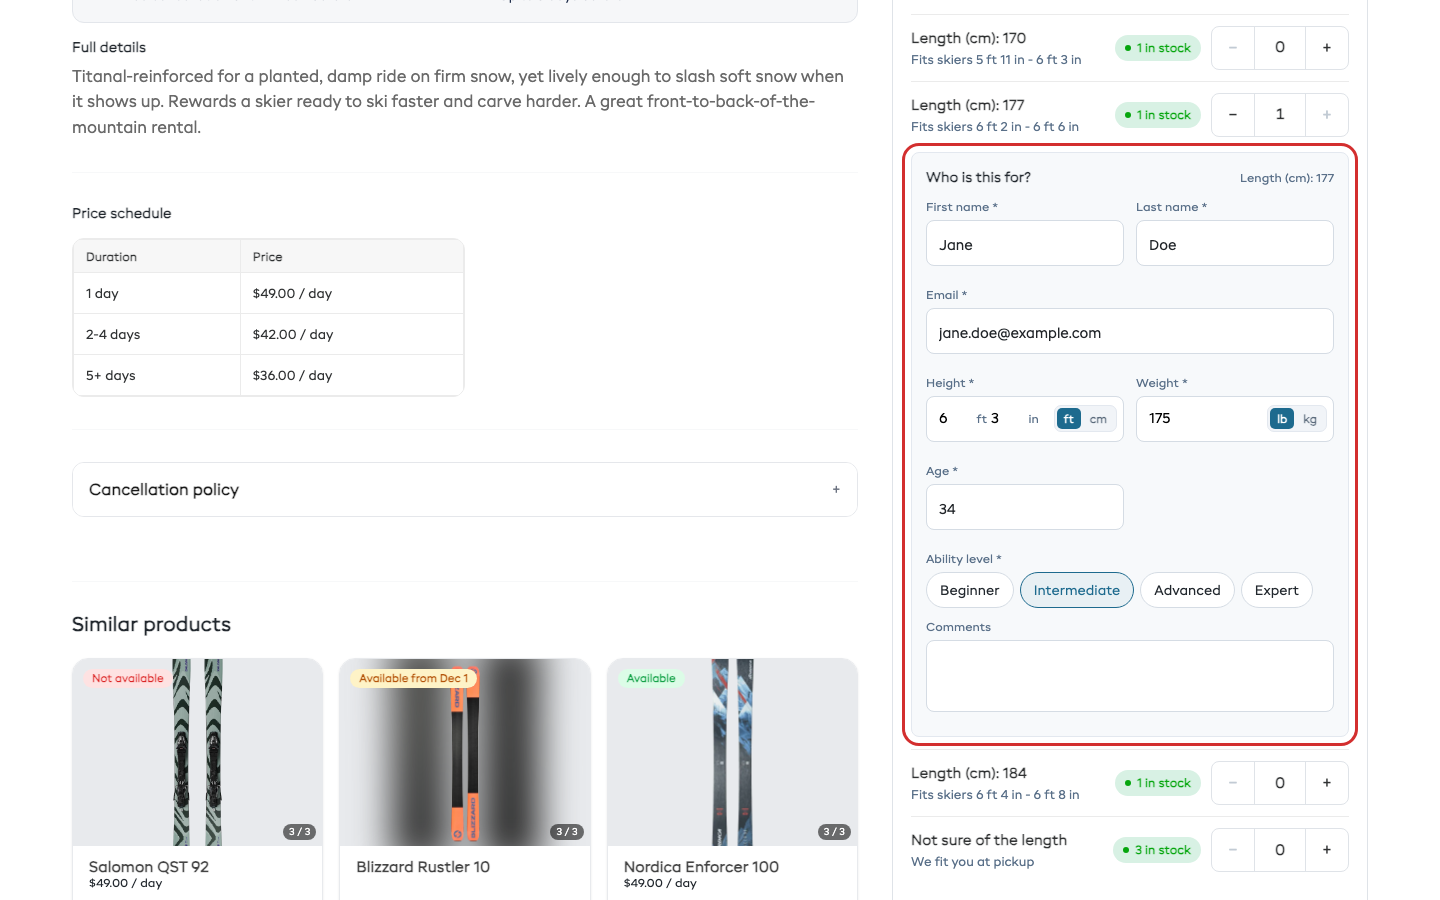
With As each item is added, a Who is this for? box opens under each item the customer picks. It asks for:
- the participant fields you set on the same page (first name, plus last name, email, date of birth or emergency contact if you turned them on)
- your per-person custom fields that apply to the item
- the item's fit questions, if it has any, such as height, weight, age and ability level
Height has an ft / cm switch and weight has an lb / kg switch. Both start in your country's units. When the customer adds gear for someone they already entered, they can pick that person's name instead of typing it again.
An item for several people, such as a four-seat vehicle, asks for Seat 1 first. The customer can fill in the other seats right away or at checkout.
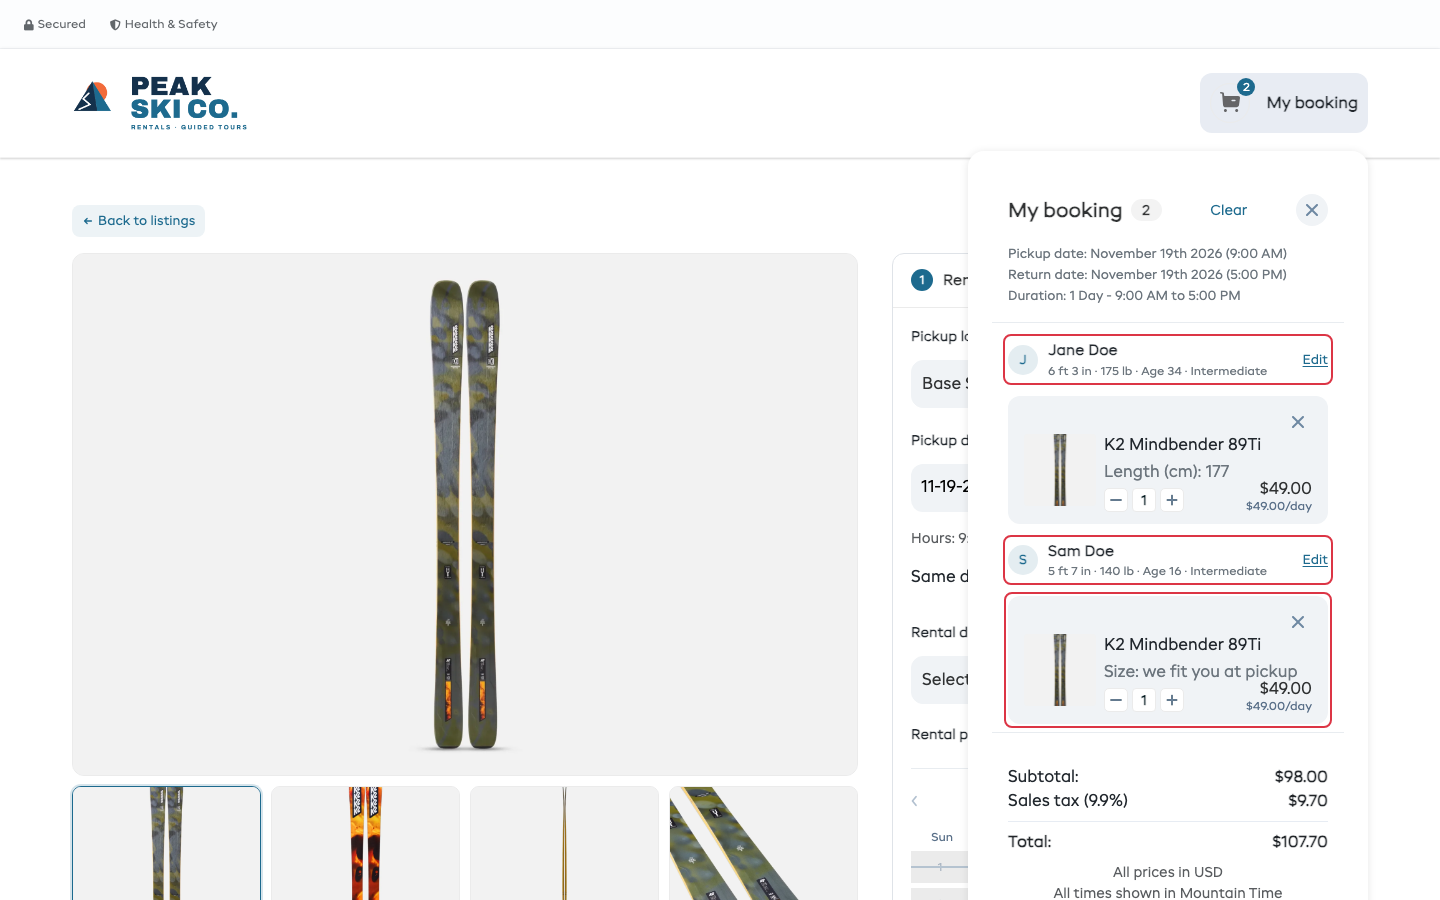
My booking then lists each item under the person it's for, with their answers and an Edit link. + Add gear for someone else goes back to your rentals to add another person.
At checkout, the customer enters their own contact details. Checkout asks only for what is still missing:
- When every item names its person and nothing the participants step asks is missing, checkout skips that step and goes straight to the waivers (or to payment).
- When something is missing, such as a seat left for later, the participants step asks only for that.
The confirmation page and the confirmation email show who each item is for, for example For Sam Rivera under the item.
If the customer changes the dates in My booking and an item is no longer free, the notice names the person it was for, for example K2 Mindbender 89Ti (Sam Rivera) - not available on this date, removed.
Show who each size fits
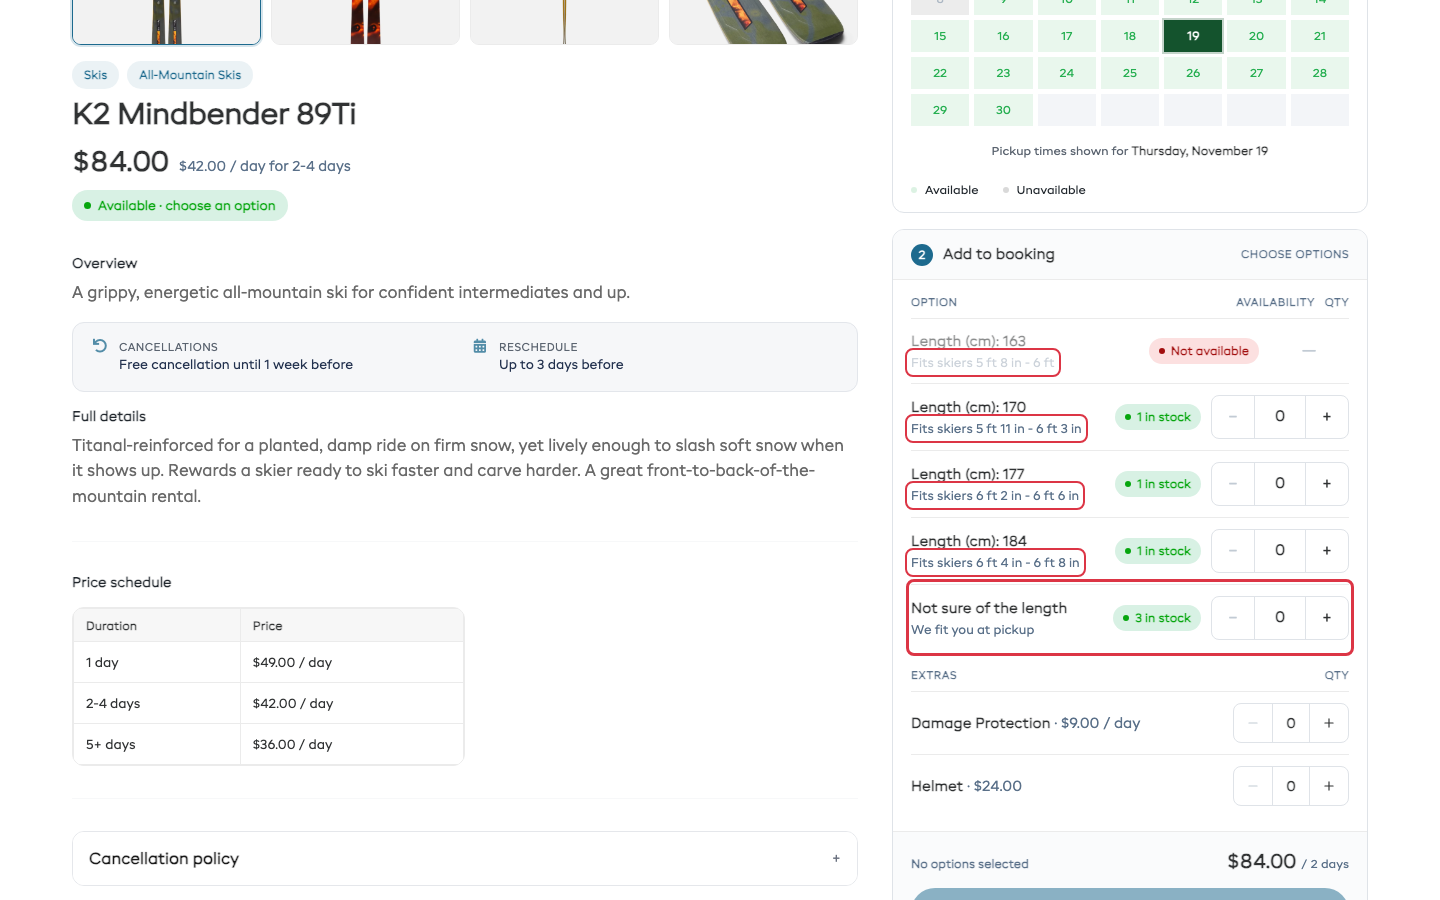
Each size can show a short line under its name, such as Fits skiers 5 ft 11 in - 6 ft 3 in. EquipDash works the line out for you on:
- ski and snowboard lengths, from the rider's height
- ski boot sizes (Mondopoint), as shoe sizes: US in the US and Canada, UK in the UK, Ireland, Australia and New Zealand, EU everywhere else
- bike frames, from the rider's height
It reads the item's Product type (Skis, Snowboards, Ski Boots or a bike type) and the size's name, and shows heights in your shop's units. A size with no chart, such as a helmet in S, M and L, shows no line until you type one.
To write your own line for a size:
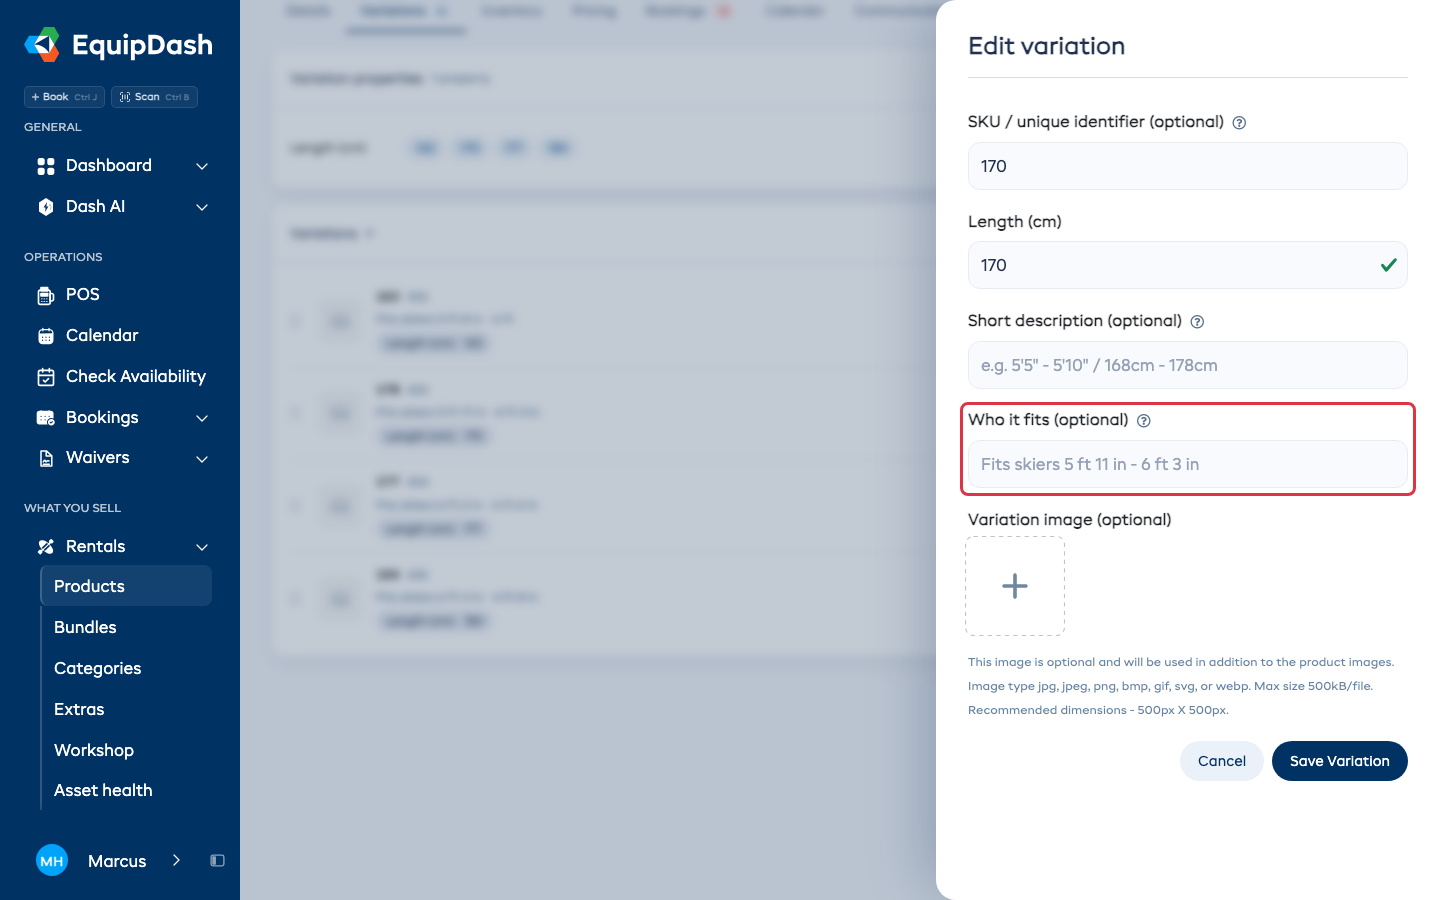
- Open the product and click the Variations tab.
- Click the edit icon (pencil) on the size.
- Type the line in Who it fits (optional), for example
Fits ages 8-10. - Click Save Variation.
The box shows the worked-out line in gray. Leave it empty to keep using that line.
Not sure of the size? We fit you at pickup
An item whose sizes show a fits line also gets a Not sure of the size row under its sizes (Not sure of the length on skis and snowboards). A customer who doesn't know their size books that row.
- It holds one unit of the size with the most free stock, so you never book more than you have.
- My booking, checkout and the confirmation email show Size: we fit you at pickup.
When the customer comes in, pick the real size on the booking:
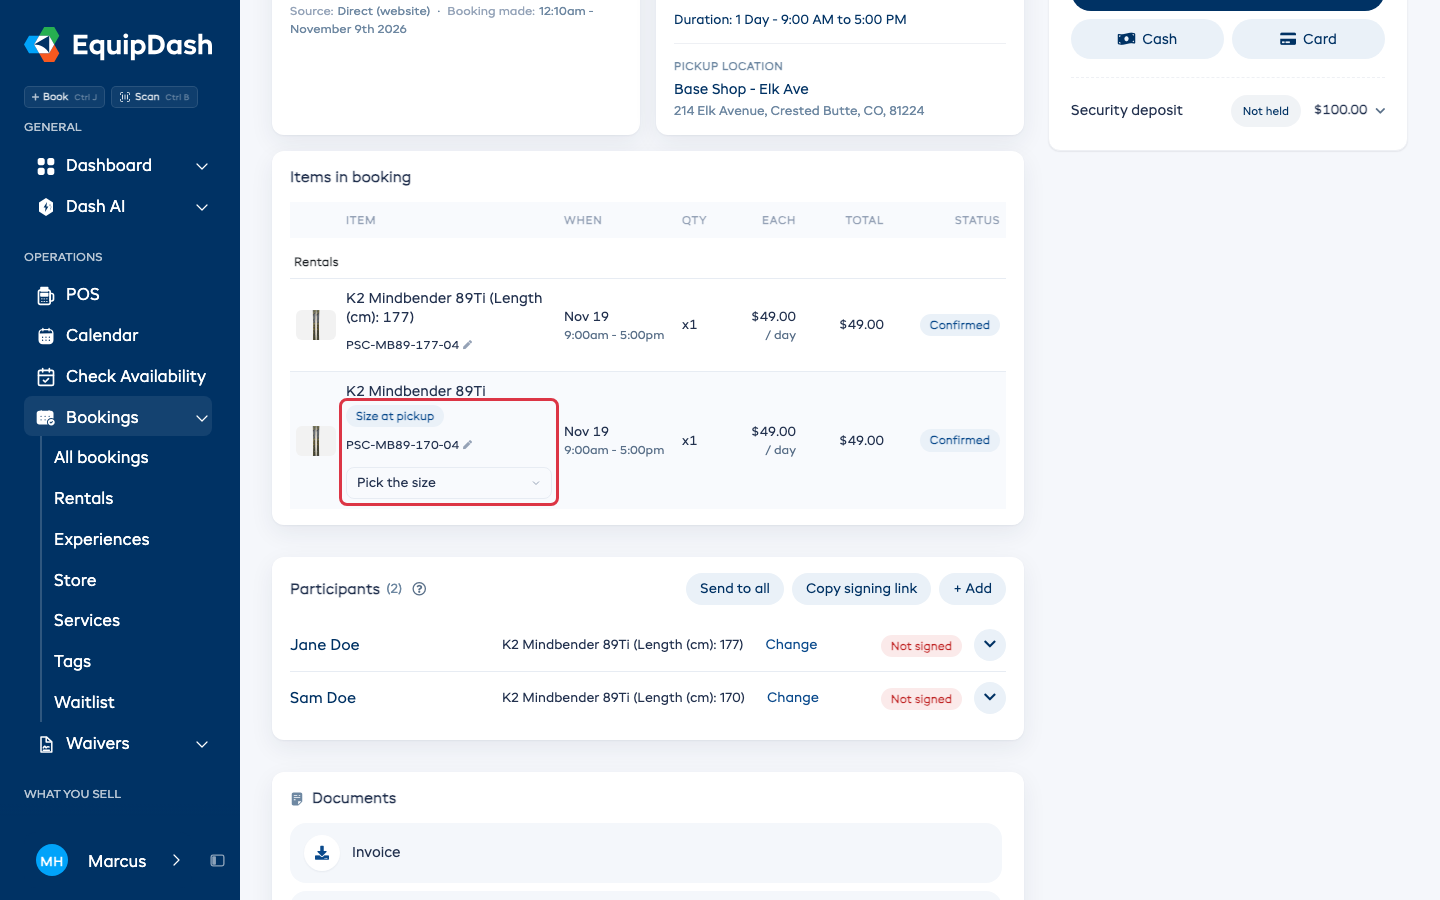
- On the Details tab, the line under Items in booking shows Size at pickup. Choose the size in Pick the size.
- Or on the Fit ticket tab, choose it in Pick the size under that person's Gear.