Importing Customers
If you have an existing customer database in a spreadsheet or another system, you can import it into EquipDash using a CSV file. This saves you from manually adding each customer one by one.
Preparing Your CSV File
Your CSV file needs to follow a specific format. The first row must be a header row with column names that EquipDash recognizes.
Required Columns
The following columns must be present in your CSV:
| Column Header | Description |
|---|---|
First Name | Customer's first name (minimum 2 characters) |
Last Name | Customer's last name (minimum 2 characters) |
Email | Customer's email address (must be valid and unique) |
Optional Columns
You can also include any of these columns:
| Column Header | Description |
|---|---|
Phone Country Code | Phone country code (e.g. +1, +44, +61) — must start with "+" |
Phone Number | Phone number |
Address Line 1 | Street address |
Address Line 2 | Apartment, suite, or unit |
City | City or town |
State | State, province, or region |
Postcode | Postal or zip code |
Country | Country name (must match a supported country exactly) |
Example CSV
First Name,Last Name,Email,Phone Country Code,Phone Number,City,Country
Sarah,Johnson,sarah@example.com,+61,0412345678,Sydney,Australia
Michael,Chen,michael@example.com,+1,5551234567,Vancouver,Canada
Emma,Williams,emma@example.com,,,London,United Kingdom
Downloading the Template
When you open the import panel, you can click the click here to download a template link to get a pre-formatted CSV file with the correct column headers. This is the easiest way to make sure your file is in the right format.
File Requirements
- The file must be in CSV format (
.csvor.txtextension). - Maximum file size: 16 MB.
- The header row must match the column names exactly (including capitalisation and spaces).
Importing the File
- Click Customers in the sidebar.
- Click the Action dropdown near the top-right of the page.
- Click Import customers.
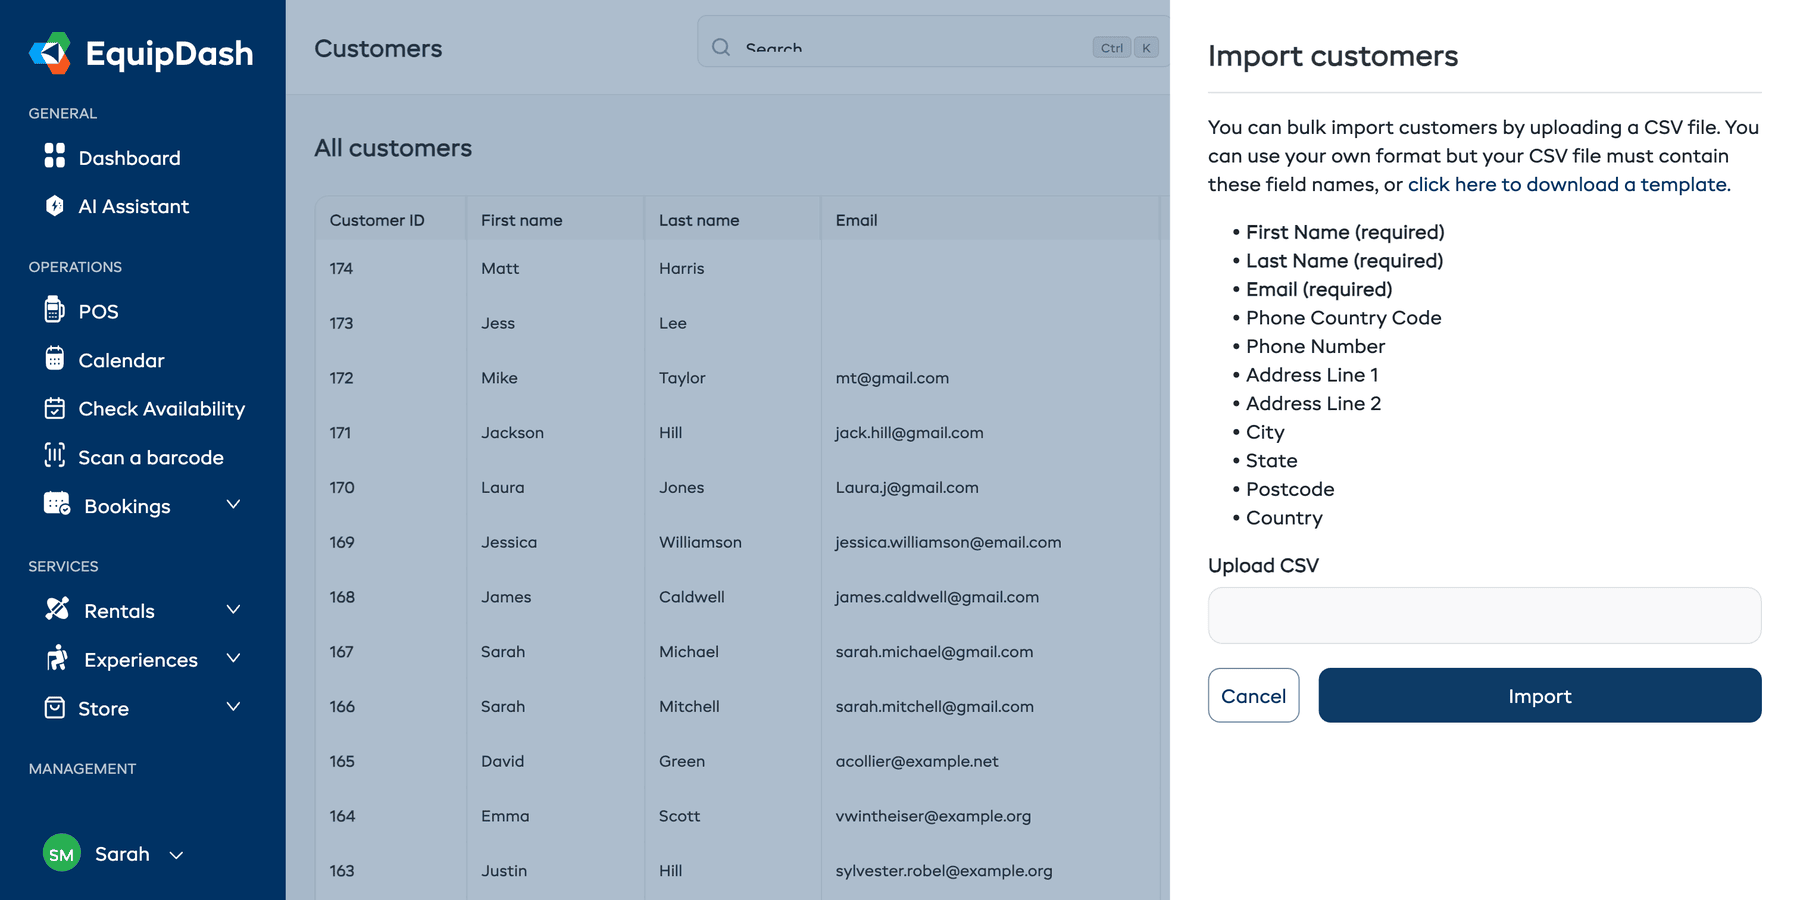
- In the side panel that opens, you will see a list of required and optional columns. Click Choose file to select your CSV file from your computer.
- Click Import to start processing.
What Happens During Import
EquipDash processes each row in your CSV:
- Validates the header row — Checks that the required columns (First Name, Last Name, Email) are present.
- Validates each row — Checks that values meet the validation rules (valid email, minimum name length, etc.).
- Creates customer profiles — For each valid row, a new customer is created.
- Skips invalid rows — Rows that fail validation are skipped, and errors are collected.
After Import
You will see a summary message telling you:
- How many customers were successfully imported.
- How many customers were in the file in total.
- If there were any errors, the specific rows and validation issues will be listed.
Handling Errors
Common reasons for rows to fail during import:
| Error | Cause | Fix |
|---|---|---|
| Missing required field | First Name, Last Name, or Email is blank | Fill in the missing value in your CSV |
| Invalid email | The email address format is not valid | Correct the email format |
| Duplicate email | A customer with this email already exists | Remove the duplicate or update the existing customer |
| Invalid country | The country name does not match a supported value | Use the exact country name from the supported list |
If some rows fail but others succeed, the successful rows will still be imported. You can fix the errors in your CSV and re-import just the failed rows.
Tips
- Download the template first. Use the template link in the import panel to get a correctly formatted CSV file.
- Check for duplicates before importing. EquipDash will reject rows with email addresses that already exist in your customer list. Clean up duplicates in your CSV first.
- Match column headers exactly. The headers are case-sensitive. "First Name" works; "first name" or "FirstName" will not.
- Start with a small test. If you have a large file, try importing a small subset first to make sure the format is correct.
- Country names must match exactly. Use the full country name as it appears in the supported list (e.g. "United Kingdom", not "UK").