Staff Overview Growth+This feature requires the Growth+ plan or higher
The Staff section lets you manage your team members — add new staff, assign roles, track employment details, manage availability, and build schedules.
The Staff List
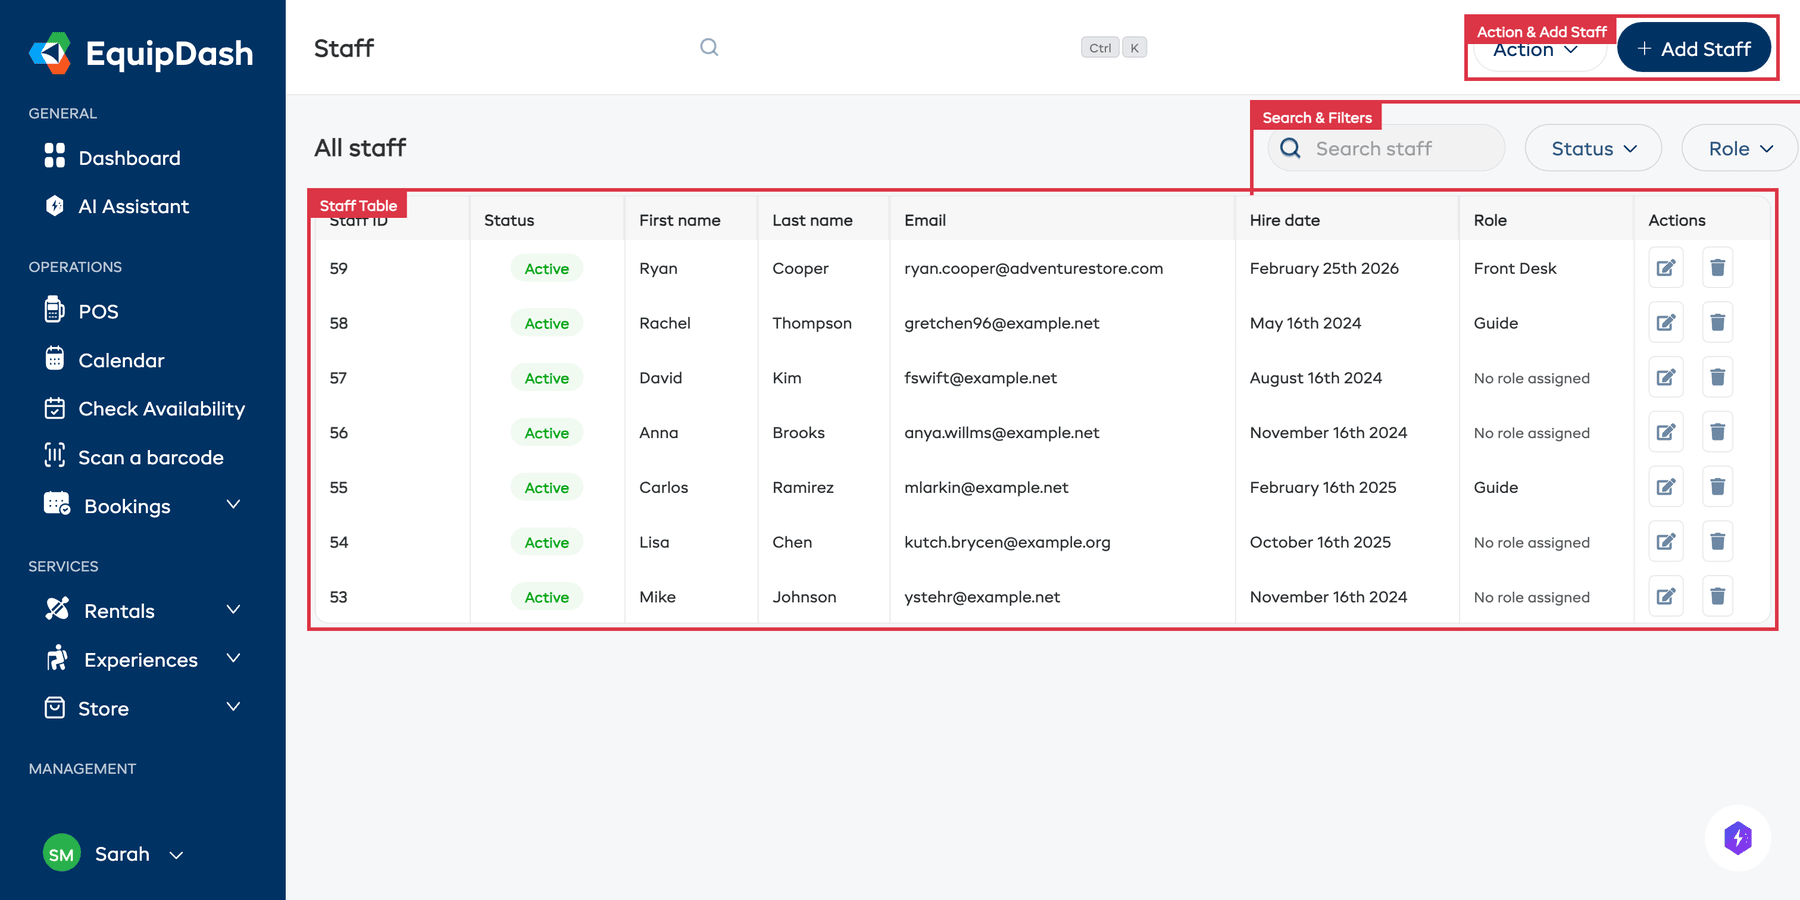
Navigate to Staff in the sidebar to see your full team. The page displays All staff in a table with the following columns:
| Column | Description |
|---|---|
| Staff ID | A unique identifier for each staff member |
| Status | Active or inactive |
| First name | Staff member's first name |
| Last name | Staff member's last name |
| Staff member's email address | |
| Hire date | The date they were hired |
| Role | Their assigned role (e.g. Admin, Manager, Staff) |
| Actions | Edit (pencil icon) or Delete (trash icon) |
Click the gear icon near the top of the table to customize your columns. Tick a column under Available columns to show it, untick one under Active columns to hide it, and drag columns into the order you prefer. Your layout is saved and shared with your whole team.
Filtering and Searching
Use the controls below the All staff heading to find specific staff:
- Search staff — type a name or email to filter the list
- Status dropdown — filter by active or inactive staff
- Role dropdown — filter by a specific role
Top Bar Actions
- + Add Staff — opens the form to create a new staff member
- Action dropdown — contains Export (download your staff list) and Import staff (bulk upload via file)
Staff Detail Page
Click any row in the staff list to open that staff member's detail page.
Header
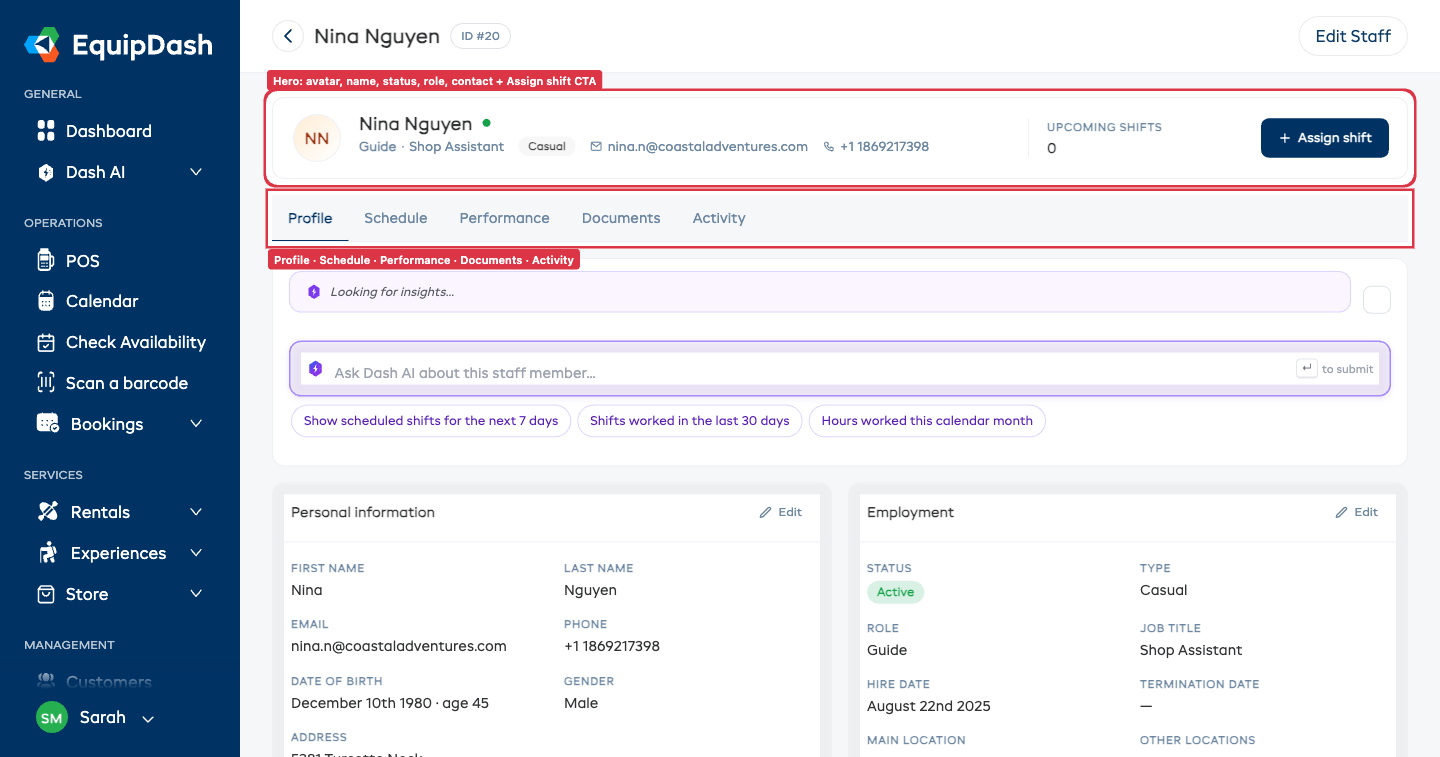
At the top of the page you see the staff member's name, their ID pill, a status dot (green = active, orange = invited, grey = inactive) and an Edit Staff button on the right for opening the full edit panel.
Hero strip
Below the header sits a single-row hero that gives you the staff member at a glance:
- Avatar — hover and click to upload a profile photo, or hit the small × to remove it.
- Name, role and contact line — name with status dot, role · job title, employment-type chip, email (click to compose), phone (click to dial), and main location.
- Upcoming shifts tile — count of scheduled shifts from today onwards.
- + Assign shift button — opens the Add Shift panel pre-targeted at this staff member.
The five tabs
A tab strip sits directly under the hero. Click any tab to switch view — your selection is reflected in the URL, so you can share a link that lands on a specific tab.
| Tab | What it's for |
|---|---|
| Profile | Personal information, employment details, emergency contact, spoken languages and certifications, and any custom fields you've defined for staff. Each card has a pencil Edit button (top-right) that flips just that card into edit mode — change a field, click Done at the bottom, and you're back to read mode. Fields auto-save as you tab through them. |
| Schedule | Set Work Hours and Record Time Off action buttons, plus the Working hours card, Time off calendar (month view, colour-coded by leave type) and Time off entries table. |
| Performance | At-a-glance metrics: hours this month, hours this week vs. contractual, upcoming shift count, time off used this year. Below that, a Hours by week sparkline (last 12 weeks) and a Recent shifts mini-table. |
| Documents | All files attached to the staff member — certifications, licences, contracts. Search the list, upload new files with the + Upload button. |
| Activity | A vertical timeline of recent events for this staff member: hire date, last login, shift create/update/delete entries from the audit log. |
Inline editing on the Profile tab
The Profile tab uses an inline-edit pattern instead of a separate edit page — quicker for the common case of fixing one or two fields:
- Click the pencil Edit button on the card you want to change (Personal information, Employment, or Emergency contact).
- The card body flips to edit mode showing every field as an input. The pencil disappears.
- Edit the fields. Each one auto-saves on blur (i.e. when you click away or tab to the next field) — no Save button per field.
- Click Done at the bottom-right of the card when you're finished. The card flips back to read mode.
If you'd rather edit everything in one big panel — the legacy modal — use the Edit Staff button in the page header. Both edit the same underlying record.
Staff Workflow
Follow these steps to get a staff member fully set up:
- Add the staff member using + Add Staff
- Assign a role to control what they can access
- Set availability so the scheduler knows when they can work
- Assign locations to the staff member if you operate across multiple sites
- Build a schedule and assign them to shifts