Adding a Customer
While EquipDash automatically creates customer profiles when people make bookings, you can also add customers manually. This is useful when you want to set up a customer profile before they book, or when you are adding a walk-in customer.
How to Add a Customer
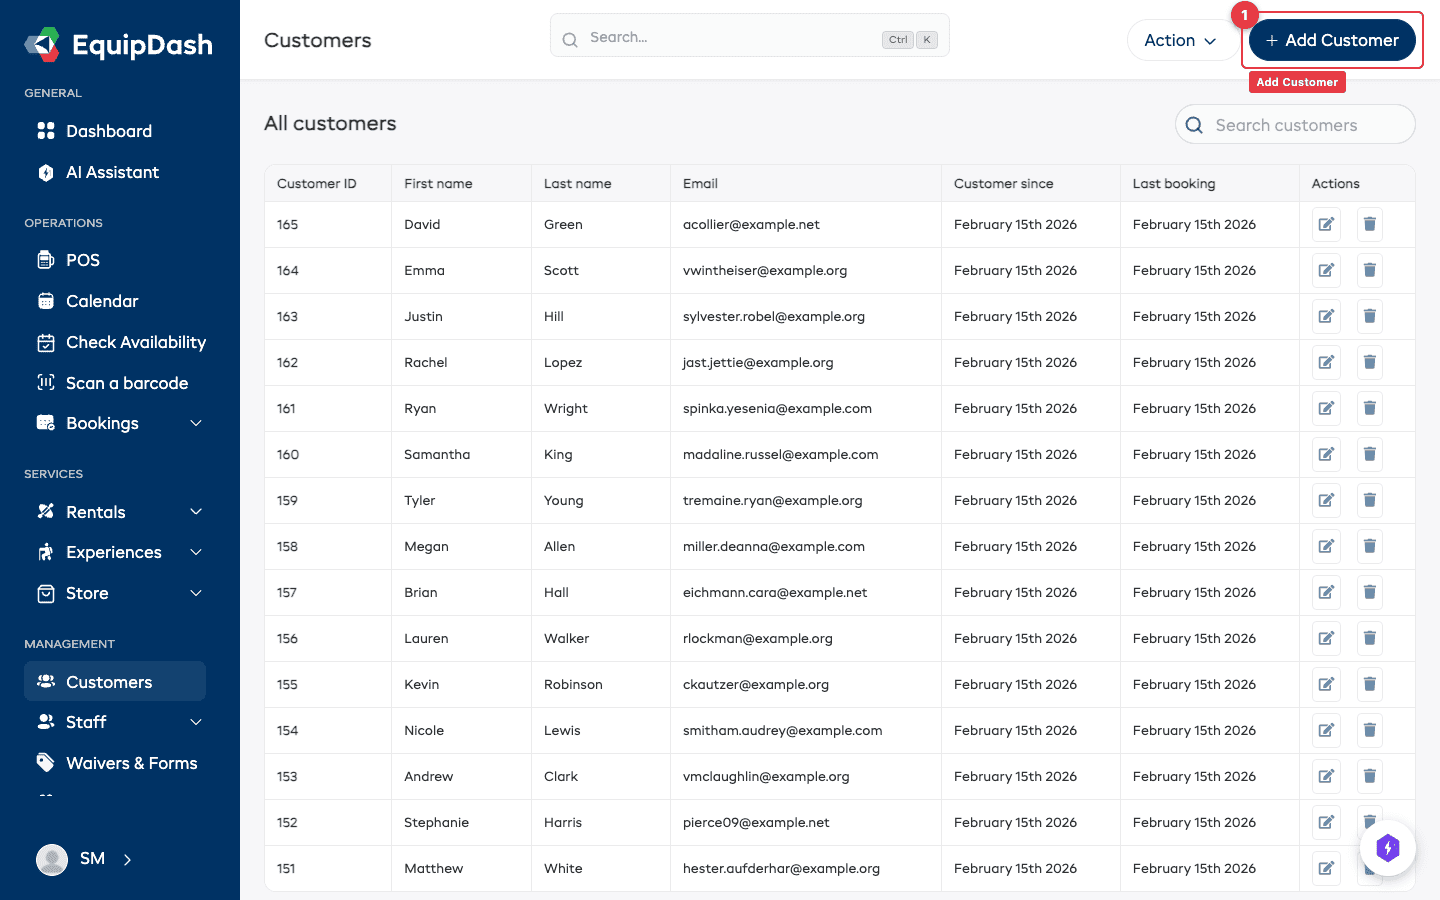
- Click Customers in the sidebar to open the customer table.
- Click the + Add Customer button in the top-right corner of the page.
-
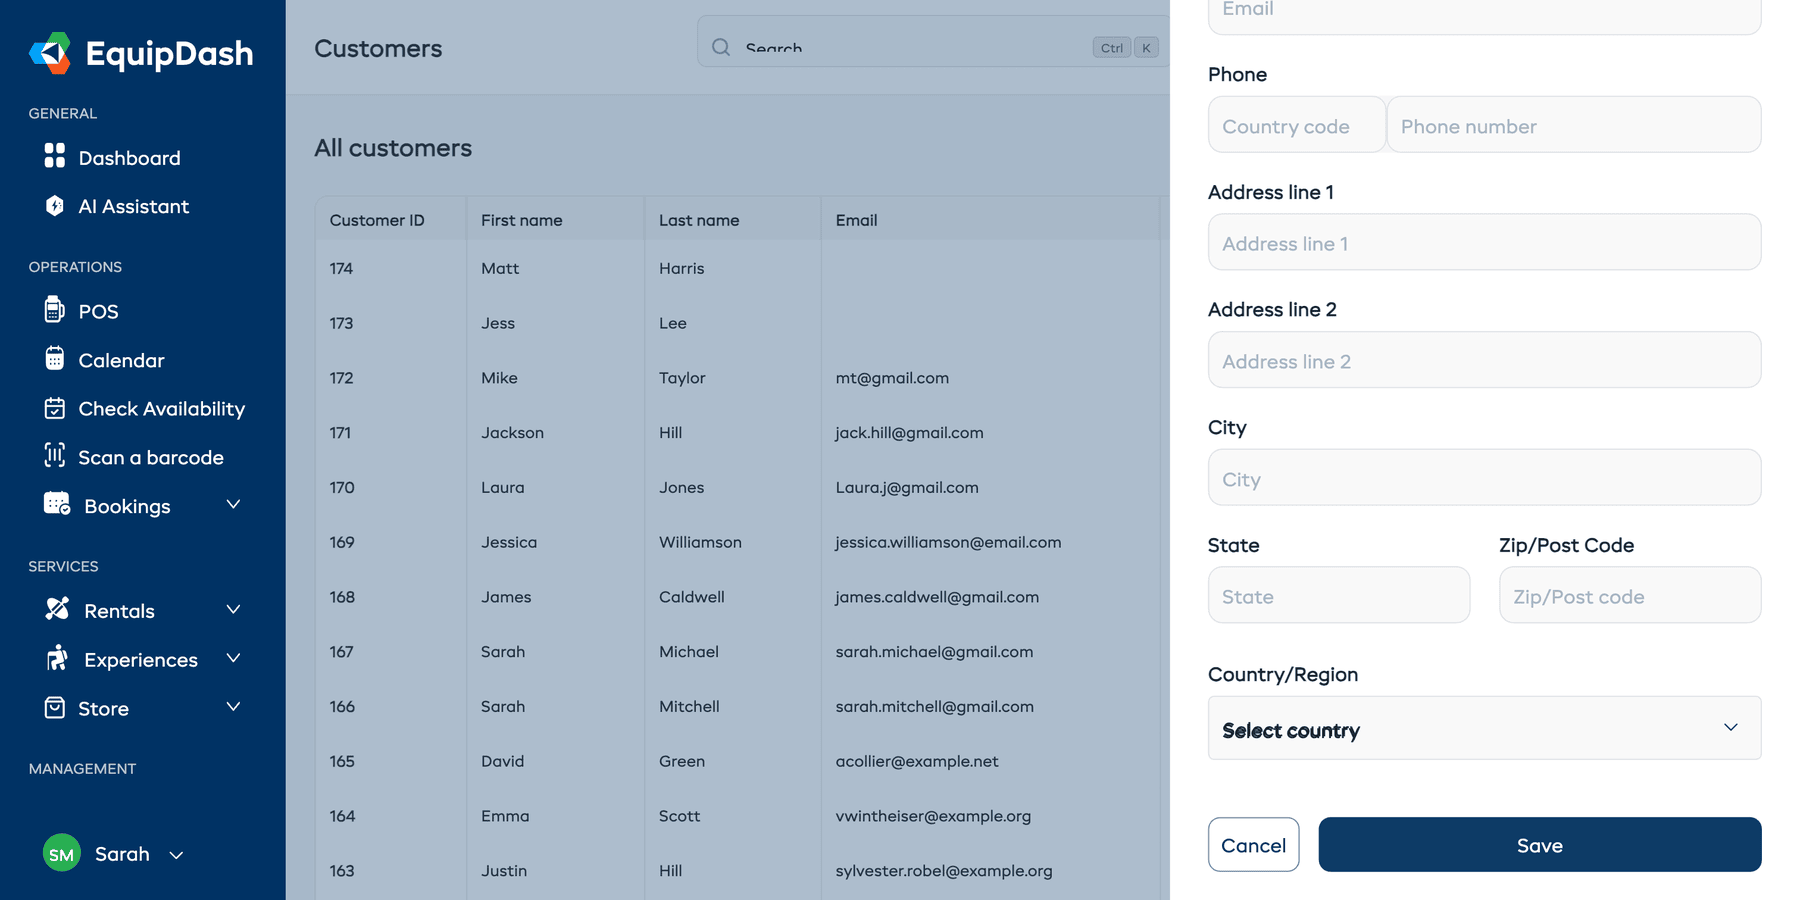
A side panel will open with the Add new customer form. Fill in the customer details:
- This is an organization (optional) — Flip this on when the customer is a company, club, or group that books on behalf of others. The form swaps to an Organization name (required) plus an optional contact person. See Organization Customers below.
- First name (required) — The customer's first name.
- Last name (required) — The customer's last name.
- Email (required) — Their email address. This must be unique across your customer list.
- Phone (optional) — Two fields side by side: Country code (e.g. +1, +44, +61) and Phone number.
- Address line 1 (optional) — Street address.
- Address line 2 (optional) — Apartment, suite, or unit number.
- City (optional) — City or town.
- State (optional) — State, province, or region.
- Zip/Post Code (optional) — Postal or zip code.
- Country/Region (optional) — Country from the dropdown list.
- If you have Custom Fields configured for customers (Growth+ plan), they will appear below the standard fields. Fill in any required custom fields.
- Click Add Customer.
The new customer will appear in your customer table and can be selected when creating bookings.
Validation Rules
EquipDash checks the following when you add a customer:
- First name and Last name must be at least 2 characters (individuals). For organizations, the Organization name is required instead and the contact name is optional.
- Email must be a valid email format and must be unique for your business. If a customer with the same email already exists, you will see an error.
- Country code must start with "+" and be no more than 4 characters (e.g. "+61").
Organization Customers
Organization bookings are off by default. To turn them on, go to Settings → Booking Widget → Checkout & customer details and switch on Organization bookings. That one setting shows the organization option everywhere: the customer form, the POS quick-create, and your public booking page.
Flip on This is an organization when the customer is a company, club, or group that books on behalf of others — rather than an individual.
- The Organization name becomes the identity: it shows on the customer list, booking pages, and manifests — with the contact person shown alongside when there is one — and it's what search matches.
- The contact person (first/last name) is optional — emails about the organization's bookings still greet the contact when there is one.
- The same toggle is available in the POS quick-create, the mobile app, and on your public booking page (customers can identify as an organization at checkout).
What Happens After Adding
Once created, the customer profile is immediately available:
- You can select this customer when creating bookings in the Point of Sale.
- The customer will appear in search results.
- You can open their detail page to add notes, view booking history, and more.
Duplicate Email Addresses
EquipDash uses email addresses to identify unique customers within your business. If you try to add a customer with an email that already exists in your customer list, the save will fail with a validation error.
If you need to update an existing customer's information, find them in the table and click into their profile to edit their details.