Quick Start Guide
This guide walks you through the fastest path from a fresh EquipDash account to your first booking. You can complete all six steps in about 10 minutes.
What You'll Learn
- How to fill in your essential business details and localization settings
- How to add your first rental product or experience (including pricing)
- How to connect Stripe so you can accept online payments
- How to create a booking using the Point of Sale
- How to embed the booking widget on your website
This guide covers the essentials only. Each step links to a detailed page where you can explore advanced options later.
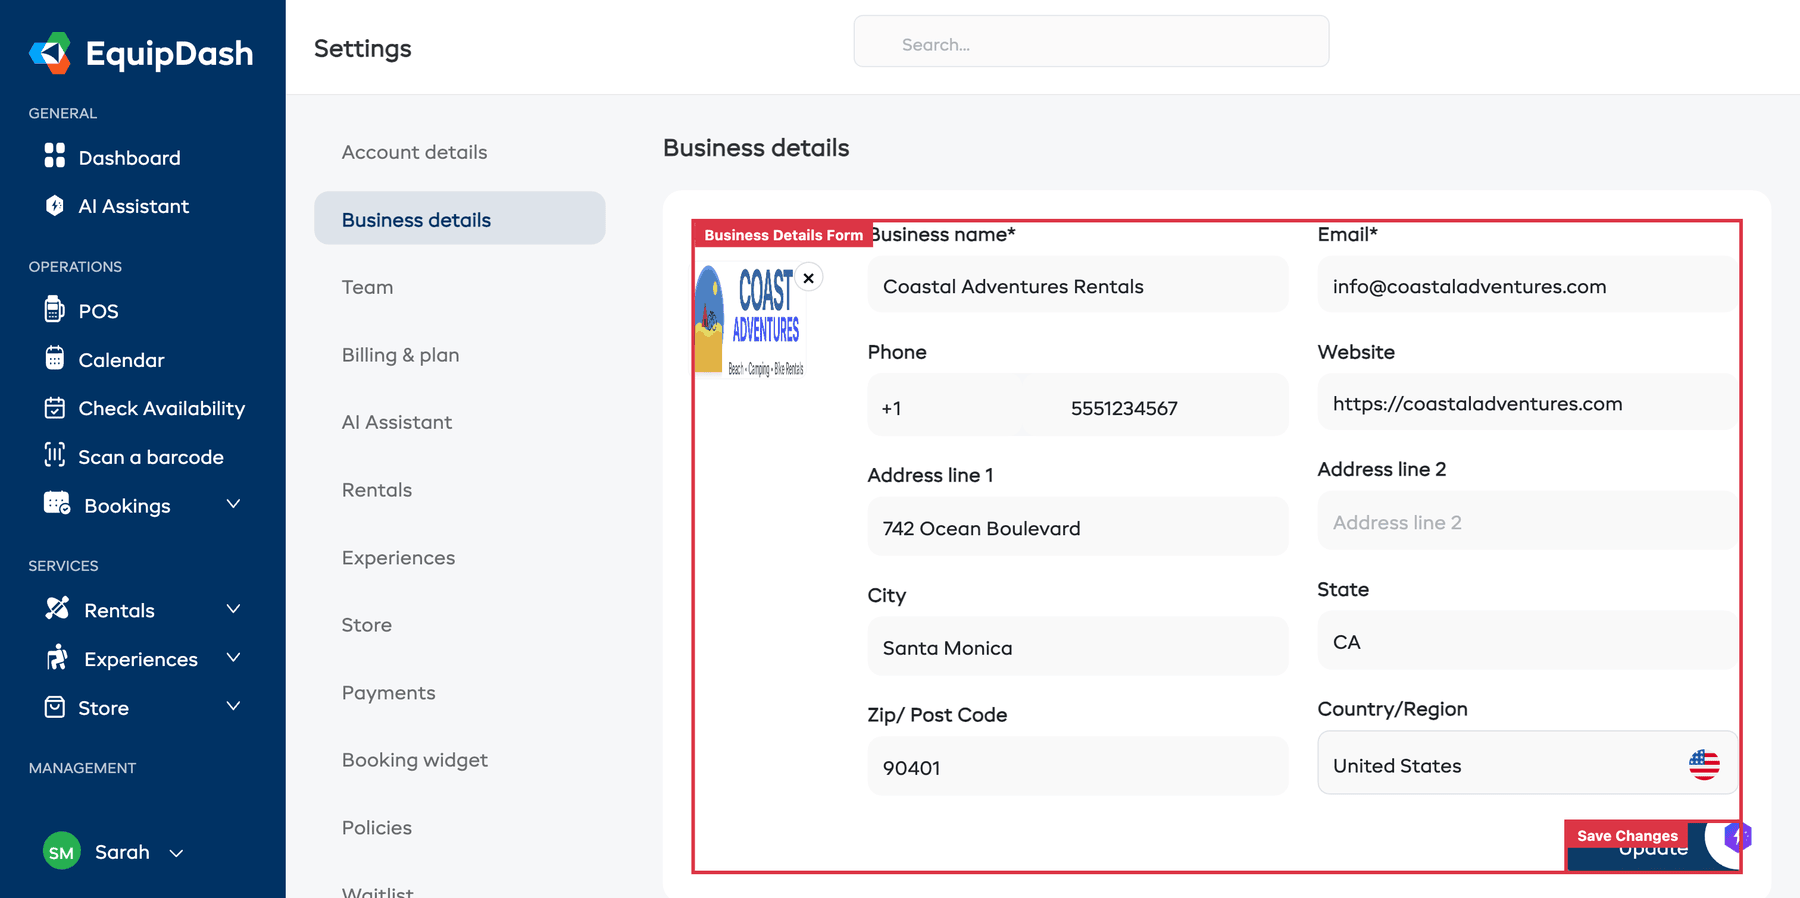
Step 1: Enter Your Business Details
Before anything else, tell EquipDash about your business so that bookings, emails, and your customer-facing widget display the right information.
- Click Settings in the sidebar.
- Select Business Details.
- Fill in your Business Name, Contact Email, Phone Number, and Address.
- Upload your Business Logo — this appears on emails and your booking widget.
- Click Save Changes.
Next, set your timezone, currency, and date format:
- Still in Settings, select Localization.
- Choose your Timezone (e.g., "America/Los_Angeles") — this controls how dates and times appear everywhere in the app.
- Choose your Currency (e.g., USD, EUR, GBP) — this controls how prices are displayed and what currency you charge in.
- Choose your preferred Date Format (MM-DD-YYYY or DD-MM-YYYY).
- Click Save Changes.
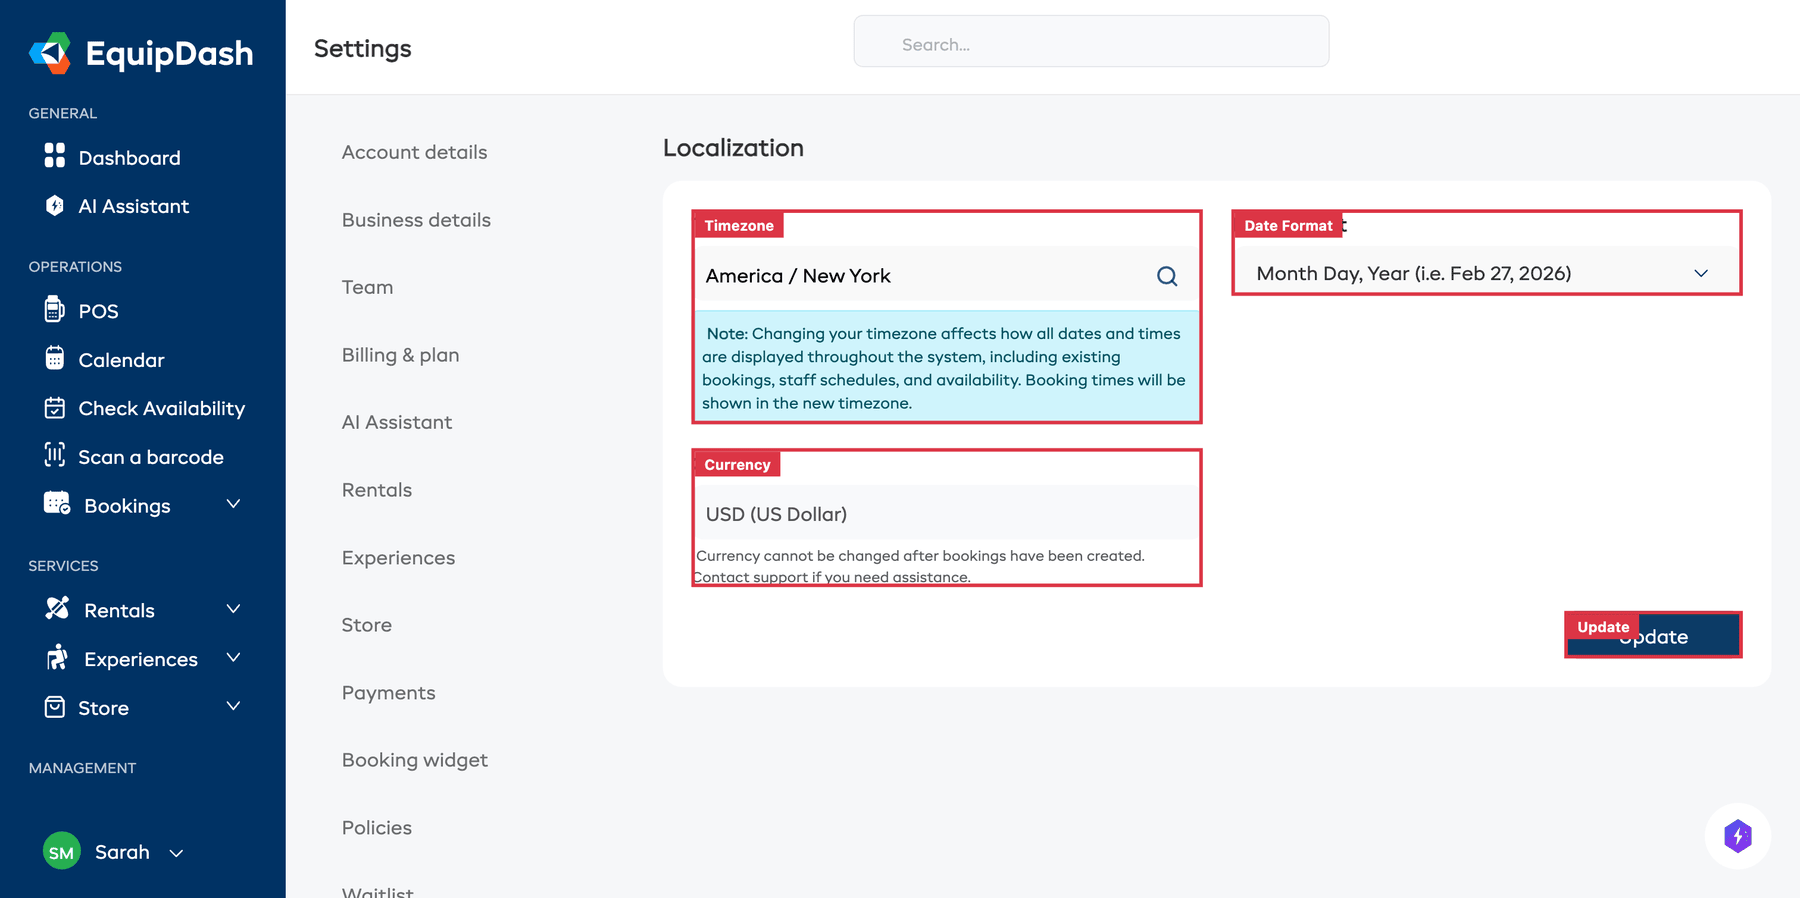
Getting the timezone and currency right from the start is important. Once you have bookings, the currency cannot be changed.
Want the full walkthrough? See Setting Up Your Business.
Step 2: Add Your First Product or Experience
EquipDash supports two types of bookable items. Pick whichever matches your business (or add both).
Option A — Add a Rental Product
Use this if you rent out physical equipment (bikes, kayaks, camping gear, etc.). The creation wizard has three steps.
- Go to Rentals in the sidebar, then click Products.
- Click Add Product — this opens a three-step creation wizard.
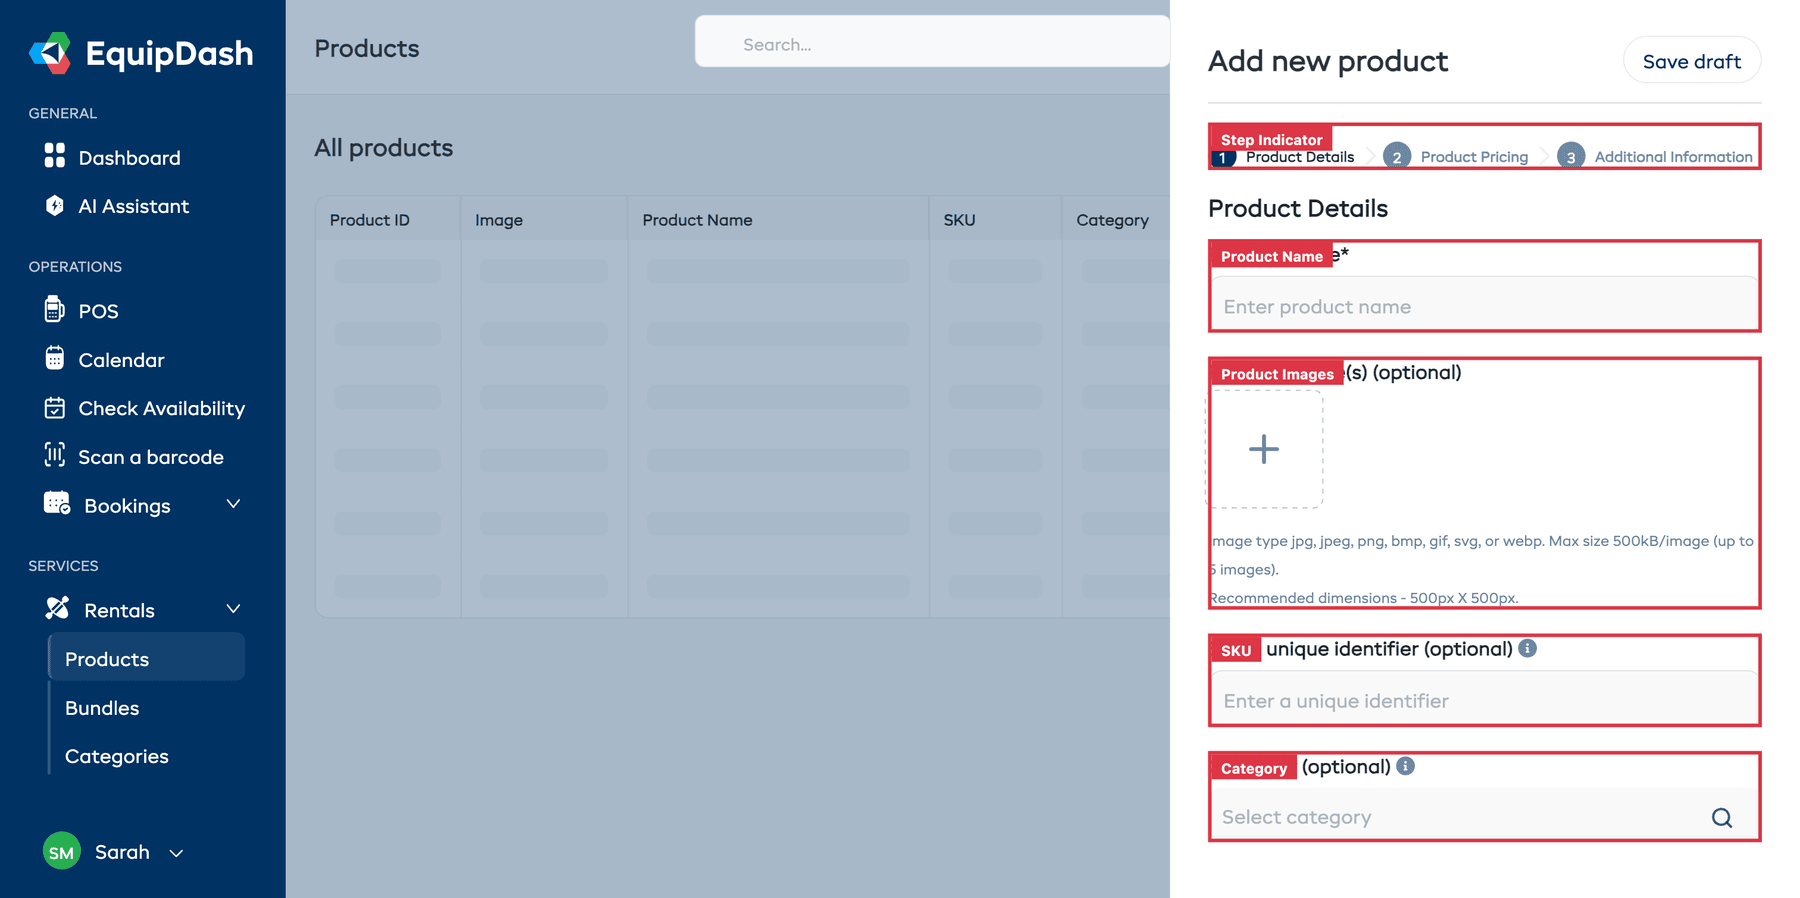
- Step 1 — Product Details — Enter a Product Name, upload Product Images (optional — customers will see these in your widget), add a SKU (optional), and choose a Category (optional).
- Step 2 — Product Pricing — Choose how your pricing works:
- Price Applies — Select Year Round for a single price all year, or Seasonal to set different prices for different seasons.
- Price Structure — Select Schedule for tiered duration-based pricing (e.g., 1 hour = $10, 2 hours = $19, 3 hours = $25) or Flat for a fixed rate per time unit (e.g., $10/hour, $50/half day).
- Add at least one price so customers can book.
- Step 3 — Additional Information — Configure optional features like Inventory Tracking (track individual units), Buffer Time (gap between rentals), Rental Period Limits, Variations (e.g., size or color options), and add a Description.
- Click Save to create your product.
Your product is now live and ready to be booked.
Full guide: Creating Products and How Pricing Works
Option B — Add an Experience
Use this if you run scheduled activities or tours (guided hikes, surf lessons, etc.). The creation wizard has three steps.
- Go to Experiences in the sidebar.
- Click Add Experience — this opens a three-step creation wizard.
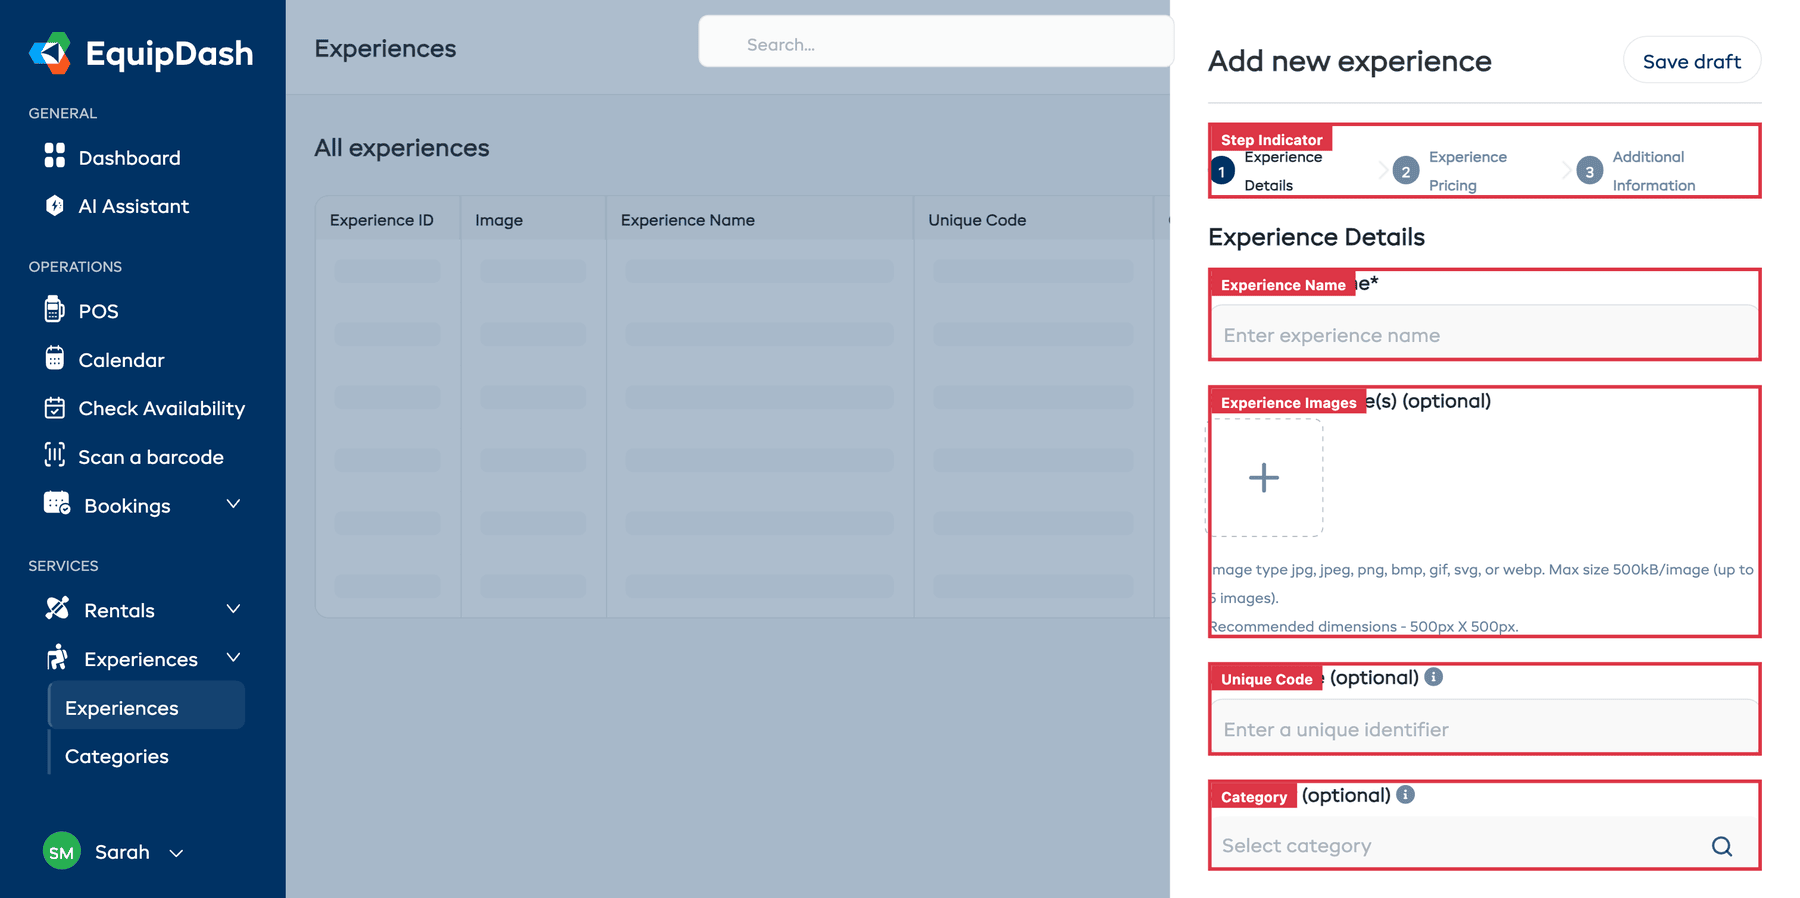
- Step 1 — Experience Details — Enter an Experience Name, upload Experience Images (optional), add a Unique Code (optional), and choose a Category (optional).
- Step 2 — Experience Pricing — Choose how your pricing works:
- Applies — Select Year Round or Seasonal.
- Pricing Structure — Select By Participant to charge per person (e.g., $65 per adult, $35 per child) or By Group to charge a flat rate for the whole group.
- For participant pricing, select which Rate Categories apply (e.g., Adult, Child) and set a price for each. Rate categories are configured in Settings > Experiences.
- Step 3 — Additional Information — Set the Duration, Maximum Participants, Availability (manual or recurring schedule), and add a Description.
- Click Save to create your experience.
After saving, you will also need to add availability slots so customers know when your experience runs. Go to the Schedule tab and add at least one time slot (e.g., every Saturday at 9:00 AM).
Full guide: Creating Experiences and Setting Up Schedules
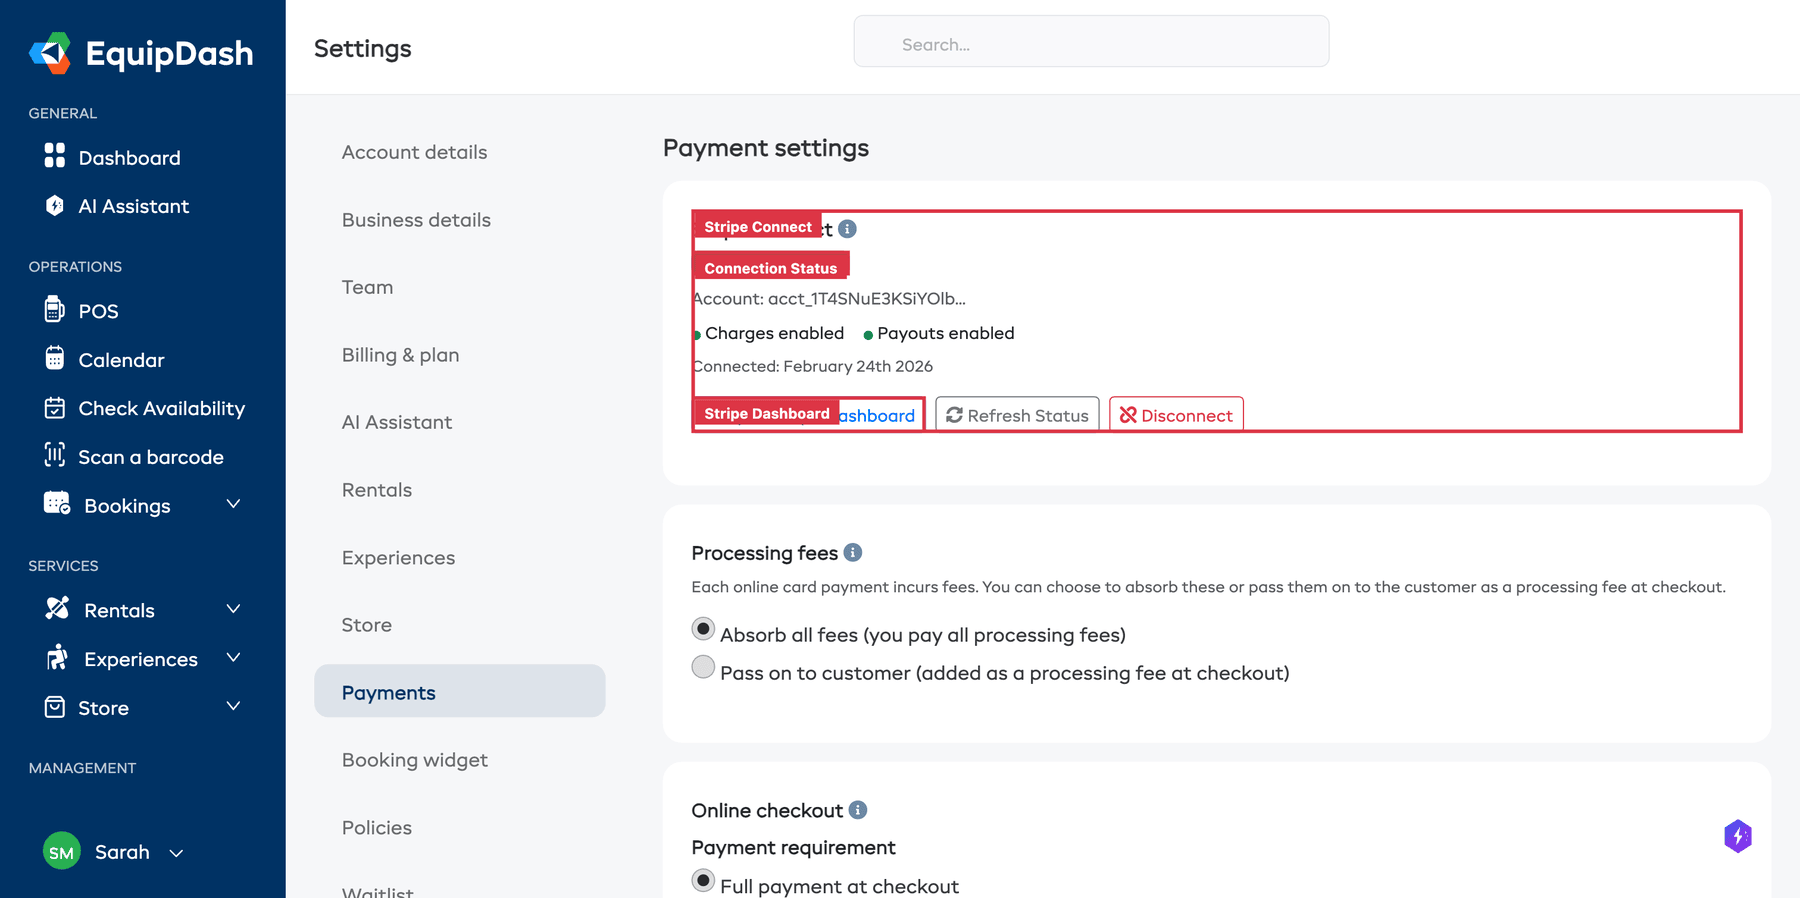
Step 3: Connect Stripe for Payments
To accept online payments through your booking widget or record card payments in the Point of Sale, connect a Stripe account.
- Go to Settings in the sidebar, then select Payments.
- Click Connect with Stripe.
- You will be redirected to Stripe's website. If you already have a Stripe account, sign in. If not, create one — it only takes a few minutes.
- Follow Stripe's prompts to authorize the connection.
- Once complete, you will be redirected back to EquipDash and see a green Connected status.
You do not need Stripe to create bookings manually. Stripe is required for online card payments through the widget. You can always record cash or manual payments against any booking.
Full guide: Connecting Stripe
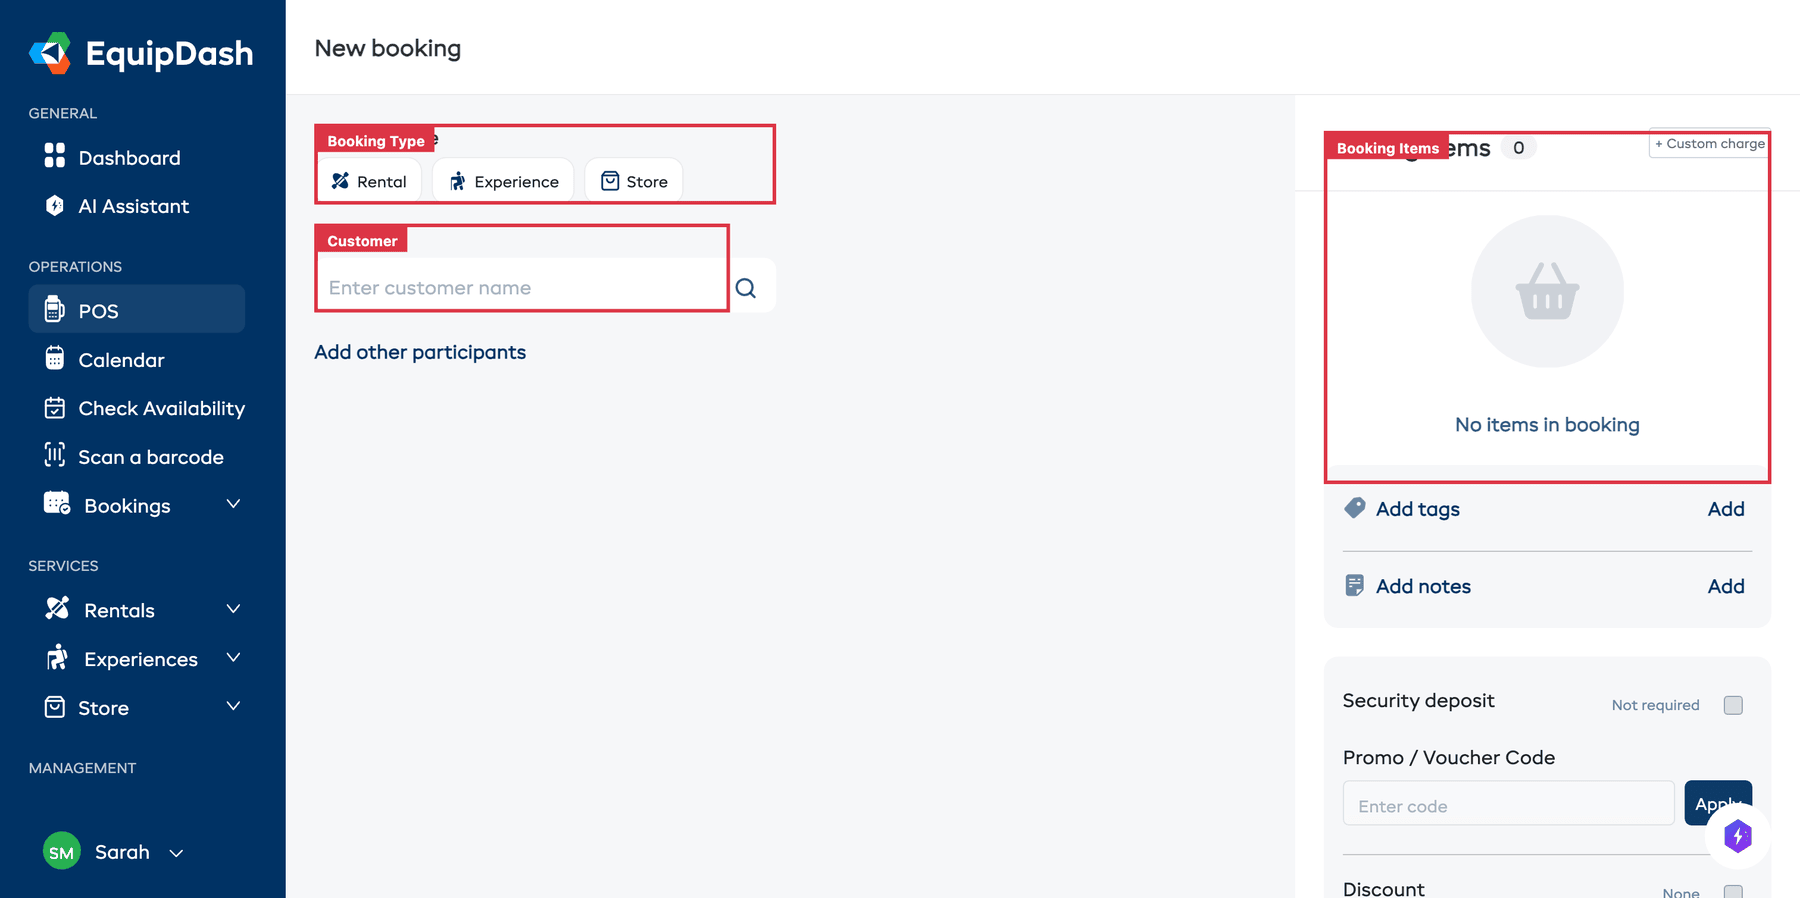
Step 4: Create Your First Booking
Now that you have a bookable item with pricing, let's create a booking using the Point of Sale (POS).
- Click Bookings in the sidebar, then click New Booking (or click the + button in the top bar). This opens the POS screen.
- Choose the booking type at the top: Rental, Experience, or Store (depending on what you set up).
- Set the dates — For rentals, choose a Pickup Date, Pickup Time, Return Date, and Return Time. For experiences, choose a Date.
- Add items — Search for and select the product or experience you created. Set the quantity (for rentals) or choose rate categories and participant counts (for experiences).
- Add customer details — Search for an existing customer or click New Customer to create one. At minimum, enter a First Name, Last Name, and Email.
- Review the pricing summary on the right — you will see the subtotal, any discounts or taxes, and the total.
- Click Create Booking.
You should see a confirmation and the new booking will appear in your Bookings list and on your Calendar.
Full guide: Creating a POS Booking
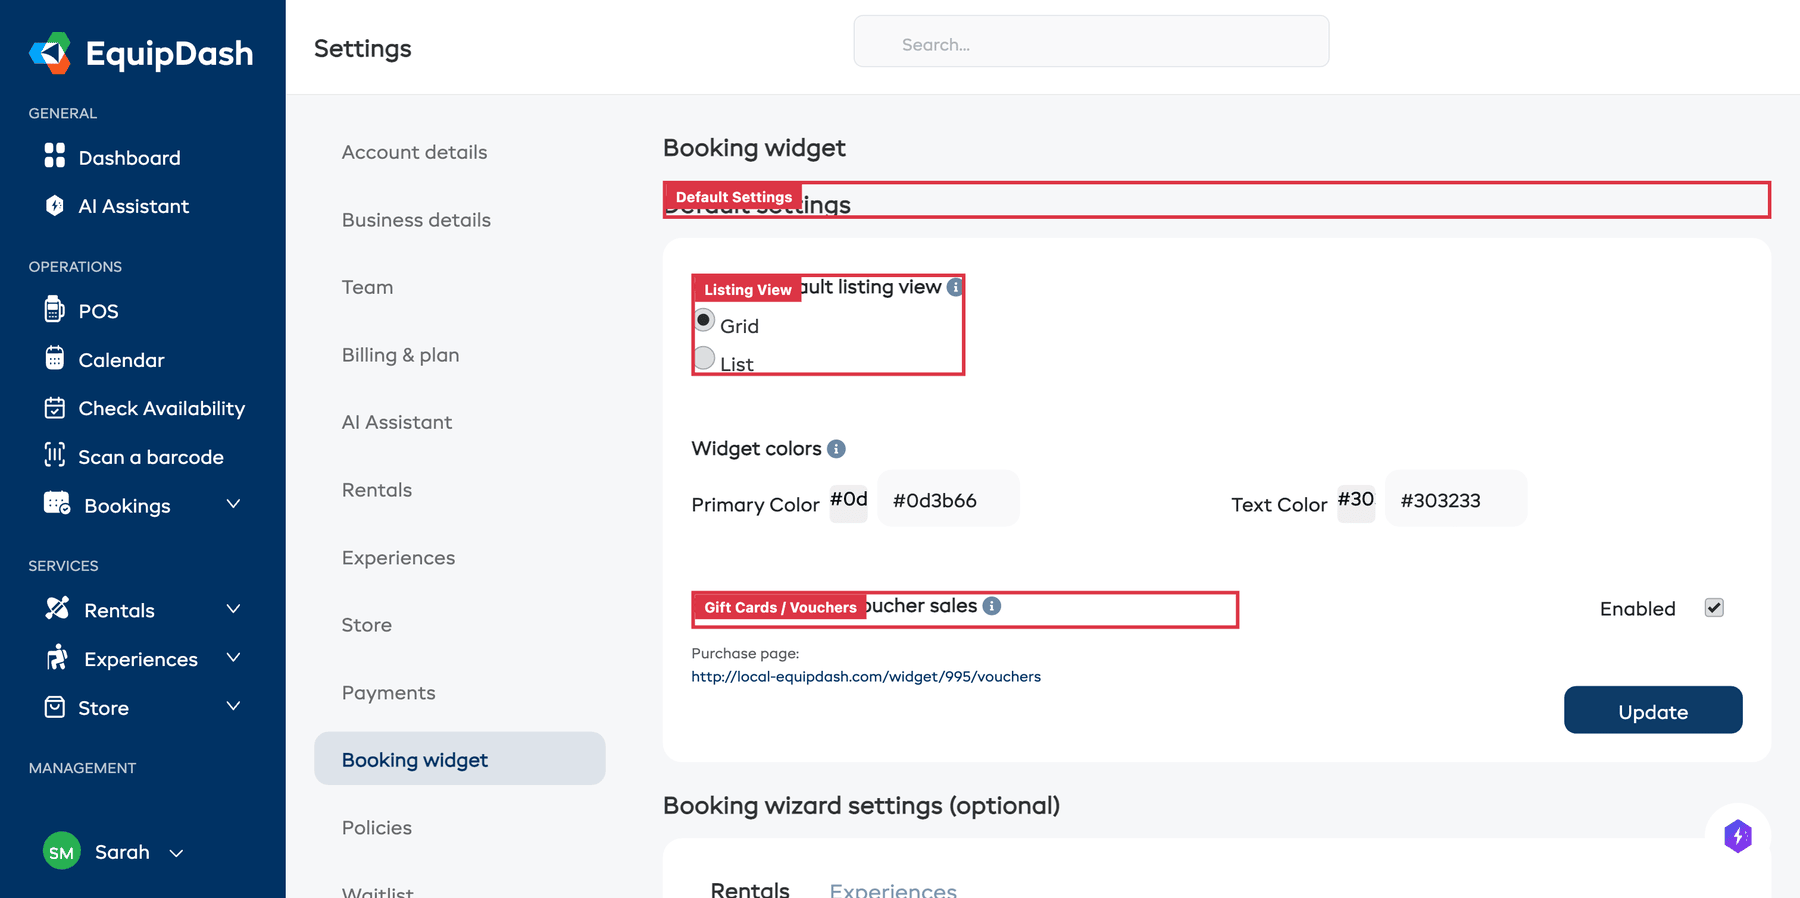
Step 5: Embed Your Booking Widget
Let customers book directly from your website by adding the EquipDash booking widget.
- Go to Settings in the sidebar, then select Widget.
- Customize your widget colors and display options to match your brand.
- Copy the embed code provided.
- Paste the embed code into your website's HTML where you want the booking widget to appear.
Once the code is on your site, customers can browse your products and experiences, check real-time availability, and complete bookings online.
Full guide: Setting Up the Widget and Embedding the Widget
You're All Set!
You now have a working EquipDash setup with a product or experience, pricing, Stripe connected, your first booking, and an embeddable widget. From here you can explore more advanced features at your own pace:
| What to do next | Guide |
|---|---|
| Add your team and set permissions | Inviting Team Members |
| Set up digital waivers | Waivers & Forms Overview |
| Configure tax rates | Adding Tax Rates |
| Customize your email notifications | Customizing Email Templates |
| Learn how the dashboard works | Your Dashboard Explained |
| Understand key terminology | Key Concepts & Terminology |