Setting Up Your Business
Before you start taking bookings, take a few minutes to configure the core settings that shape how EquipDash works for your business. This guide walks you through each one in order.
What You'll Learn
- How to enter your business details and logo
- How to add your business locations
- How to set your timezone and currency
- How to connect Stripe for online payments
- How to configure tax rates
- How to set up your email notification preferences
You can come back and change any of these settings later. Nothing is locked in permanently.
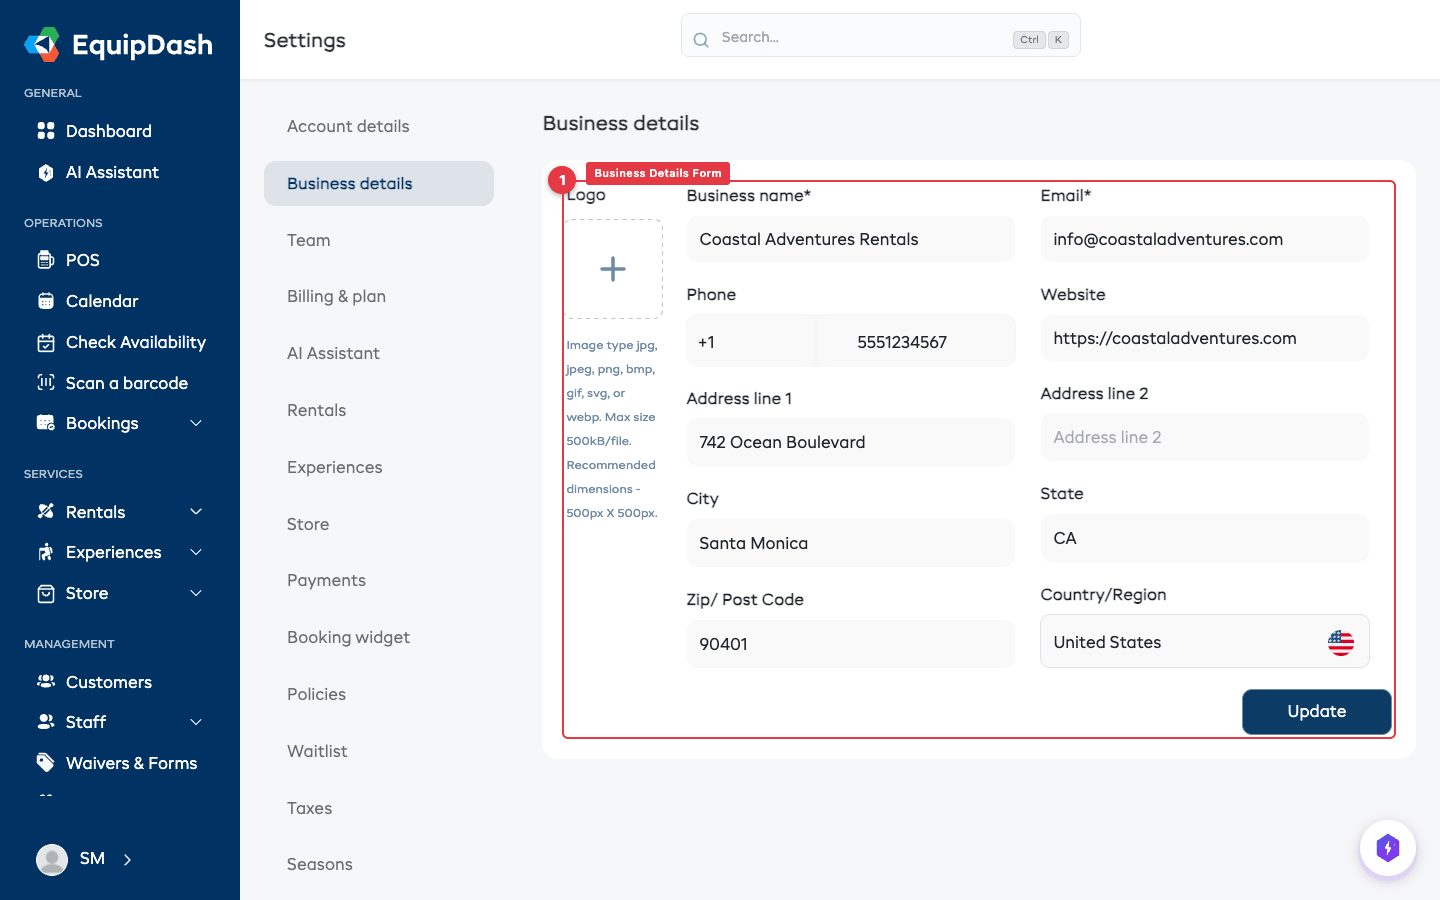
Step 1: Business Details
Your business details appear on customer-facing emails, the booking widget, and printed/PDF documents.
- Click Settings in the sidebar.
- Select Business Details.
- Fill in the following:
- Business Name — The name customers will see
- Contact Email — Where customer replies are directed
- Phone Number — Displayed on booking confirmations
- Address — Your primary business address
- Website — A link back to your main website
- Upload your Business Logo — this is used in emails and your widget header.
- Click Save Changes.
Detailed guide: Business Details Settings
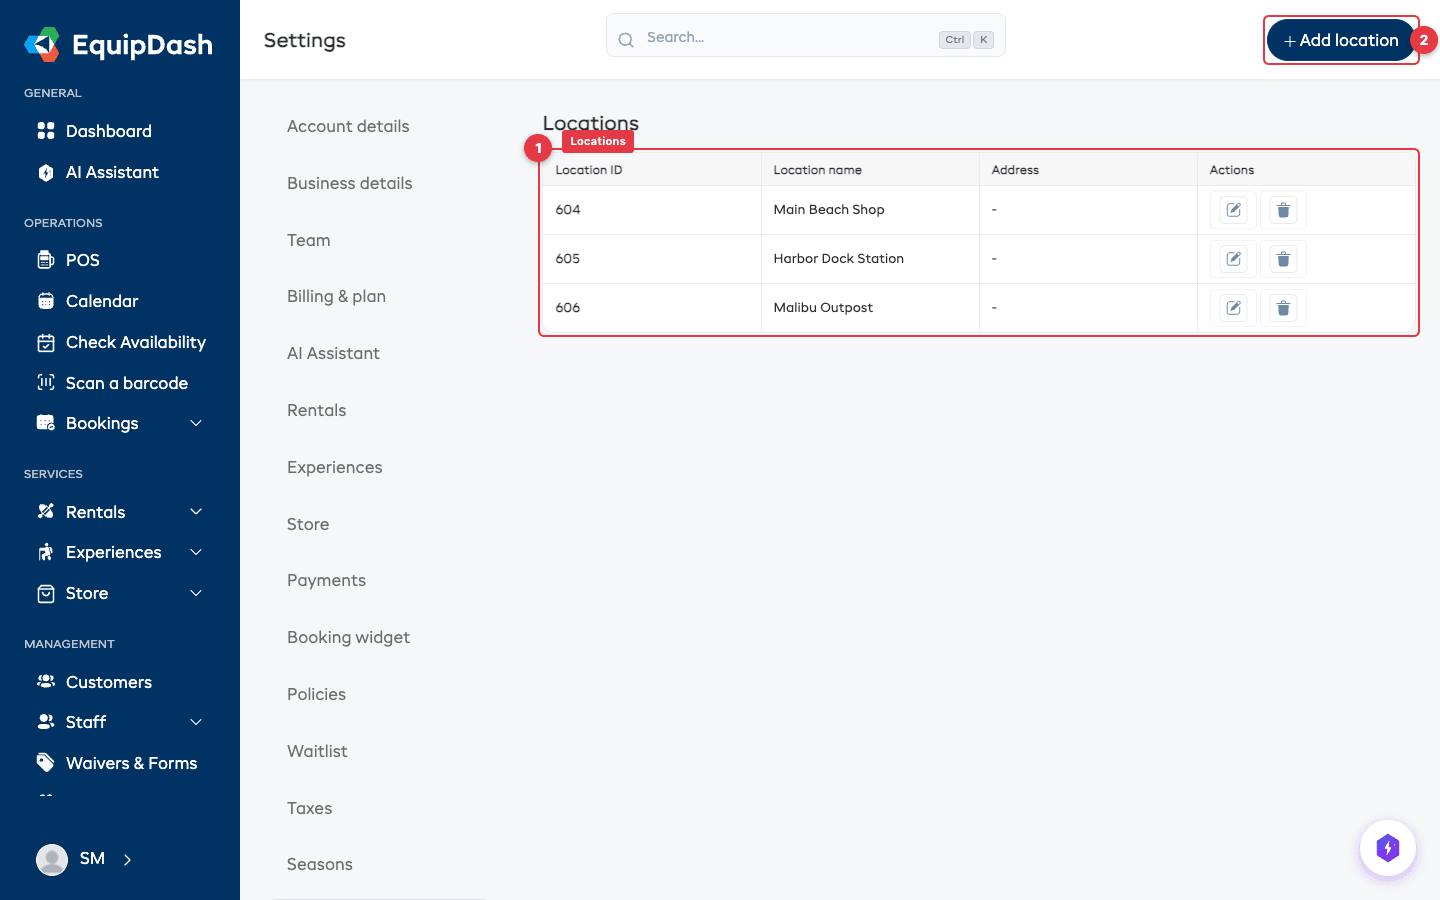
Step 2: Add Your Locations
If your business operates from one or more physical locations (a shop, a beach hut, a warehouse), add them so you can assign products and experiences to specific sites.
- In Settings, select Locations.
- Click Add Location.
- Enter the Location Name and Address.
- Click Save.
Repeat for each location. Your first location is typically your main shop or office.
Locations don't have to be different physical sites — they can also represent areas within your business, such as "Front Desk" or "Workshop". This is useful for rostering staff to specific areas and organizing your operations.
Detailed guide: Managing Locations
Step 3: Set Your Timezone and Currency
Getting these right is important — they affect how dates, times, and prices are displayed throughout the entire app, in emails, and on your widget.
- In Settings, select Localization.
- Choose your Timezone from the dropdown (e.g., "America/New_York", "Europe/London").
- Choose your preferred Date format from the dropdown (e.g., "Month Day, Year" or "Day Month, Year").
- Set your Currency (e.g., USD, EUR, GBP).
- Click Update.
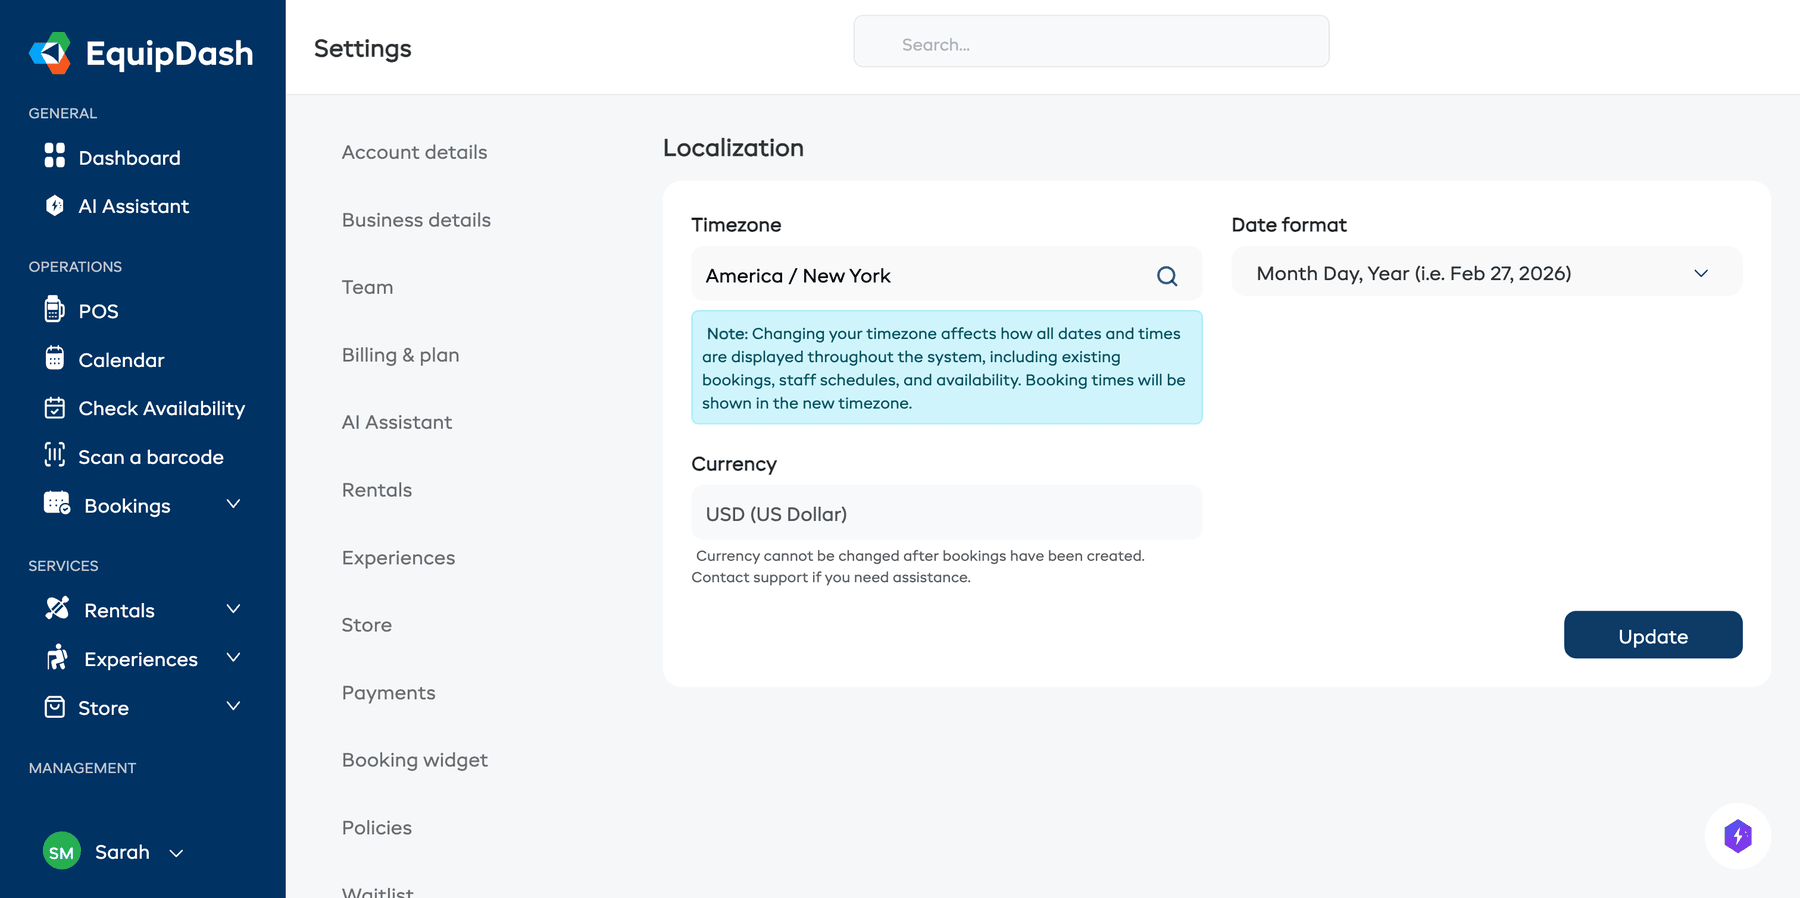
Changing your timezone affects how all dates and times are displayed throughout the system, including existing bookings, staff schedules, and availability. Booking times will be shown in the new timezone. If you are unsure about which timezone to choose, pick the one where your business operates.
Currency cannot be changed after bookings have been created. Make sure you set it correctly before taking your first booking. Contact support if you need assistance.
Detailed guide: Localization Settings
Step 4: Connect Stripe for Payments
To accept online payments through your booking widget, you need to connect a Stripe account. EquipDash uses Stripe to securely process credit and debit card payments.
- In Settings, select Payments.
- Click Connect with Stripe.
- You will be redirected to Stripe's website. If you already have a Stripe account, sign in. If not, create one — it only takes a few minutes.
- Follow Stripe's prompts to authorize the connection.
- Once complete, you will be redirected back to EquipDash and you will see a green Connected status.
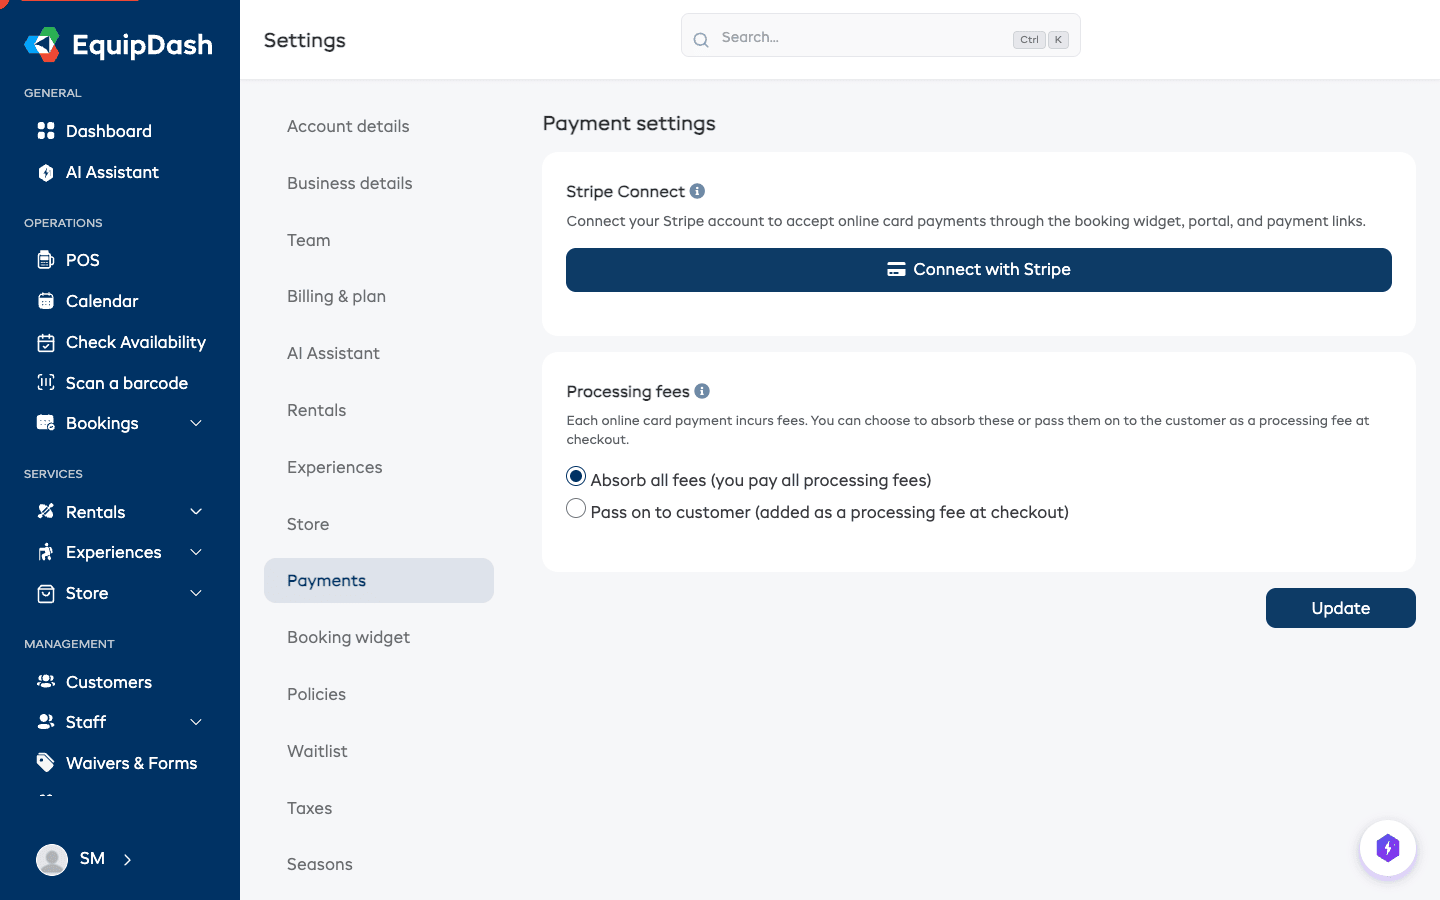
Once connected, you can also configure:
- Processing fees — Choose whether to absorb card processing fees or pass them on to customers. See Processing Fees.
- Checkout, deposits & card readers — Set rules for checkout payments, security deposits, and in-person card readers. See Checkout, Deposits & Card Readers.
You do not need Stripe to create bookings manually from the dashboard. Stripe is only required for online payments through the widget. You can always record manual or cash payments against any booking.
Detailed guide: Connecting Stripe
Step 5: Configure Tax Settings
If you need to charge tax on your bookings, set up your tax rates so that EquipDash can calculate and display the correct amounts automatically.
- In Settings, select Taxes.
- Click + Add new tax.
- Enter a Tax rule name (e.g., "Sales Tax", "VAT", "GST").
- Enter the Tax rate as a percentage (e.g., 9.50 for 9.5%).
- Choose whether the tax is included in price or not included in price:
- Tax included in price — Your listed prices already contain tax. The tax amount is calculated out of the total (common in many countries outside the US).
- Tax not included in price — Tax is added on top of your listed prices at checkout (common in the US).
- Click Create tax rule.

You can create multiple tax rules if needed (for example, different rates for goods and services, or for different regions). You can also assign specific tax rules to individual products and experiences.
Detailed guide: Adding Tax Rates
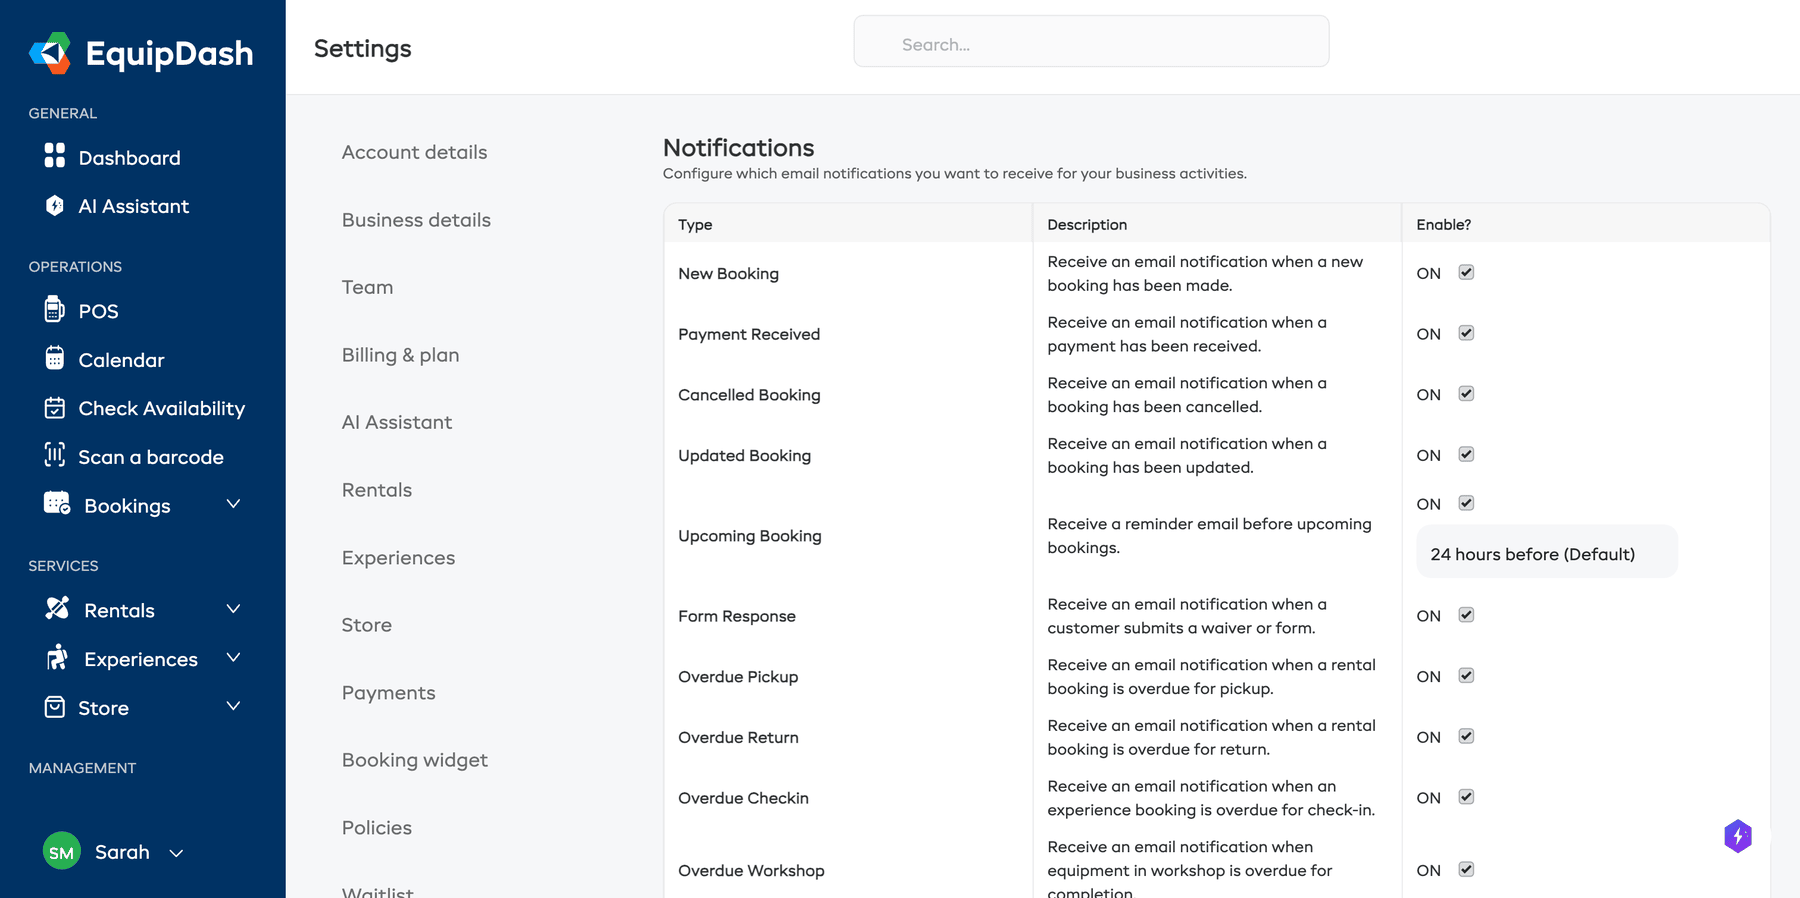
Step 6: Set Up Email Preferences
EquipDash sends automated emails on your behalf — booking confirmations, payment receipts, reminders, and more. You control which emails are sent and who receives internal notifications.
- In Settings, select Notifications.
- Review the list of available email notifications.
- Toggle each notification type on or off depending on your preferences.
- For internal notifications (like "New booking received"), choose which team members should be notified.
- Click Save Changes.
You can also customize the content and branding of your emails. Growth+This feature requires the Growth+ plan or higher
- Customizing Email Templates — Change the wording, colors, and layout of outgoing emails
- Template Variables — Use dynamic placeholders to personalize each email
Detailed guide: Notification Settings
What to Do Next
Your business is now configured and ready to go. Here are the natural next steps:
| What to do | Guide |
|---|---|
| Add your first product or experience | Quick Start Guide |
| Invite your team | Inviting Team Members |
| Set up your booking widget | Setting Up the Widget |
| Create a digital waiver | Waivers & Forms Overview |
| Explore pricing options | How Pricing Works |