Assigning Forms to Products & Experiences Growth+This feature requires the Growth+ plan or higher
Assigning a form to a product or experience means your customers will automatically receive the form when they make a booking. This is the most common way to collect waivers and information — no manual sending required.
How Assignment Works
When a customer books a product or experience that has an assigned form:
- The form link is included in their booking confirmation email.
- If you have the booking widget enabled, the form may also appear during the checkout process (depending on your settings).
- The customer fills out the form online and submits it.
- The completed response appears in the form's Responses page and is linked to their booking.
Setting Assignments When Creating a Form
The easiest way to assign a form is during creation:
- Click + New waiver/form on the Waivers & Forms page.
- Under Applies to, tick Products and/or Experiences. Only options for enabled modules appear; single-module suppliers see the only valid option pre-selected.
- For each, choose how to apply:
- All Products / All Experiences — The form applies to every item.
- Individual Products / Individual Experiences — Select specific items from the dropdown.
- Product Categories / Experience Categories — Select categories; all items in those categories will have the form.
- Click Create (open form builder).
Editing Assignments from the Form Builder
You can change assignments at any time from the form builder:
- Open the form by clicking the edit icon (pencil) on the form's row in the Waivers & Forms table.
- In the top-left corner, find the Assigned to box. It shows a summary of current assignments (e.g., product names, or "No assignments").
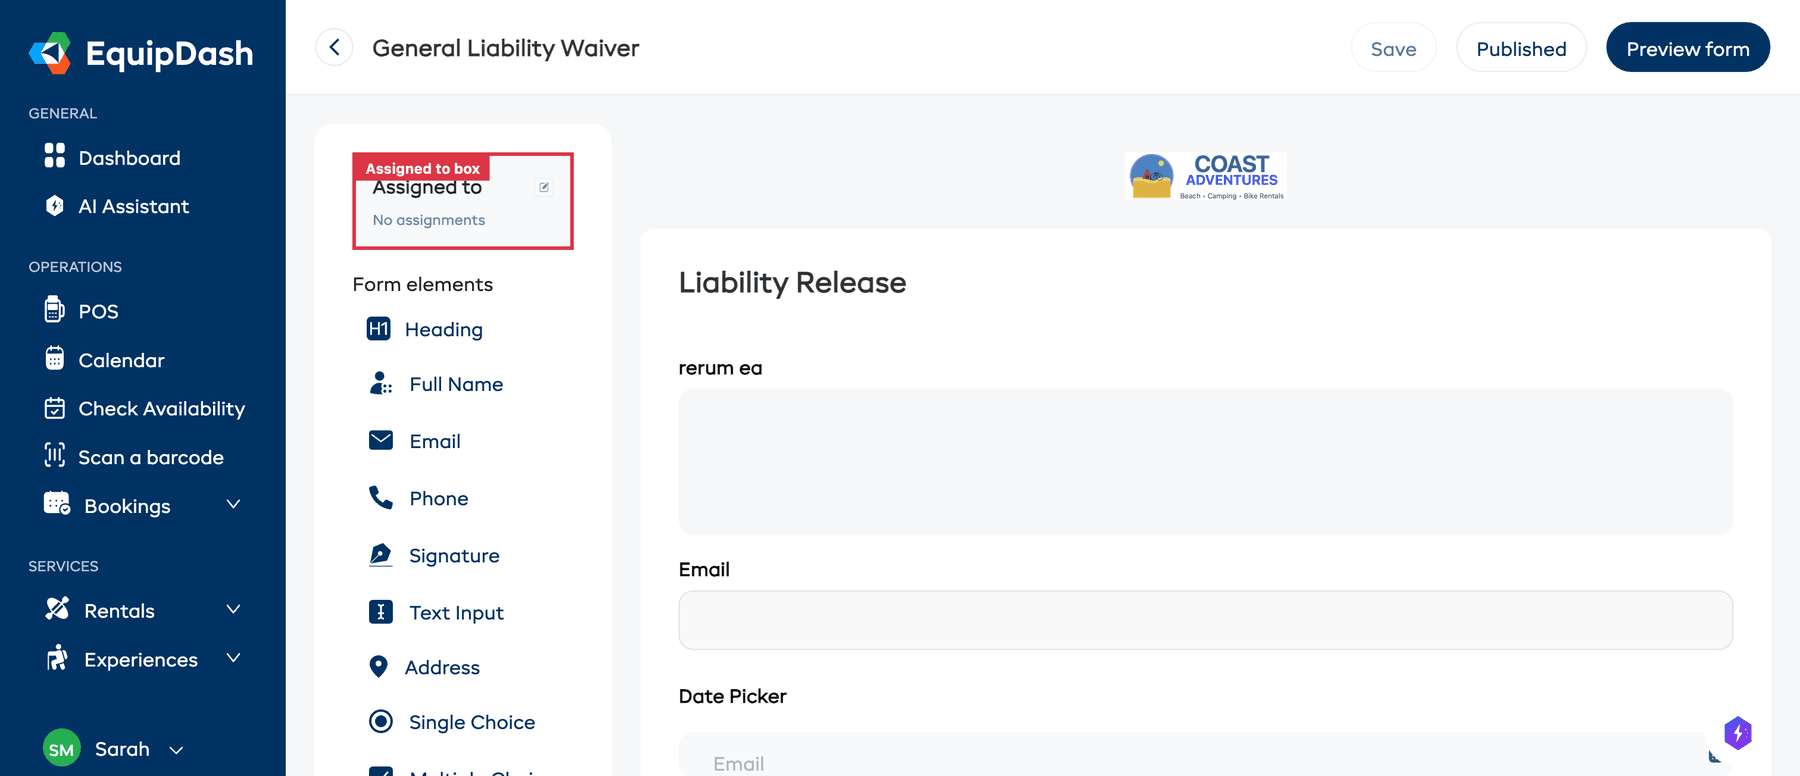
- Click the edit icon (pencil) on the Assigned to box.
- The "Edit related products/experiences" sidebar panel opens.
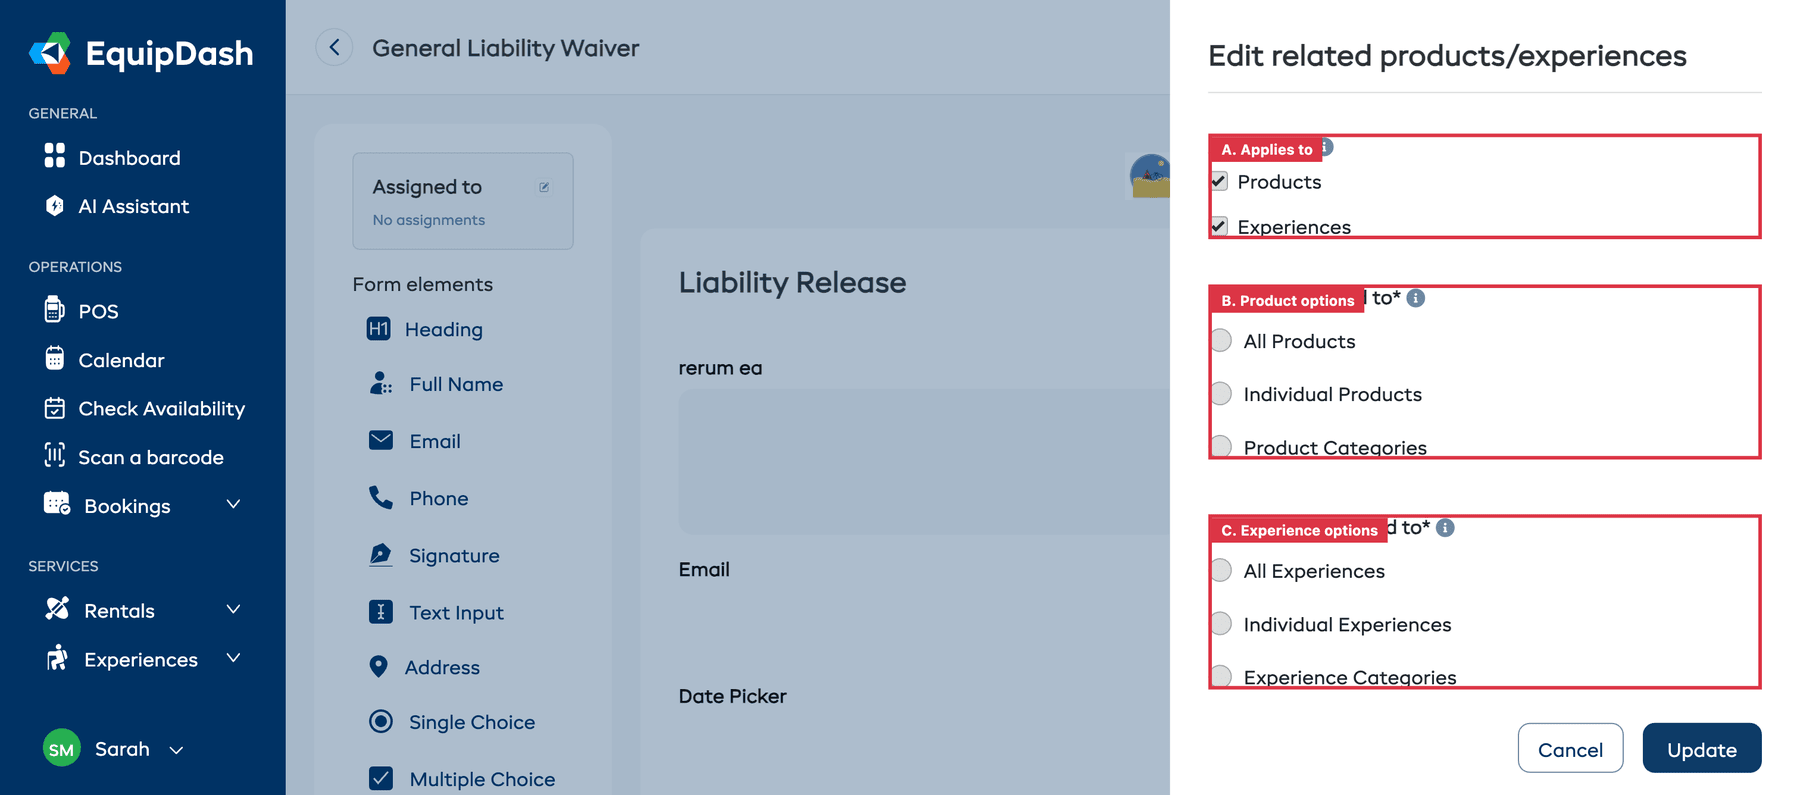
- Update the Applies to checkboxes and selections as needed.
- Click Update to save, or Cancel to discard changes.
Assignment Options
| Option | What It Does |
|---|---|
| All Products | Applies the form to every product in your inventory |
| Individual Products | Choose specific products from a searchable dropdown |
| Product Categories | Choose product categories — all products in those categories get the form |
| All Experiences | Applies the form to every experience |
| Individual Experiences | Choose specific experiences from a searchable dropdown |
| Experience Categories | Choose experience categories — all experiences in those categories get the form |
How Customers Sign Assigned Waivers
Once a waiver is assigned to a product or experience, customers sign it inline as part of the widget checkout — before they pay, not via a post-booking email. The email link still exists as a fallback, but the inline flow is the default.
See Inline Waiver Signing for the customer-facing view and Viewing Waiver Responses for filtering responses by signing source (widget_inline vs email).
Assigning Multiple Forms
You can assign more than one form to the same product or experience. For example, a scuba diving experience might need:
- A liability waiver (required before the dive)
- A medical questionnaire (to check health conditions)
- A certification upload form (to verify the customer's dive cert)
All assigned forms are sent to the customer with their booking confirmation.
Checking What Is Assigned Where
For a quick overview of all your form assignments:
- Go to Waivers & Forms in the left sidebar.
- The Products applied to and Experiences applied to columns in the table show which items each form is linked to.
Removing an Assignment
- Open the form in the form builder.
- Click the edit icon on the Assigned to box.
- Untick the relevant Products or Experiences checkbox, or change the selection.
- Click Update.
Removing an assignment does not delete the form or any existing responses. It simply stops the form from being sent to new customers booking that item.
Tips
- Assign forms early. Link your forms to products and experiences as soon as they are ready, so no bookings are missed.
- Use categories for efficiency. If all your rental products need the same waiver, assign it to a product category instead of selecting each product individually.
- Test the flow. Make a test booking to see the full customer experience — from confirmation email to form completion.