Viewing Responses Growth+This feature requires the Growth+ plan or higher
Every time a customer fills out one of your forms or signs a waiver, their response is stored in EquipDash. You can view all responses for each form, drill into individual submissions, link them to bookings, and edit them if needed.
Getting to the Responses Page
- Click Waivers & Forms in the left sidebar.
- Click on any row in the table (except the Action column).
- You are taken to the Responses page for that form.
The page shows the form name in the header with a back arrow, and two buttons in the top-right: Edit waiver/form (to jump to the form builder) and Share link (to open the sharing modal).
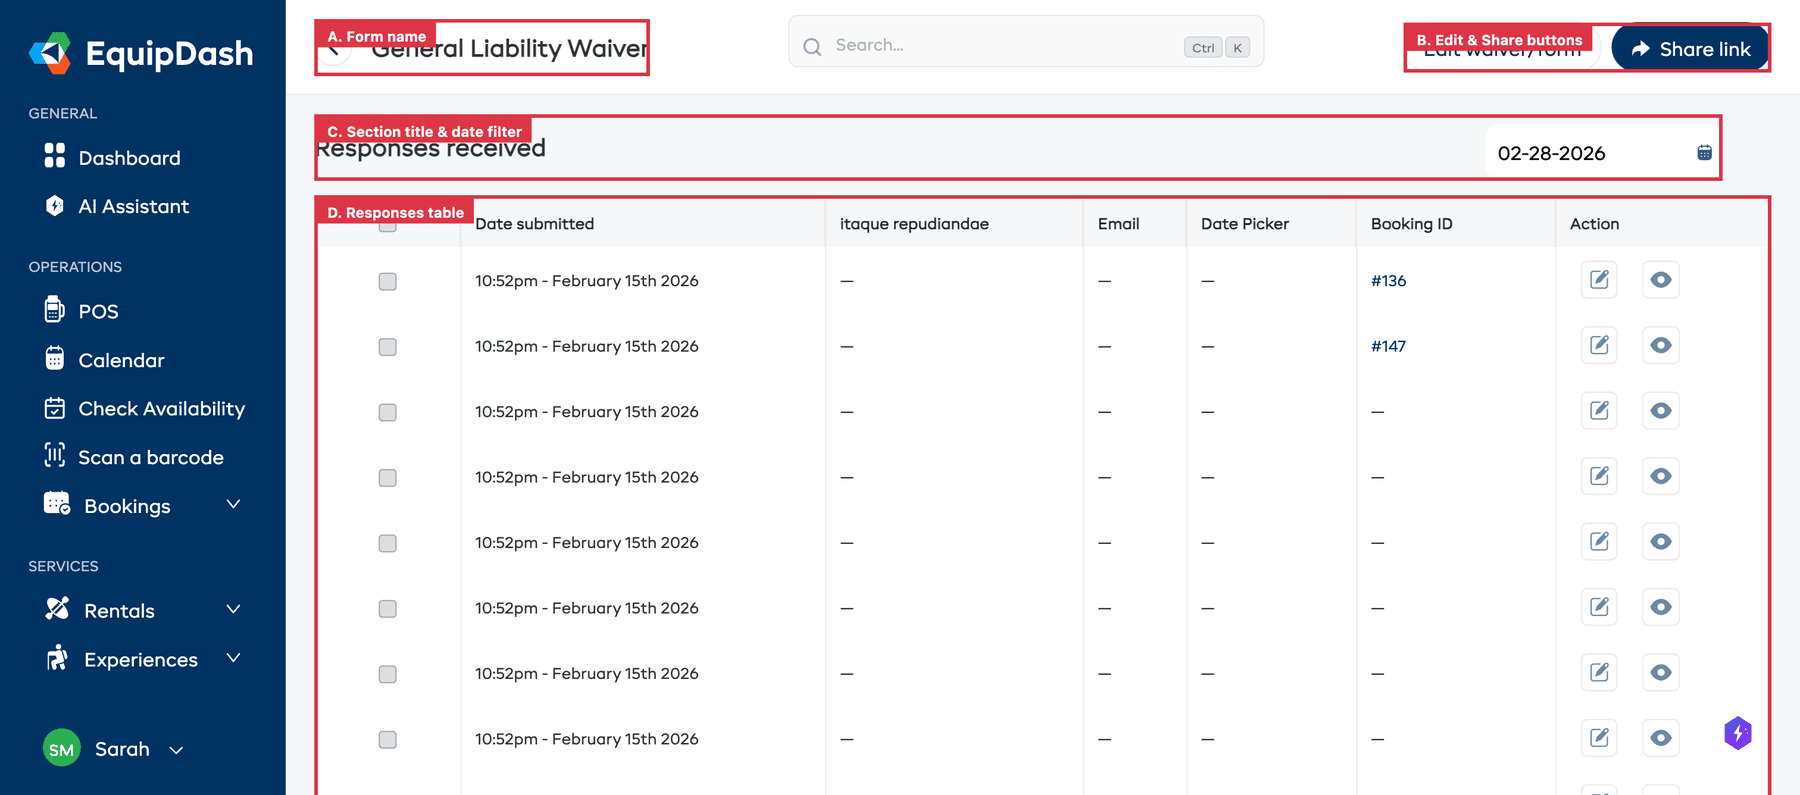
Understanding the Responses Table
The section is titled "Responses received" and has a date filter in the top-right corner.
| Column | What It Shows |
|---|---|
| Checkbox | Select responses for bulk actions |
| Date submitted | The date and time the response was submitted (e.g., "10:52pm - February 15th 2026") |
| Dynamic field columns | Up to 3 columns showing answers from the form's fields (column names match your form field labels) |
| Booking ID | The linked booking reference (e.g., "#136") as a clickable link, or an em-dash if not linked |
| Action | Edit (pencil icon) and View (eye icon) buttons |
Viewing an Individual Response
- Click the view icon (eye) in the Action column for the response you want to see.
- A sidebar panel opens showing the response details.
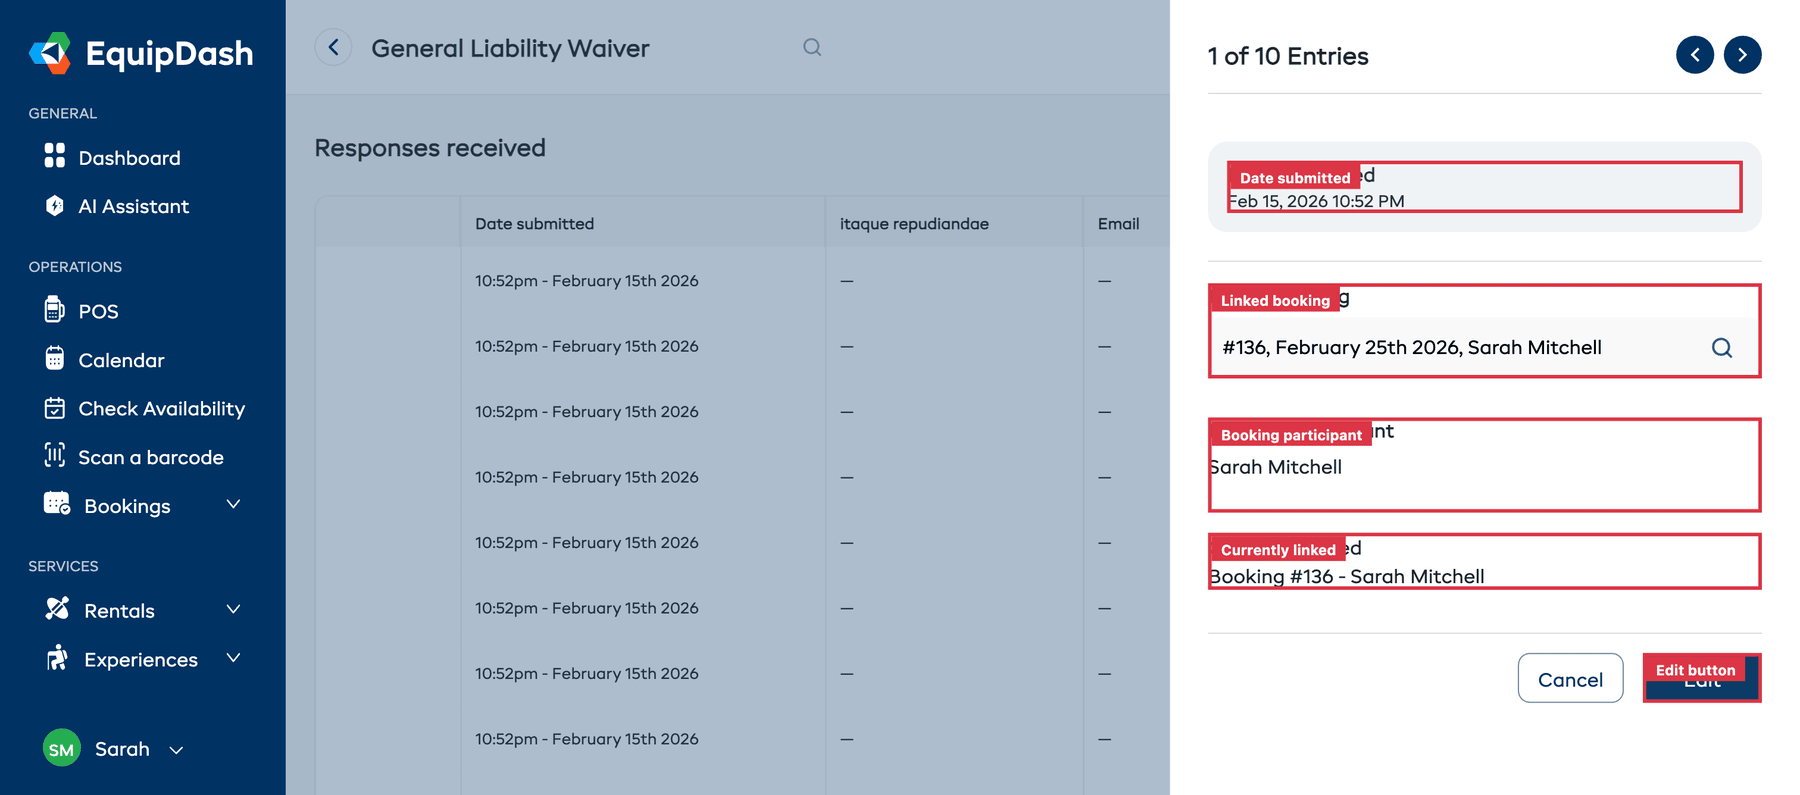
The panel shows:
- Entry counter — e.g., "1 of 10 Entries" with left/right arrows to navigate between responses.
- Date Submitted — When the response was submitted.
- Response data — The customer's answers to each field in the form.
- Linked booking — A searchable dropdown showing which booking this response is linked to. You can search by booking ID or customer name to link/relink it.
- Booking participant — The name of the participant from the linked booking.
- Currently Linked — Shows the current booking link (e.g., "Booking #136 - Sarah Mitchell").
- Click Cancel to close, or Edit to switch to edit mode and modify the response data.
Editing a Response
- Click the edit icon (pencil) in the Action column, or click Edit in the view panel.
- The sidebar switches to edit mode where you can modify the response field values.
- Click Update to save your changes.
Linking a Response to a Booking
From the view/edit panel, you can link or change which booking a response is associated with:
- Open the response (click the view or edit icon).
- In the Linked booking field, use the search dropdown to find a booking by ID or customer name.
- If the booking has multiple participants, select the correct Booking participant from the dropdown.
- Click Update to save the link.
Filtering Responses by Date
Use the date filter in the top-right corner of the Responses page:
- Click the date picker field.
- Select a date or date range.
- The table filters to show only responses submitted on or before that date.
- Click Clear filters to reset.
Bulk Deleting Responses
To delete multiple responses at once:
- Tick the checkboxes on the left side of the rows you want to delete.
- A "Delete X entries" button appears.
- Click it and confirm the deletion.
Deleted responses are permanently removed and cannot be recovered.
Checking Completion from a Booking
You can also check form completion from the booking side:
- Open a booking's detail page.
- Look for the Forms section to see all linked form responses.
- Click on a response to view the details.
This two-way link makes it easy to verify that a customer has completed their required forms before their booking starts.
Tips
- Use the entry navigation arrows. When viewing a response, use the left/right arrows in the header to quickly move through all responses without closing the panel.
- Link responses to bookings. Linking responses to their bookings makes it easy to verify that a customer has completed their required forms before their booking starts.
- Link standalone responses to bookings. If customers fill out forms via shared links before booking, link the responses to their bookings later so everything is connected.
- Review responses before the booking date. For critical waivers, check that all participants have submitted their responses before the activity or rental starts.
- Check the Booking ID column. Responses with a linked booking show a clickable booking reference (e.g., "#136") that takes you directly to that booking's detail page.
- Clean up test data. Use bulk delete to remove any test submissions you made while setting up your forms.