Creating a Waiver or Form Growth+This feature requires the Growth+ plan or higher
Creating a waiver or form in EquipDash takes just a few minutes. You give it a name, choose what products or experiences it applies to, and then design the layout in the form builder.
Step-by-Step: Creating a New Form
- Click Waivers & Forms in the left sidebar.
- Click the + New waiver/form button in the top-right corner.
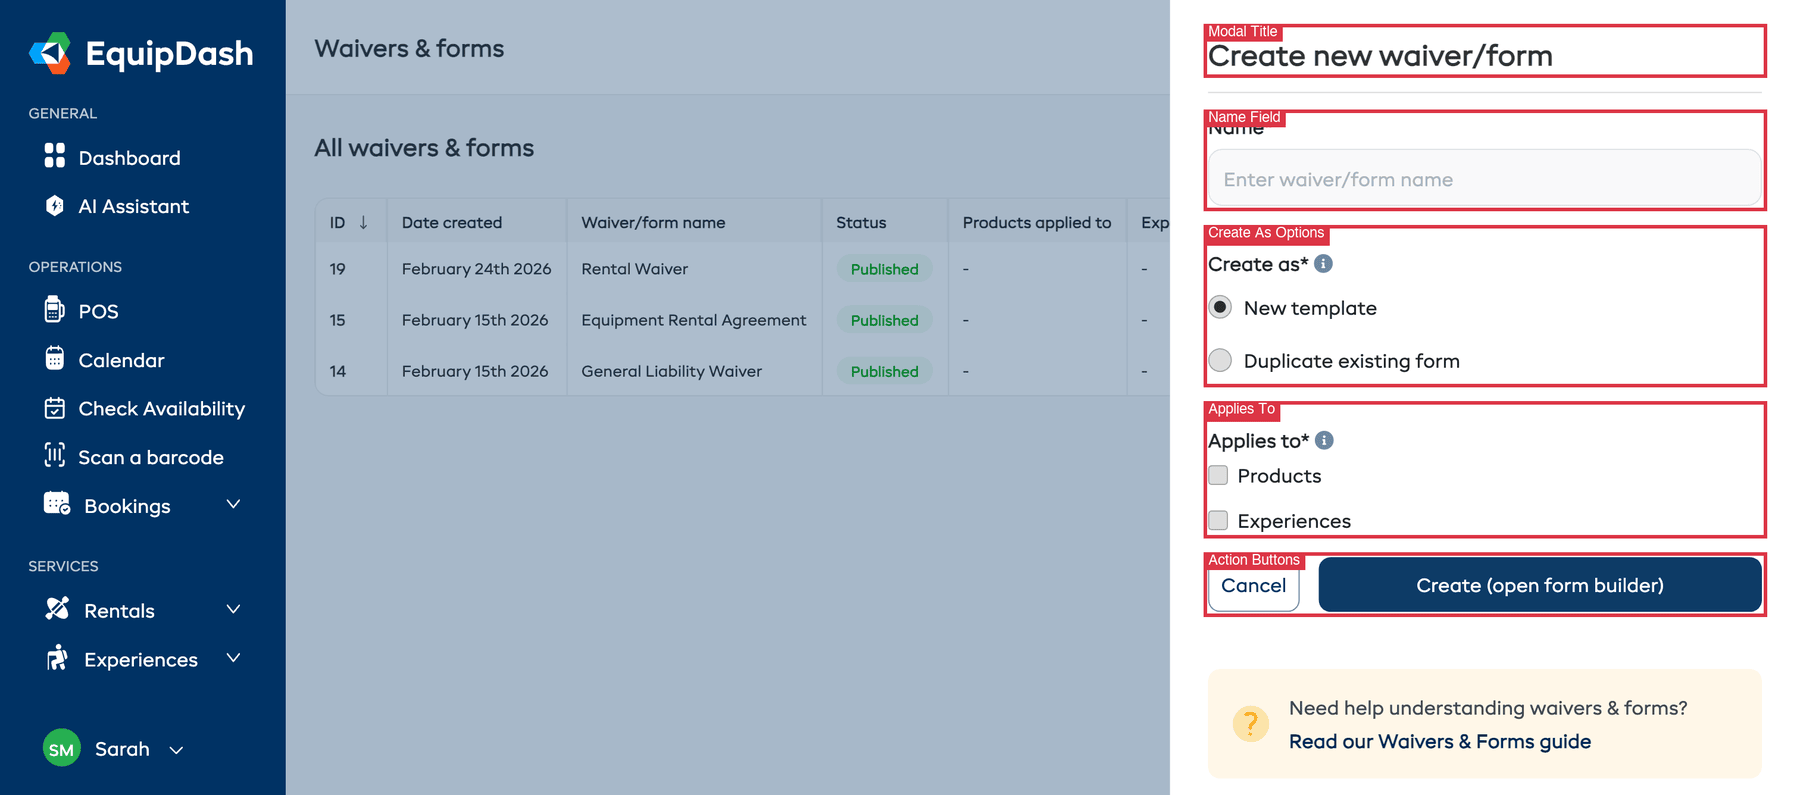
- A sidebar panel opens titled "Create new waiver/form".
-
Enter a Name for the form (e.g., "Liability Waiver", "Health Questionnaire", "Emergency Contact Form").
-
Under Create as, choose one of:
- New template — Start with a blank form.
- Duplicate existing form — Copy the layout from an existing form. When selected, a dropdown appears where you can search and select the form to duplicate.
-
Under Applies to, tick the checkboxes for where this form should be used:
- Products — If ticked, choose how to apply: All Products, Individual Products, or Product Categories, then select the specific items.
- Experiences — If ticked, choose how to apply: All Experiences, Individual Experiences, or Experience Categories, then select the specific items.
noteOnly options for enabled modules appear. If you only have one of Rentals or Experiences enabled, that option is pre-selected for you.
-
Click Create (open form builder).
You are taken to the form builder where you can start adding fields.
Adding Fields to Your Form
Once you are in the form builder, add fields by clicking them from the Form elements panel on the left. They are added to the form canvas on the right. See Form Fields & Builder for a complete guide to all available field types and how the builder works.
Assigning to Products and Experiences
The product and experience assignments you set during creation can be changed at any time from within the form builder. Click the edit icon (pencil) on the Assigned to box in the top-left of the form builder to update assignments. See Assigning Forms for more details.
Publishing Your Form
When your form is ready for customers:
- Click the Publish button in the top-right corner of the form builder.
- Once published, the button changes to a green Published badge.
- A modal opens with the shareable link and QR code for your form.
Published forms can be shared with customers via link or QR code. See Sharing Form Links.
Previewing Your Form
Before publishing, preview how the form will look to customers:
- Click the Preview form button in the top-right corner of the form builder.
- A preview panel opens showing the form exactly as customers will see it.
- Close the preview to return to the builder.
Next Steps
After creating your form, you will typically want to:
- Add and arrange fields in the form builder. See Form Fields & Builder.
- Assign it to products or experiences if you did not do so during creation. See Assigning Forms.
- Share a standalone link if you want customers to fill it out independently. See Sharing Form Links.