Creating a Campaign Growth+This feature requires the Growth+ plan or higher
Email campaigns let you reach your customers with promotions, news, and updates. You can write your message, choose who receives it, attach a promo code, and track results — all without leaving EquipDash.
Step-by-Step: Creating a New Campaign
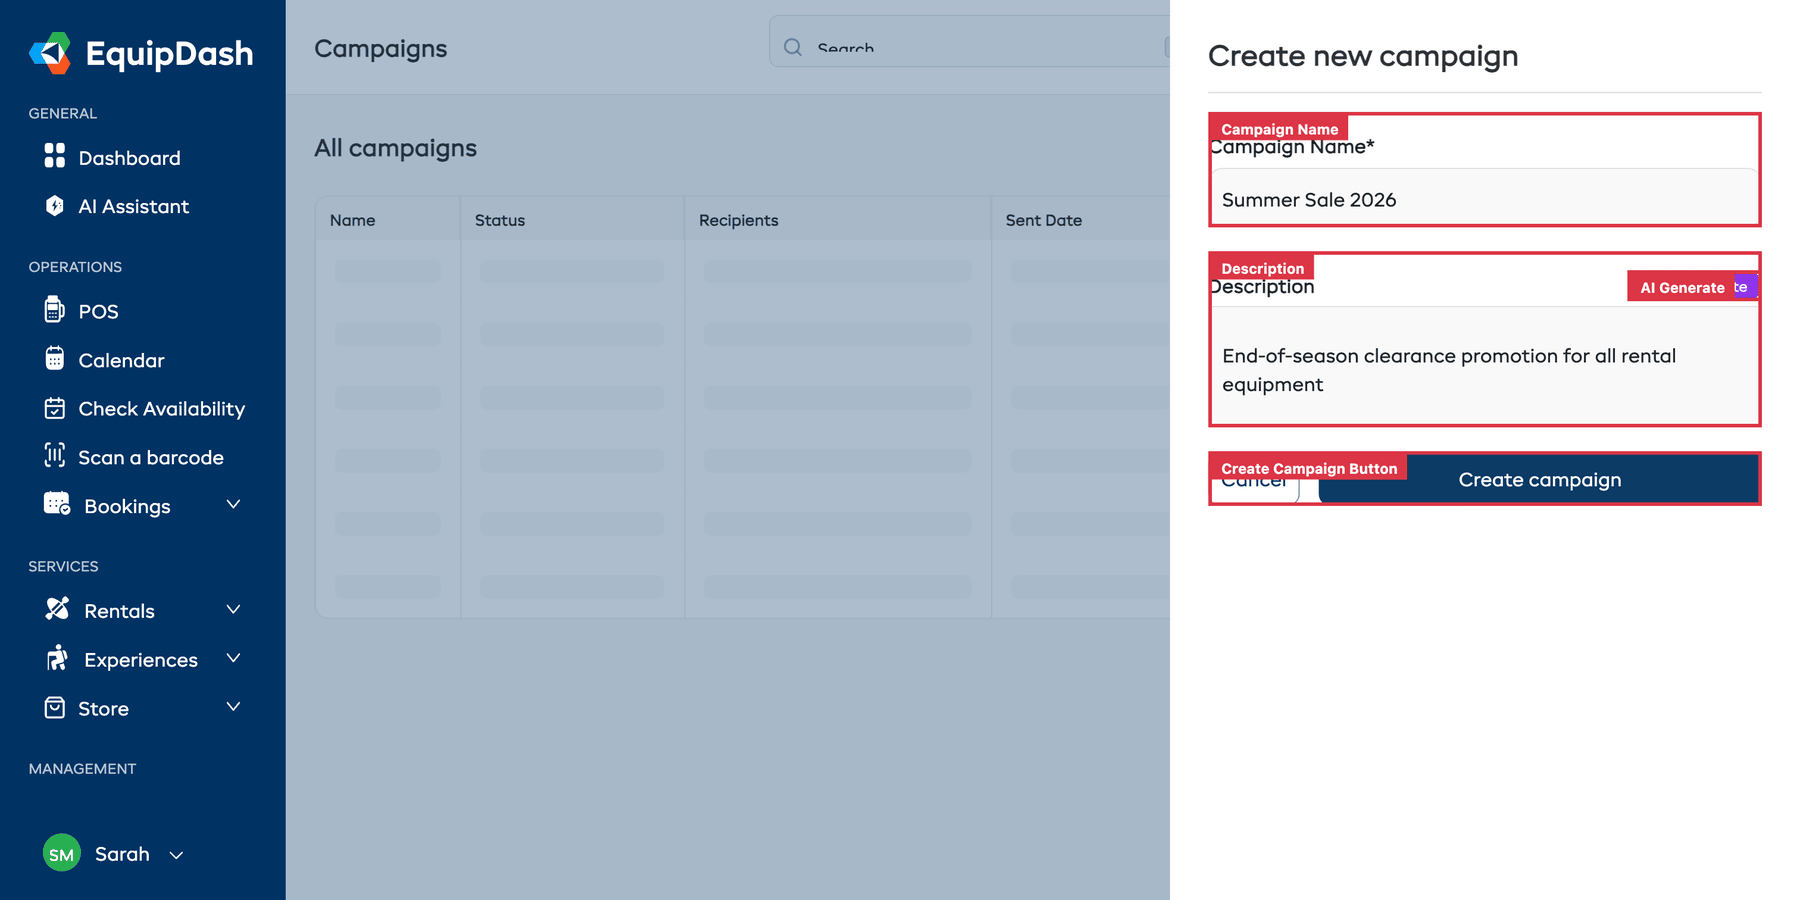
1. Create the Campaign
- In the left sidebar, click Promotions then Campaigns.
- Click + New campaign in the top-right corner.
- A slide-over panel opens with two fields:
| Field | Description |
|---|---|
| Campaign Name* | An internal name for your reference (e.g., "Summer Sale 2026", "Welcome Back Offer"). Customers do not see this. |
| Description | An optional internal description. Click AI Generate to auto-generate one. |
- Click Create campaign.
You are taken to the campaign detail page, where you can configure everything using the four tabs: Details, Email Editor, Recipients, and Stats.
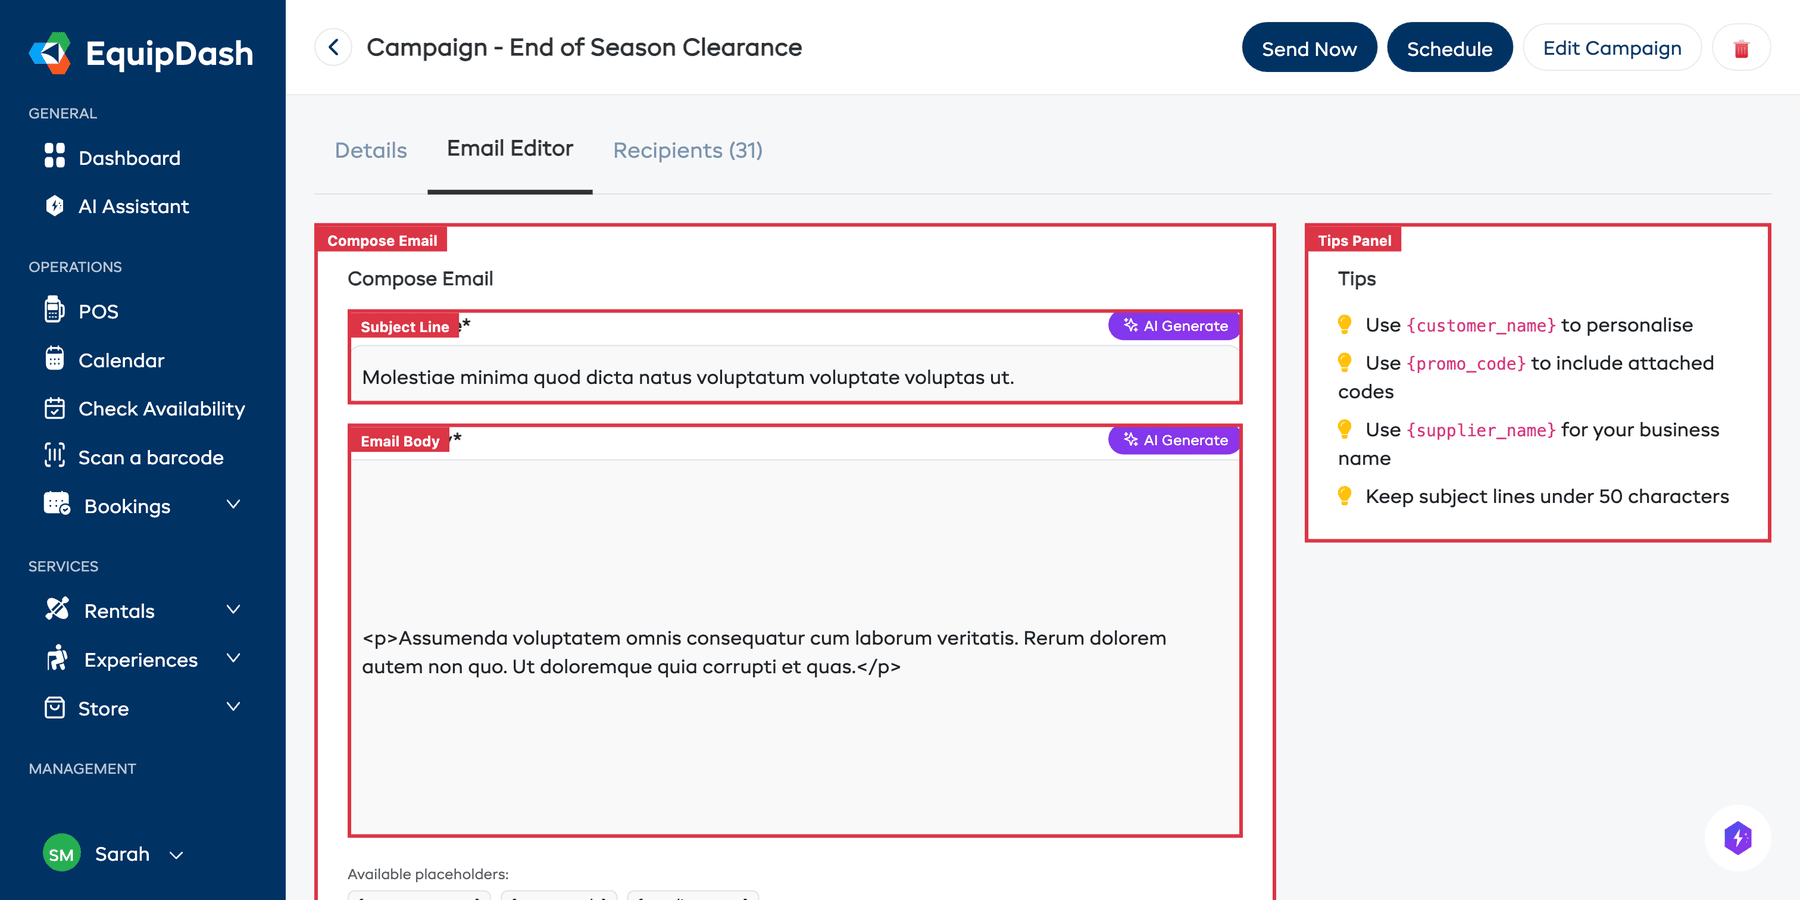
2. Write the Email
- Click the Email Editor tab.
- Fill in the Subject Line* — this is what customers see in their inbox. Click AI Generate to get suggestions.
- Write the Email Body* — the main content of your email. Click AI Generate to auto-generate content.
The editor is a plain-text editor. Your email is automatically formatted with your business branding (logo, colours) when sent.
Personalisation placeholders are available below the editor. Use these to personalise each email:
| Placeholder | What It Inserts |
|---|---|
{customer_name} | The recipient's name |
{promo_code} | The attached promo code (if any) |
{supplier_name} | Your business name |
The Tips panel on the right reminds you of these placeholders and best practices.
3. Attach a Promo Code (Optional)
On the Details tab, the Attached Promo Codes card on the right side lets you link a promo code to the campaign:
- Click on the Attached Promo Codes card.
- Select an existing promo code to attach.
The attached code can be inserted into the email body using the {promo_code} placeholder.
4. Select Recipients
See Selecting Recipients for full details on targeting your audience.
5. Send the Campaign
Once you are happy with your content and recipients, send or schedule the campaign from the campaign detail page.
Campaign Statuses
| Status | Meaning |
|---|---|
| Draft | The campaign is being prepared and has not been sent yet. You can edit and delete draft campaigns. |
| Scheduled | The campaign is scheduled to send at a future date and time. |
| Sending | The campaign is currently being sent to recipients. |
| Sent | All emails have been delivered. |
Tips
- Write a strong subject line. It is the first thing customers see. Keep it under 50 characters and make the value clear.
- Keep it focused. One clear message with one call-to-action performs better than an email that tries to cover everything.
- Use the AI Generate button. It can save you time on both subject lines and email body content.
- Use personalisation. Emails with the customer's name feel more personal and tend to get better engagement.