Check Availability
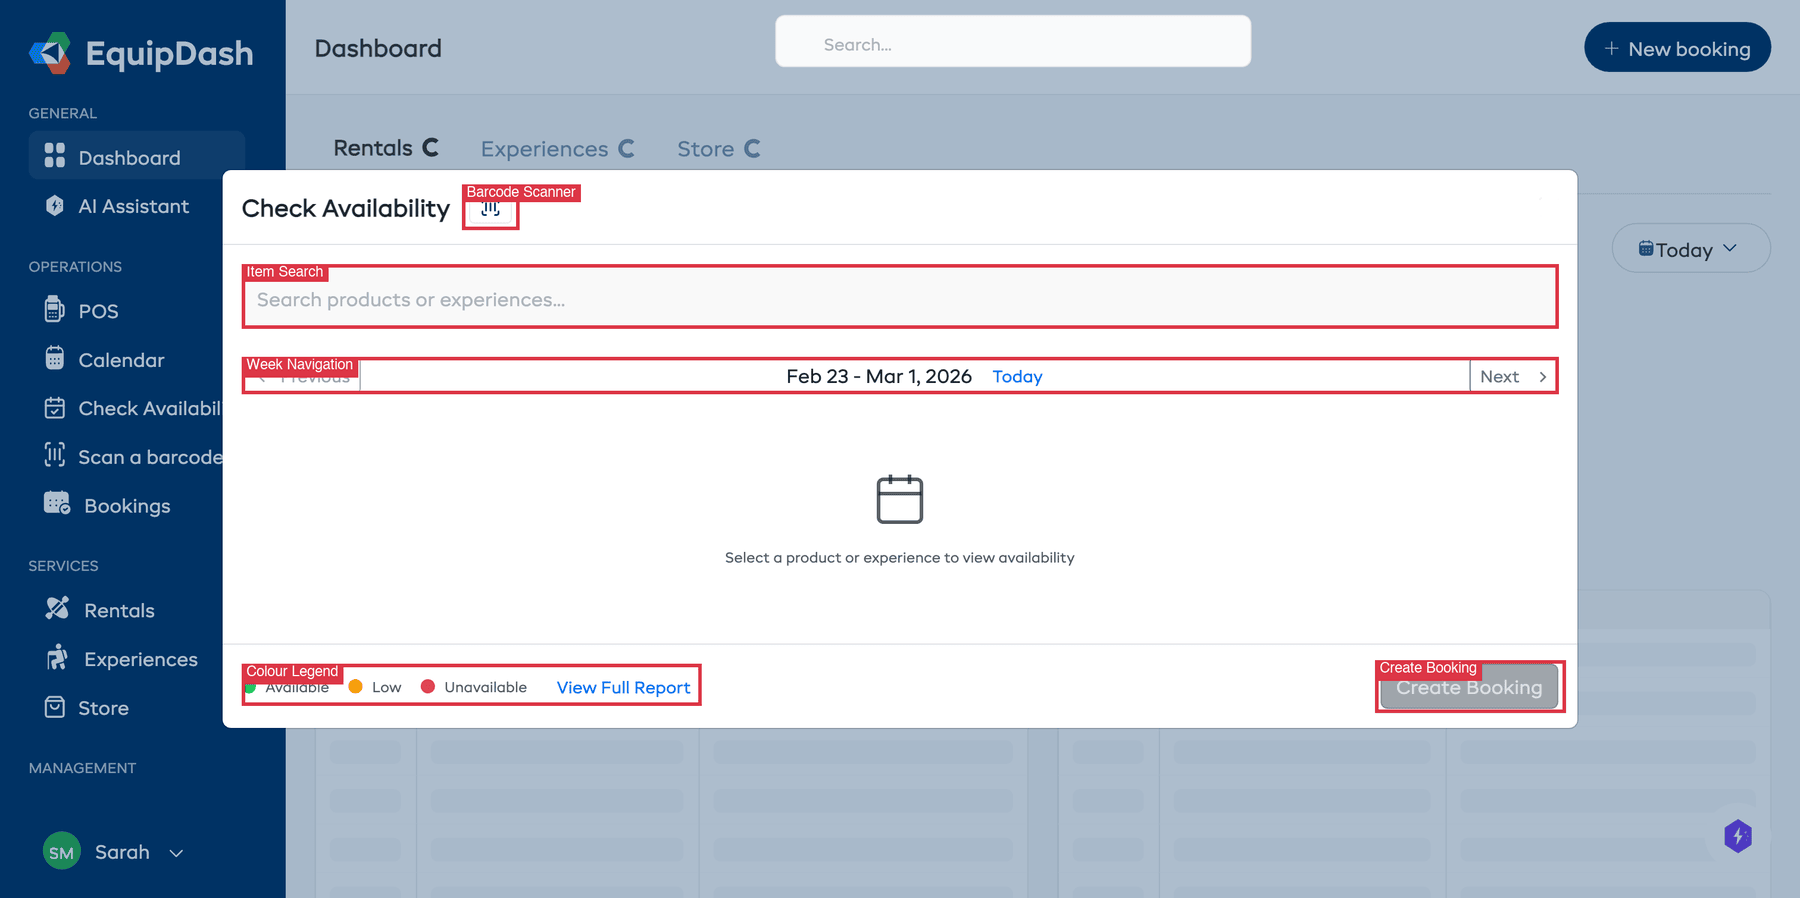
The Check Availability tool gives you a fast, visual way to see when a product or experience is available. It opens as a modal overlay from anywhere in the app, shows a weekly calendar grid with live inventory counts, and lets you jump straight into creating a booking from the selected time slot.
Opening Check Availability
There are several ways to open the availability checker:
- Sidebar — Click Check Availability in the left sidebar under Operations.
- Keyboard shortcut — Press Ctrl+Shift+A (Windows/Linux) / Cmd+Shift+A (Mac) from anywhere in the app.
- From a product page — Product detail pages include an embedded availability panel for that specific product.
Selecting an Item
When the modal opens, you need to choose what you want to check availability for:
- Type a product or experience name in the search field at the top ("Search products or experiences...").
- A dropdown appears showing matching items grouped under Products and Experiences. Each result shows the item name, ID, and SKU.
- If the product has variations (e.g. different sizes), each variation is listed separately — select the specific one you need.
- Click the item to load its availability grid.
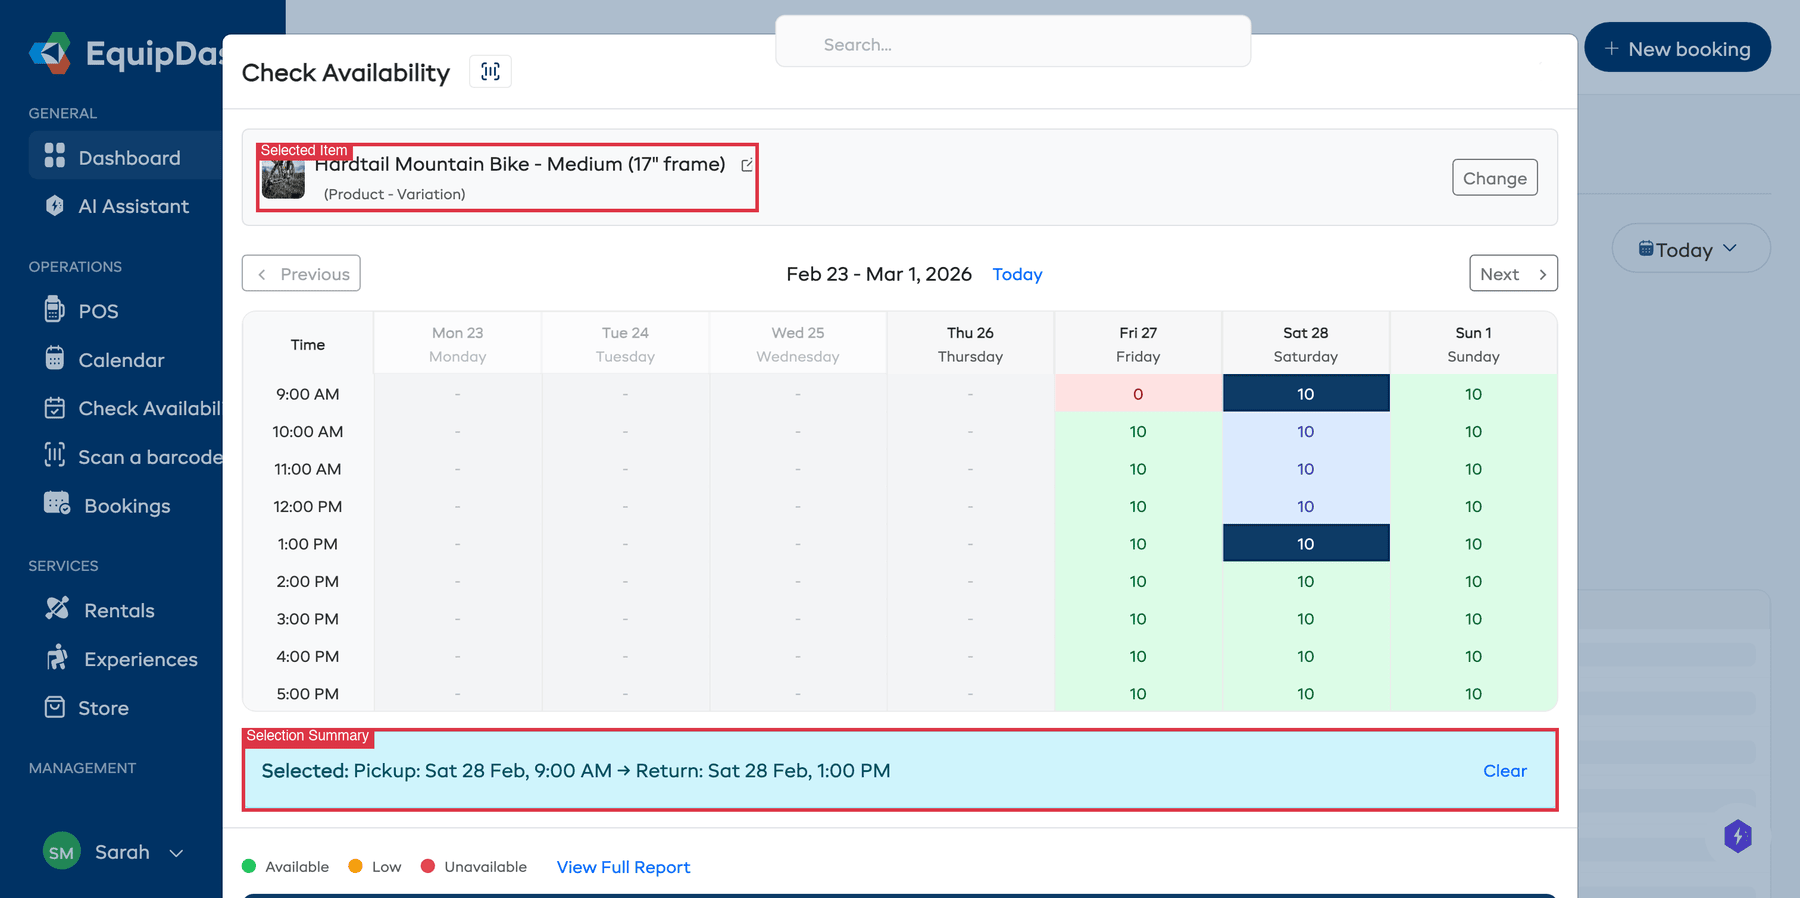
Once a product is selected, its name, image, and type label (e.g. "Product - Variation") appear at the top of the modal. To switch to a different item, click the Change button.
Using the Barcode Scanner
If you have barcode scanning set up, you can scan a product barcode to select it instantly. Click the barcode scanner icon next to the modal title, then scan the barcode on the product or inventory label.
Reading the Availability Grid
The grid shows a 7-day week view with your business opening hours as time slots down the left side.
Each cell displays a number showing how many units are available at that time. Cells are colour-coded:
| Colour | Meaning |
|---|---|
| Green | Available — units are available for booking |
| Amber | Low — limited units remaining |
| Red | Unavailable — no units available (shows "0") |
| Grey / dash | Past time slot or outside operating hours |
The colour legend is shown at the bottom of the modal for quick reference.
For Rental Products
The grid shows your business opening hours across the week. To select a rental period:
- Click a time slot to set the pickup time. It is highlighted in dark blue.
- Click a second time slot (after the pickup) to set the return time. The range between pickup and return is highlighted in light blue.
- If you click a time before your current pickup, EquipDash automatically swaps them so the earlier time becomes the pickup.
A selection summary appears below the grid showing your chosen times — for example: "Selected: Pickup: Sat 28 Feb, 9:00 AM → Return: Sat 28 Feb, 1:00 PM".
Selecting a return time is optional. If you only click once (pickup only), EquipDash will still let you proceed to create a booking.
For Experiences
The grid shows scheduled time slots where the experience is running:
- Click a time slot to select that session.
- The selected session is highlighted with the date and time shown in the summary.
Navigating Weeks
Use the navigation controls at the top of the grid to move between weeks:
- Previous — Go to the previous week (you cannot go before the current week)
- Next — Go to the next week
- Today — Jump back to the current week
The week range is displayed between the arrows (e.g. "Feb 23 - Mar 1, 2026").
Creating a Booking from the Grid
Once you have selected an available time slot:
- The Create Booking button at the bottom right becomes active.
- Click Create Booking.
- You are taken to the Point of Sale (POS) page with the product, dates, and times pre-filled.
- Complete the booking by adding customer details and payment.
This is the fastest way to go from "Is this available?" to a confirmed booking.
Clearing Your Selection
If you want to start over, click Clear in the selection summary bar to reset the pickup and return times without closing the modal.
Viewing the Full Availability Report
For a more detailed view, click the View Full Report link at the bottom of the modal. This takes you to the full availability reports page where you can see availability across all products and longer date ranges.
Tips
- Use the keyboard shortcut (Ctrl+Shift+A / Cmd+Shift+A) to open availability instantly while talking to a customer on the phone.
- Barcode scanning is the fastest way to select a product if you have the item physically in front of you.
- Check multiple items by clicking Change to select a new item — the grid refreshes automatically.
- Past time slots are greyed out and cannot be selected, so you do not need to worry about accidentally booking in the past.
- Numbers in cells tell you exactly how many units are available, so you can gauge demand at a glance.