Scanning Barcodes Growth+This feature requires the Growth+ plan or higher
Use a barcode to find an item, filter the rental calendar, send an item to Workshop, or record pickup and return. Generate labels in EquipDash or register your existing barcode values on the items first.
How to Scan
- Click Scan below the EquipDash logo in the left sidebar.
- A modal opens with a scan input field that is automatically focused.
- Use a connected USB or Bluetooth barcode reader to scan a barcode label, or type the barcode value manually and press Enter.
- EquipDash shows the matching item. Review the result before choosing an action.
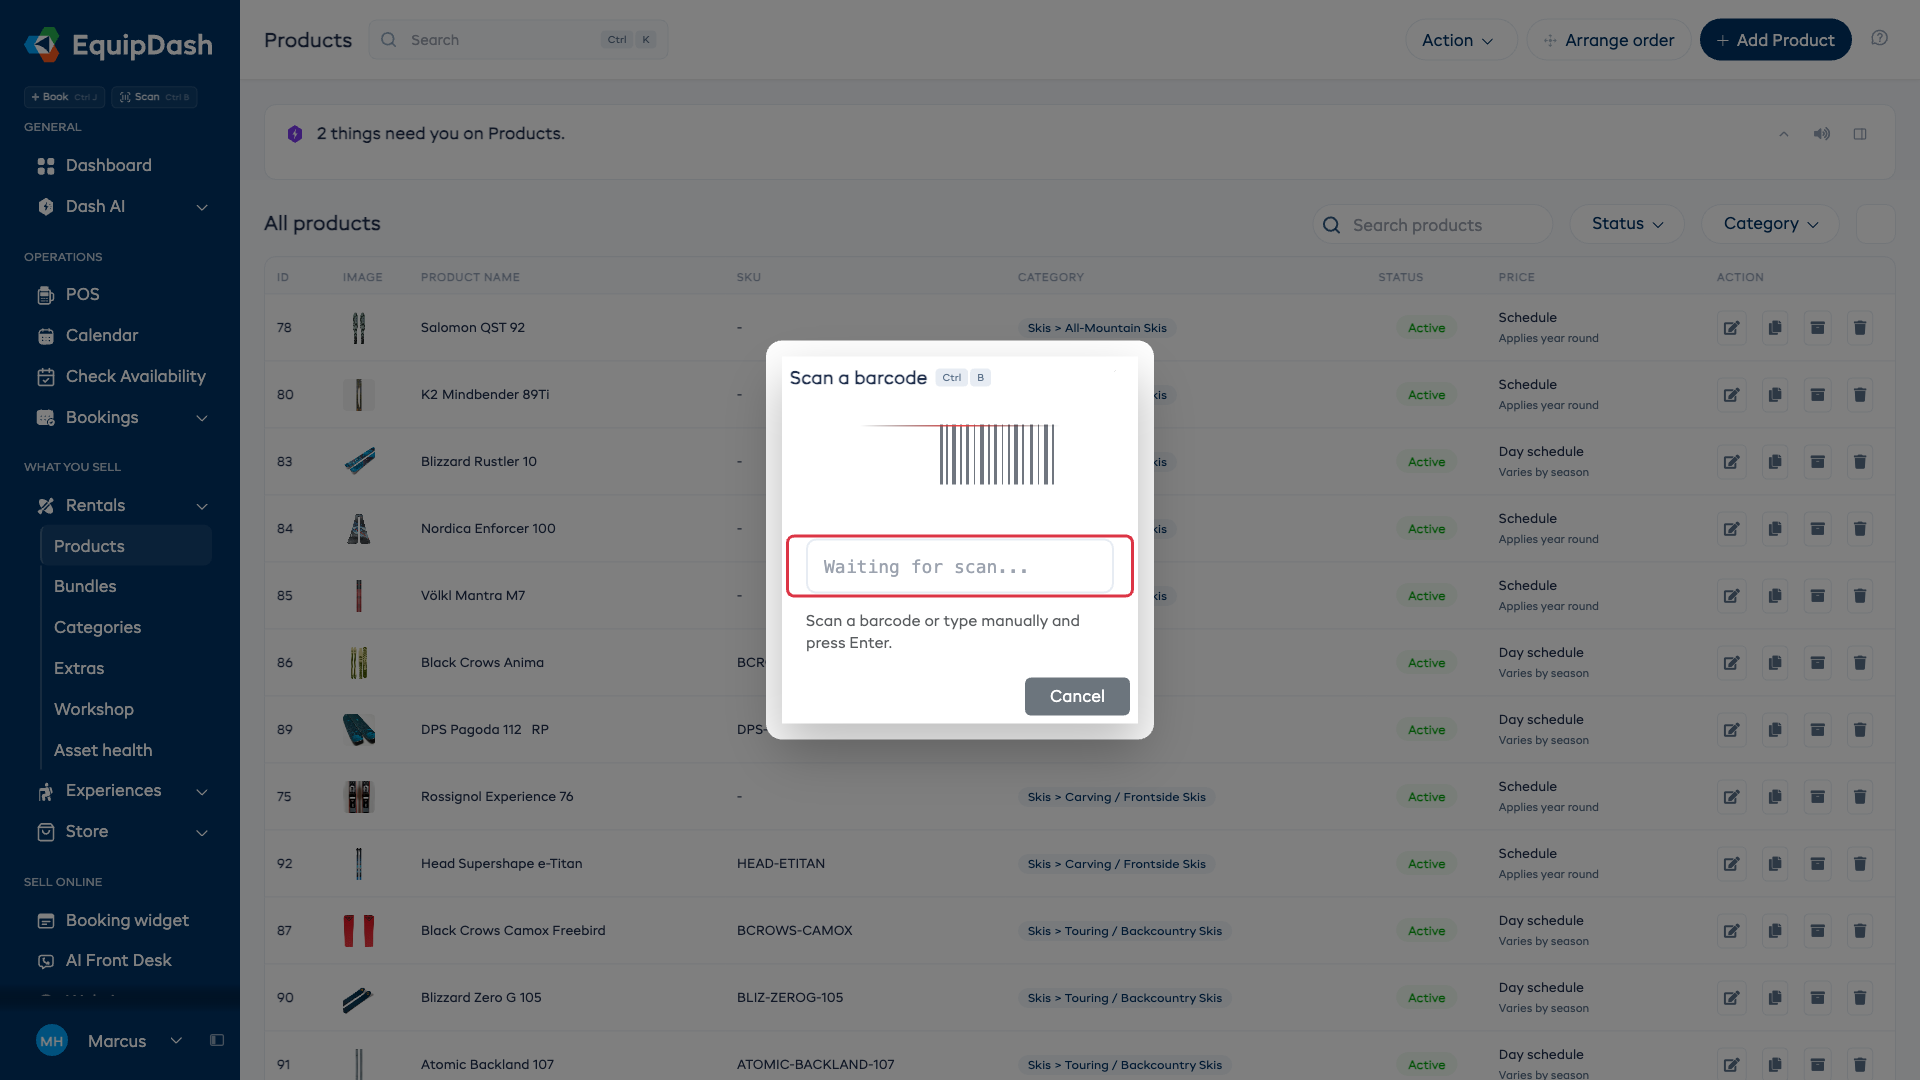
What Happens After a Scan
The result of a scan depends on where you initiated it:
Calendar scan
When you scan from the Calendar page:
- EquipDash identifies the product from the barcode.
- The calendar automatically filters to show only that product's bookings.
- You can quickly see when the item is booked, available, or out on rental.
Workshop scan (send to workshop)
When you scan using Add Item on the Workshop page:
- EquipDash identifies the product and inventory unit.
- Review the product and item identifier.
- Choose Send to Workshop.
- Wait for Done!, then close the scanner. The item appears under In Workshop.
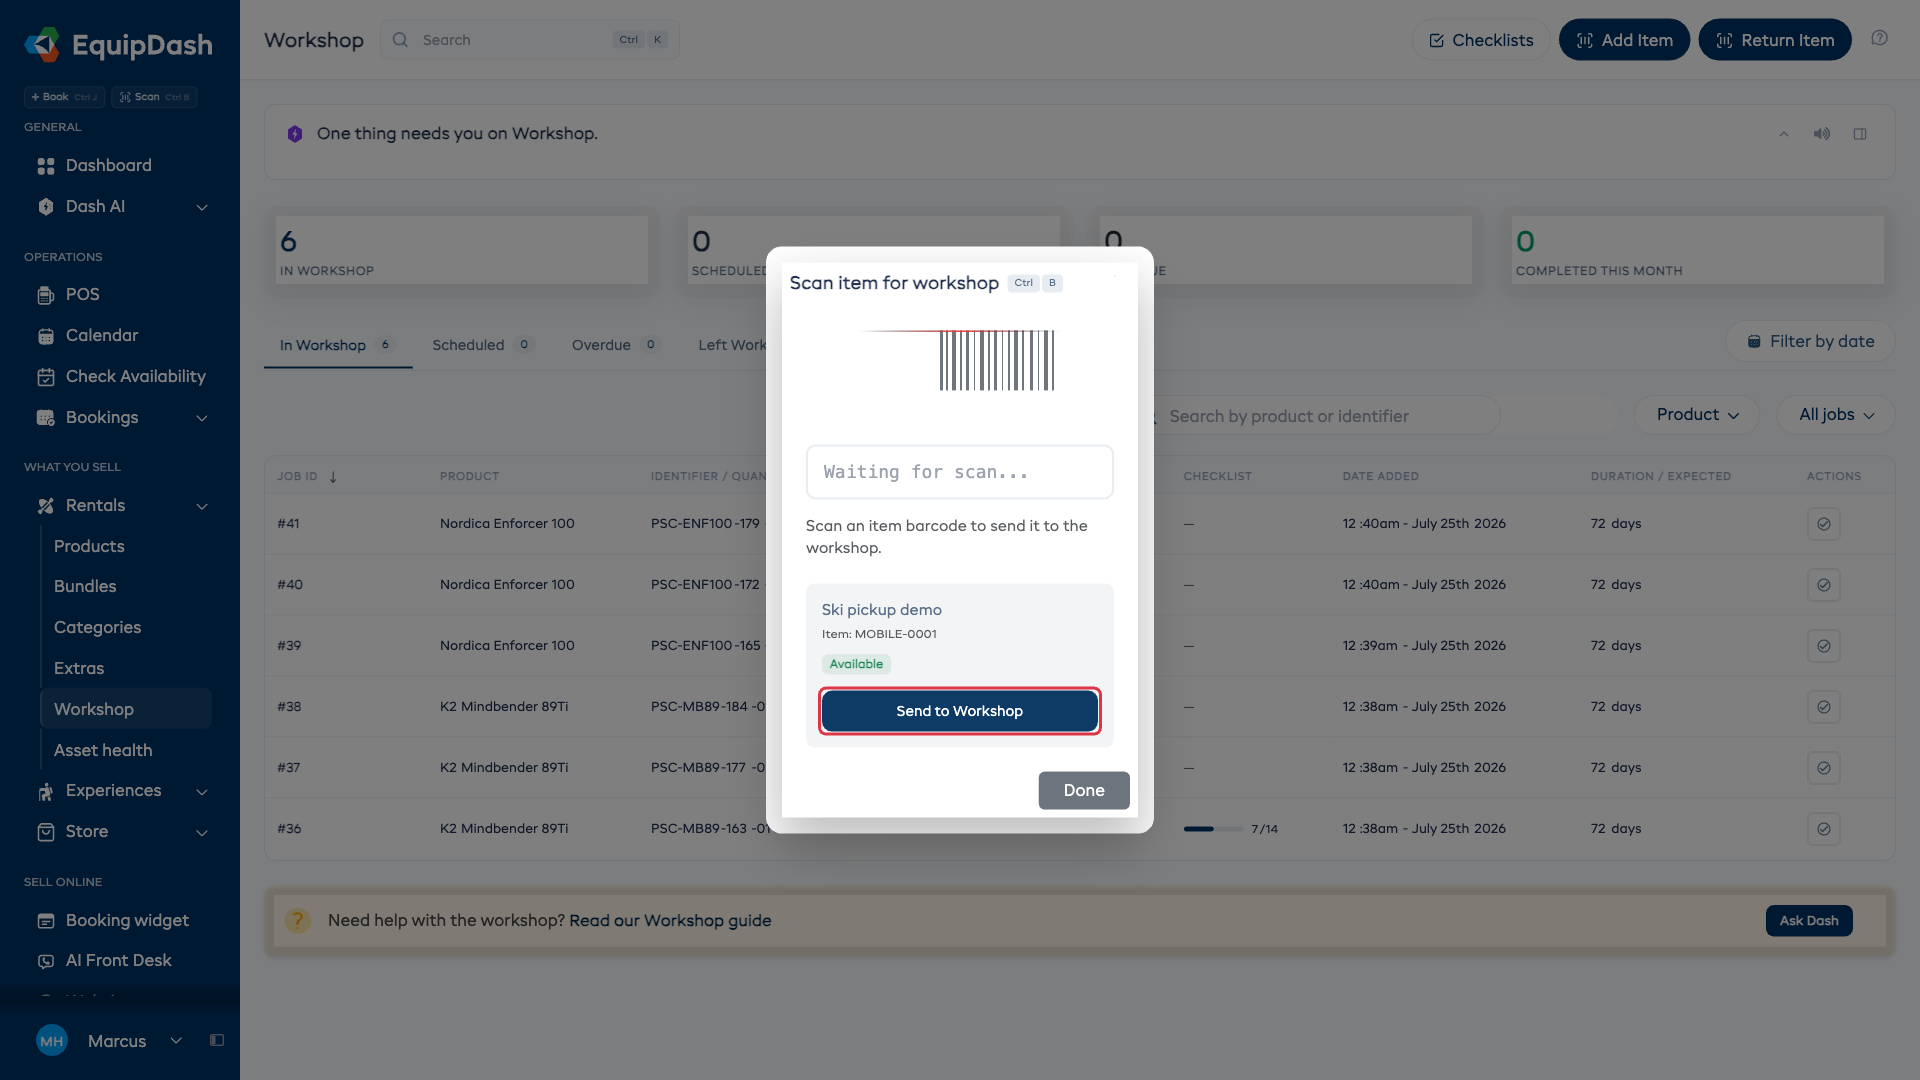
An item that is currently picked up must be returned before you can send it to Workshop.
If the product has a default checklist template assigned, the checklist is automatically attached to the new workshop job when the item is scanned in.
Workshop scan (return from workshop)
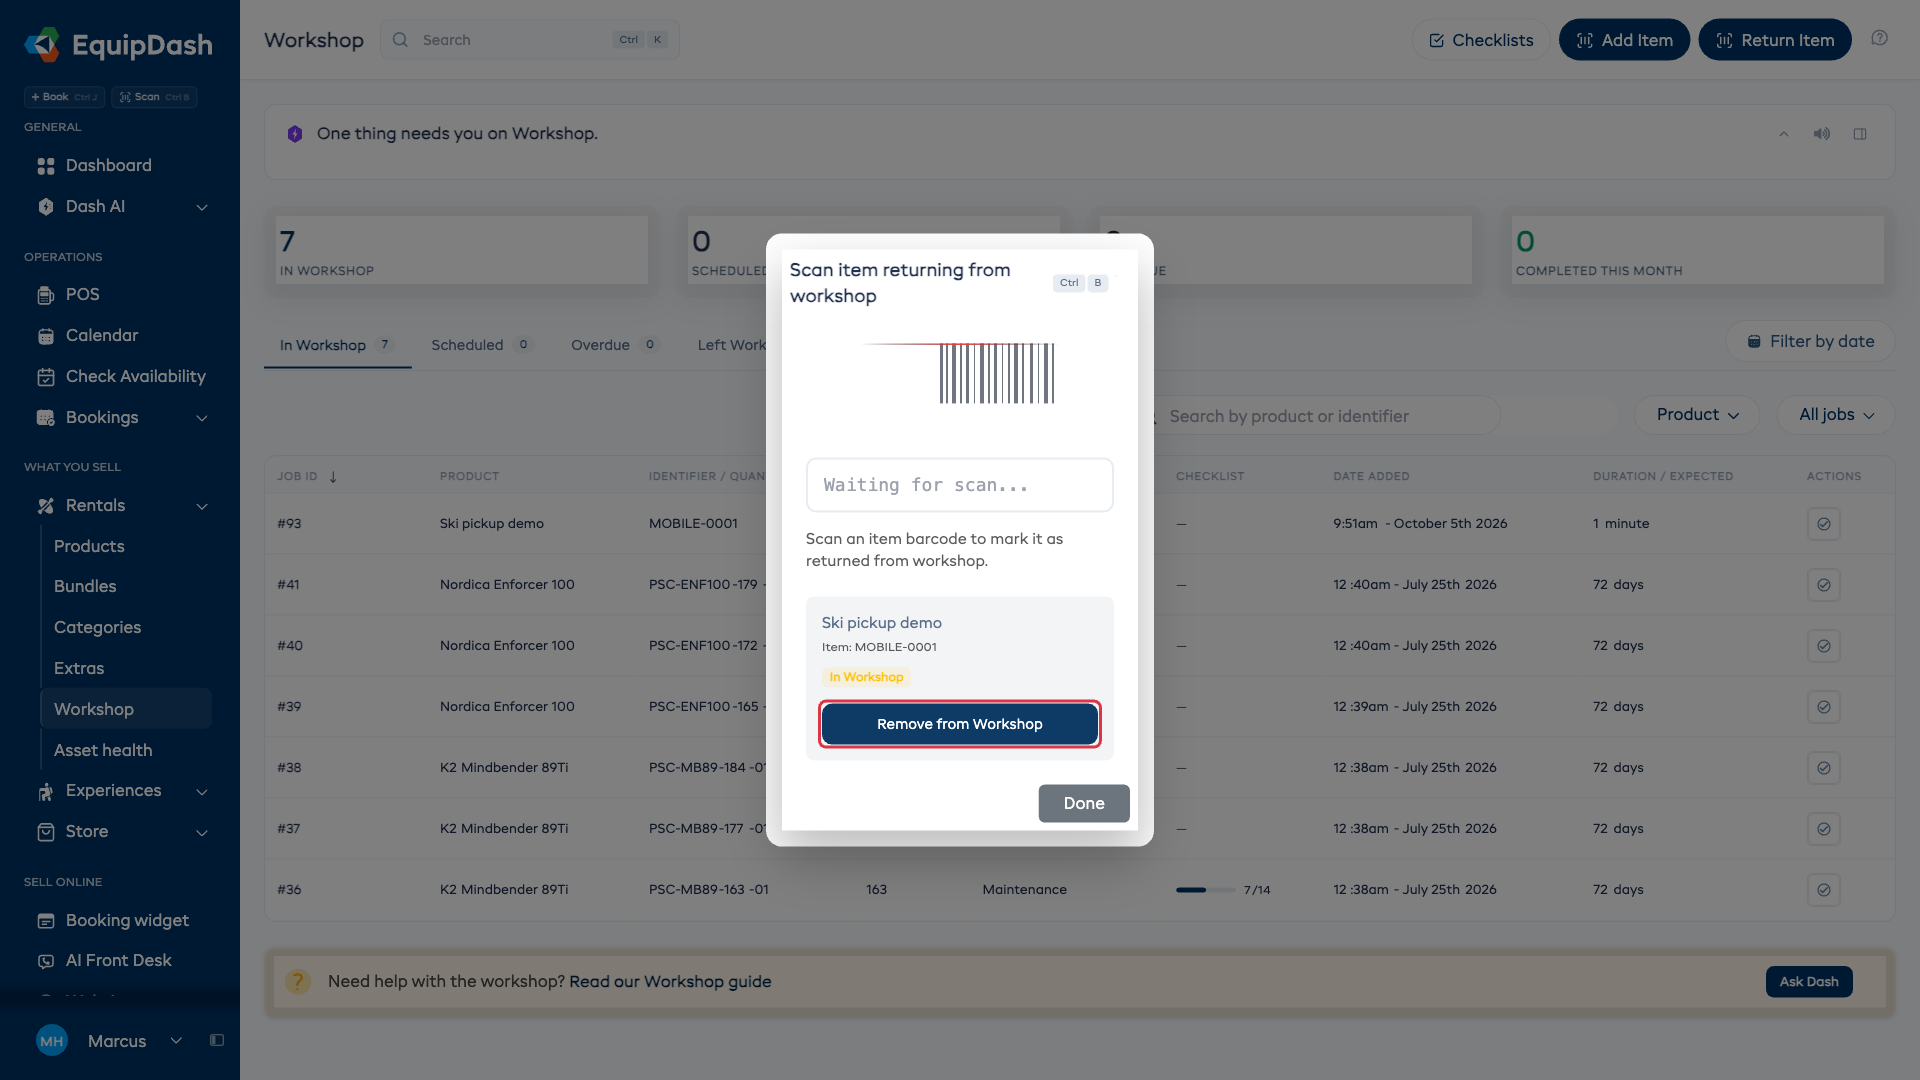
When you scan using Return Item on the Workshop page:
- EquipDash identifies the item and checks that it is currently in the workshop.
- Review the product and item identifier, then choose Remove from Workshop.
- Wait for Done!, then close the scanner.
- Open Left Workshop to check the completed job. Add any completion details from the job itself.
Booking fulfillment scan
When you scan during booking pickup or return:
- Open Pickup or Return on the booking, then choose the scan button.
- Scan the item and check the product and identifier.
- Confirm the pickup or return, then close the scanner and check the booking status.
At pickup, scanning a different available item of the same product and variation can offer Reassign & Pick Up. Check both identifiers before confirming. To keep the original item, scan its barcode again.
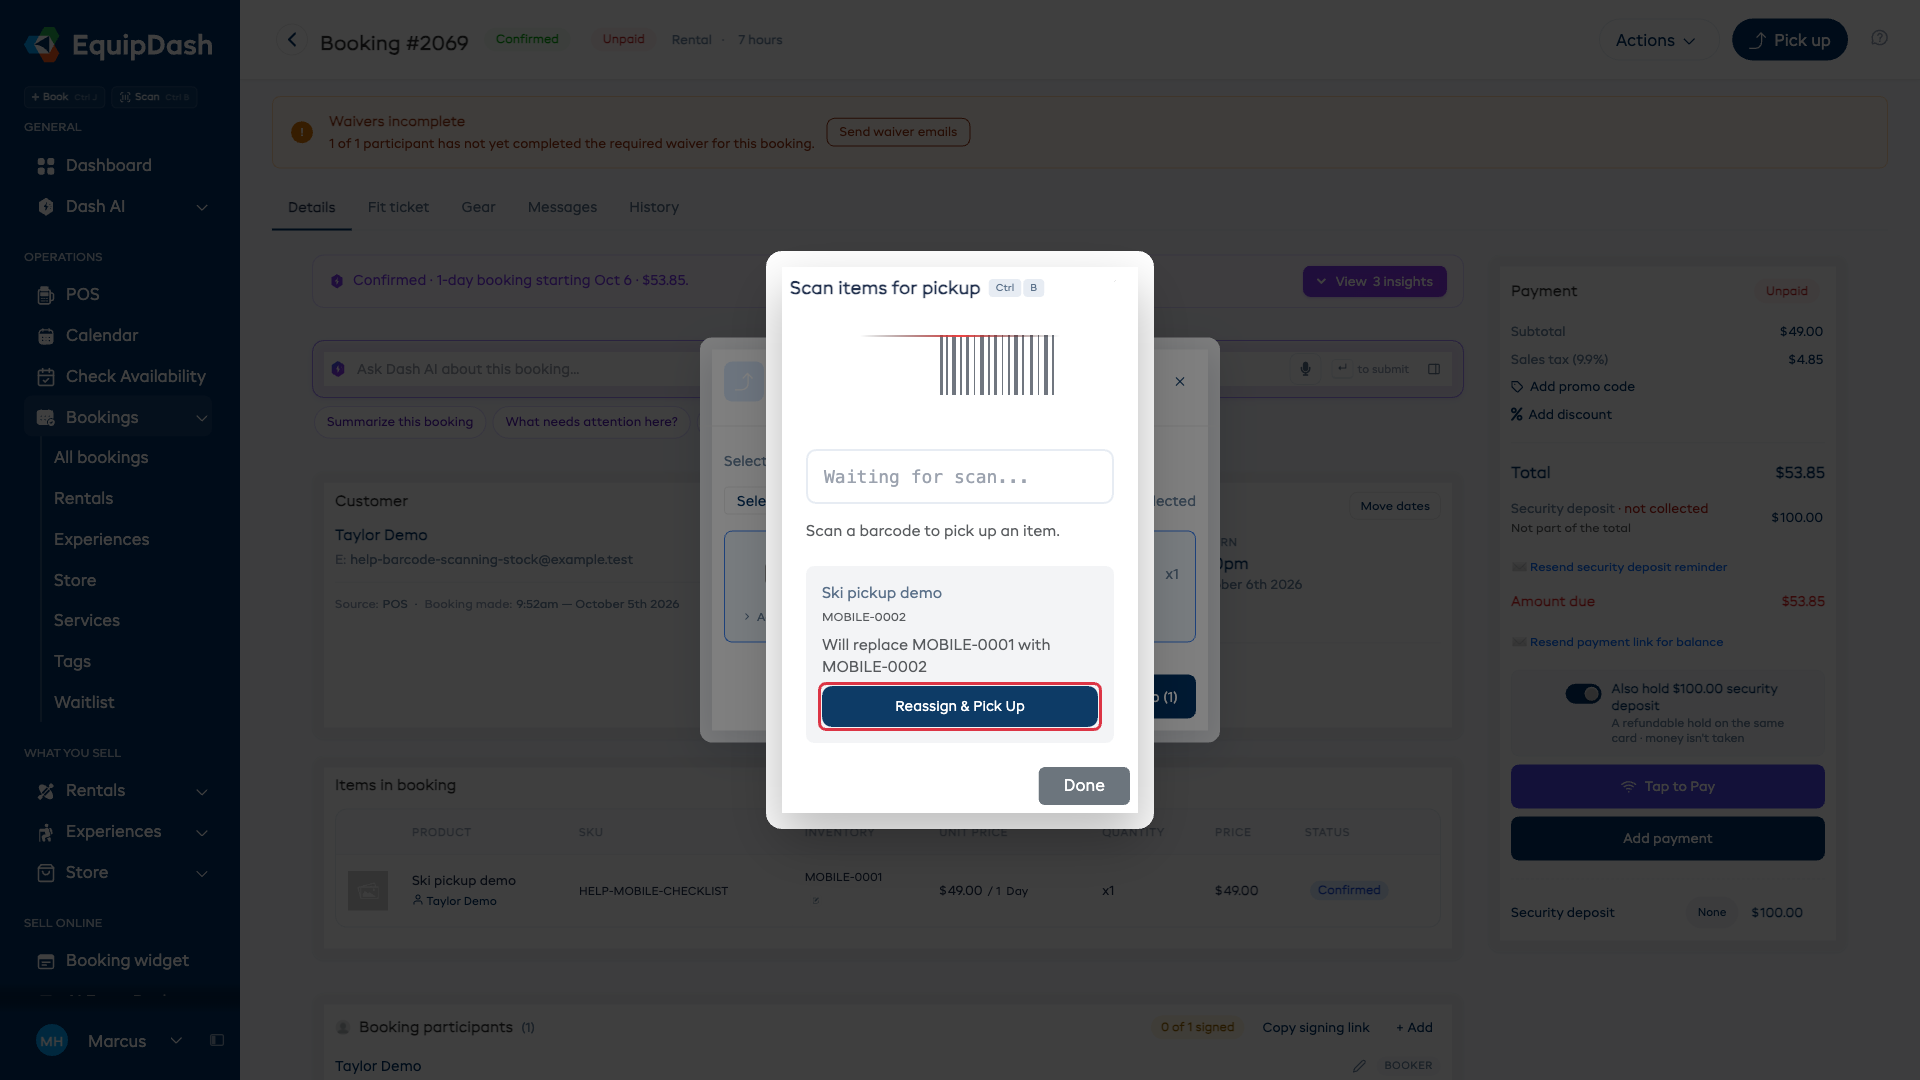
At return, scan the item that was actually picked up.
Supported Scanning Methods
| Method | Description |
|---|---|
| USB barcode reader | Plug in a handheld scanner - it sends the barcode value as keyboard input directly into the scan field |
| Bluetooth scanner | Connect a wireless barcode scanner to your device - works the same as a USB reader |
| Manual entry | Type the barcode value into the scan field and press Enter |
Troubleshooting Scans
If a scan does not work:
- Scanner not registering - Make sure the scan input field is focused (click inside it). USB and Bluetooth scanners send input as keystrokes, so the field must be active.
- Barcode not recognized - Check that the value is registered to the item in EquipDash. You can also enter an inventory item's identifier. An unregistered external code does not identify an item.
- Wrong item identified - Double-check that the barcode label is attached to the correct item. You can view the barcode value on the product or inventory detail page to verify.
Related Guides
- Setting Up Barcodes - Generating barcodes for your items.
- Printing Barcode Labels - Creating physical labels to attach to items.
- Quick Actions from Calendar - Scanning barcodes on the calendar.
- Sending Items to Workshop - Using the scanner to send items for repair.