Creating a Survey Growth+This feature requires the Growth+ plan or higher
The survey builder lets you create professional feedback surveys in minutes using a drag-and-drop interface. You can add different question types, customize the look with your logo, and configure when surveys are sent.
Creating a New Survey
- Click Surveys in the left sidebar.
- Click + New survey in the top-right corner.
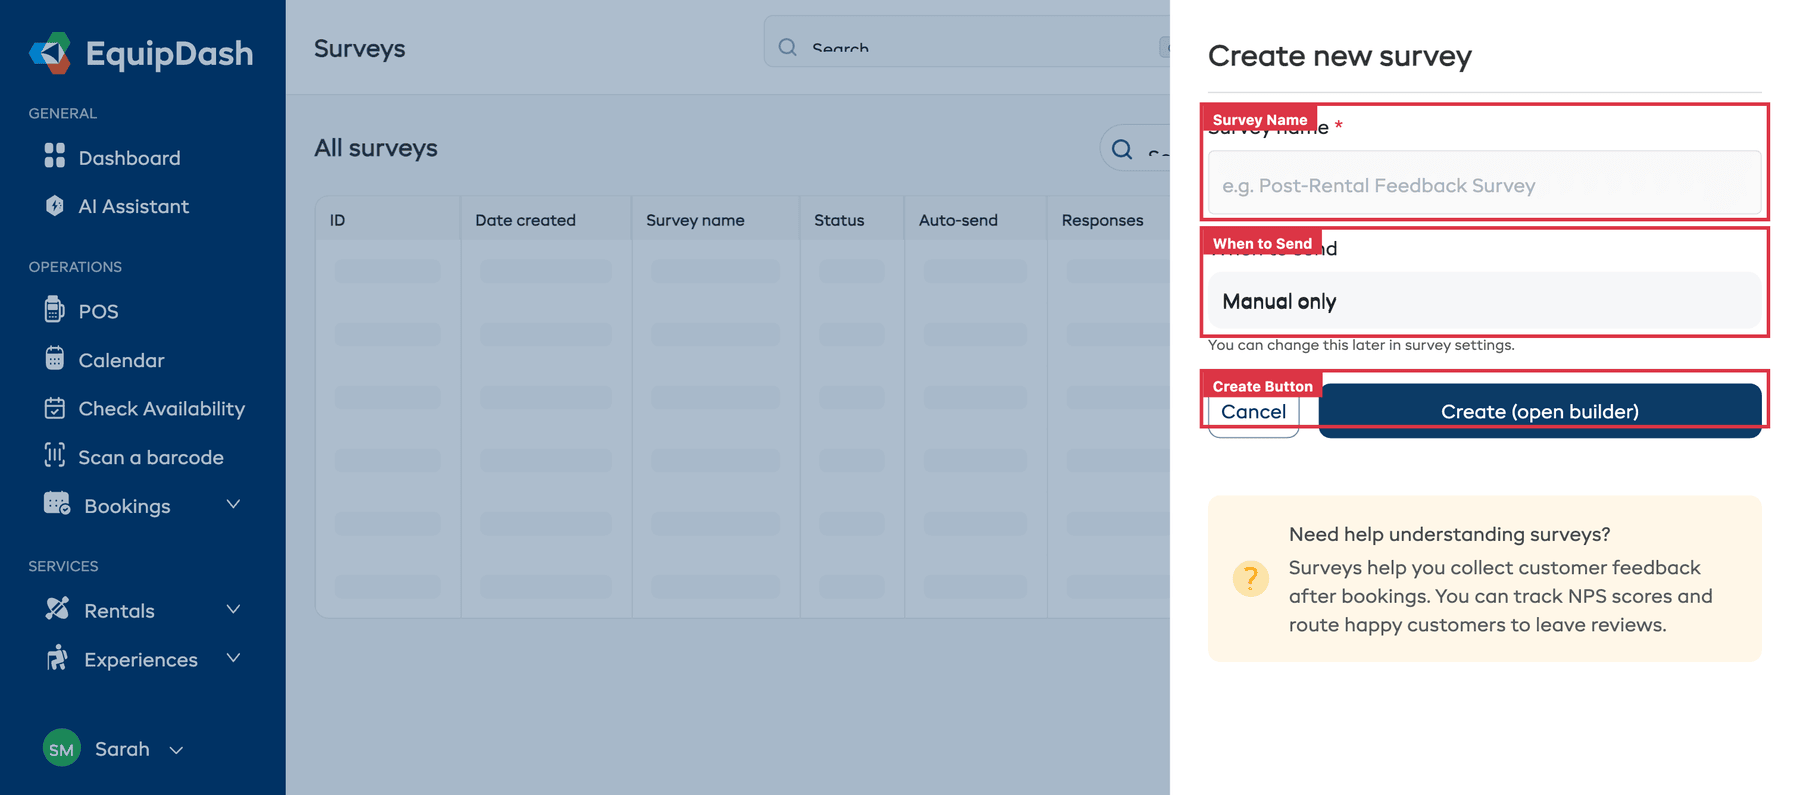
- A side panel opens titled Create new survey.
- Enter a Survey name (e.g. "Post-Rental Feedback Survey").
- Choose when to send from the When to send dropdown — select Manual only, After booking completes, After equipment return, or After experience checkout. You can change this later in survey settings.
- Click Create (open builder). You will be taken to the survey builder.
Using the Survey Builder
The survey builder has three main areas:
- Left panel — Shows three info cards at the top (Assigned to, Status toggle, and Auto-send), followed by the element palette split into Survey elements and Form elements.
- Centre canvas — Your survey preview where you arrange and edit questions. Shows your logo at the top (if added), questions in order, and a page label at the bottom.
- Top toolbar — The survey name with a back arrow on the left, and Save, Settings, Share, and Preview buttons on the right.

Adding Elements
- Find the element you want in the left panel under Survey elements or Form elements.
- Drag the element onto the canvas and drop it where you want it to appear.
- Click on the element to select it, then edit its label, description, or options.
- Click Save in the top toolbar to save your changes.
Reordering Elements
- Drag and drop any element on the canvas to move it to a new position.
- Click Save to keep the new order.
Deleting an Element
- Click on the element you want to remove.
- Click the delete icon that appears.
- The element is removed and the remaining elements reorder automatically.
Multi-Page Surveys
If your survey is long, you can split it across multiple pages so customers are not overwhelmed.
- Click + Add New Page at the bottom of the canvas.
- A new page is created. Drag elements onto it just like the first page.
- Customers will see a Next button to move between pages when filling out the survey.
To delete a page, click the delete icon next to the page header. All elements on that page will be removed.
Adding Your Logo
You can add your business logo to the top of the survey for a branded experience.
- Click the logo area at the top of the canvas.
- Upload an image from your computer.
- The logo appears at the top of your survey.
To remove the logo, click the logo and then click the delete icon.
Configuring Survey Settings
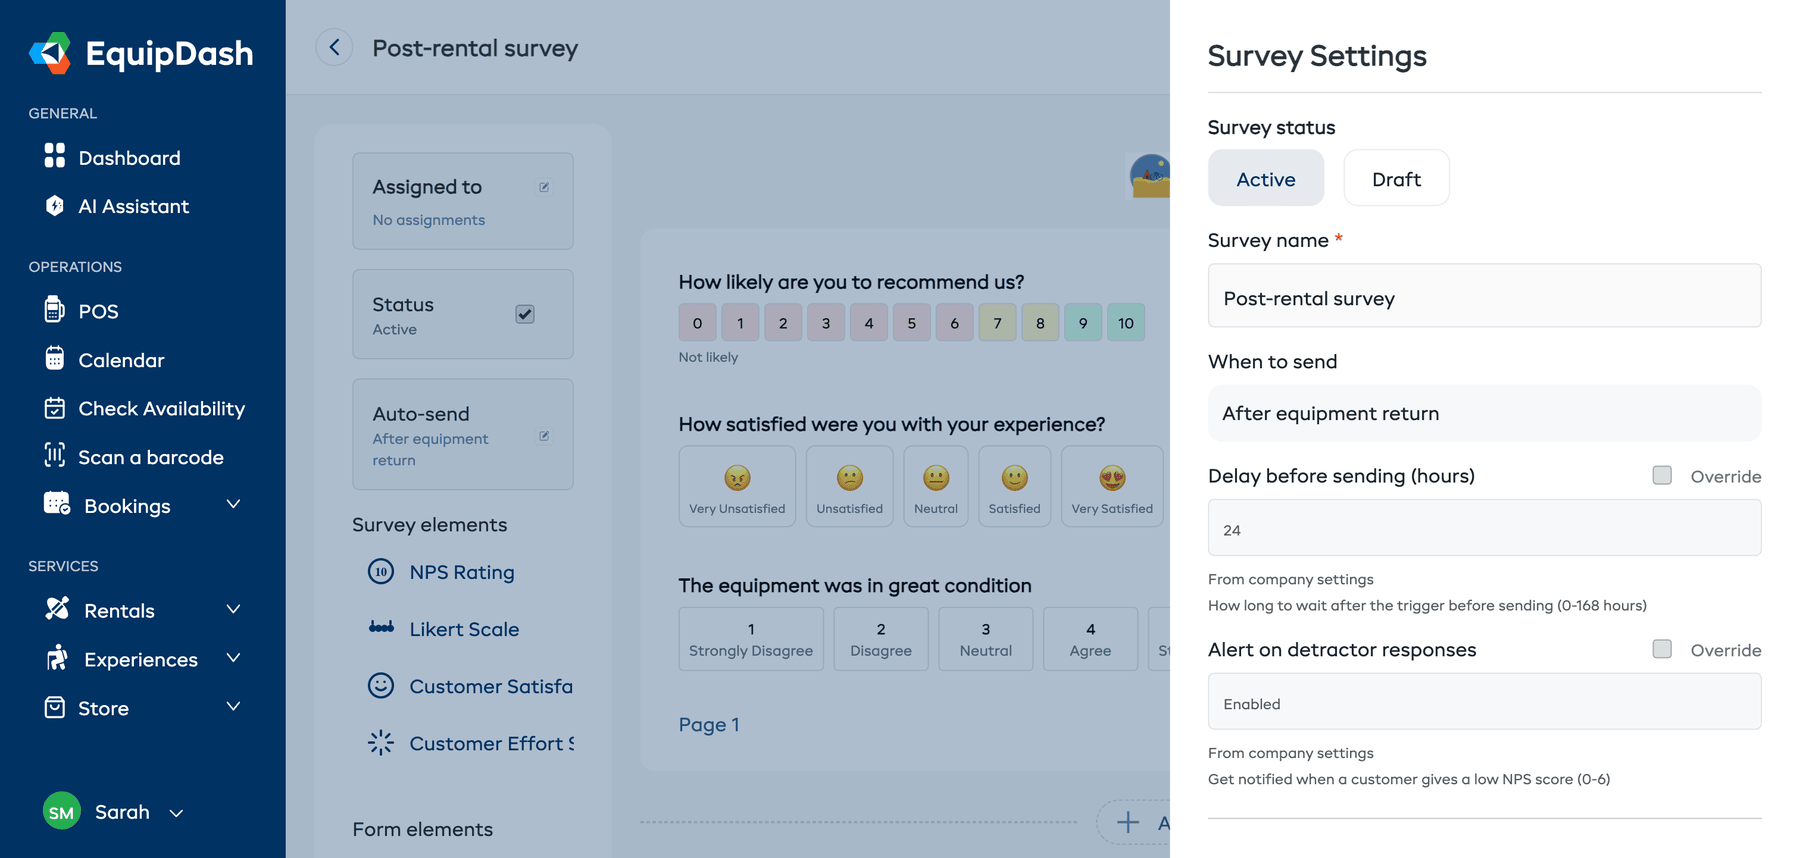
Click Settings in the top toolbar to open the settings panel. A side panel opens titled Survey Settings where you can configure:
| Setting | Description |
|---|---|
| Survey status | Toggle between Active and Draft using the two buttons at the top. |
| Survey name | The internal name for this survey (customers do not see this). |
| When to send | When to automatically send the survey — see Sending Surveys for details. |
| Delay before sending (hours) | How many hours to wait after the trigger event before sending. Defaults to your company settings (typically 24 hours). Toggle Override to set a custom delay for this survey. Range: 0-168 hours. |
| Alert on detractor responses | Get notified when a customer gives a detractor score (0-6 on NPS). Defaults to your company settings. Toggle Override to customise. |
| Review Routing URLs | Override your default Google, TripAdvisor, Facebook, Yelp, or Custom review URLs for this specific survey. These default from your company settings. |
Click Save Settings when you are done, or Cancel to discard changes.
Assigning to Products or Experiences
You can link a survey to specific products or experiences. When assigned, the survey will only be triggered for bookings that include those items.
- Click the Assigned to card in the left panel of the builder.
- A side panel opens titled Edit related products/experiences.
- Check Products and/or Experiences under Applies to. Only options for enabled modules appear; single-module suppliers see the only valid option pre-selected.
- Click Update.
If you do not assign any items, the survey applies to all bookings.
Previewing Your Survey
Before making your survey active, preview how it will look to customers:
- Click Preview in the top toolbar.
- A preview opens showing exactly what customers will see.
- Close the preview when you are done reviewing.
Activating Your Survey
When you are happy with your survey:
- In the left panel of the builder, find the Status card.
- Toggle it to Active.
- The survey is now live. If you set an automatic send trigger, it will start going out to customers after their next qualifying booking.
You can also change the status from the Survey Settings panel by clicking the Active or Draft button at the top.
Sharing Your Survey
You can share your survey directly using a link or QR code:
- Click Share in the top toolbar.
- A modal titled Share Survey opens with:
- A survey link and Copy link button to copy it to your clipboard.
- An Open survey in new tab link to preview it yourself.
- A QR code with HTML embed code for adding to your website.
- Download QR image to save the QR code for printing (e.g. on flyers or at your counter).
- Copy code to copy the embed HTML.