Experience Categories
Categories help you organize your experiences into logical groups. They make it easier for customers to browse your offerings in the booking widget and help you keep things tidy as your catalog grows.
How Categories Work
Each experience can be assigned to one category. Categories are displayed in the booking widget as filters, letting customers quickly narrow down to the type of activity they are looking for.
Example categories:
- Water Sports
- Land Tours
- Family Activities
- Private Tours
- Workshops
- Seasonal Specials
Viewing Your Categories
Navigate to Experiences > Categories in the sidebar to see all your experience categories.
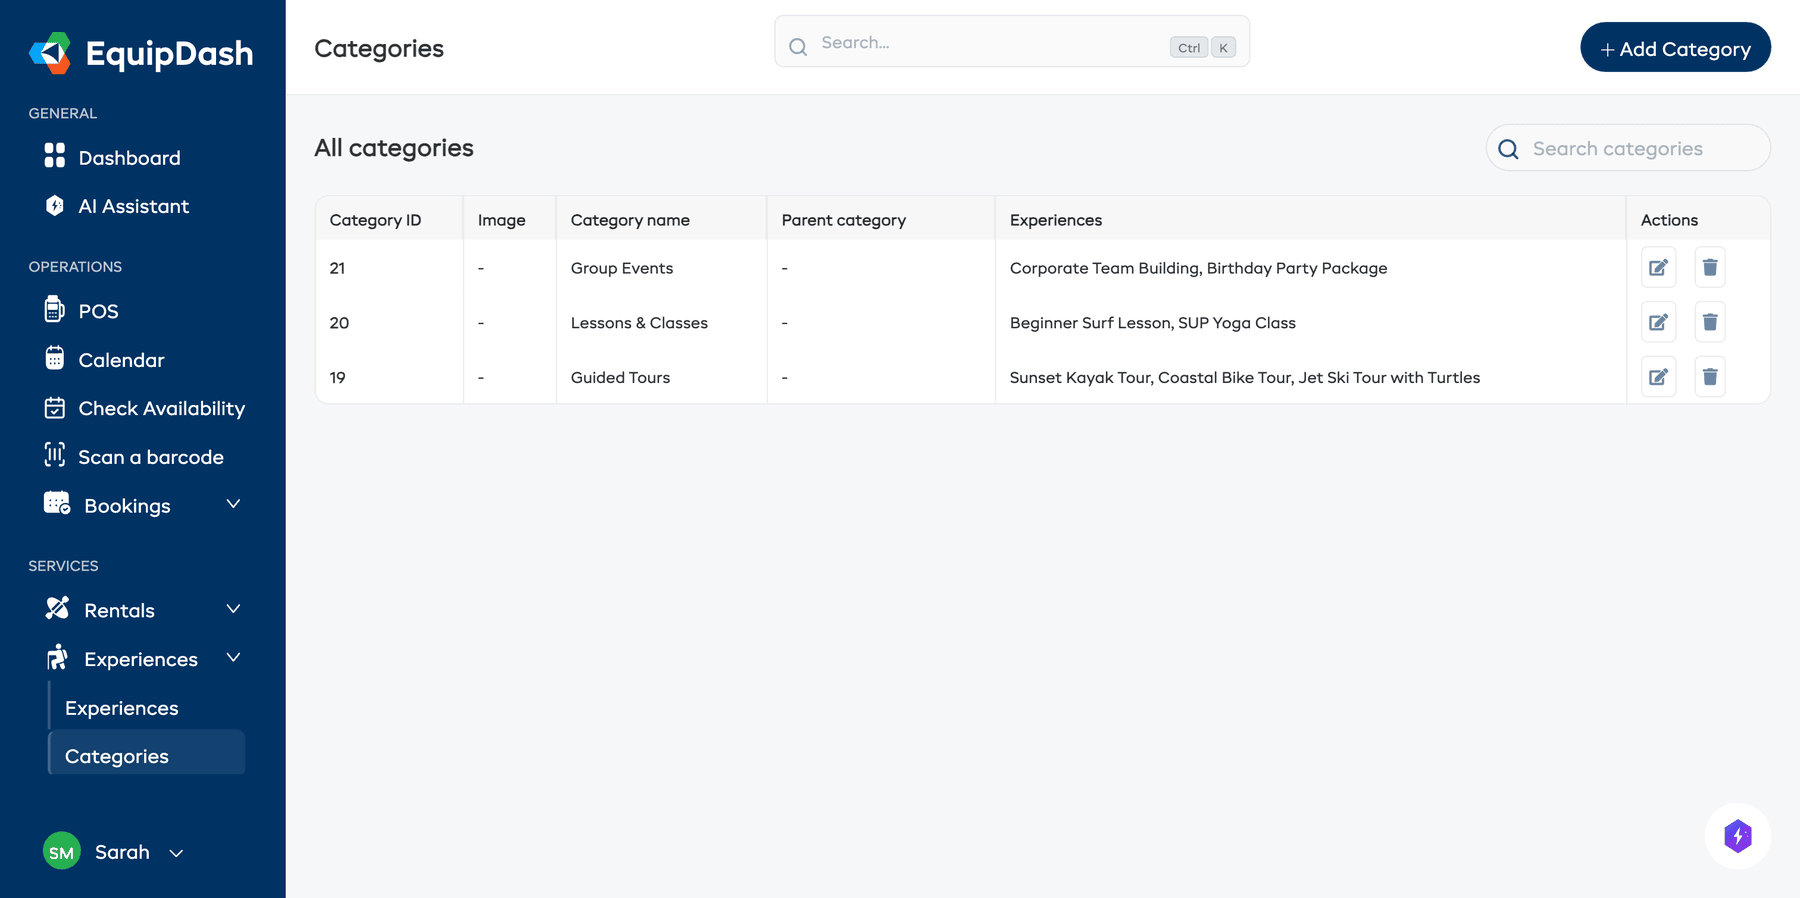
The table shows:
- Category ID — The internal ID of the category.
- Image — The category image (shown in the booking widget).
- Category Name — The display name of the category.
- Parent Category — The parent category, if this is a subcategory.
- Experiences — The names of experiences that belong to this category.
- Actions — Edit or delete the category.
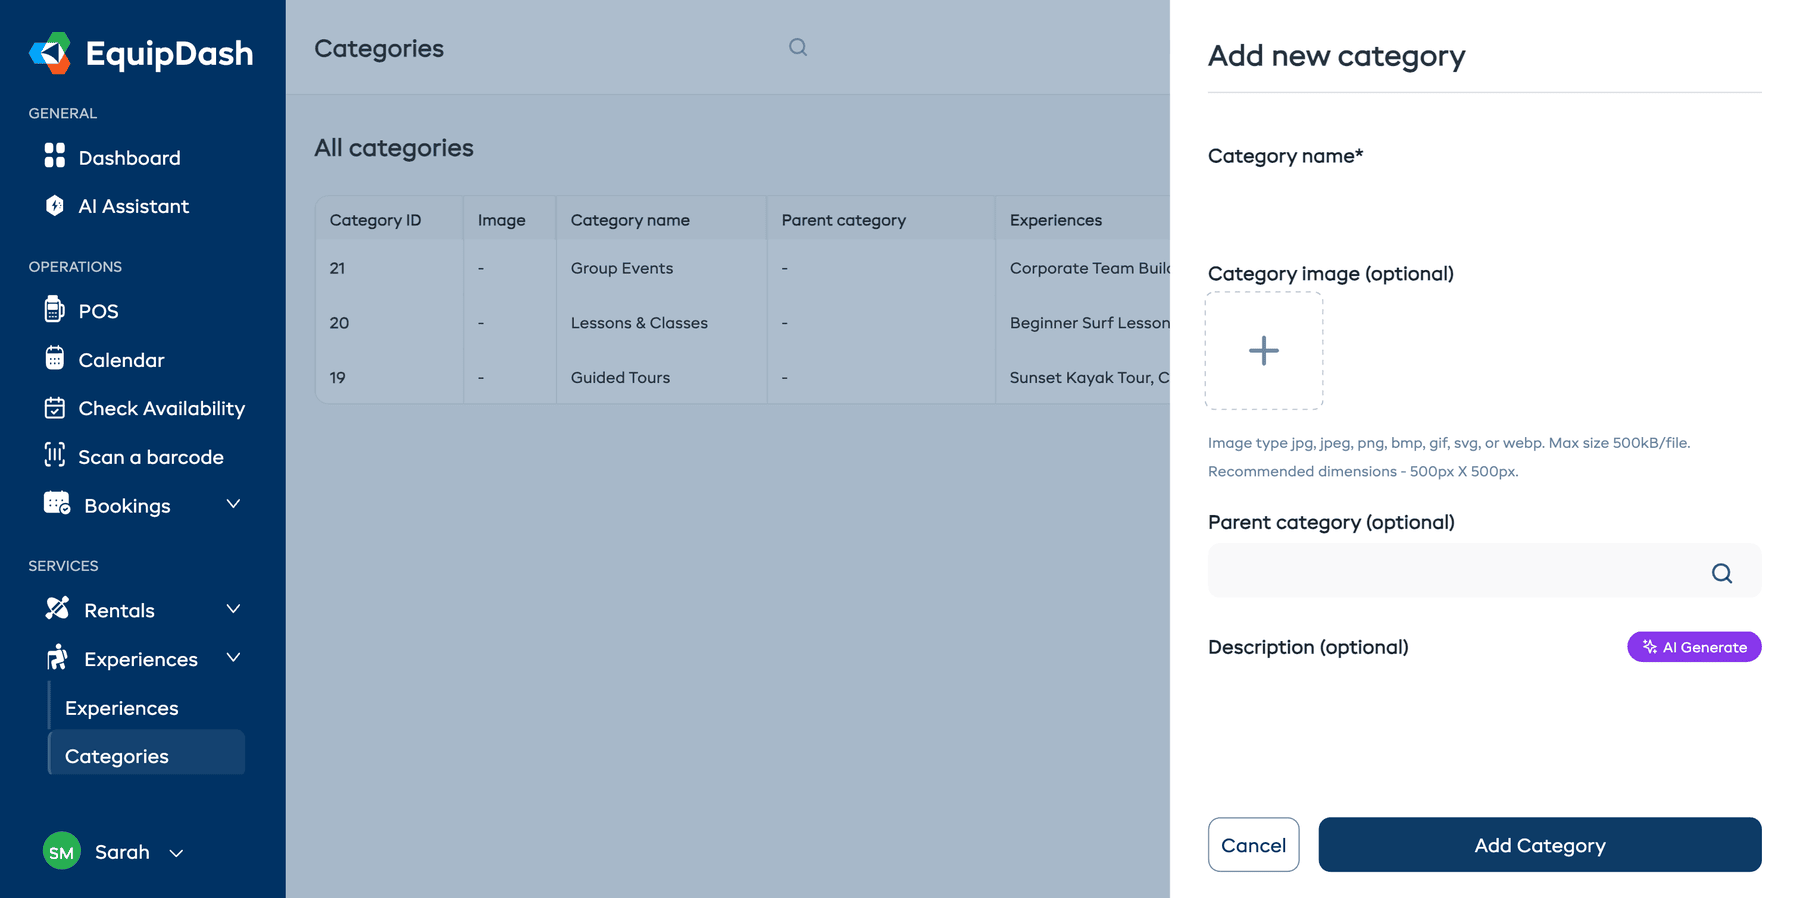
Creating a Category
- Go to Experiences > Categories.
- Click the + Add Category button.
- In the panel that opens, enter a Category name.
- (Optional) Upload a Category image. This is displayed in the booking widget alongside the category name.
- (Optional) Select a Parent category if this is a subcategory.
- (Optional) Add a Description — a short summary visible to customers. You can use the AI Generate button to have EquipDash draft one for you.
- Click Add Category.
Assigning Experiences to a Category
You assign an experience to a category when you create or edit it:
- In Step 1 of the experience wizard, type in the Category search box.
- Select the category from the dropdown.
- Continue through the wizard and save.
An experience can belong to one category at a time. To change an experience's category, edit the experience and select a different category.
Editing a Category
- Go to Experiences > Categories.
- Click the Edit icon on the category row.
- Update the name, description, or image.
- Click Save.
Changes to the category name or image will be reflected everywhere the category is displayed, including the booking widget.
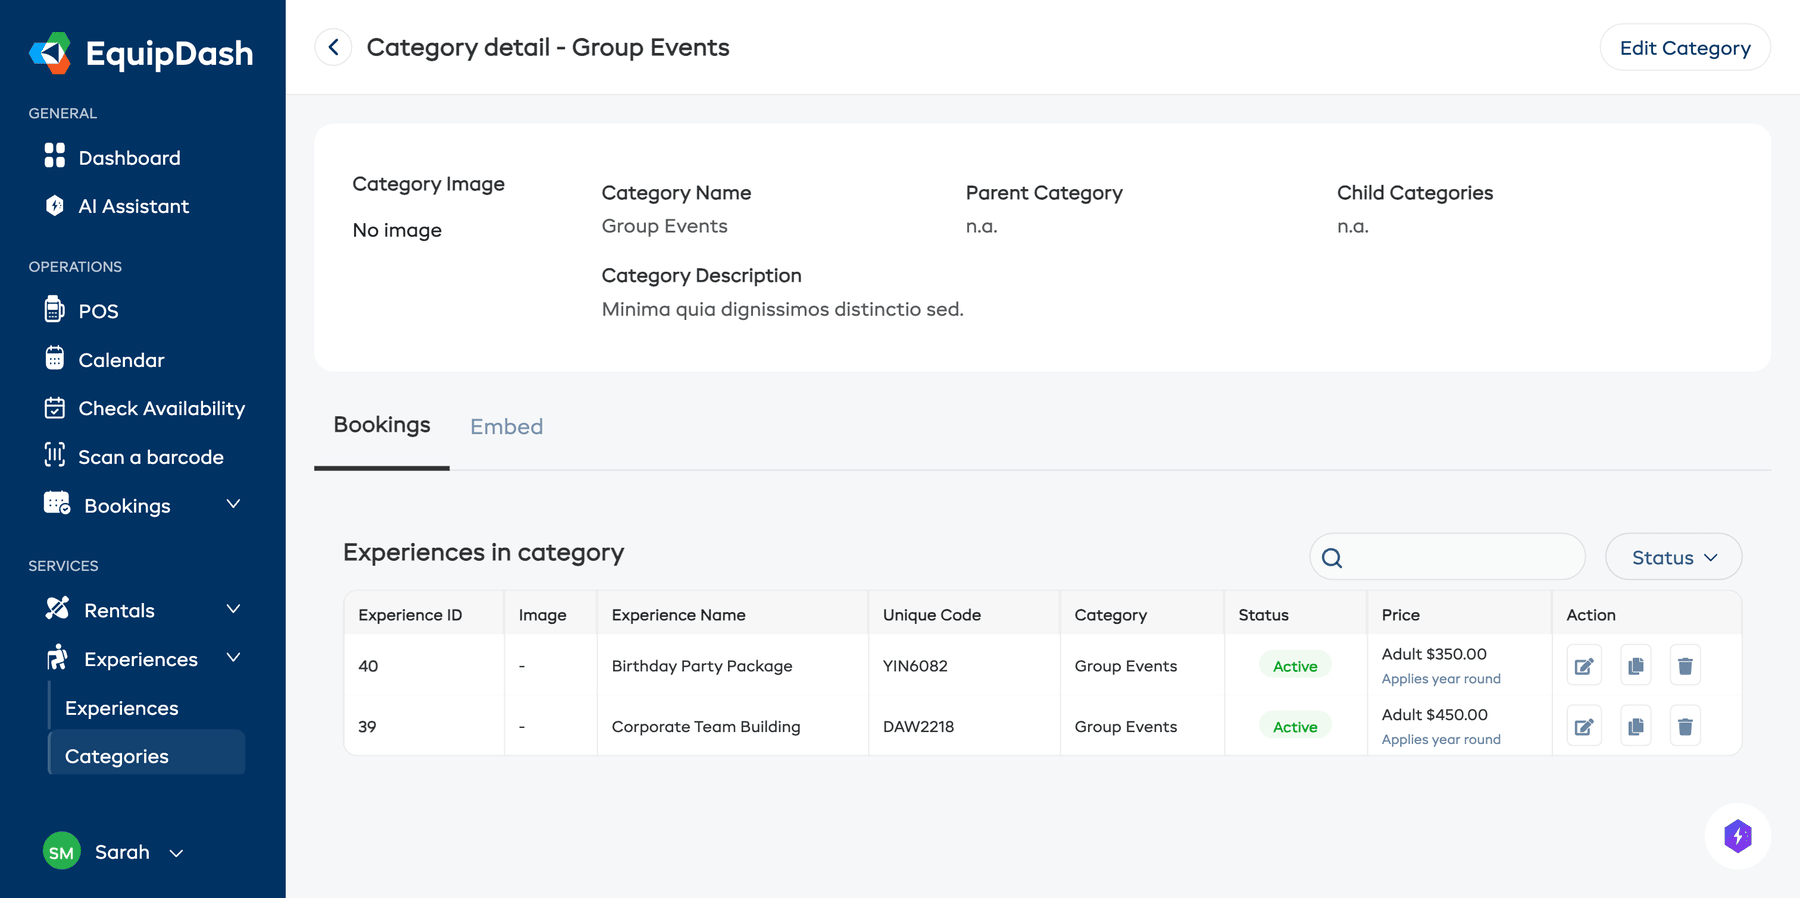
Viewing Category Details
Click a category name in the table to open its detail page. The category detail page shows:
- The category image, name, parent category, and child categories.
- The category description.
- A table of all experiences assigned to this category.
Deleting a Category
- Go to Experiences > Categories.
- Click the Delete icon on the category row.
- Confirm the deletion.
Deleting a category does not delete the experiences inside it. Those experiences will simply become uncategorized. You can reassign them to a different category later by editing each experience.
How Categories Appear in the Booking Widget
In the booking widget, categories are shown as filters or tabs that customers can use to browse your experiences.
Customers can click a category to see only the experiences in that group, making it quicker to find what they are looking for.
Tips
- Keep category names short and clear. Customers see these in the widget, so names like "Water Sports" work better than "Water-Based Activities and Tours".
- Use images. A good category image helps customers visually identify the type of activity.
- Do not create too many categories. A handful of well-chosen categories is easier to browse than a long list. Aim for 3 to 8 categories.
- Review periodically. As you add and remove experiences, check that your categories still make sense.