Managing Experiences
Once you have created your experiences, you can manage them from the Experiences page and the individual experience detail page. This guide covers viewing your experience list, editing details, changing status, and deleting experiences.
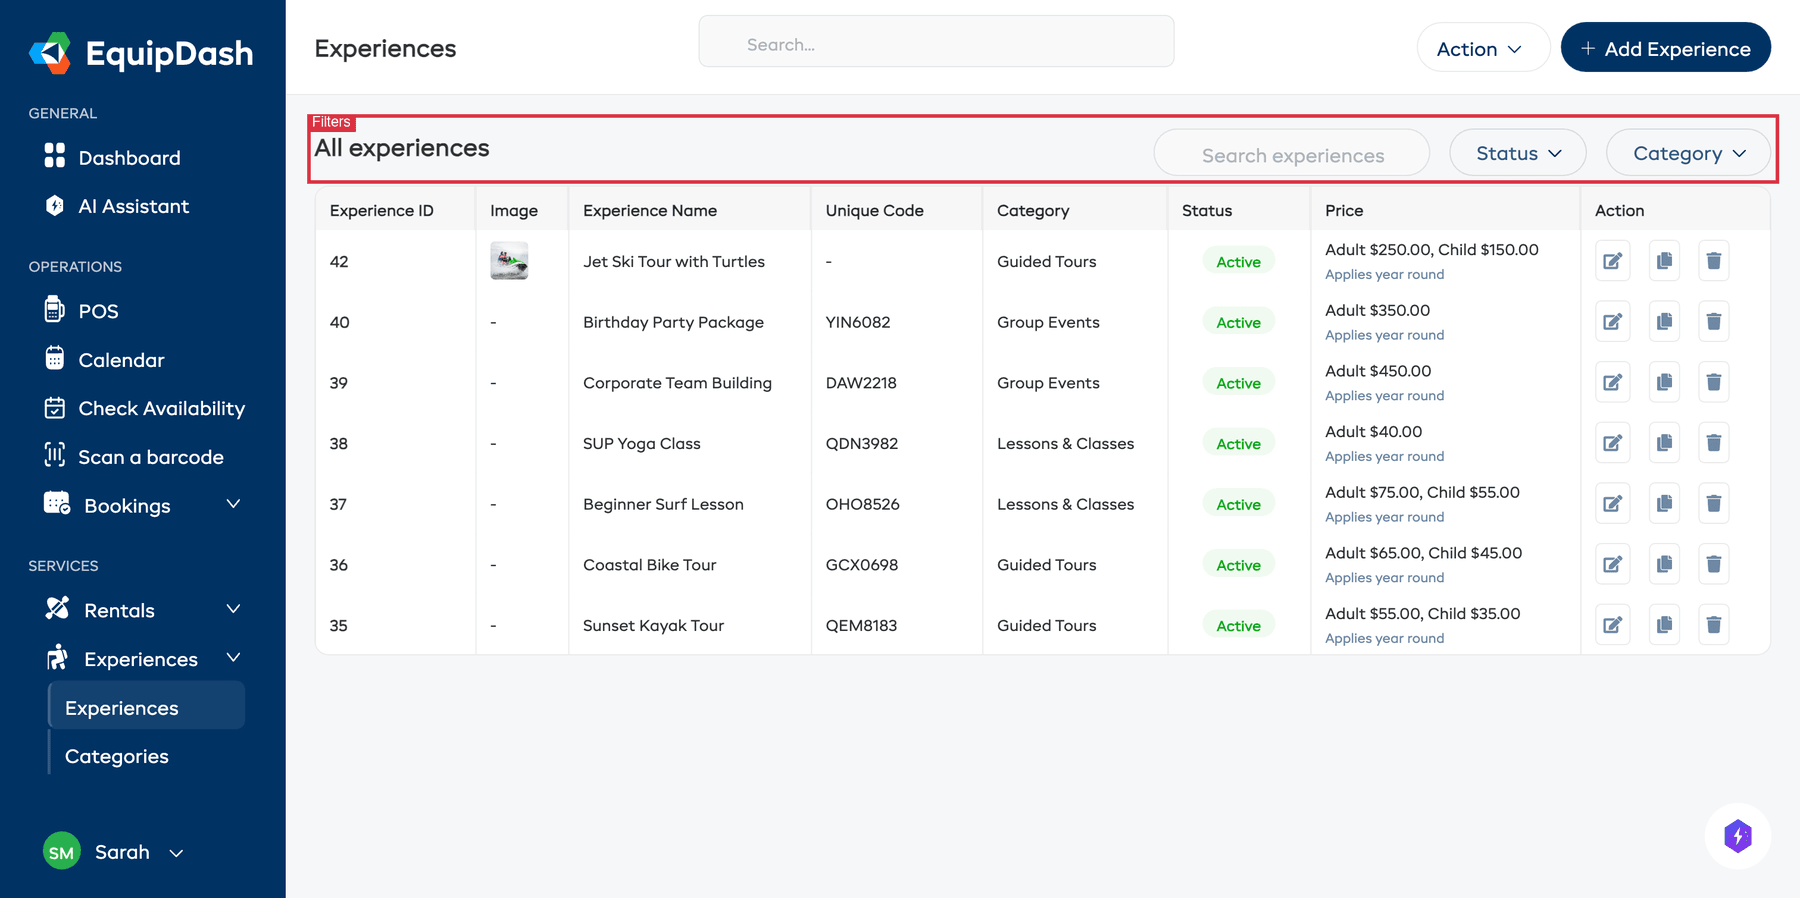
The Experiences Table
Navigate to Experiences > Experiences in the sidebar to see all your experiences in a searchable, sortable table.
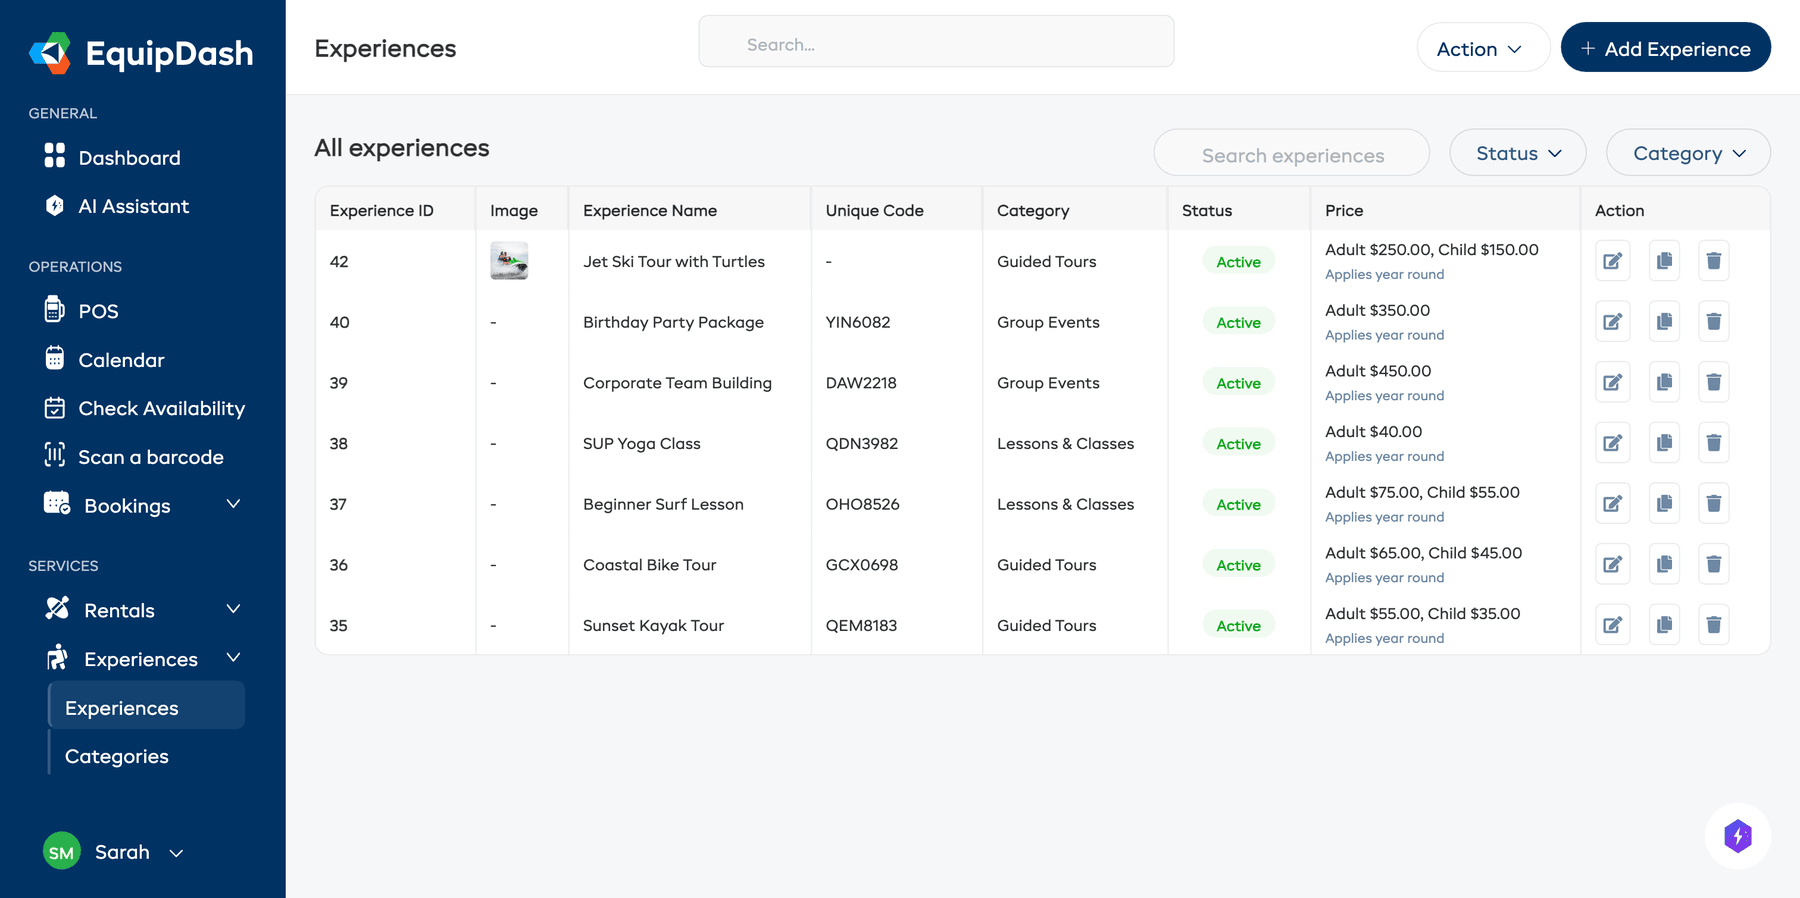
From the table you can:
- Search for experiences by name using the search bar.
- Sort by clicking column headers.
- Filter by category using the category dropdown.
- Filter by status using the Status dropdown.
- Export the full experience list as a CSV file by clicking the Action dropdown and selecting Export.
Viewing an Experience
Click on any experience in the table to open its detail page. The page is built around a hero strip at the top — image, status, "From" price, upcoming-sessions count, and a + Book now button — followed by a tab strip:
- Experience Details — Overview with the experience image, brief and full descriptions, pricing structure, duration, location, and custom field values. Most fields are inline-editable — click a value to edit it in place, no wizard needed.
- Pricing — A side-by-side editor: pick Year Round or Seasonal and By Participant or By Group on the left, then enter prices for the rate categories that matter. The right card shows a live customer-facing preview as you type.
- Availability — All scheduled sessions grouped by date with calendar-tile date stickers, capacity bars, status pills, guide chips, and pagination. See Setting Up Availability.
- Bookings — Bookings linked to this experience, with filters scoped to experience-relevant statuses (Confirmed, Pending payment, No show, Cancelled, Completed).
- Calendar — A calendar view showing this experience's sessions.
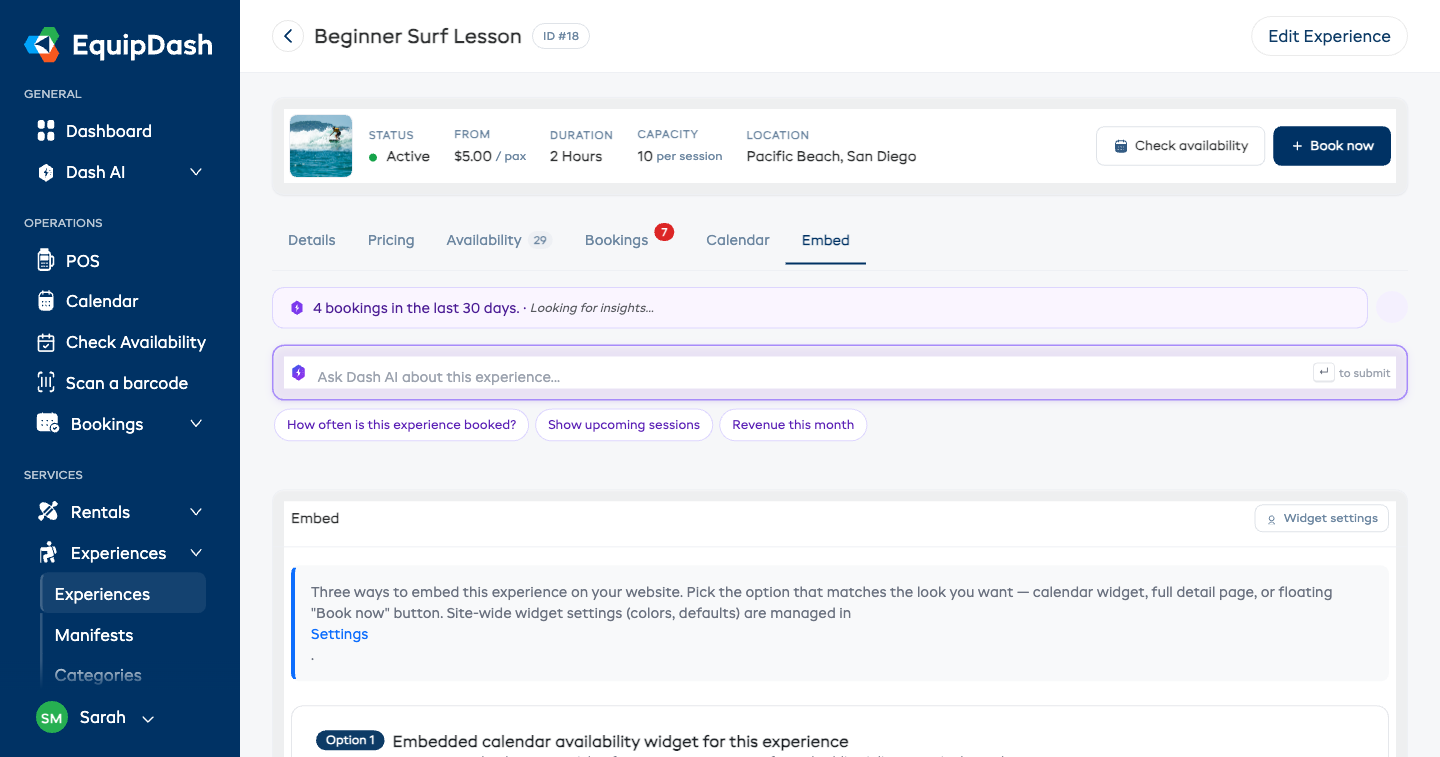
- Embed — Get a direct link or embed code to feature this experience on your website.
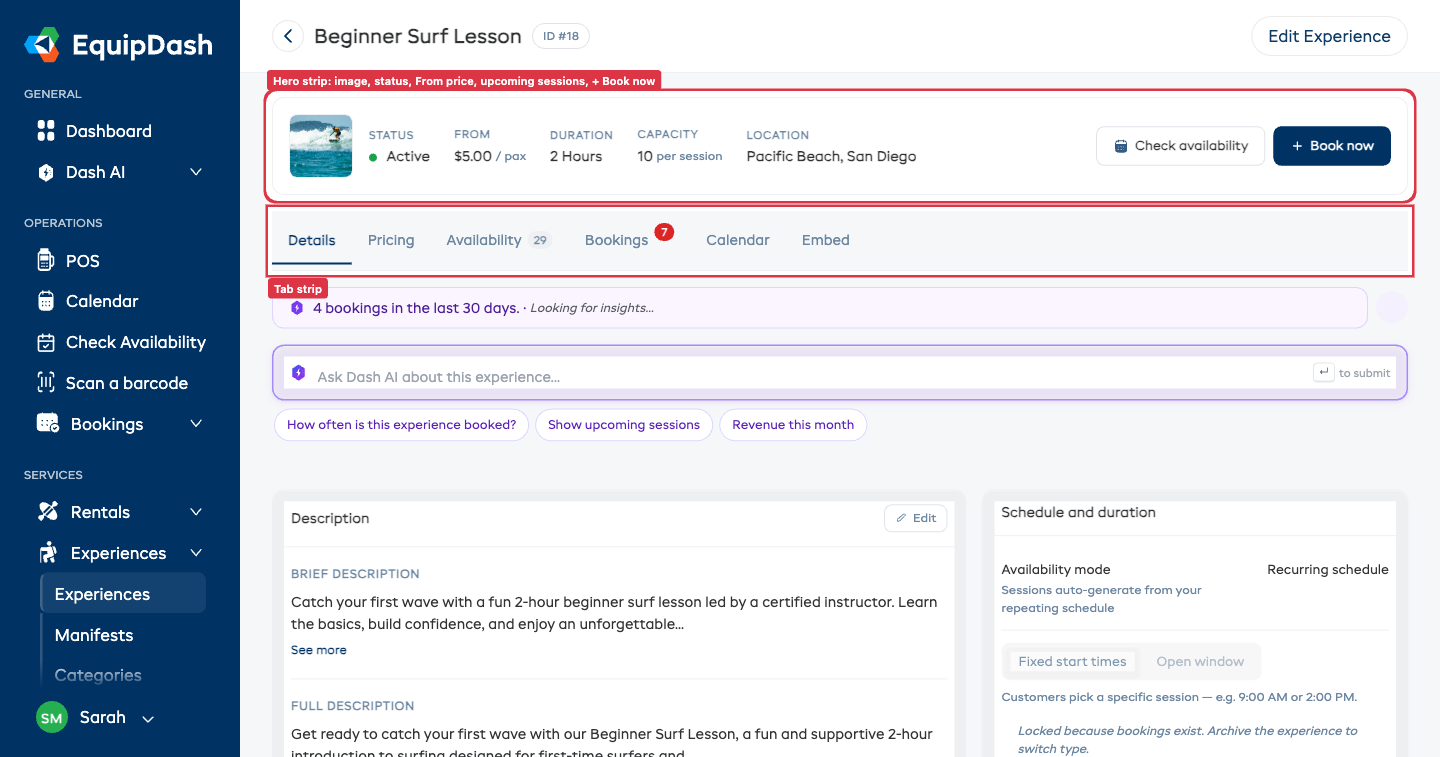
Quick Book from the hero strip
The + Book now button in the hero strip opens a Quick Book modal scoped to this experience — pick a date, a session, a customer, the number of participants of each rate type, and confirm in seconds. The full per-participant first-name/last-name and required custom fields can be captured inline. See Quick Book for the full walk-through.
Editing an Experience
There are two ways to edit an experience:
Inline on the Detail Page (recommended for one-off tweaks)
Most fields update in place — no wizard required:
- Open the experience detail page by clicking the experience name in the Experiences table.
- Click any value to edit it inline:
- Click the Brief description or Full description to open the rich-text editor under the same heading. Click Save when you're done.
- Click the duration, location, minimum booking notice, or any custom field value to edit and save.
- Click the photo area to upload a new image or remove the current one.
- Click the Pricing tab to open the side-by-side pricing editor — pick the structure on the left, set prices, and click Save Pricing. The preview on the right updates live.
- Each save shows a small green confirmation pill — no full-page reload.
From the Slide-Out Wizard (for everything in one place)
Click the Edit Experience button at the top-right of the detail page (or the Edit icon in the Experiences table) to open the full wizard with all existing details pre-filled. Useful when you want to change several things at once or walk through every field.
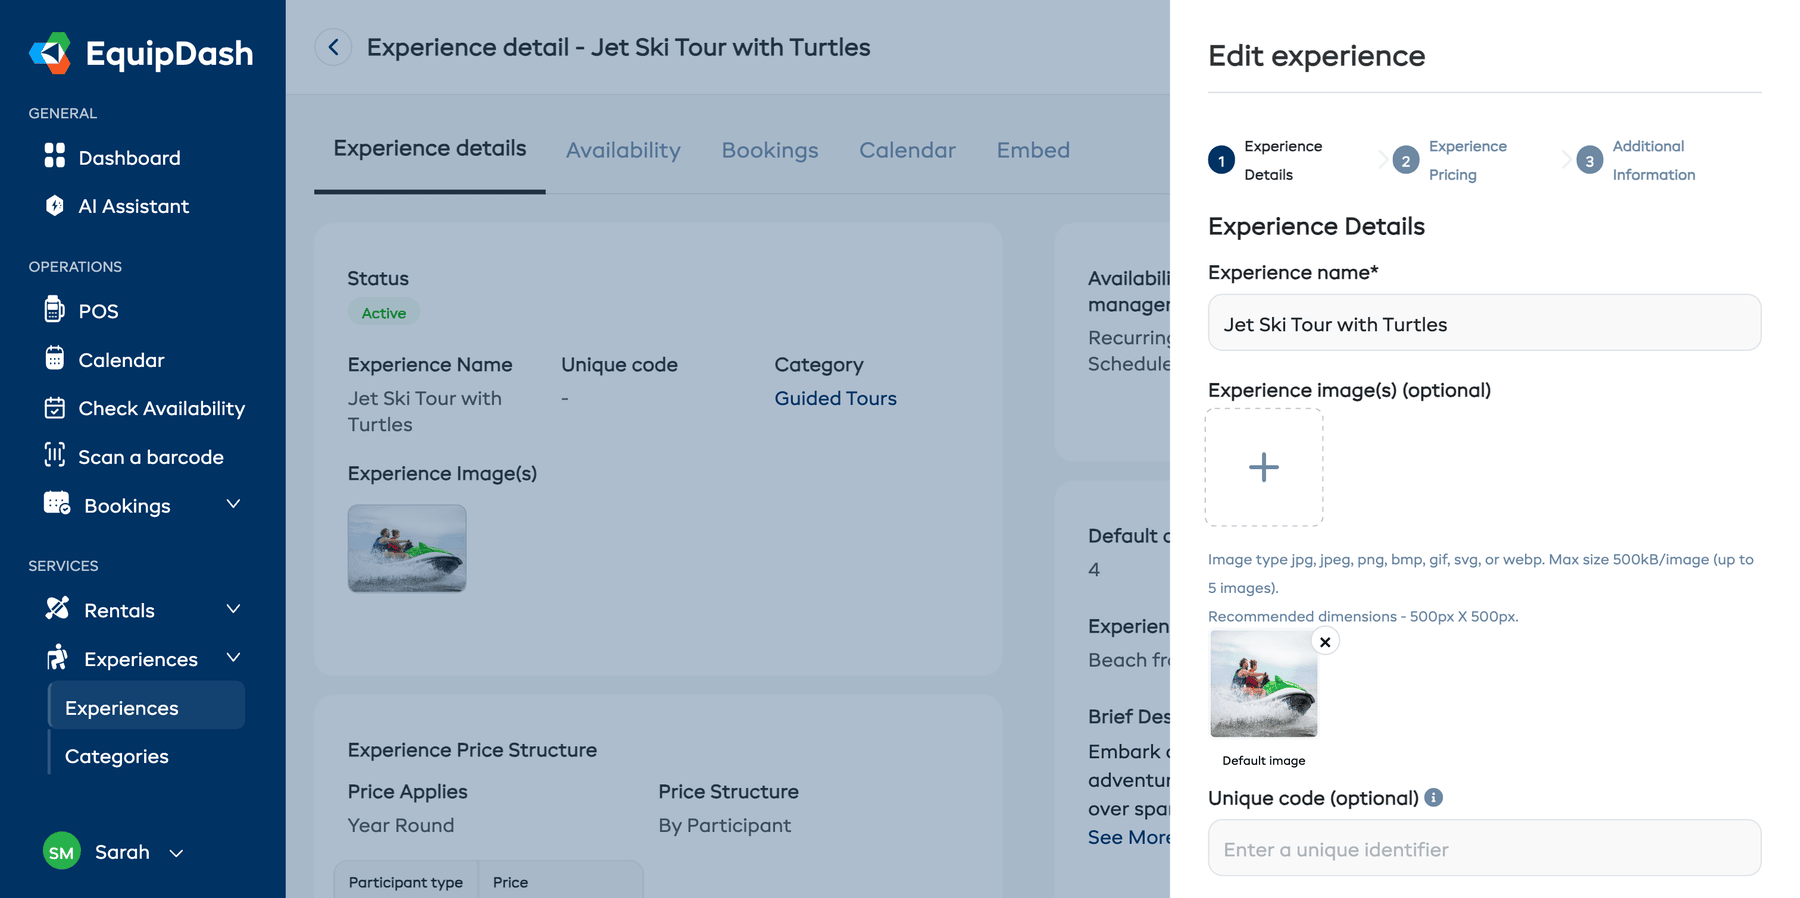
What You Can Edit
You can change any of the following at any time:
- Name, unique code, and category
- Images (add, remove, or change the default)
- Pricing structure and prices
- Brief description and full description
- Duration and location
- Minimum booking notice
- Participants required setting
- Availability management method (manual or recurring)
- Default capacity
- Custom field values
Changing the pricing structure (e.g. from per-participant to per-group) will reset your existing prices. Make sure to re-enter your pricing after switching. The Pricing tab includes a confirmation step before any prices are wiped.
Changing Experience Status
Experiences can be in one of two statuses:
- Active — The experience is live and available for booking through the widget and POS.
- Draft — The experience is hidden from customers. It will not appear in the booking widget.
To change the status:
- Open the experience detail page.
- Click the Edit Experience button in the top-right corner.
- In the wizard, you can change the status of the experience.
- Click Save to apply the change.
Alternatively, you can save an experience as a draft when first creating it by clicking Save Draft instead of Add Experience.
Embedding an Experience
You can share or embed individual experiences from the Embed tab on the experience detail page.
- Open the experience detail page by clicking the experience name in the table.
- Click the Embed tab.
- Copy the Direct Link to share a standalone page for this experience.
- Or copy one of the embed snippets — full-page iframe, modal pop-up, or floating button — to drop the booking flow into your own website.
Deleting an Experience
Deleting an experience is permanent and cannot be undone. Any future availability sessions for this experience will also be removed. Existing bookings will not be deleted, but they will no longer be linked to the experience.
- Open the experience detail page.
- Click the Delete button.
- Confirm the deletion in the modal that appears.
If you are not sure you want to delete an experience, consider setting it to Draft status instead. This hides it from customers while keeping all its data intact.