Importing Shifts from CSV Growth+This feature requires the Growth+ plan or higher
If you already plan your roster in a spreadsheet — Excel, Google Sheets, Numbers — you can upload it directly to EquipDash instead of re-typing every shift.
When to Use CSV Import
- First-time setup — you're moving from a spreadsheet-based system and want your existing shifts in EquipDash on day one.
- Long-range planning — you've drafted a quarter or season's worth of shifts in a spreadsheet and want to push them all in.
- External tools — you generate shifts from another scheduling tool and need to import them.
For week-to-week planning inside EquipDash, Copy Schedule and Schedule Templates are usually faster.
Opening the Import Panel
- Go to Staff → Schedule.
- Click the
···(more actions) icon at the right end of the toolbar. - Choose Import shifts from CSV.
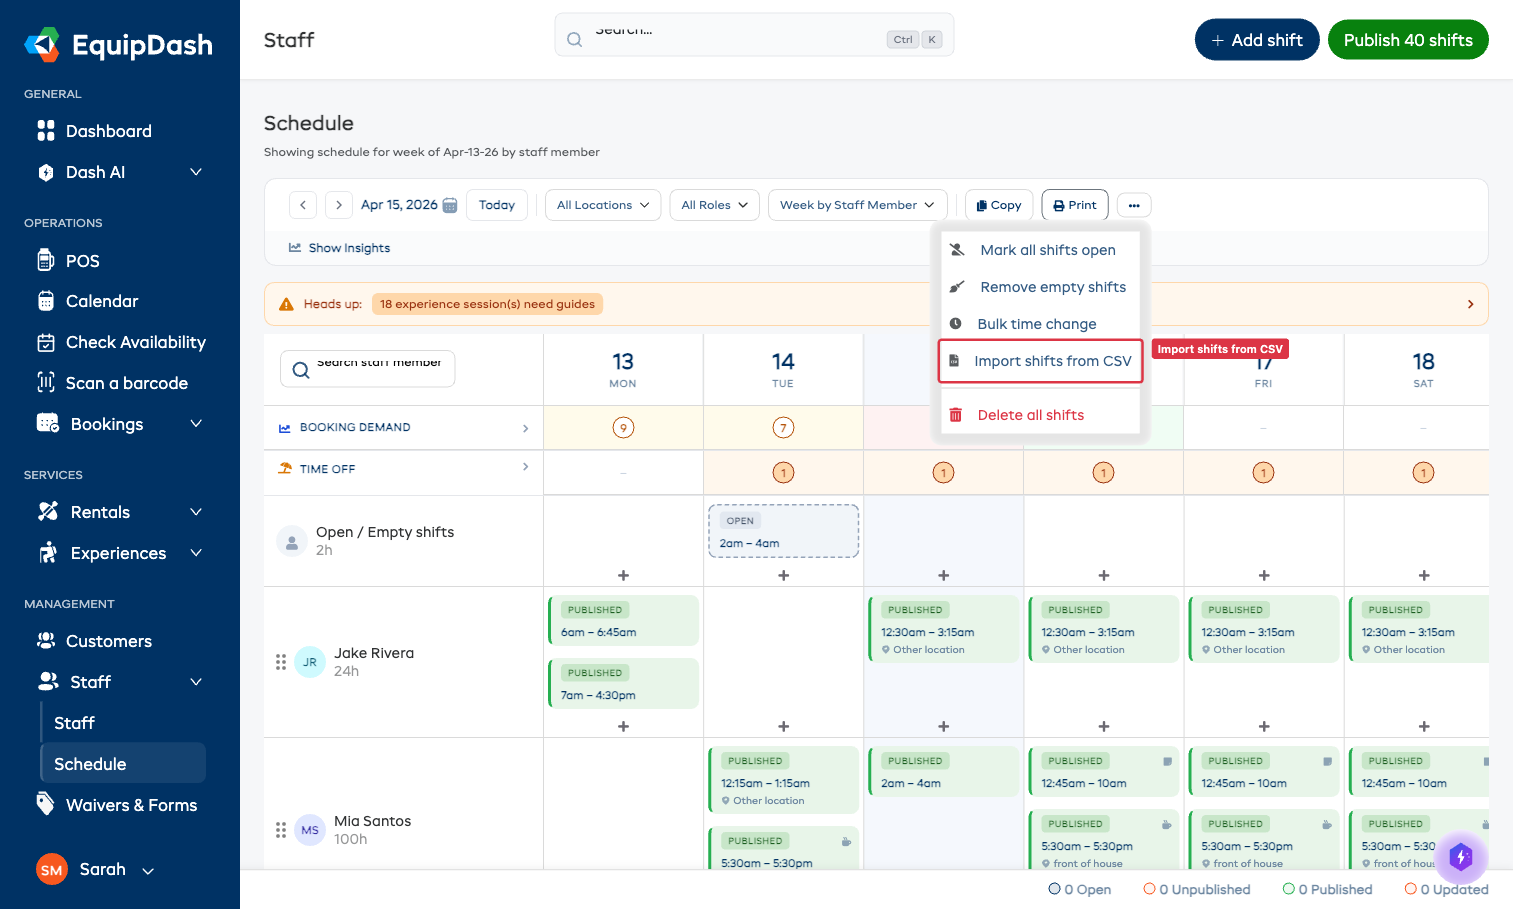
The Import Shifts panel slides open from the right.
Required CSV Columns
Your CSV file must include these columns. Column headers must match exactly (case-sensitive).
| Column | Required? | Format | Example |
|---|---|---|---|
staff_email | ✅ Yes | The email address of the staff member, exactly as it appears in EquipDash | jake@example.com |
shift_date | ✅ Yes | Date — see "Accepted date formats" below | 2026-04-13 |
start_time | ✅ Yes | 24-hour time HH:MM | 09:00 |
end_time | ✅ Yes | 24-hour time HH:MM | 17:00 |
location_name | Optional | The name of a supplier location, exactly as set up in Settings → Locations | Main Shop |
notes | Optional | Free-text notes for the shift | Bring keys |
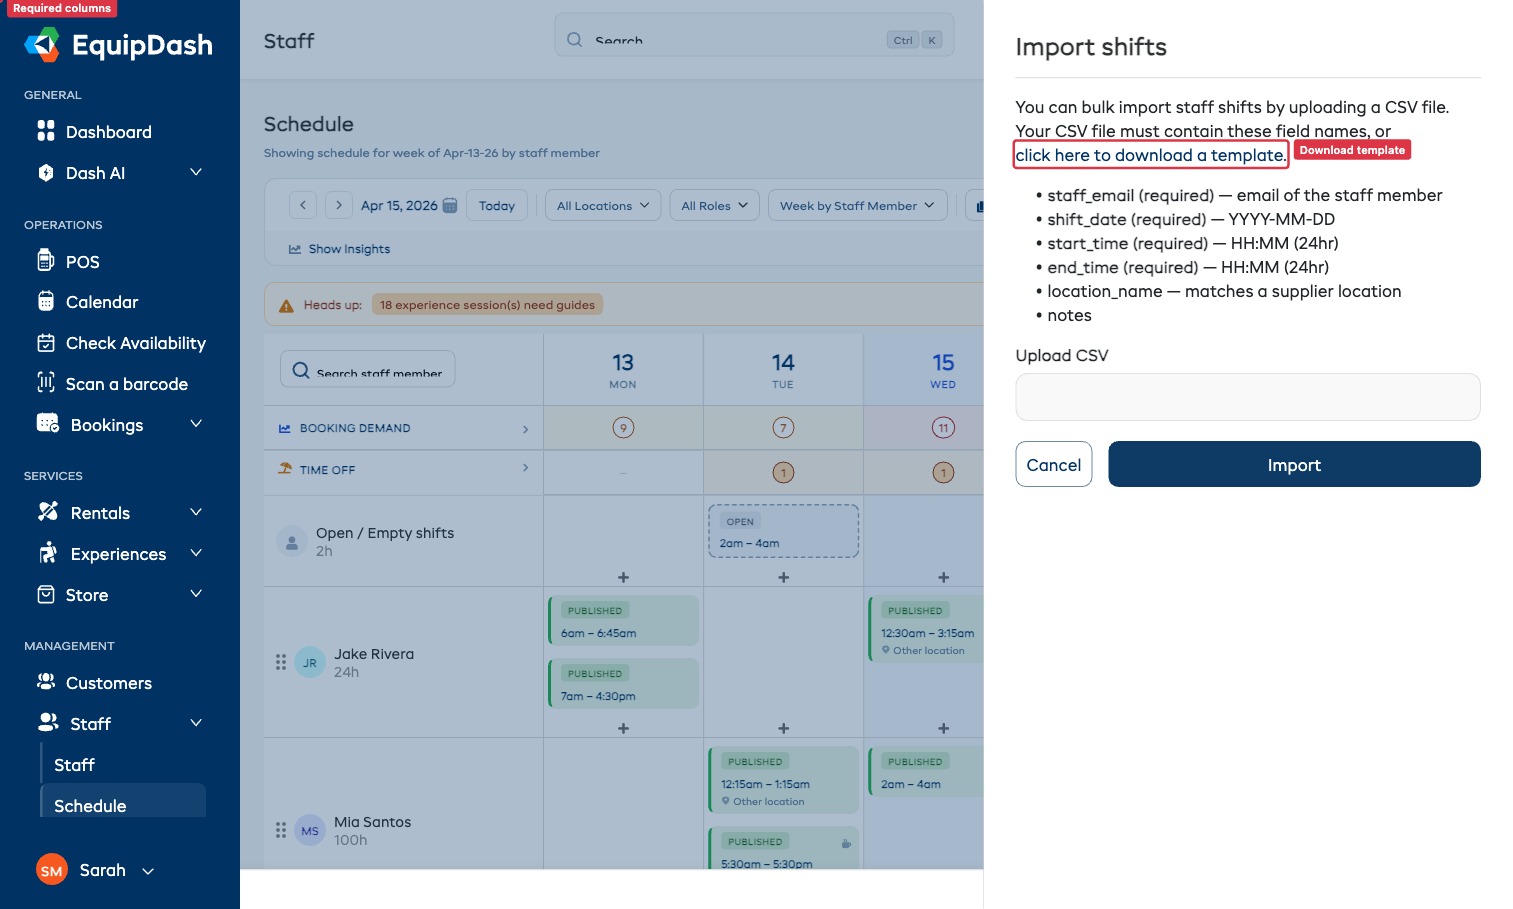
Download a Template
Click click here to download a template in the import panel to get a pre-formatted CSV with the correct column headers. Open it in your spreadsheet tool of choice, fill in the rows, and re-save as CSV.
Accepted Date Formats
Excel often rewrites 2026-04-13 into a locale-specific format. EquipDash accepts the common variants so you don't have to fight with the spreadsheet:
2026-04-13(ISO)13/04/2026or13-04-2026(DD/MM/YYYY — AU/EU)04/13/2026or04-13-2026(MM/DD/YYYY — US)13-Apr-2026(short-month variants)
If a date doesn't match any accepted format, the row is rejected with a clear error.
Uploading the CSV
- In the Import Shifts panel, click Choose file and pick your saved CSV.
- Click Import.
EquipDash processes each row in order:
- Valid rows create a new shift, assigned to the staff member matched by
staff_email. New shifts start as Unpublished — publish them once you've reviewed. - Invalid rows are skipped and reported. The summary tells you exactly which row failed and why (unknown email, invalid date, missing required field, etc.).
- The schedule grid refreshes to show the imported shifts.
Common Errors and Fixes
| Error | What it means | Fix |
|---|---|---|
| Unknown staff email | The email doesn't match any active staff member | Add the staff in Staff → Add Staff first, then re-run the import |
| Invalid date | The date doesn't match any accepted format | Check for typos; ensure leading zeros (e.g. 04 not 4) |
| Invalid time | Times must be HH:MM 24-hour | Convert 5:30 PM to 17:30 in your spreadsheet |
| Unknown location | The location_name doesn't match any supplier location | Match the spelling exactly to a location in Settings → Locations |
| End before start | A row's end_time is earlier than its start_time | Fix the times — overnight shifts need to be split into two rows |
After the Import
- Imported shifts appear as Unpublished so you can review before notifying staff.
- Use Bulk Editing if you need to tweak times or locations across the imported batch.
- Use Publish Rosters when you're ready to send notifications.