Managing Vouchers Growth+This feature requires the Growth+ plan or higher
Once vouchers are created, you can track their balances, update their details, and deactivate them when needed. This page covers everything you need to manage your vouchers day to day.
Viewing Your Vouchers
- In the left sidebar, click Promotions then Vouchers.
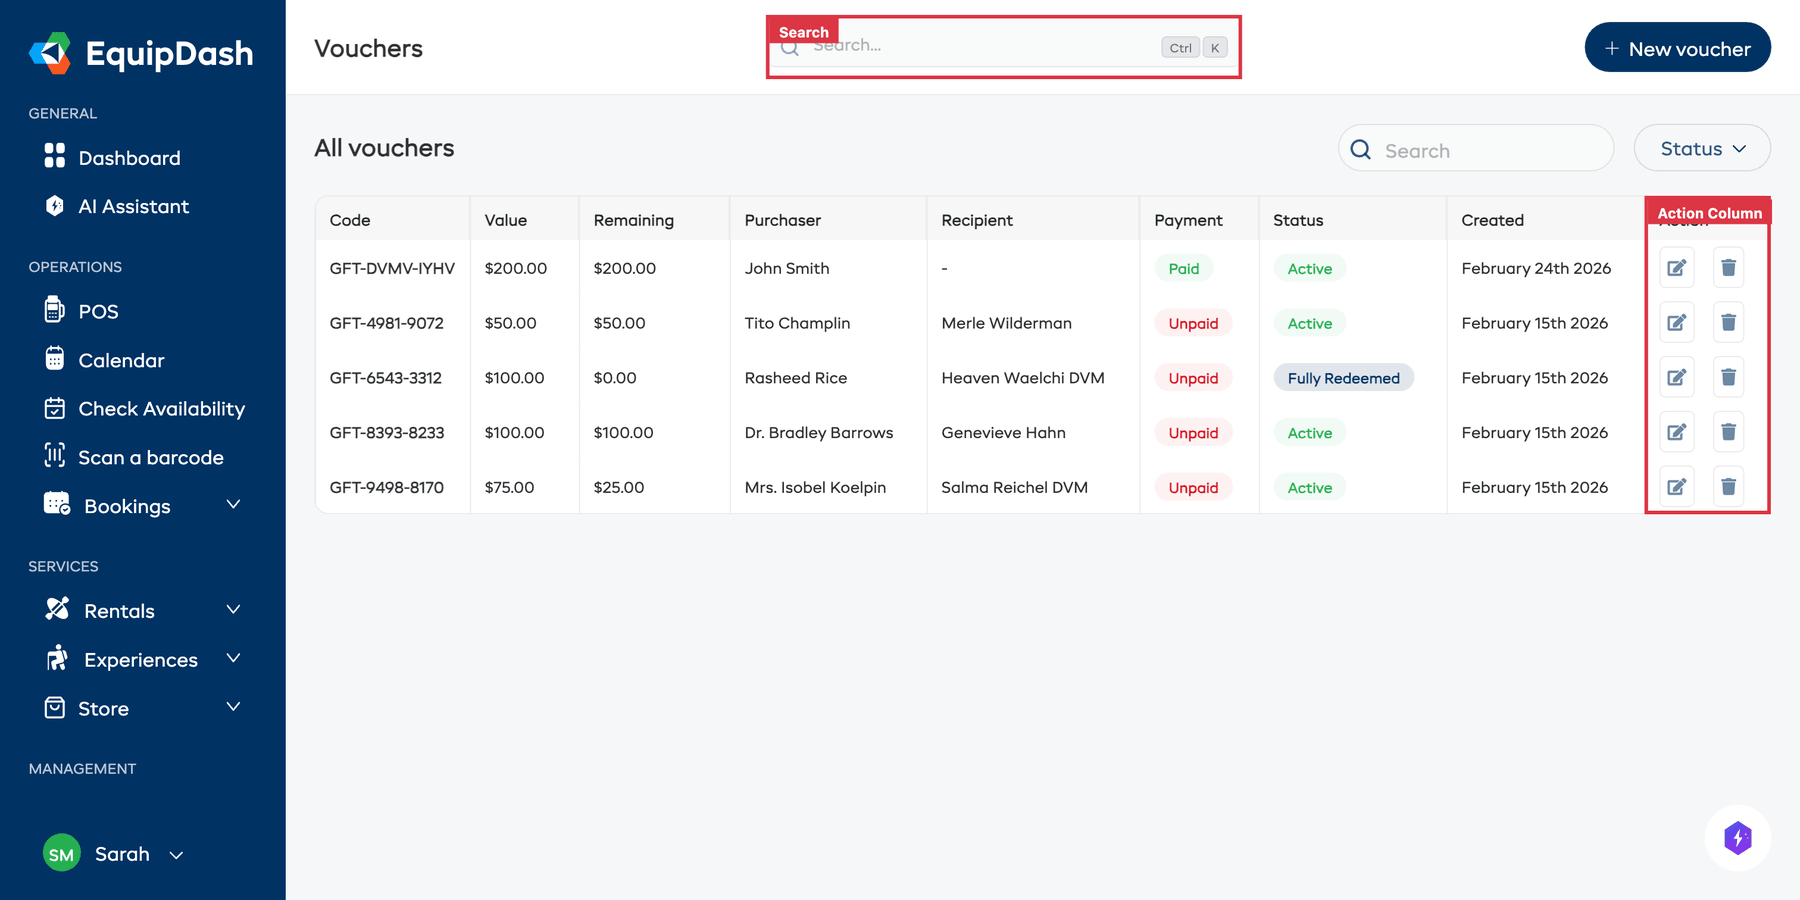
- The table lists all your vouchers with key information.
| Column | What It Shows |
|---|---|
| Code | The voucher code (e.g., "GFT-4981-9072") |
| Value | The original value the voucher was created with |
| Remaining | How much credit is left on the voucher |
| Purchaser | The person who bought the voucher |
| Recipient | The person the voucher was gifted to (or "-" if for self-use) |
| Payment | Whether the voucher purchase has been paid — Paid (green) or Unpaid (red) |
| Status | Active, Fully Redeemed, or other status |
| Created | When the voucher was created |
| Action | Edit (pencil icon) and Delete (trash icon) buttons |
Click the gear icon near the top of the table to customize your columns. Tick a column under Available columns to show it, untick one under Active columns to hide it, and drag columns into the order you prefer. Your layout is saved and shared with your whole team.
Searching and Filtering
Use the controls above the table:
- Search — Type a voucher code, purchaser name, or recipient name to find it quickly.
- Status dropdown — Filter by status (e.g., Active, Fully Redeemed).
Viewing Voucher Details
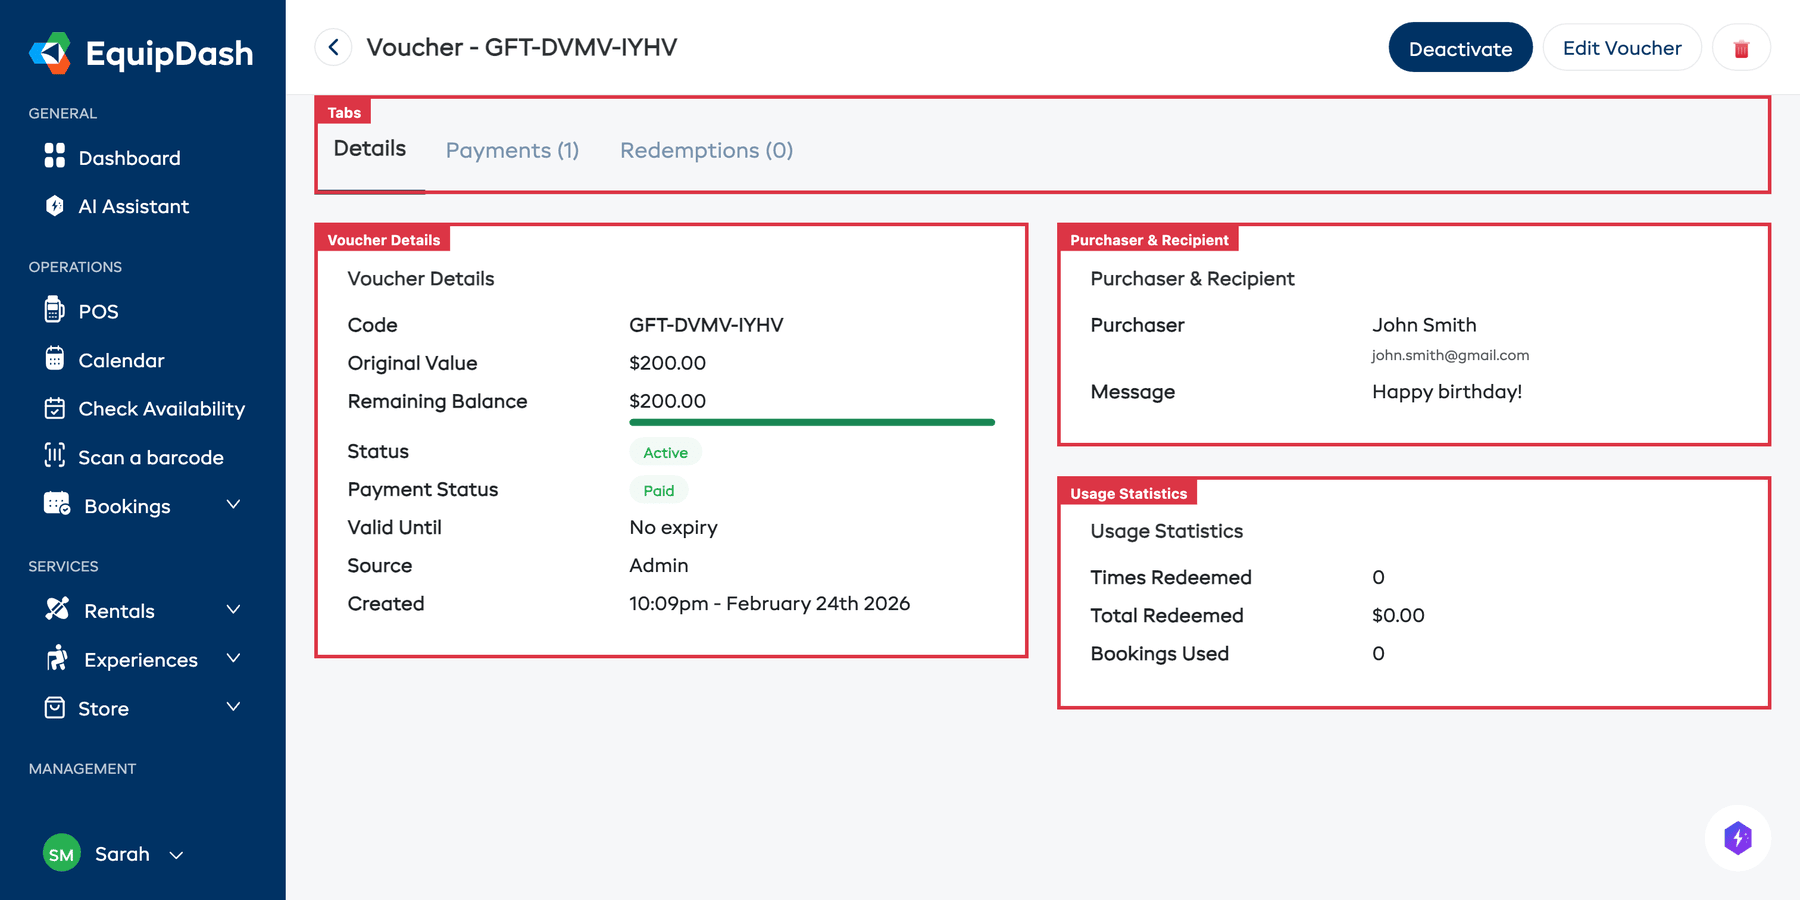
Click on any row in the table to open the voucher detail page. The detail page has three tabs:
Details Tab
Shows three cards:
Voucher Details (left):
- Code, Original Value, Remaining Balance (with a visual progress bar), Status, Payment Status, Valid Until, Source, Created
Purchaser & Recipient (top right):
- Purchaser name and email, and the personal message (if one was included)
Usage Statistics (bottom right):
- Times Redeemed, Total Redeemed, Bookings Used
Payments Tab
Shows the payment history for the voucher purchase — whether the purchaser has paid and any payment records.
Redemptions Tab
Lists every time the voucher was used at checkout, including which booking it was applied to and how much was redeemed.
Editing a Voucher
- From the voucher detail page, click the Edit Voucher button in the top-right corner.
- Update any editable fields.
- Click Save changes.
You can also click the edit icon (pencil) directly from the table's Action column.
Deactivating a Voucher
If you need to prevent a voucher from being used (for example, if it was issued in error):
- Open the voucher detail page by clicking on it in the table.
- Click the Deactivate button (red) in the top-right corner.
- The voucher's status changes to Inactive. Customers who try to use it at checkout will see a message that the voucher is no longer valid.
To reactivate, open the detail page and click Activate.
Deleting a Voucher
To permanently remove a voucher:
- Click the delete icon (trash) in the Action column of the table, or click the trash icon on the detail page.
- Confirm the deletion.
Voucher Statuses
| Status | Meaning |
|---|---|
| Active | The voucher can be used at checkout and has remaining balance |
| Fully Redeemed | The entire balance has been used up |
Tips
- Monitor outstanding balances. Vouchers with remaining balance represent a future liability. Keep an eye on your total outstanding voucher value.
- Check the Payment column. Unpaid vouchers may need follow-up with the purchaser.
- Follow up on unused vouchers. If a voucher is approaching its expiry date and has not been used, consider sending the recipient a reminder.