Quick Book in 30 Seconds
Quick Book opens a drawer from a rental product detail page or an experience detail page. Use it when a customer wants one item or session and you know the dates.
For bookings with more items, extras, discounts, payments, or waivers, use Open in POS for more options. POS keeps the selections you have already made.
When to Use Quick Book
Use Quick Book when:
- The customer already exists in your system (or you can create them with a name and email or phone in the drawer)
- They want this one product or this one experience session
- You do not need to take payment in this same step (payment can be added on the booking detail page)
Use the full POS when you need:
- Multiple products / experiences / store add-ons in one booking
- Bundles, discounts, promo codes, vouchers
- To take payment now (Stripe terminal, card, cash)
- Required waivers
Opening Quick Book
For a rental product:
- Navigate to Rentals → Products and click the product you want to book.
- Click the + Book now button in the hero strip (top-right of the page).
For an experience:
- Navigate to Experiences → Experiences and click the experience you want to book.
- Click the + Book now button in the hero strip (top-right of the page).
The drawer opens on the right side of the page.
Inside the Drawer - Rental
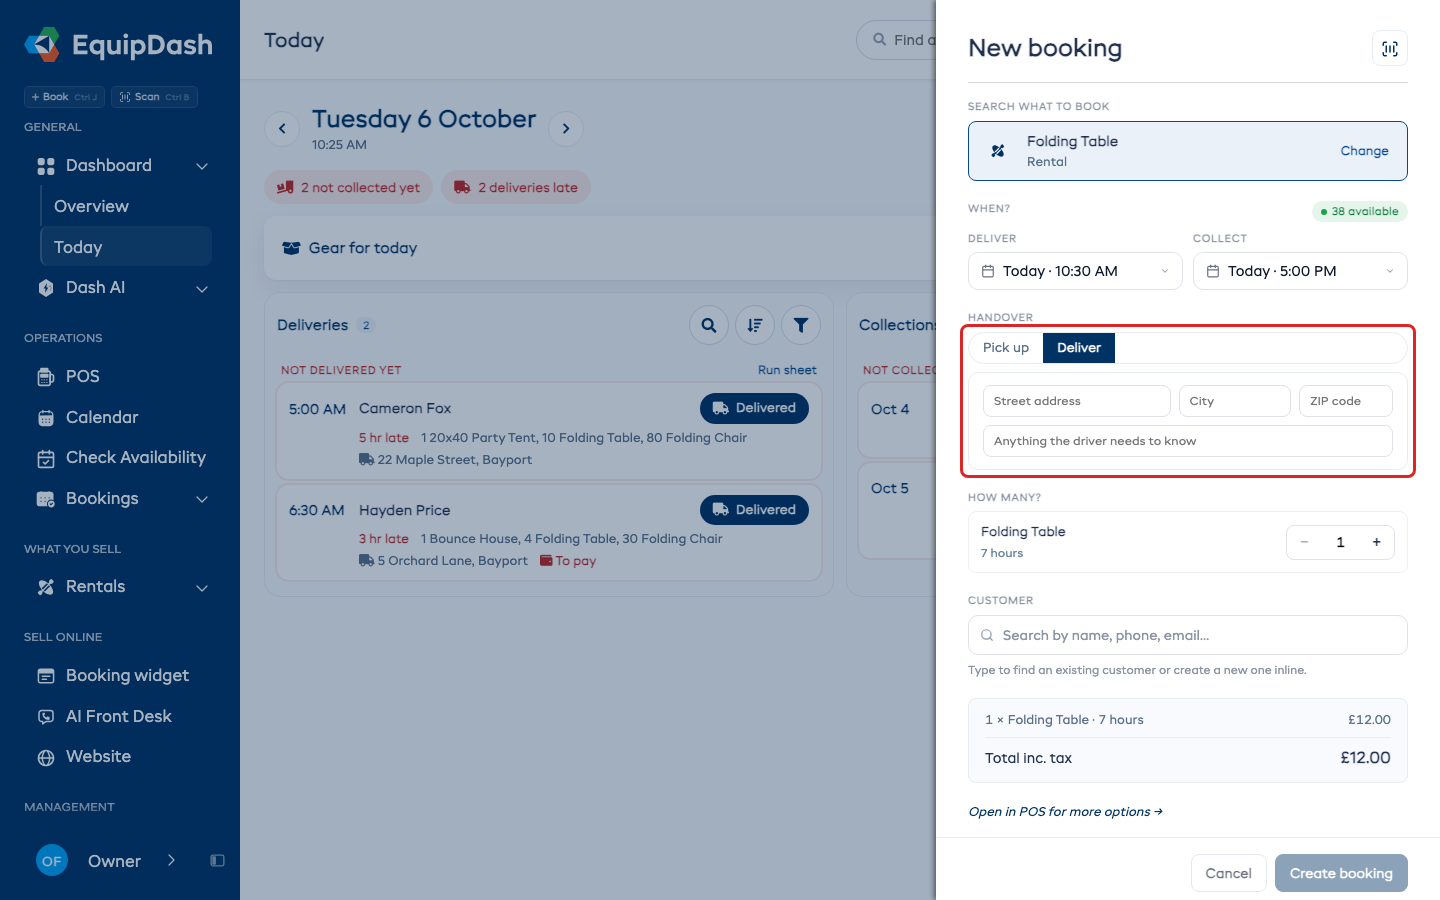
The rental Quick Book drawer shows:
- Pickup and return - click either date button to change the date or time. Same-day duration choices appear when your shop offers them.
- Availability - the status beside WHEN? reflects the selected rental window.
- Pickup location - selected automatically for one location; choose a location when your shop has several.
- Quantity controls - set a quantity for each variation under HOW MANY?. Each row shows its available stock; the controls prevent you from exceeding that count. Products without variations have one quantity control.
- Customer search - search by name, email, or phone and select a result. You can add a new customer from the search area.
- Price breakdown - review the selected items and total before creating the booking.
If your shop delivers, a HANDOVER choice of Pick up or Deliver appears. Choose Deliver to add the address and a note for the driver; the delivery charge is added to the price, and the dates read Deliver and Collect.
Inside the Drawer - Experience
The experience Quick Book drawer uses these fields:
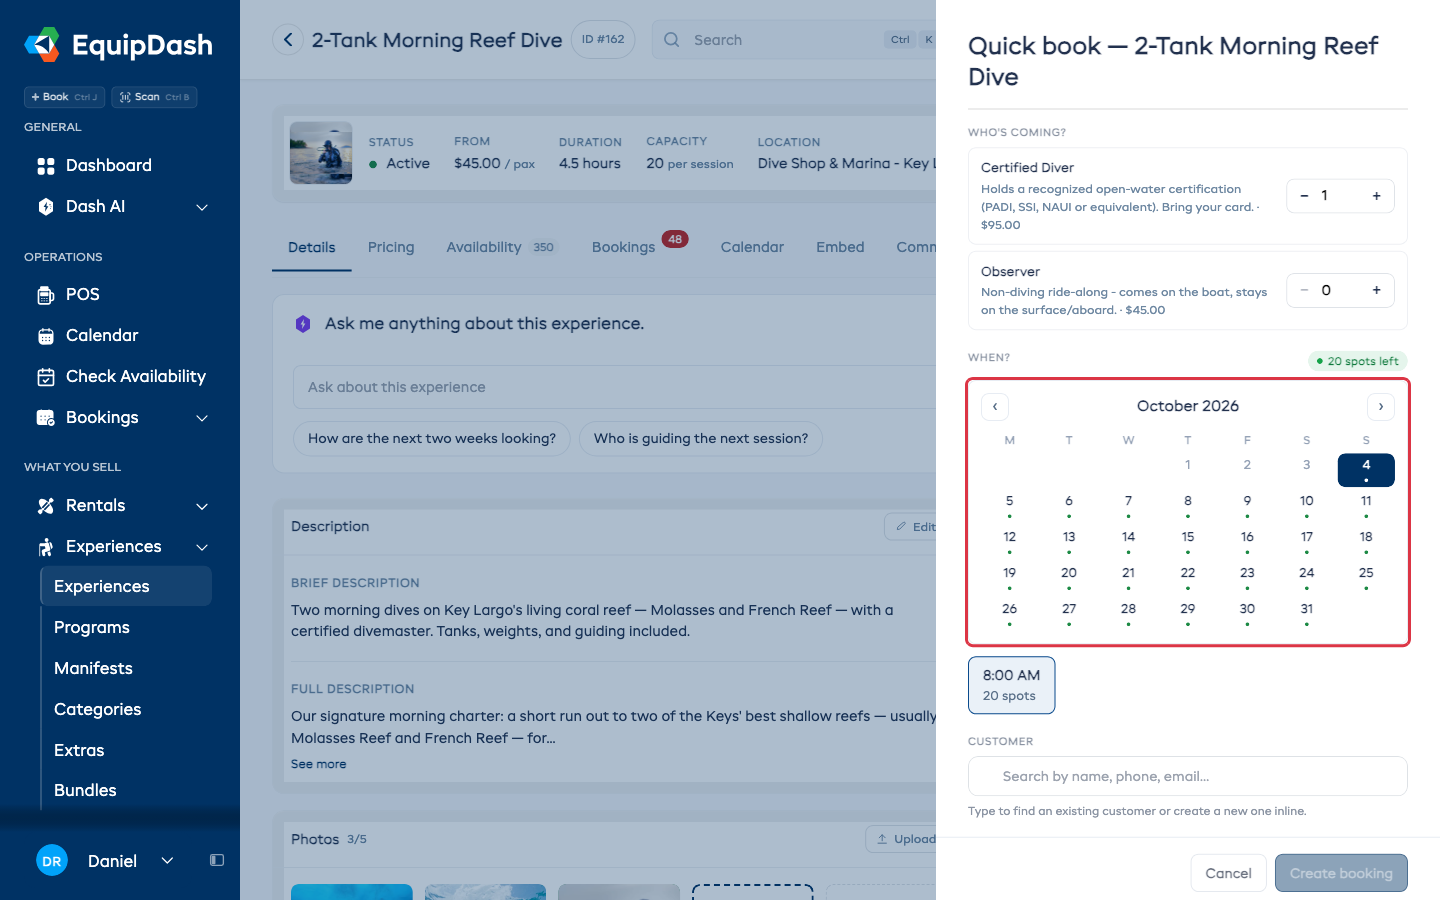
- Participant counts - set the quantity for each rate category under WHO'S COMING?. Experiences priced by group show a Group size control.
- Calendar - choose an available day under WHEN?. Use the month arrows to find another date.
- Session choices - choose a time for the selected date and check its remaining places. Sold-out sessions cannot be selected.
- Customer search - choose an existing customer or add a new one.
- Participant Details, when required - enter each participant's name and any required custom fields. The first participant can use the selected customer's name.
- Price breakdown - review the participant count and total. The availability status appears beside WHEN?.
A walk-up added to a session that is already running is checked in as soon as the booking is made, so they don't need checking in again.
Confirming the Booking
When you have:
- Picked the dates/times (rental) or a session (experience)
- Picked a variation (rental) or set the participant counts (experience)
- Picked or created a customer
- Filled in any required per-participant names and custom fields (experience, when applicable)
The Create booking button becomes available at the bottom of the drawer. Click it.
EquipDash creates the booking using the same pipeline as the full POS - the booking source is recorded as POS, inventory / session capacity is reserved, the confirmation email goes to the customer (if email notifications are on), and the page navigates straight to the booking detail so you can take payment, add notes, or hand over the gear.
If anything goes wrong (a session sold out between the page load and your click, missing required participant data, etc.) the drawer stays open and a red toast tells you exactly what to fix - your input is preserved so you can correct and try again.
Open in POS for More Options
If part-way through Quick Book you decide you actually need extras, a discount, custom fields the inline form doesn't cover, or to take payment now, click Open in POS for more options → at the bottom of the drawer. The POS opens pre-filled with:
Rental flow:
- The product (and variation, if you picked one)
- The pickup and return window
- The pickup location
- The customer
Experience flow:
- The experience and the chosen session
- The participant counts per rate category (or group size)
- The customer
So nothing you have already typed is lost.
Permission
Quick Book is available to any user with the Bookings → Create permission - the same permission that gates the full POS. If a staff member should not be able to create bookings, remove that permission and the + Book now button will hide on both the rental and experience detail pages.
What Quick Book Does Not Do
By design, Quick Book keeps things minimal. To stay fast, it skips:
- Multi-product / multi-experience bookings
- Bundles, store add-ons, custom charges
- Promo codes, vouchers, custom discounts
- Payment collection (use the booking detail page after creation)
- Notes and tags
- Completing required waivers (finish these from the booking page)
- Editing existing bookings (use Edit Booking for that)
If you need any of those, use Open in POS for more options - Quick Book will hand off your selections so far.
Related Guides
- Creating a POS Booking - the full walk-through
- POS Tips & Shortcuts
- Recording a Payment
- Editing a Booking