Connecting QuickBooks Growth+This feature requires the Growth+ plan or higher
Follow these steps to connect your QuickBooks Online account to EquipDash.
Step 1: Open the Integrations Page
- Click Settings in the sidebar.
- Select API & Integrations from the settings menu.
- Click the Integrations tab.
You will see the QuickBooks Online integration card with a Connect to QuickBooks button.
note
If the button is disabled and shows "Another accounting integration is already connected", you need to disconnect your current integration (e.g., Xero) first. Only one accounting integration can be active at a time.
Step 2: Authorise with QuickBooks
- Click Connect to QuickBooks.
- You will be redirected to Intuit's sign-in page.
- Sign in to your QuickBooks account (or create one if you do not have one yet).
- QuickBooks will ask you to choose which company to connect. Select the company you want to sync with EquipDash.
- Click Connect to authorise EquipDash.
- You will be redirected back to EquipDash.
Step 3: Confirm the Connection
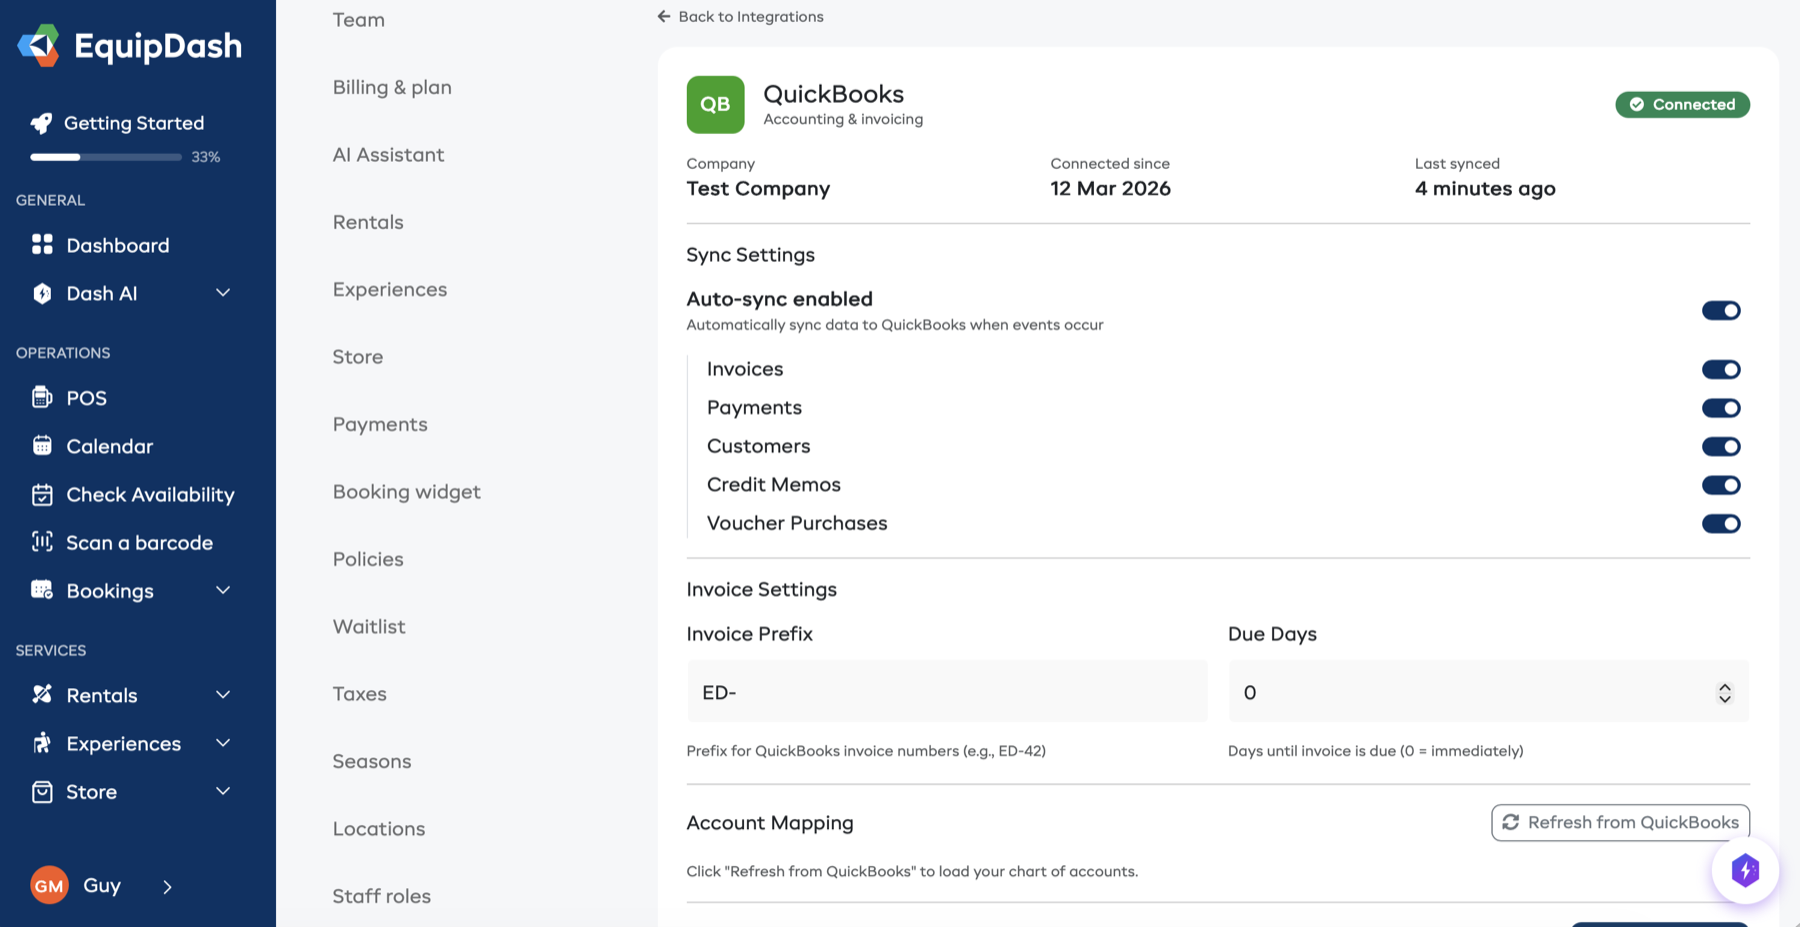
Once authorised, the QuickBooks integration card will show:
- Connected status badge (green).
- Company name -- the QuickBooks company you selected.
- Connected since -- the date you connected.
- Last synced -- when data was last sent to QuickBooks.
Click Configure to open the settings page for QuickBooks.
After Connecting
Once connected, you should:
- Configure sync settings -- choose what to sync (invoices, payments, customers, credit memos, vouchers).
- Set up account mapping -- tell EquipDash which QuickBooks accounts to use for different types of revenue.
- Map your tax codes -- link your EquipDash tax rules to the correct QuickBooks tax codes.
- Fetch QuickBooks data -- click Refresh from QuickBooks to load your accounts and tax codes into EquipDash.
See Configuring QuickBooks for detailed instructions.
Disconnecting from QuickBooks
If you need to disconnect:
- Go to the QuickBooks settings page (click Configure on the Integrations page).
- Scroll to the bottom of the settings section.
- Click Disconnect.
- Confirm the action in the pop-up.
caution
Disconnecting stops all automatic syncing. Invoices and payments already in QuickBooks are not affected, but no new data will be sent.
Troubleshooting
| Issue | Solution |
|---|---|
| "Connect to QuickBooks" button does nothing | Check that pop-ups are not blocked by your browser. |
| Redirected back but still shows "Not Connected" | The authorisation may not have completed. Try clicking Connect to QuickBooks again. |
| Connected to the wrong company | Disconnect from QuickBooks, then reconnect and choose the correct company. |
| Token expired errors in sync logs | EquipDash refreshes tokens automatically. If errors persist, disconnect and reconnect. |
| "Another accounting integration is already connected" | Disconnect your current integration (e.g., Xero) before connecting QuickBooks. |