How customers book on your site ProThis feature requires the Pro plan
Customers browse, book and pay without ever leaving your site. Your catalog pages are built from what you already sell, so there is nothing to copy across and nothing to keep in step.
The pages that come with it
- All rentals, All experiences and Store list everything you have available.
- Each item has its own page, with the dates, times and prices from your calendar.
- Cart and checkout take the payment, using the payment methods you already accept.
- Gift cards and programs get their own pages when you sell them.
Set how they look and work
Click Booking in the toolbar.
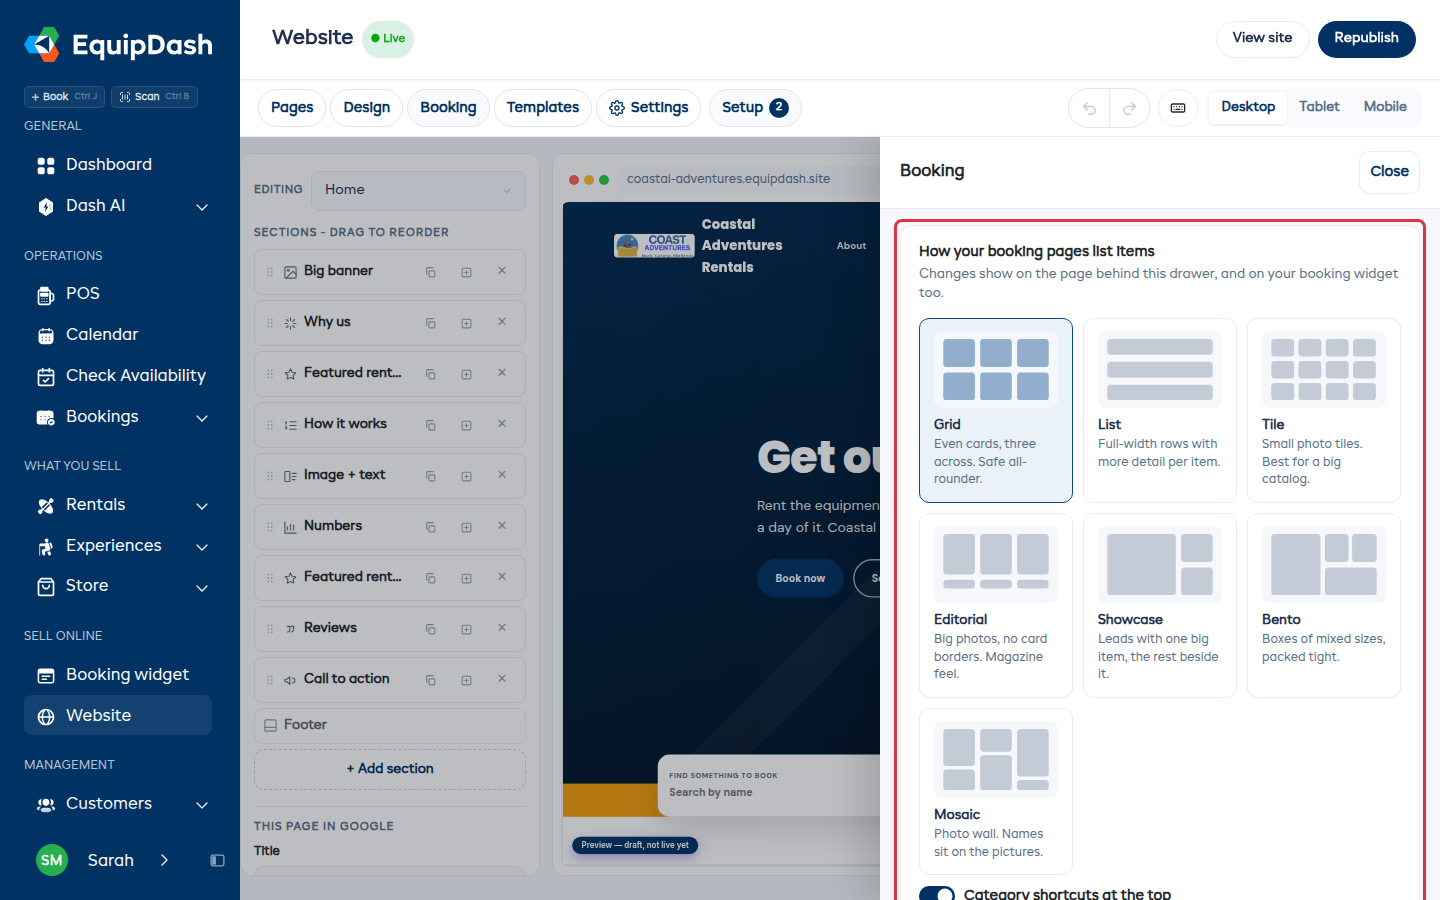
- How your booking pages list items - the layout for your catalog pages: Grid, List, Tile, Editorial, Showcase, Bento or Mosaic. Each one shows what it looks like before you pick it, and you also choose which item leads the page (the first one gets the big spot).
- Experiences page opens on - what a customer sees first on an experience.
- Prices & times - whether to show the timezone next to times.
- Checkout questions - what you ask the person booking, and what you ask for each person on the booking.
- Customers sign waivers - before payment or after.
These are the same settings your booking widget uses, so your site and your widget always ask for the same things.
Put booking on any page
Add a Booking section wherever you want it - part-way down your home page, at the bottom of an About page, on a page of its own. It's the real booking form, not a link to one.
The chat
If you have AI Front Desk, the chat button appears on your site too, so a customer can ask a question and book in the conversation. Turn it on or off for the site under Booking in the toolbar.