Change the words, photos and sections ProThis feature requires the Pro plan
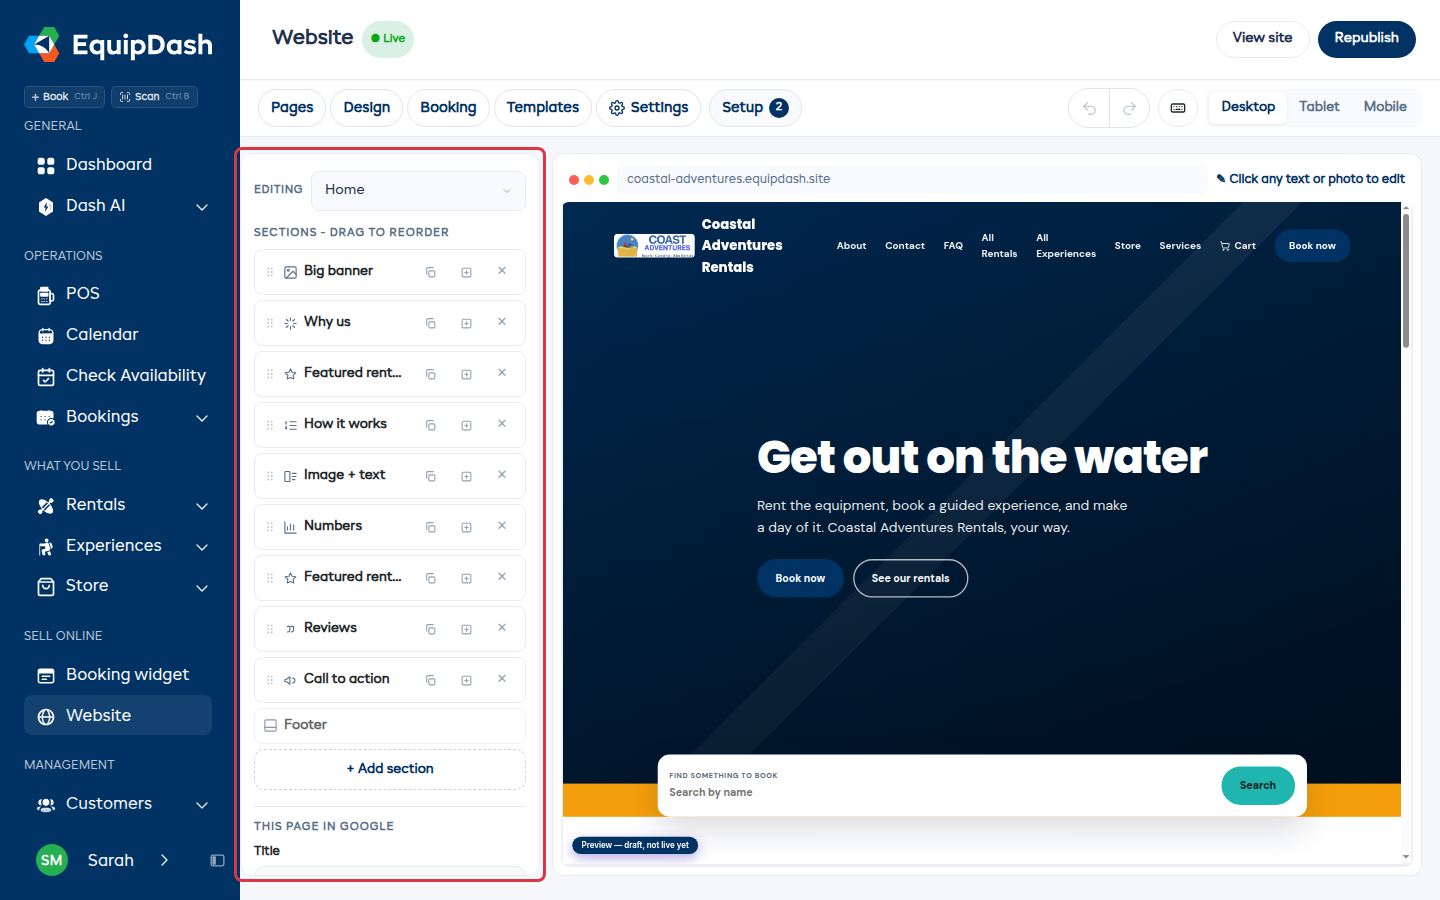
Your site sits on the right of the editor and it is the real thing, not a picture of it. Click any text and type. Click any photo to swap it. Everything saves as you go - the toolbar says Saved when it has.
Edit text and photos
- Click the text on the page and type over it.
- Click a photo, then Replace to choose another, Focal to pick the part that stays in frame when the photo is cropped, or Remove.
- Click a button to change its words, where it goes, and how it looks.
Got it wrong? Use the undo arrow in the toolbar (or Cmd + Z).
Sections
Every page is a stack of sections - a banner, a row of featured rentals, a few reasons to book with you, opening hours, an FAQ, a contact form. The list down the left is that stack, top to bottom.
- Reorder - drag a section up or down by the handle.
- Settings - click a section to open its own controls: background, alignment, spacing, width, and how tall a banner is.
- Duplicate or Remove - the icons on each row.
- Add a section - click + Add section at the bottom and pick one. Each comes with two or three ready-made looks.
The footer stays at the bottom of every page and can't be removed, but you can edit everything in it.
Pages
Click Pages in the toolbar.
- Add page creates a blank page you build up from sections.
- The switch on each row shows or hides that page in your site menu.
- Drag to reorder the menu.
- Pages marked AUTO are your catalog pages - all rentals, all experiences, your store. You can't delete them, and they fill themselves from what you sell.
- Page layouts sets how an individual rental or experience page looks. Change it once and every item page follows.
How it looks on a phone
Use Desktop, Tablet and Mobile at the right of the toolbar to see each one. Most of your customers are on a phone, so it's worth a look before you publish.