Setting Up Extras
Extras are add-ons customers can tack onto a booking — a helmet with a bike, damage insurance, a photo package on a tour. You set an extra up once, choose where it's offered, and it automatically appears everywhere that item is booked: your booking widget, the POS, and bookings created by Dash AI or the API.
Creating an extra
-
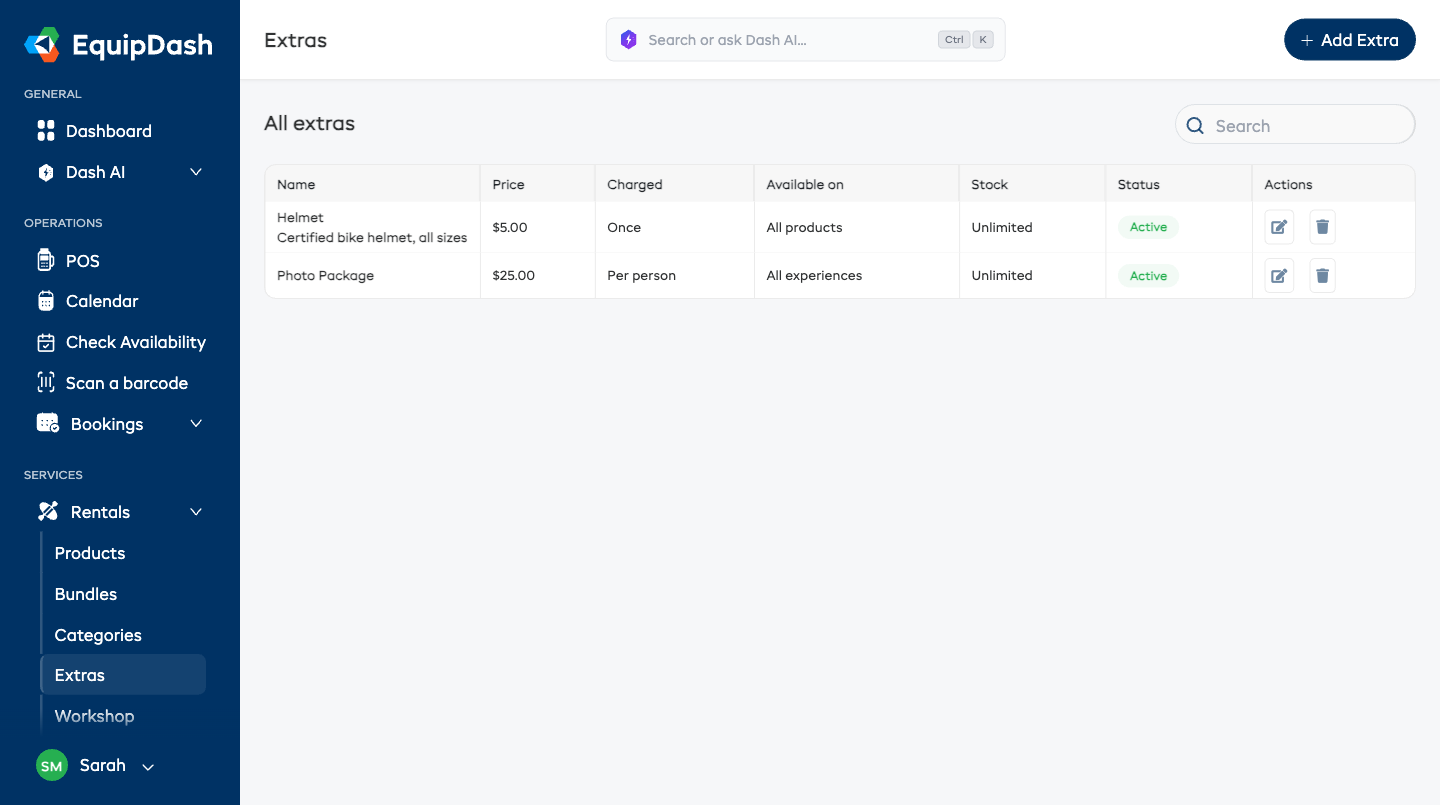
Go to Rentals → Extras (the same page is also under Experiences → Extras).
-
Click Add Extra.
-
Leave Status set to Active (the default). Switch it to Disabled any time you want to hide the extra without deleting it.
-
Enter a Name customers will recognize — "Helmet", "Bike Insurance", "Photo Package".
-
Optionally add a short Description — it shows under the name wherever the extra is offered.
-
Enter the Price.
-
Choose how it's Charged:
- Once — one charge each time it's added (a helmet, a set of pedals).
- Per person — multiplied by the number of participants on experience bookings (a photo package for the whole group).
- Per time period — multiplied by the rental length. Pick the unit (day, hour, or week), e.g. a bike light at $2 / day. A 3-day rental charges $6; a few-hours rental rounds up to one period (minimum 1). On experiences it bills as a single charge.
-
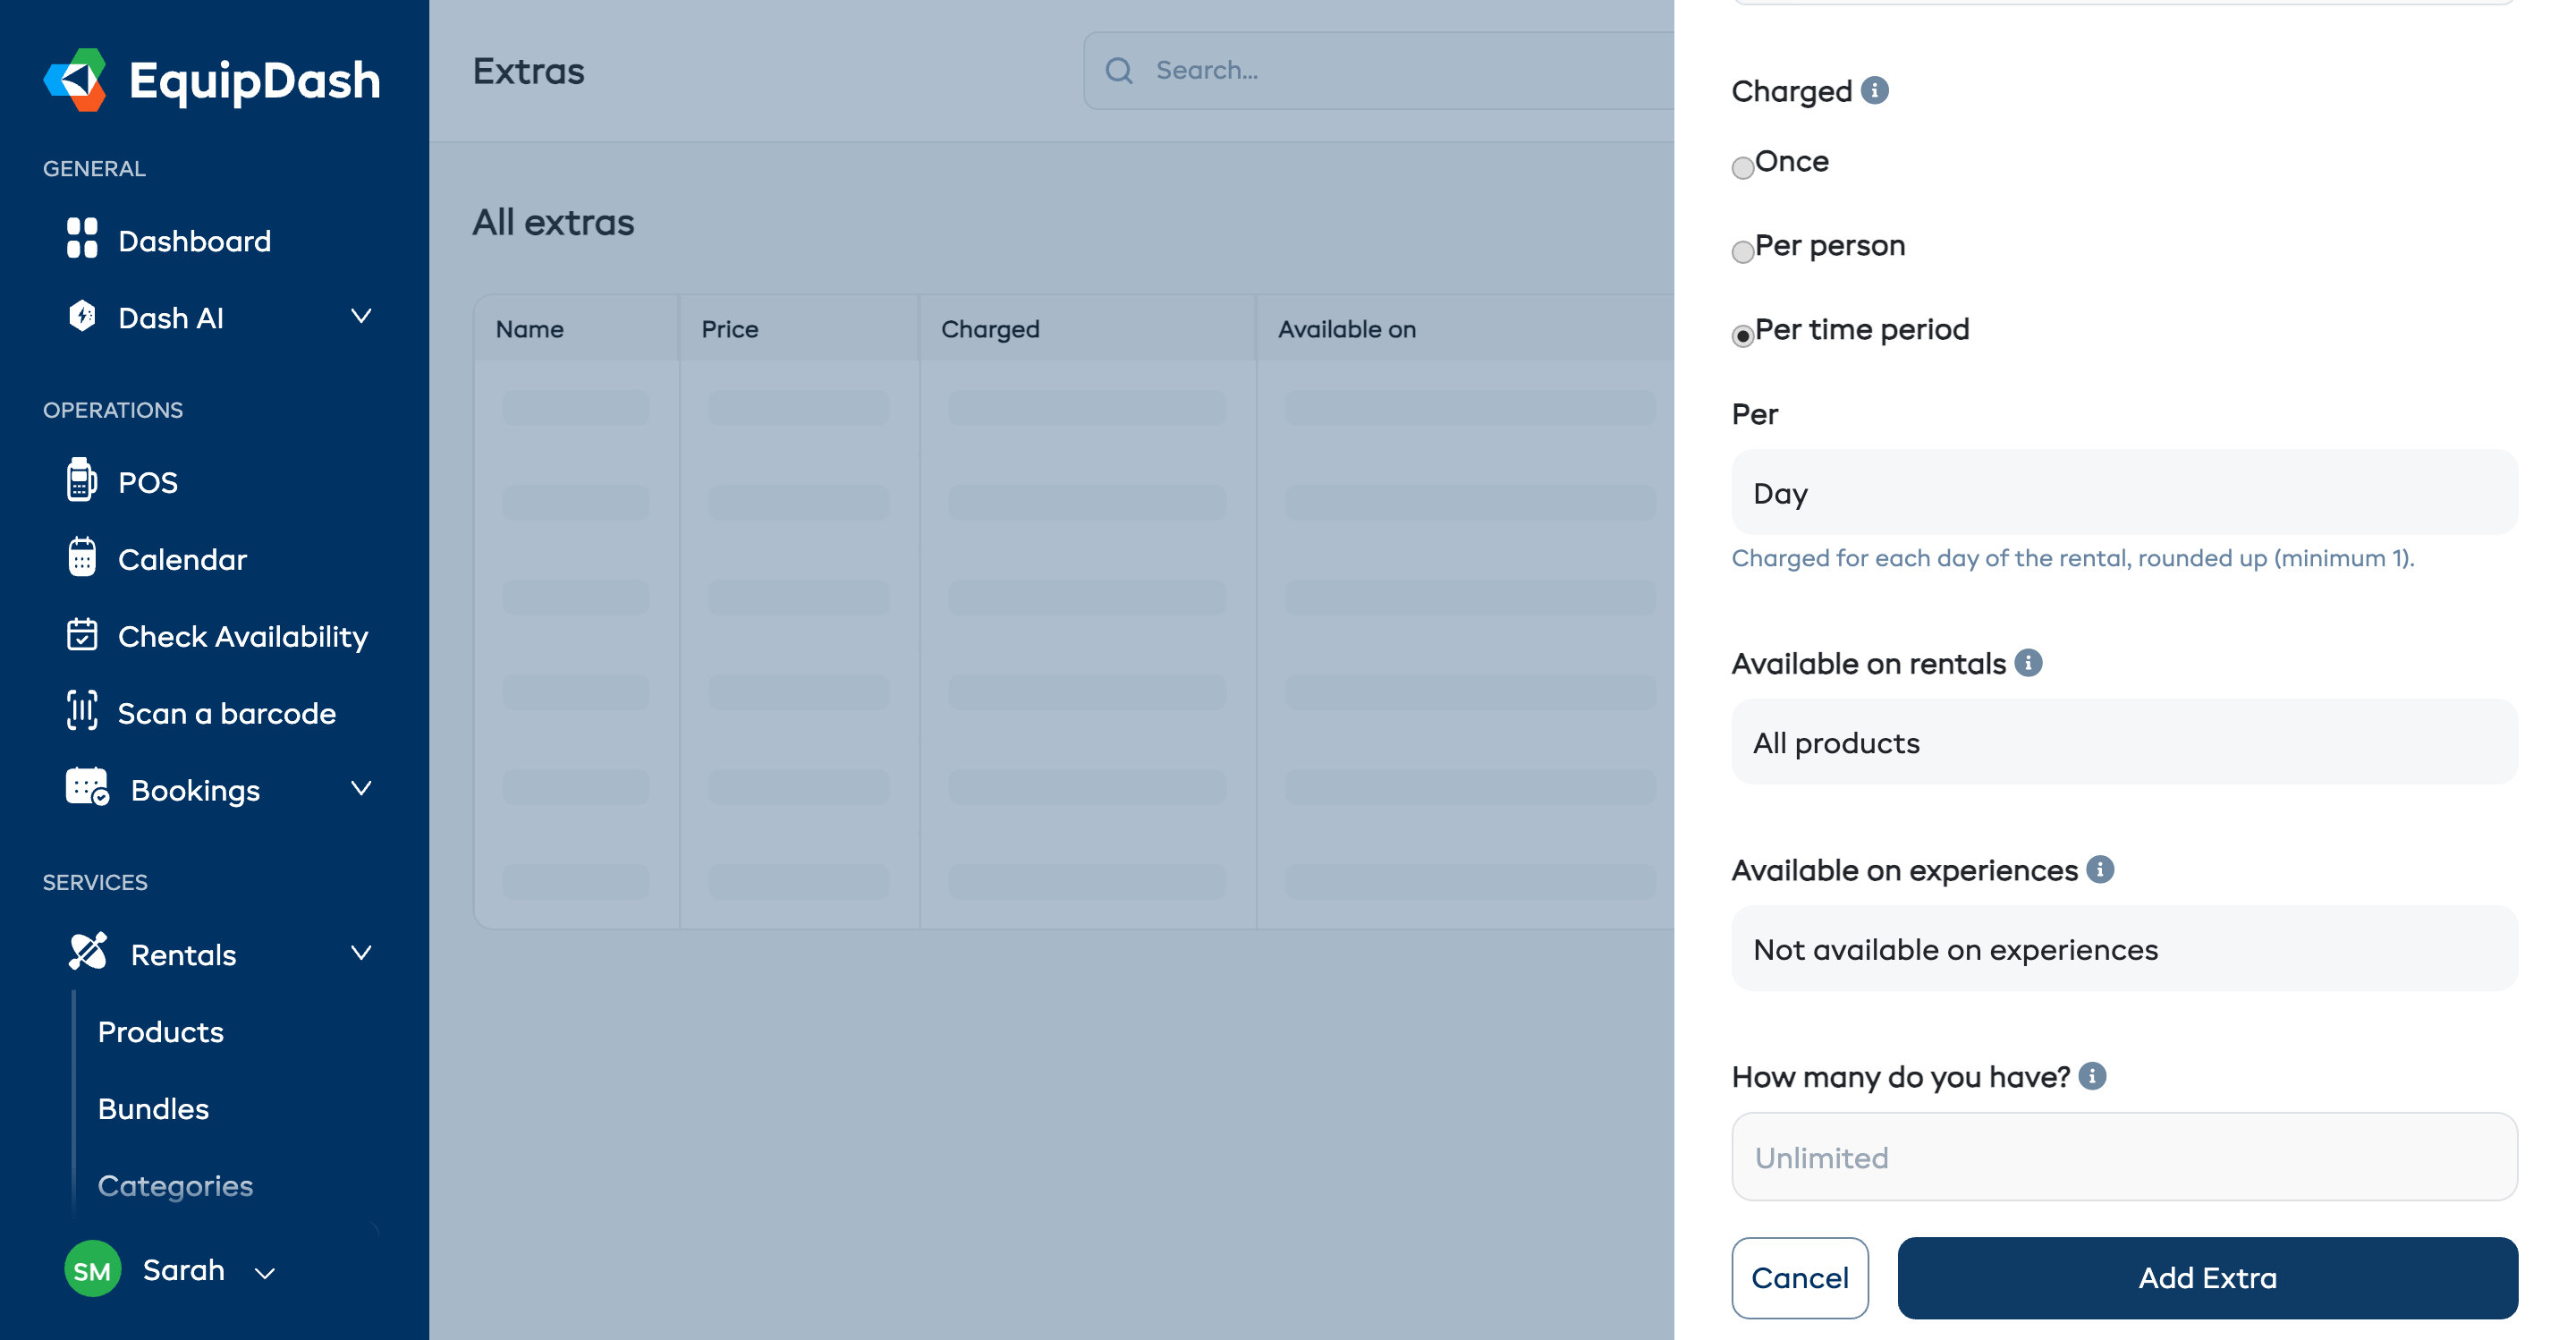
Choose where it's available — each is a simple dropdown with the same choices:
- Available on rentals — All products, Specific categories, Specific products, or Not available on rentals.
- Available on experiences — All experiences, Specific categories, Specific experiences, or Not available on experiences.
Picking a "Specific…" option reveals a picker below to choose the exact categories, products, or experiences.
-
If you only have a limited number (helmets, child seats), enter How many do you have? — customers can't book more than you have for the same dates. Leave it blank for unlimited (insurance, photo packages).
-
Click Add Extra.
A single extra can be offered on rentals and experiences at the same time — a helmet can appear on your bike rentals and your guided bike tours. Set both "Available on" sections and you're done.
Where customers see extras
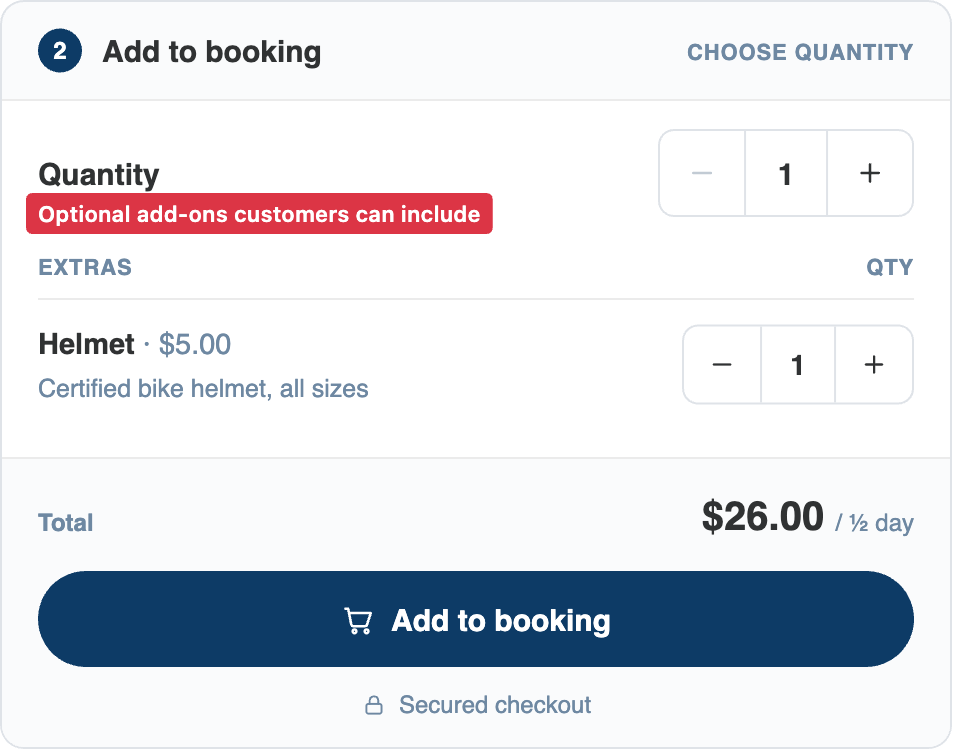
- Booking widget — when a customer adds a product to their booking, the available extras appear right under the quantity selector with their prices (per-day extras show "$2 / day"). As they add an extra, the running total updates instantly — a per-day extra multiplies by the rental length. On experiences, extras appear on the booking step after the customer picks a time and participants; per-person extras start at the participant count with one tap.
- POS — when staff expand a product or experience card, the extras appear with the same one-tap steppers.
- Cart and checkout — each added extra is listed under its item with its price, and the line total includes it.
- Booking details — every sold extra shows as its own line under the item it belongs to, with quantity and price.
Editing and deleting
- Edit an extra (pencil icon) to change its price, name, or availability. Changes apply to new bookings only — existing bookings keep the price the customer was charged.
- Toggle Active off to hide an extra everywhere without deleting it — useful for seasonal extras.
- Delete an extra (trash icon) to remove it from the catalog. Bookings that already include it keep their charges.