Setting Up Barcodes Growth+This feature requires the Growth+ plan or higher
Barcodes let you quickly identify products and inventory items by scanning them with a barcode reader or manually entering a barcode value. This speeds up workflows like checking in returns, sending items to the workshop, and filtering the calendar.
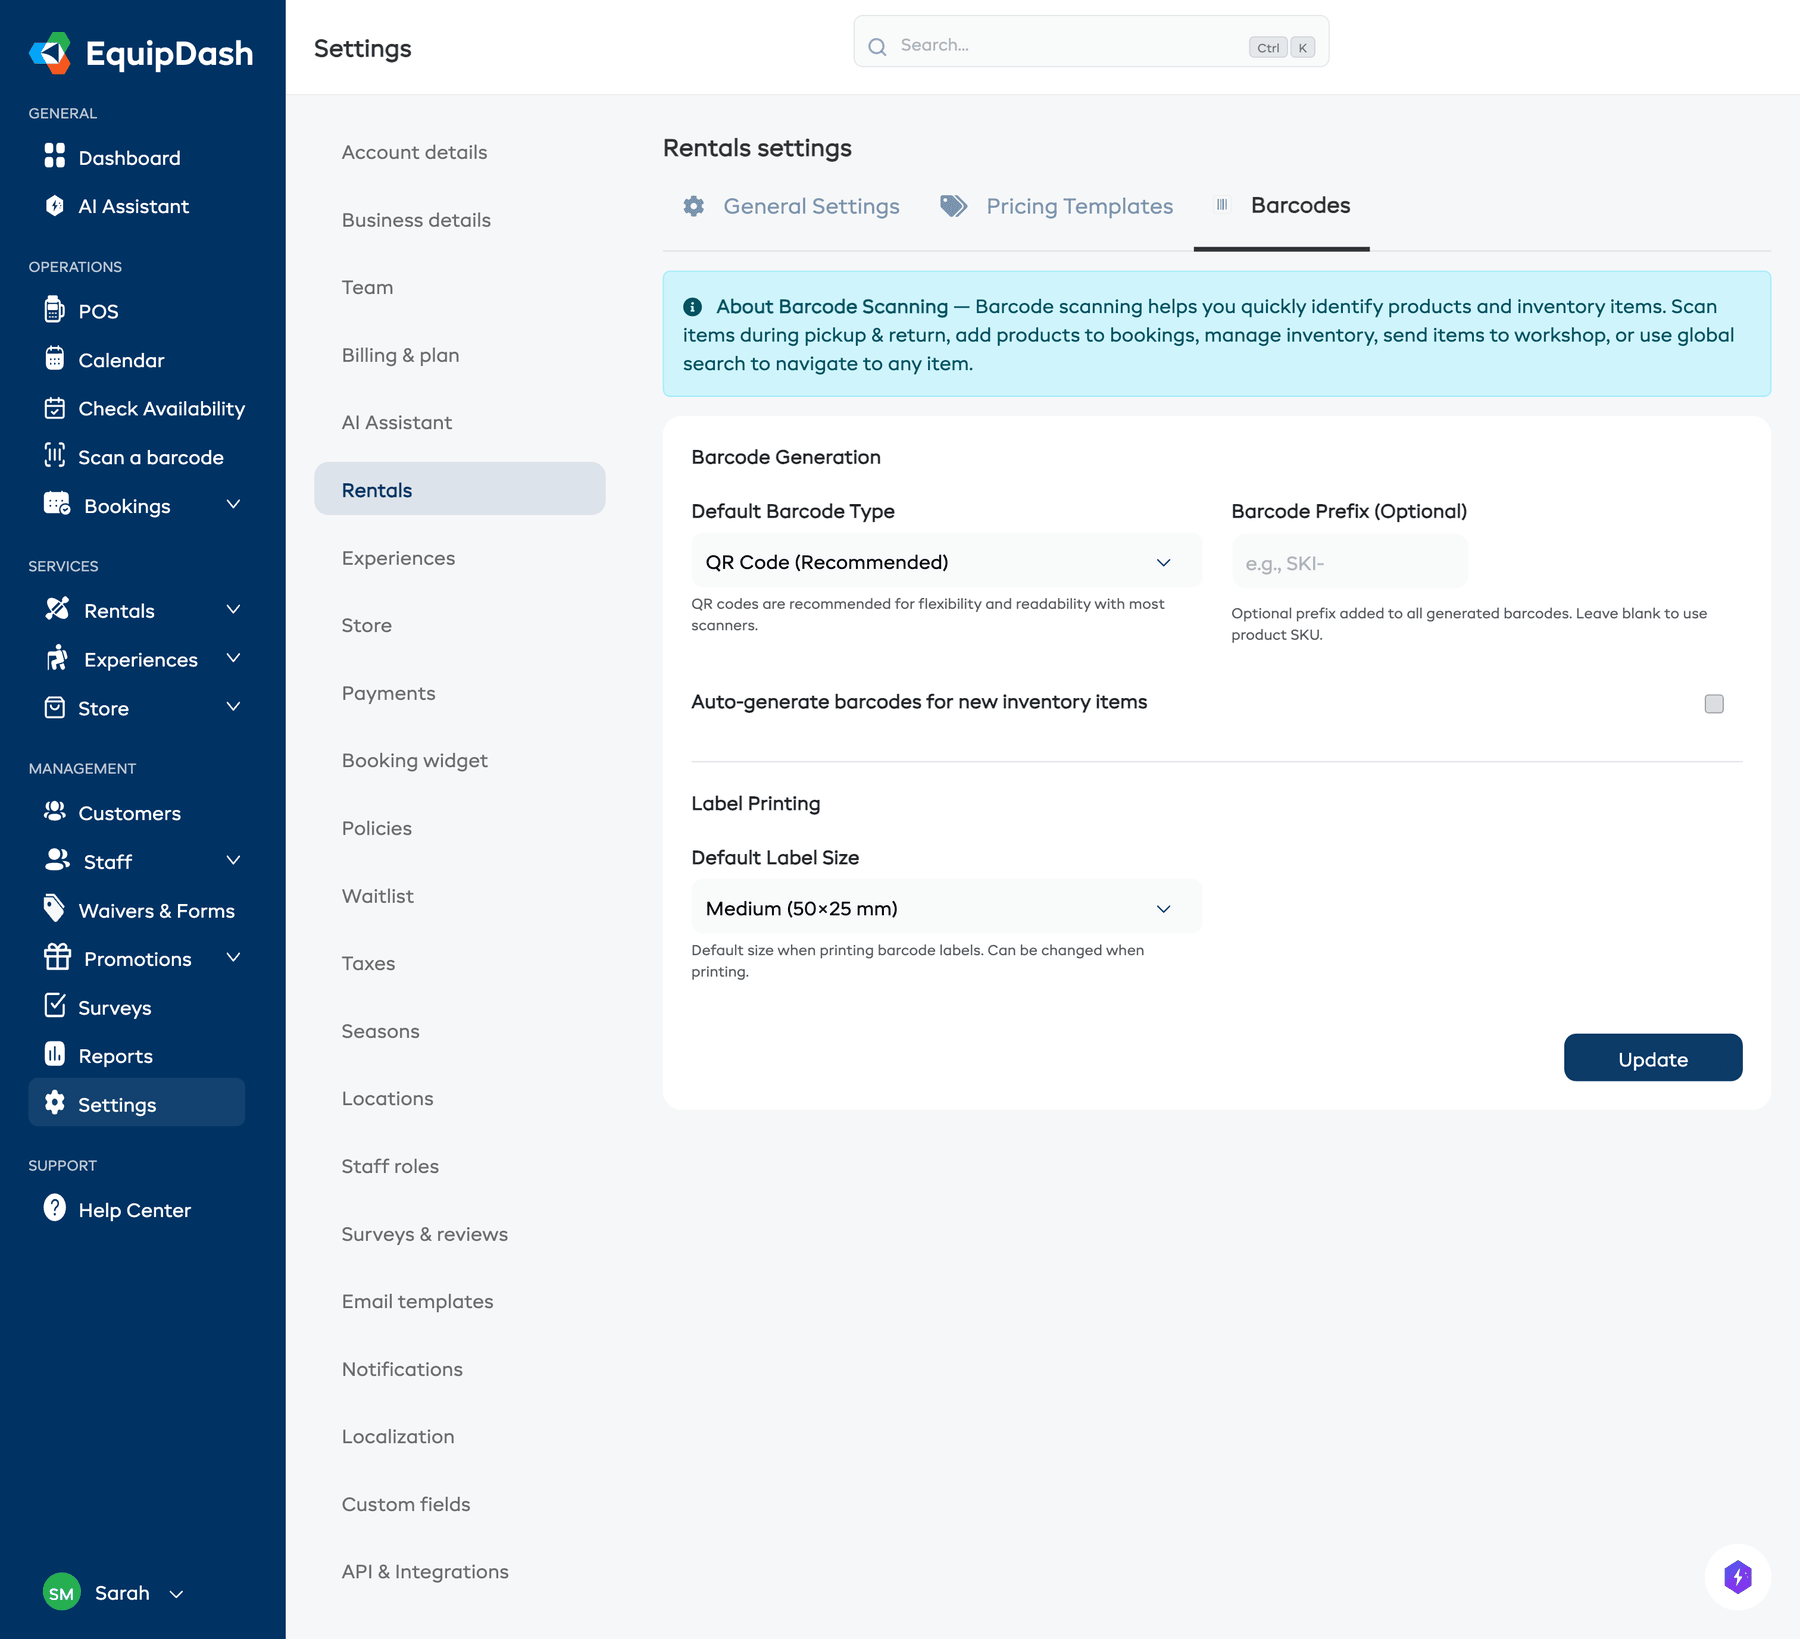
Barcode Settings
Configure your default barcode settings before generating barcodes:
- Go to Settings > Rentals in the left sidebar.
- Click the Barcodes tab.
- Under Barcode Generation, configure the following:
- Default Barcode Type -- Choose between QR Code (recommended) or standard barcode formats. QR codes are recommended for flexibility and readability with most scanners.
- Barcode Prefix (Optional) -- An optional prefix added to all generated barcodes. Leave blank to use the product SKU.
- Auto-generate barcodes for new inventory items -- Toggle this on to automatically create a barcode whenever new inventory is added.
- Under Label Printing, set the Default Label Size (e.g., Medium 50×25 mm). This can be changed when printing.
- Click Update to save your settings.
Understanding Barcode Types
EquipDash supports three types of barcodes, each serving a different purpose:
1. Product-Level Barcodes
A product-level barcode identifies the product itself, not a specific inventory unit. When scanned, it refers to the product as a whole. This is useful for quickly looking up a product, filtering the calendar, or adding a product to a booking.
- Set on the Product Detail page in the Barcodes section.
- One barcode per product (you can add multiple if needed).
- Works for both group-tracked and item-tracked products.
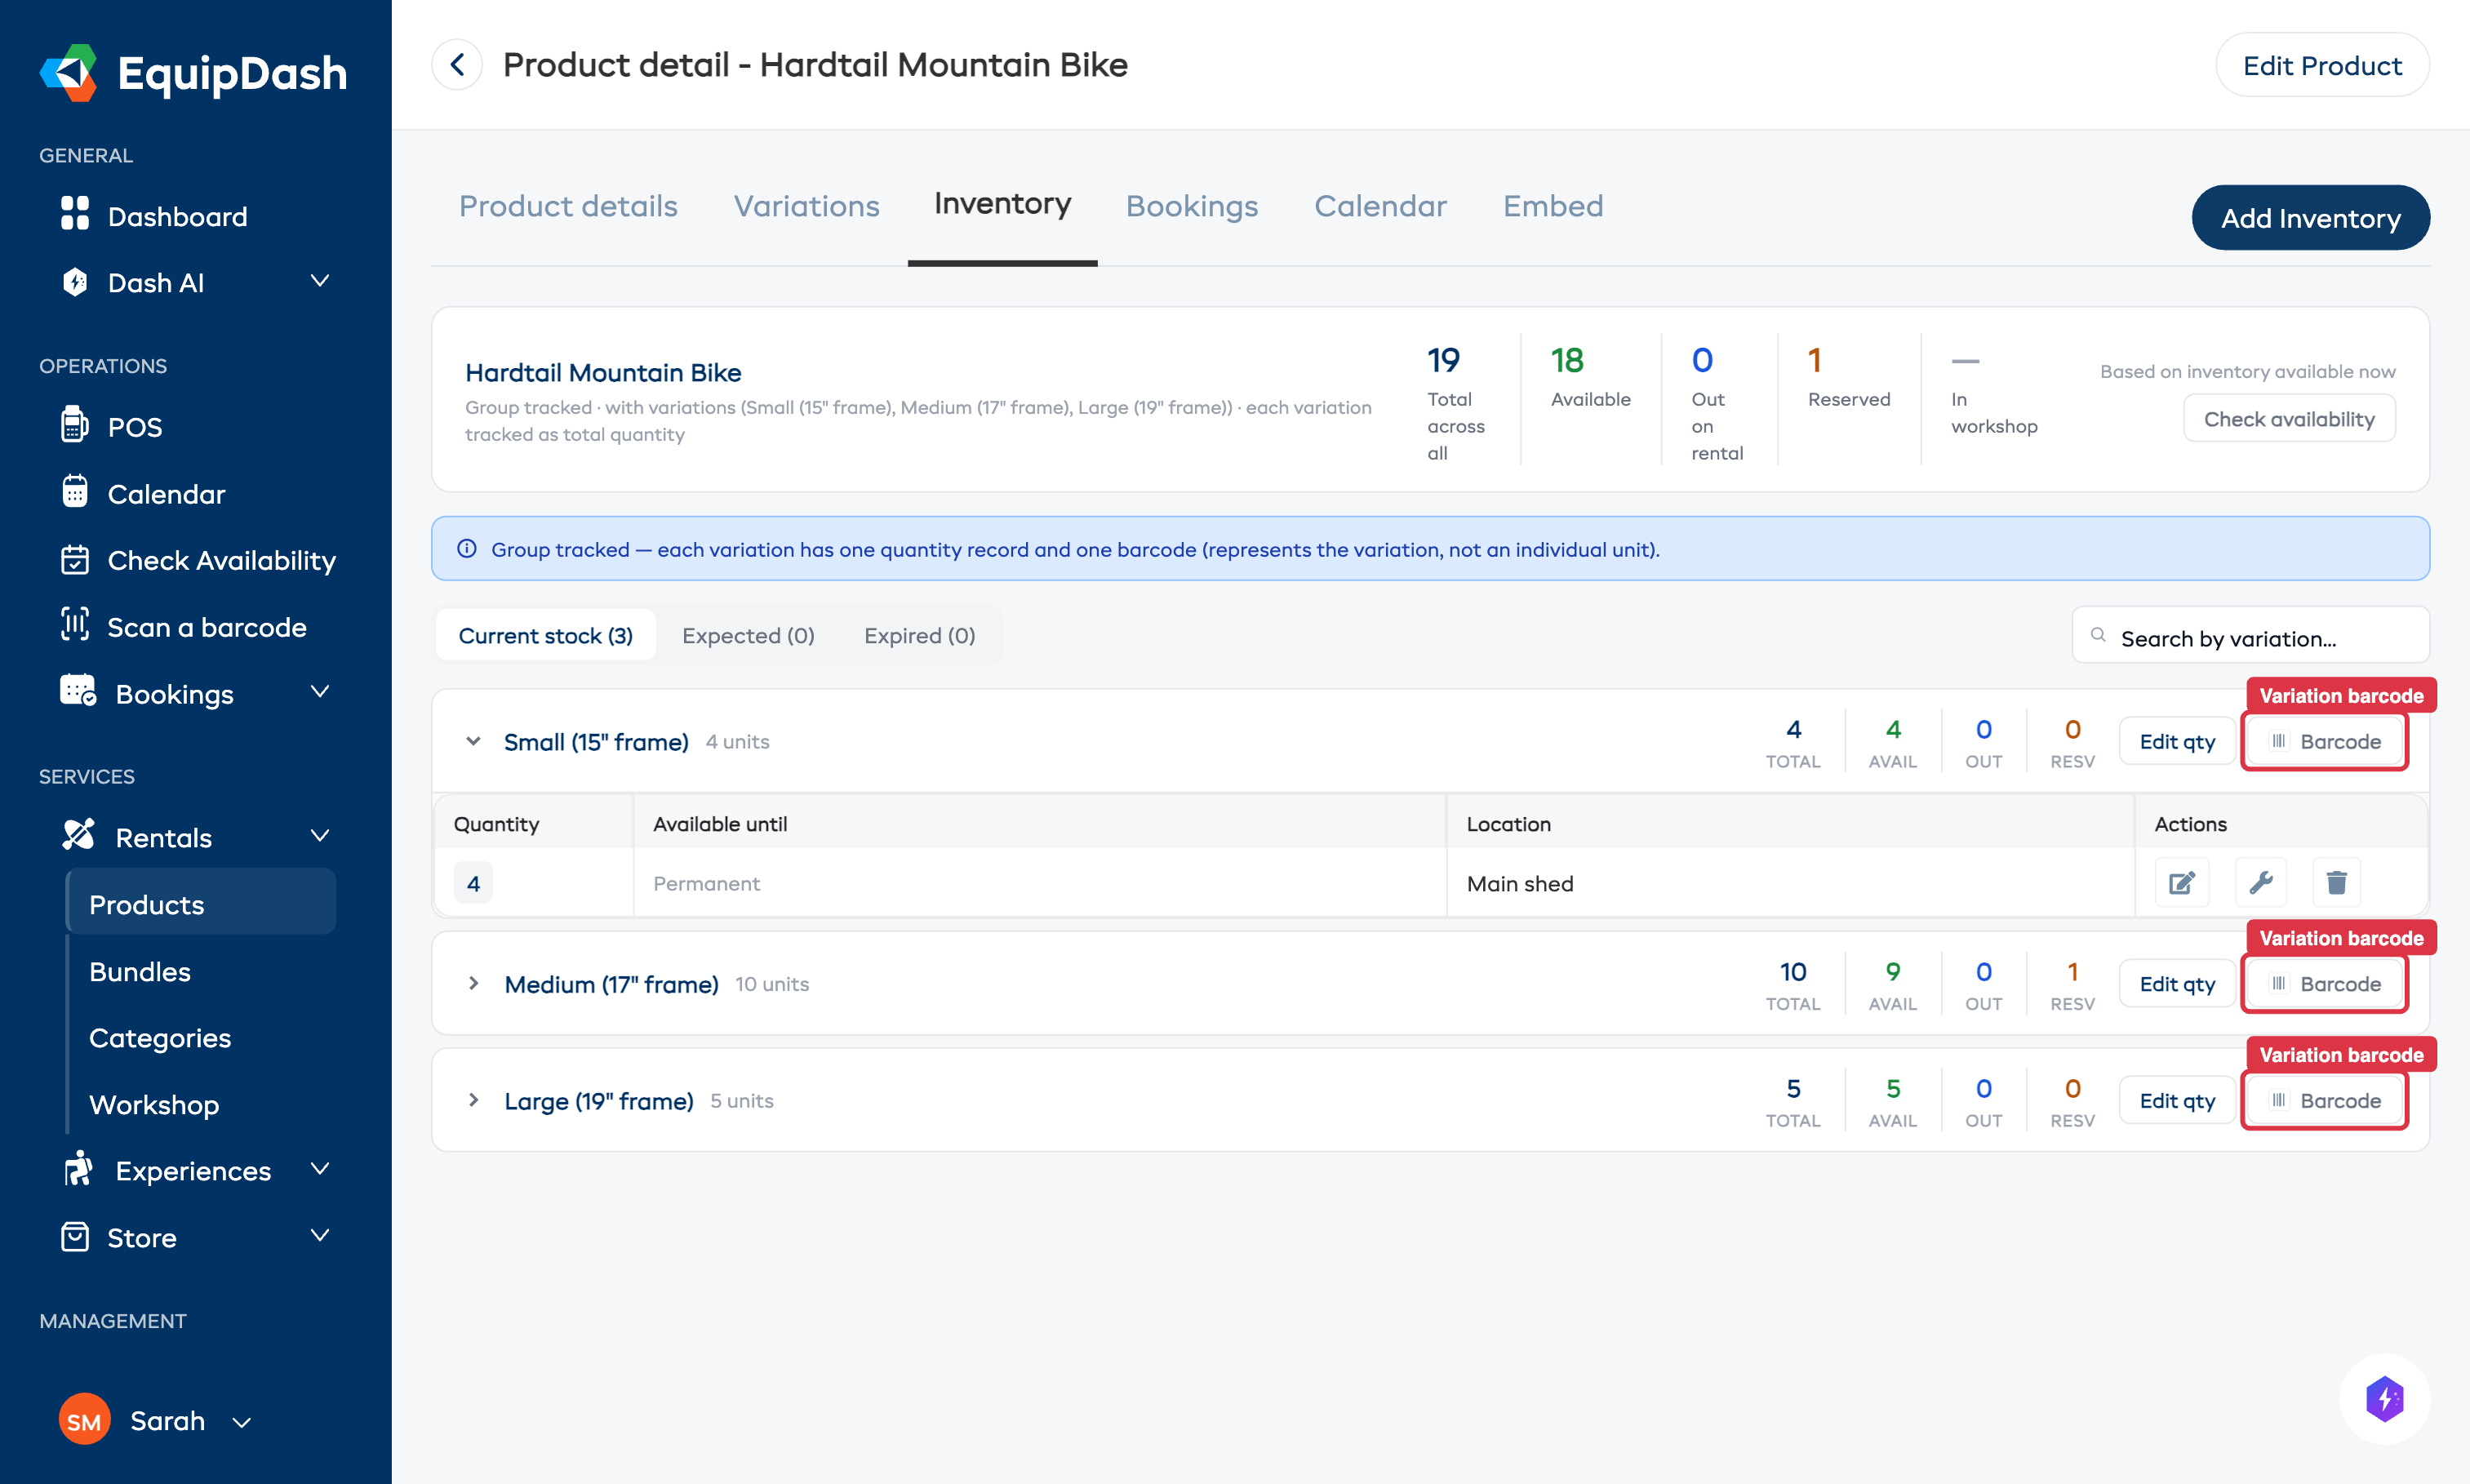
2. Inventory Group Barcodes (Group-Tracked Products)
For products that use group tracking (where you track a quantity of identical units rather than individual items), barcodes are assigned at the inventory group level. Each inventory row (variation + quantity group) can have a barcode generated for it.
- Managed on the Inventory tab of the product detail page.
- Use the Generate Barcodes button to generate barcodes for all inventory rows at once.
- Identifies the inventory group when scanned.
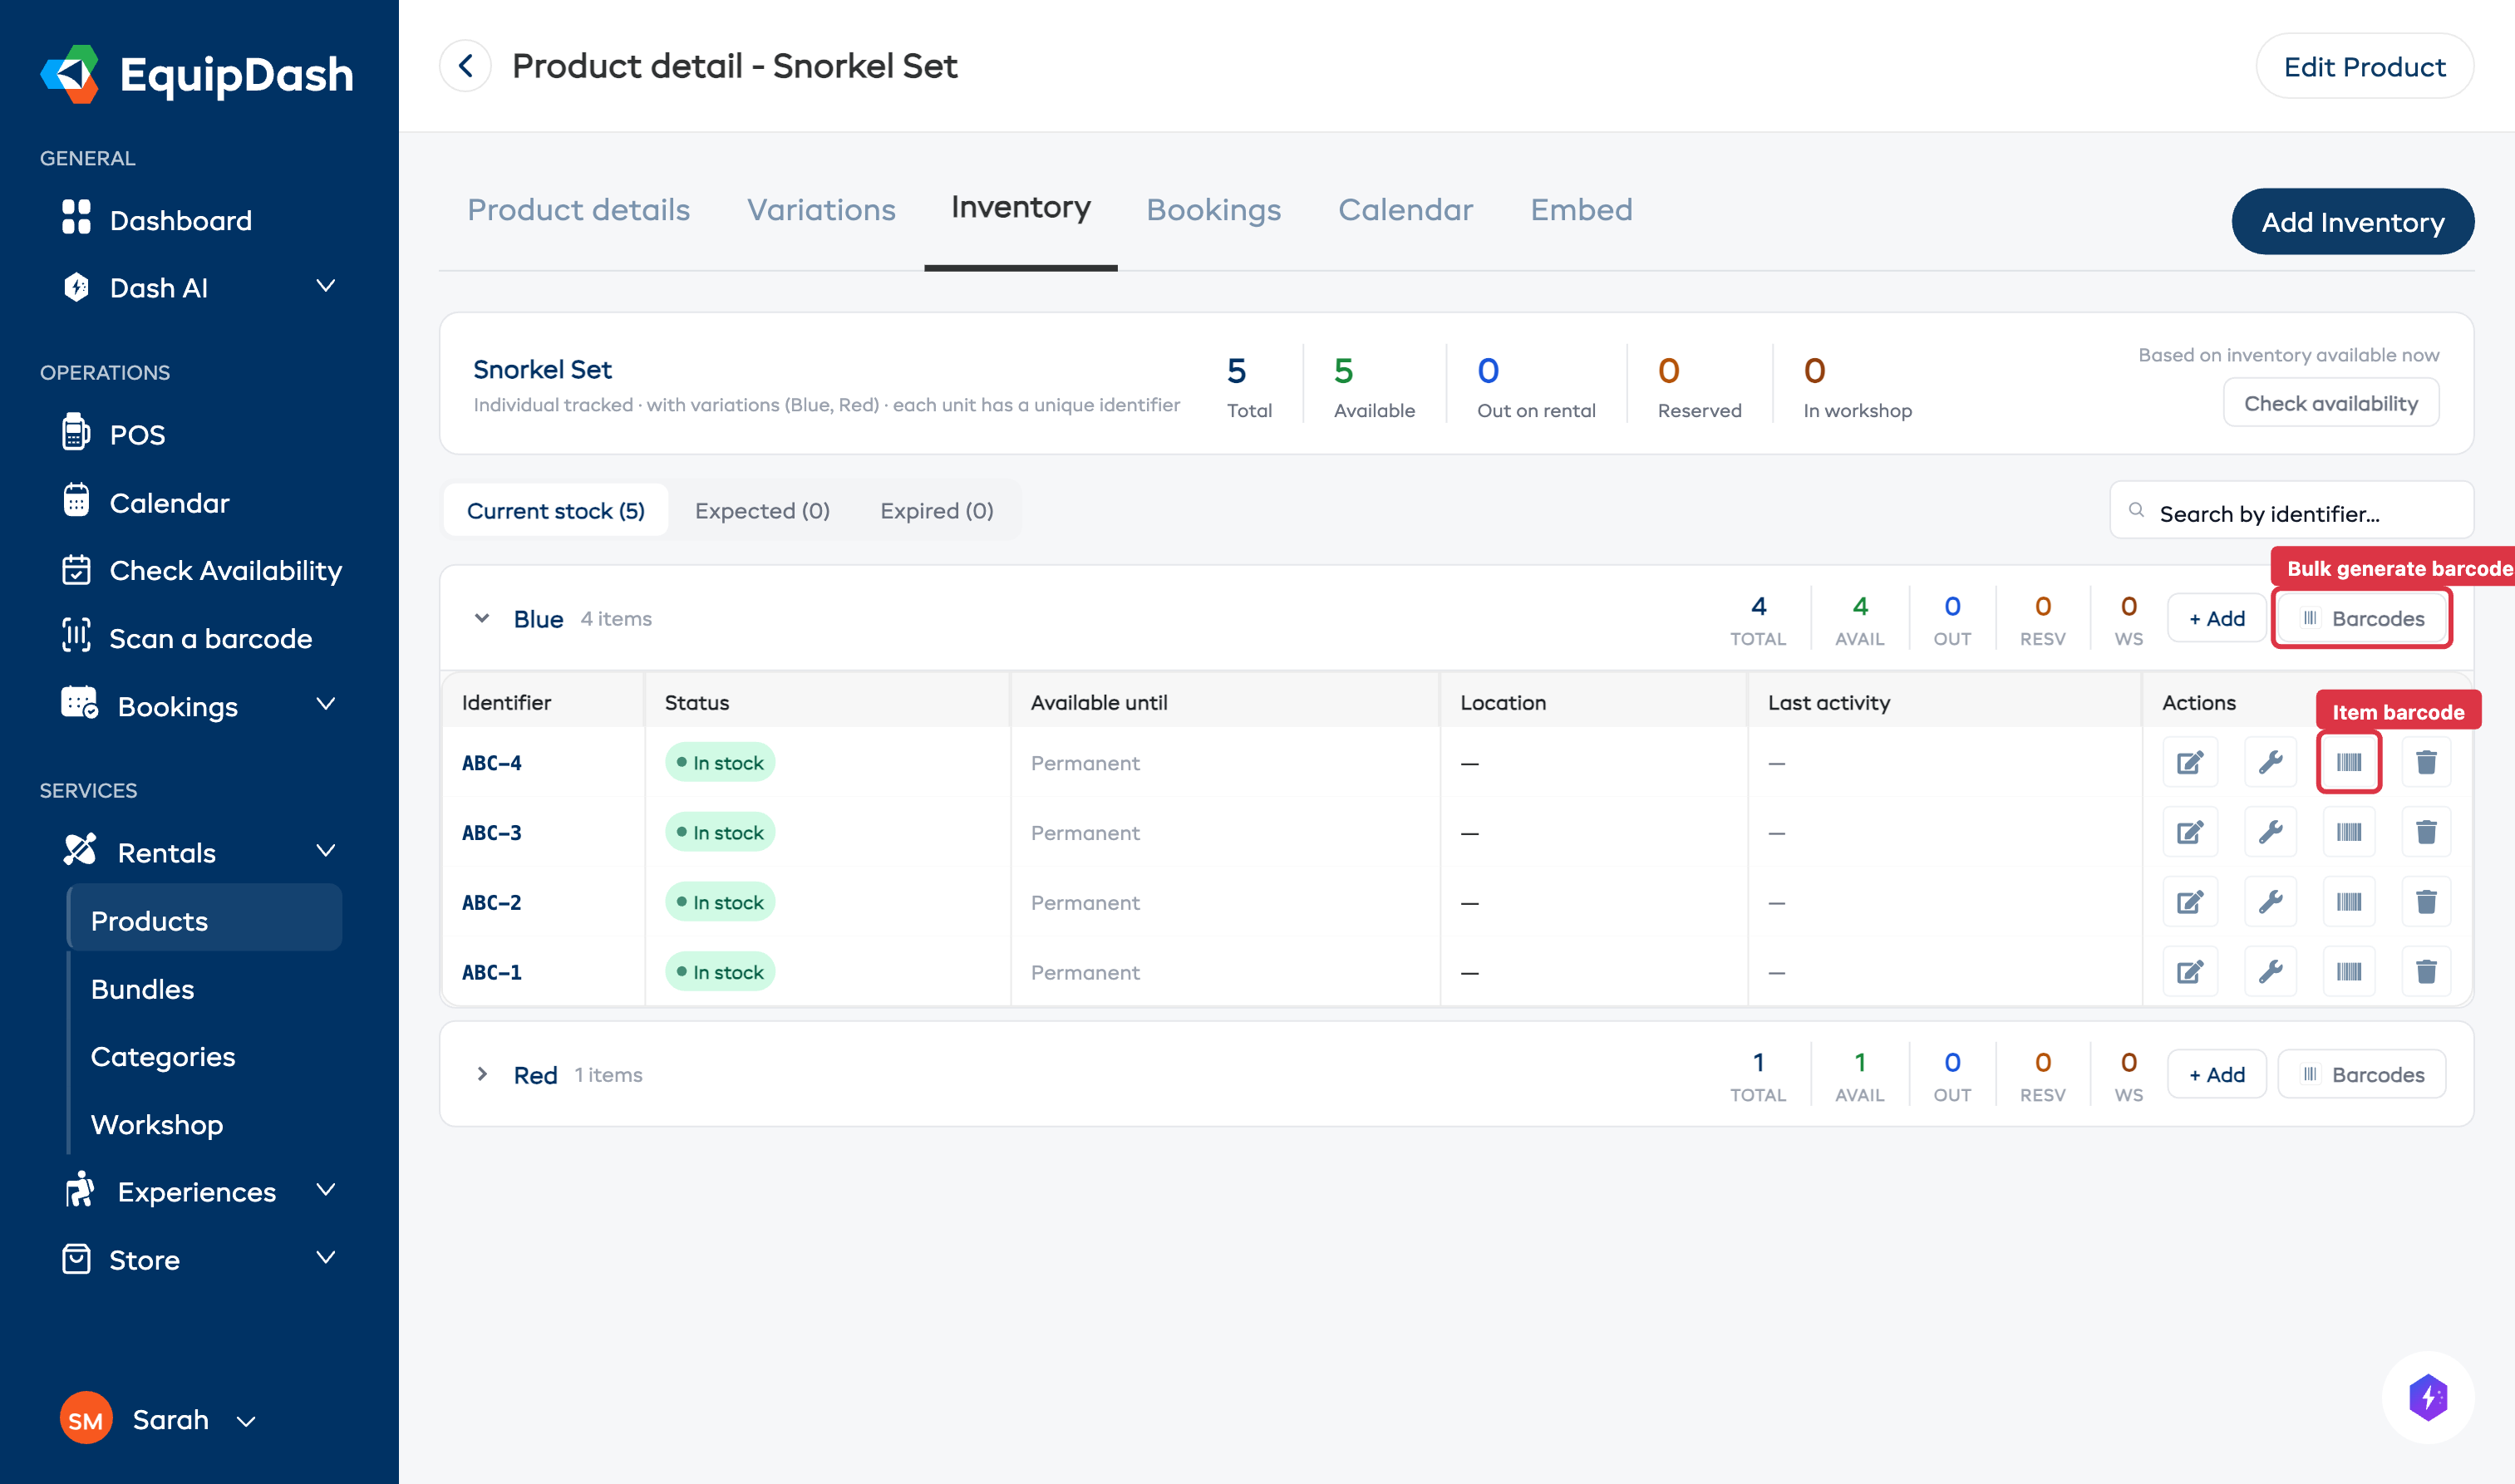
3. Individual Inventory Barcodes (Item-Tracked Products)
For products that use item tracking (where each unit has a unique identifier like "Youth-001"), barcodes are assigned to each individual inventory unit. This lets you identify the exact unit when scanning.
- Managed on the Inventory tab of the product detail page.
- Use the Generate Barcodes button to generate barcodes for all items at once, or use the barcode icon in the Actions column to generate for a single item.
- Identifies the specific unit when scanned -- useful for tracking which exact item was given to which customer.
Generating Product-Level Barcodes
- Go to Rentals > Products and click on a product name.
- The Details tab opens by default. Scroll to the Barcodes card in the right column.
- Click Add Barcode.
- A barcode is generated using your default barcode type and prefix settings.
The Barcodes card shows each barcode's value, type (e.g., QR Code), and whether it was auto-generated. You can print, edit, or delete barcodes from here.
Generating Inventory Barcodes
For Group-Tracked Products
- Go to Rentals > Products and click on a product name.
- Click the Inventory tab.
- Click the Generate Barcodes button above the inventory table to generate barcodes for all inventory rows.
- To print, click Print Barcodes.
For Item-Tracked Products
- Go to Rentals > Products and click on a product name.
- Click the Inventory tab.
- To generate barcodes for all items at once, click the Generate Barcodes button.
- To generate a barcode for a single item, click the barcode icon in the Actions column of that item's row.
- To print, click Print Barcodes or use the print icon on individual item rows.
Where Barcodes Can Be Used
Once generated, barcodes can be scanned in several places:
| Location | Action |
|---|---|
| Calendar | Scan to filter the calendar to a specific product |
| Workshop | Scan to send an item to or return it from the workshop |
| Booking fulfillment | Scan to identify items during pickup and return |
| Global search | Scan to jump directly to a product or inventory detail |
Related Guides
- Scanning Barcodes -- How to use the barcode scanner.
- Printing Barcode Labels -- Printing physical labels.
- Inventory Units -- Managing individual inventory items.