Creating a Product
Adding a new product to EquipDash takes just a few minutes using the product creation wizard. The wizard is a slide-out panel that walks you through three steps: Product Details, Product Pricing, and Additional Information.
Opening the Product Wizard
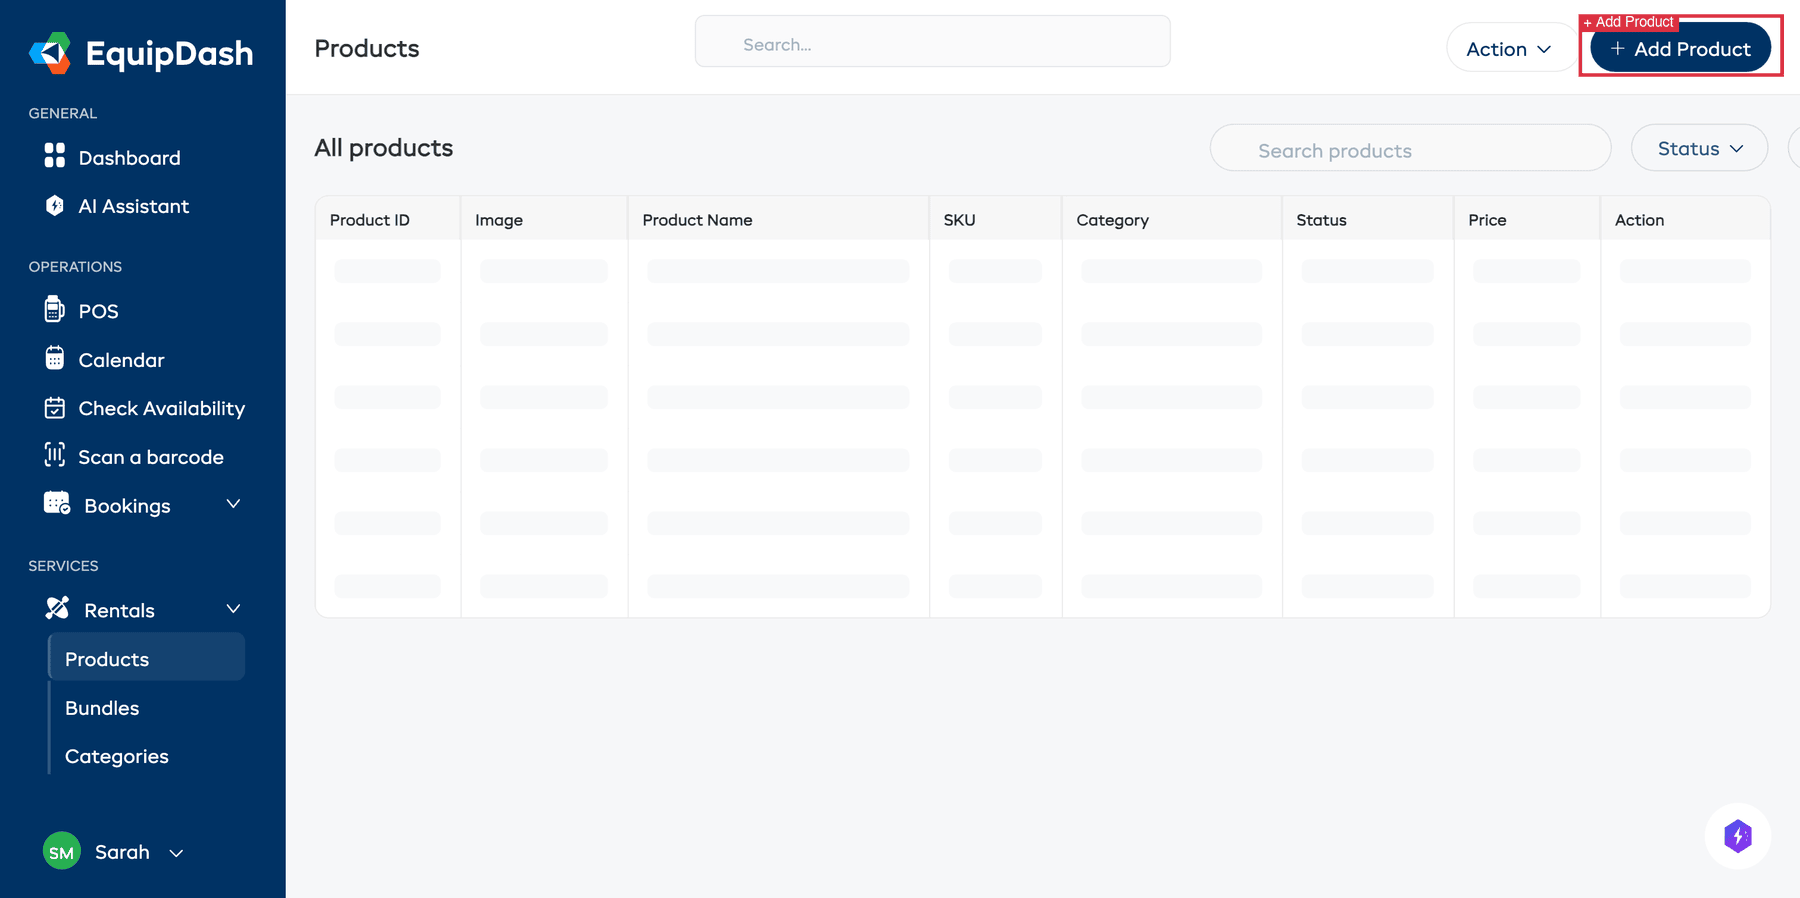
- Go to Rentals > Products in the left sidebar.
- Click the Add Product button in the top-right corner.
- The Add new product panel will slide out from the right side of the screen.
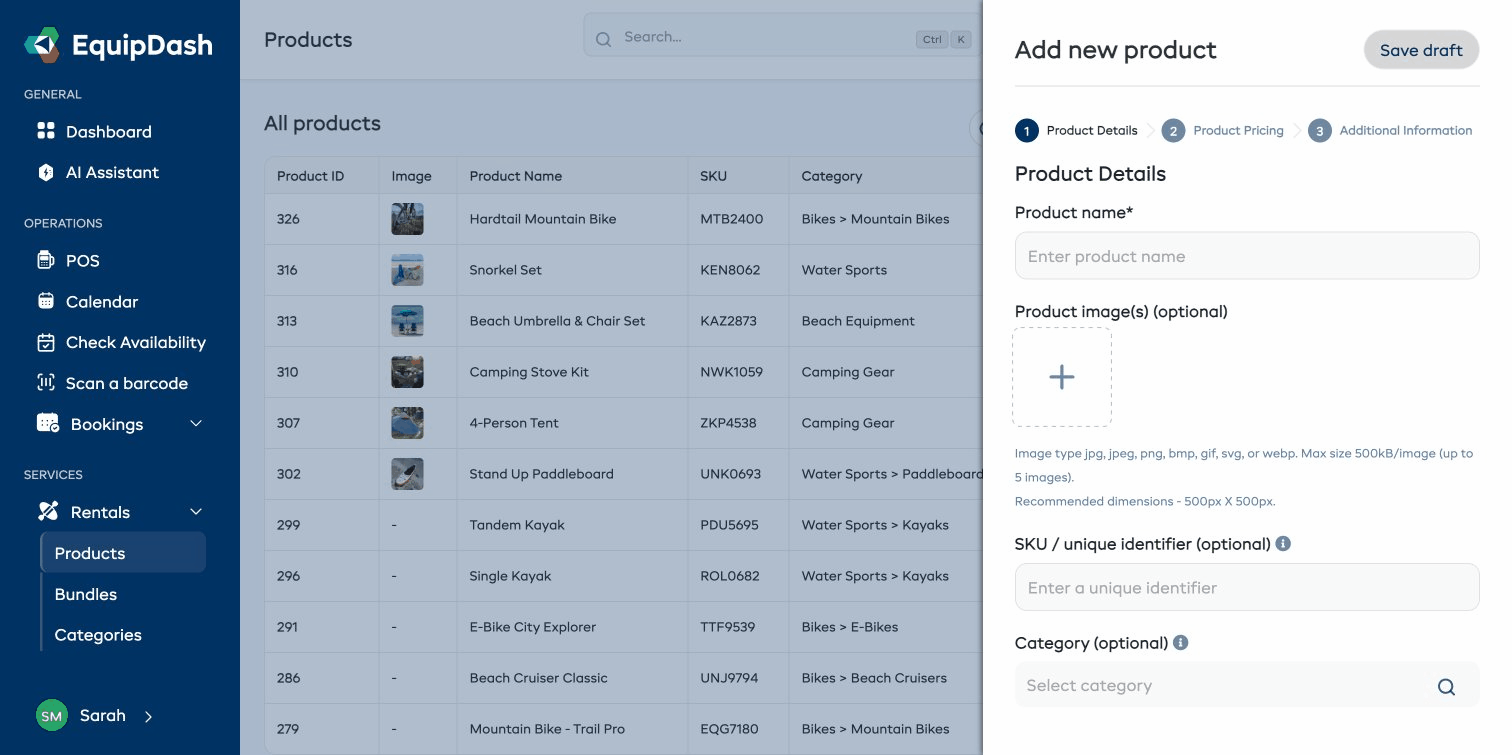
At the top of the wizard you will see a progress indicator showing the three steps: 1 Product Details > 2 Product Pricing > 3 Additional Information. A Save draft button is available in the top-right corner of the panel at any time, allowing you to save an incomplete product and come back to it later.
Step 1: Product Details
The first step captures the core information about your product.
-
Enter a Product name (required) -- for example, "Stand-Up Paddleboard".
-
Optionally upload one or more Product image(s) by clicking the + button in the image upload area. You can upload up to 5 images. Accepted formats: jpg, jpeg, png, bmp, gif, svg, or webp. Maximum file size is 500 kB per image. Recommended dimensions are 500px x 500px.
-
Optionally enter a SKU / unique identifier for internal reference.
-
Optionally select a Category from the searchable dropdown. If you have not created categories yet, you can skip this and assign one later.
-
Click Next to proceed to Step 2, or click Cancel to close the wizard without saving.
At the bottom of each step you will see a link: "Need help understanding products? Read our Product guide". Click it to open this documentation in a new tab.
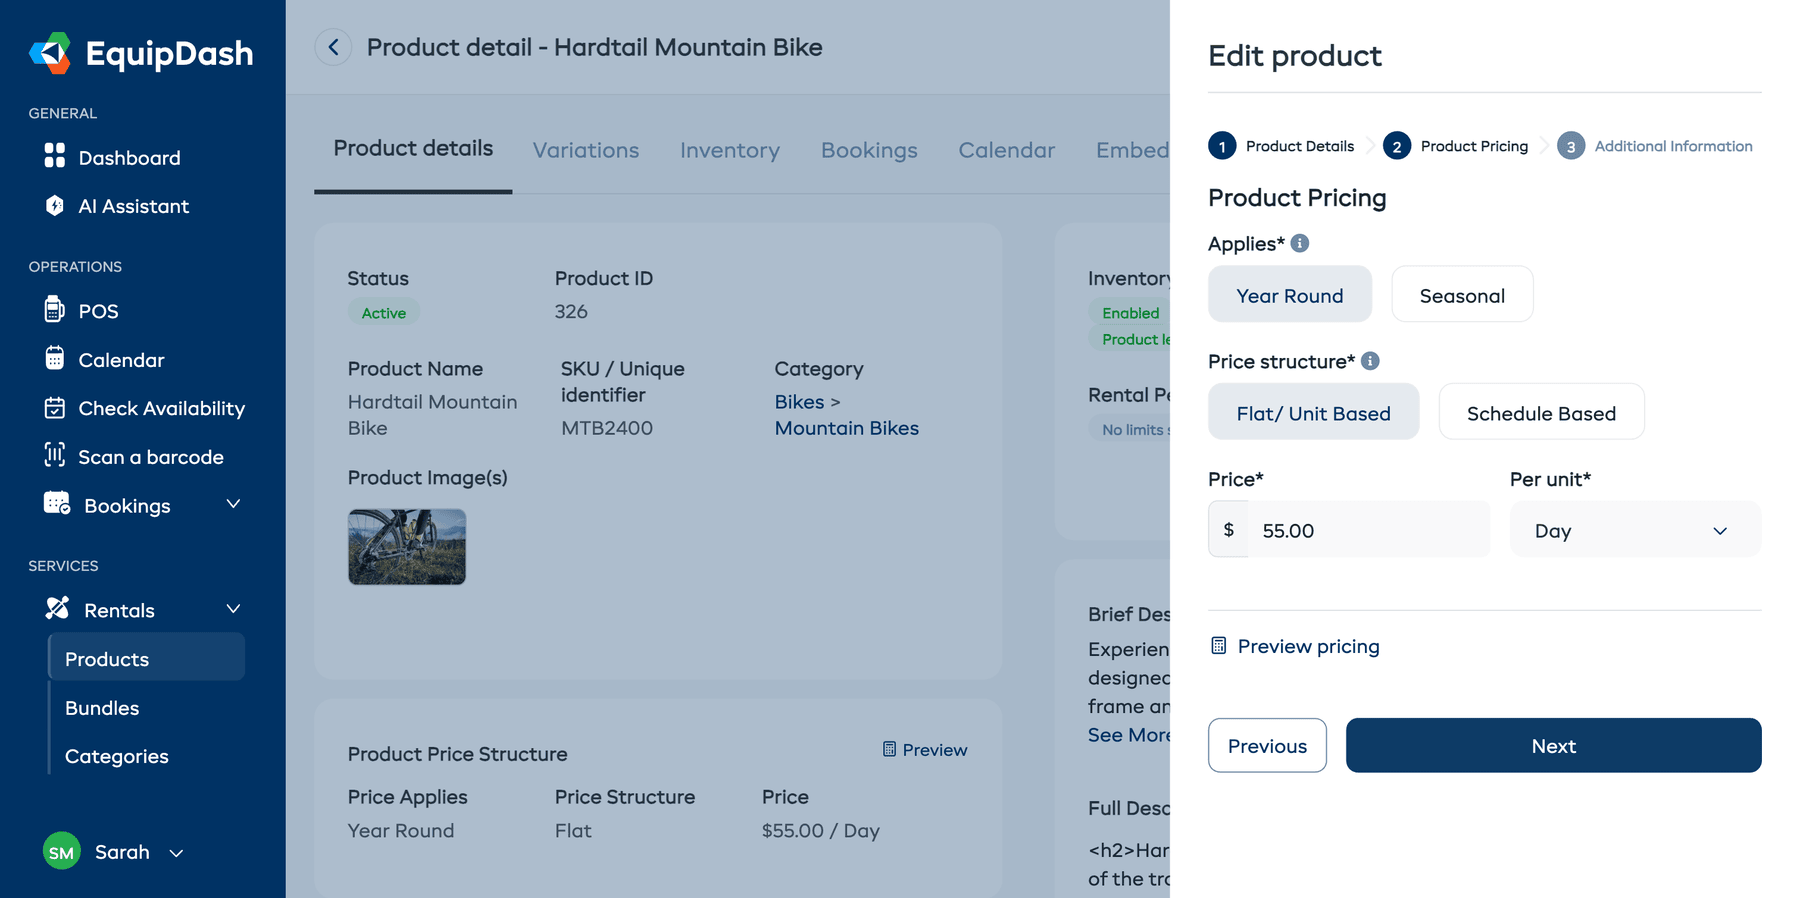
Step 2: Product Pricing
This step is where you define how much your product costs to rent. Pricing has two settings: when prices apply (year-round or seasonal) and how prices are calculated (flat or schedule-based).
Let Dash suggest prices for you
At the top of Step 2 you'll see a Suggest prices button. Click it and Dash AI will research competitor pricing in your area, then suggest a competitive rate — including which pricing structure (flat, tiered, seasonal) it thinks fits best based on what other businesses do.
You can review the sources Dash used, then click Apply to form to drop the suggested values straight into the pricing fields below. Dash will switch the Applies and Price structure toggles automatically if its recommendation differs from your current selection.
See the full guide: Suggest Prices with Dash AI.
Price applies
- Choose when your pricing applies using the Applies toggle buttons:
- Year Round (default) -- One set of prices applies all year.
- Seasonal -- Different prices for different seasons (e.g., higher rates in summer). Requires seasons to be configured in Settings > Seasons first.
Price structure
- Choose the Price structure using the toggle buttons:
- Flat / Unit Based (default) -- A single price per time unit. For example, $10/hour or $50/day.
- Schedule Based -- Custom prices for different durations. For example, $10 for 1 hour, $19 for 2 hours, $25 for 3 hours.
Flat / Unit Based pricing
If you selected Flat / Unit Based:
- Enter the Price amount in the currency input field.
- Select the time unit from the Per unit dropdown: 15 Minutes, Half Hour, Hour, Day, or Week.
Schedule Based pricing
If you selected Schedule Based:
- Select what to Charge based on from the dropdown: Hours, Days, or Weeks.
- Add pricing tiers -- each row has a duration and a price. Click +Add another to add more tiers.
- Optionally enable the Additional [unit] charge toggle to set a rate for time beyond the last tier.
After configuring your pricing, a Preview pricing link will appear. Click it to verify how your pricing calculates for different rental durations.
- Click Next to proceed to Step 3, or click Previous to go back to Step 1.
For a deeper look at pricing options, see Product Pricing.
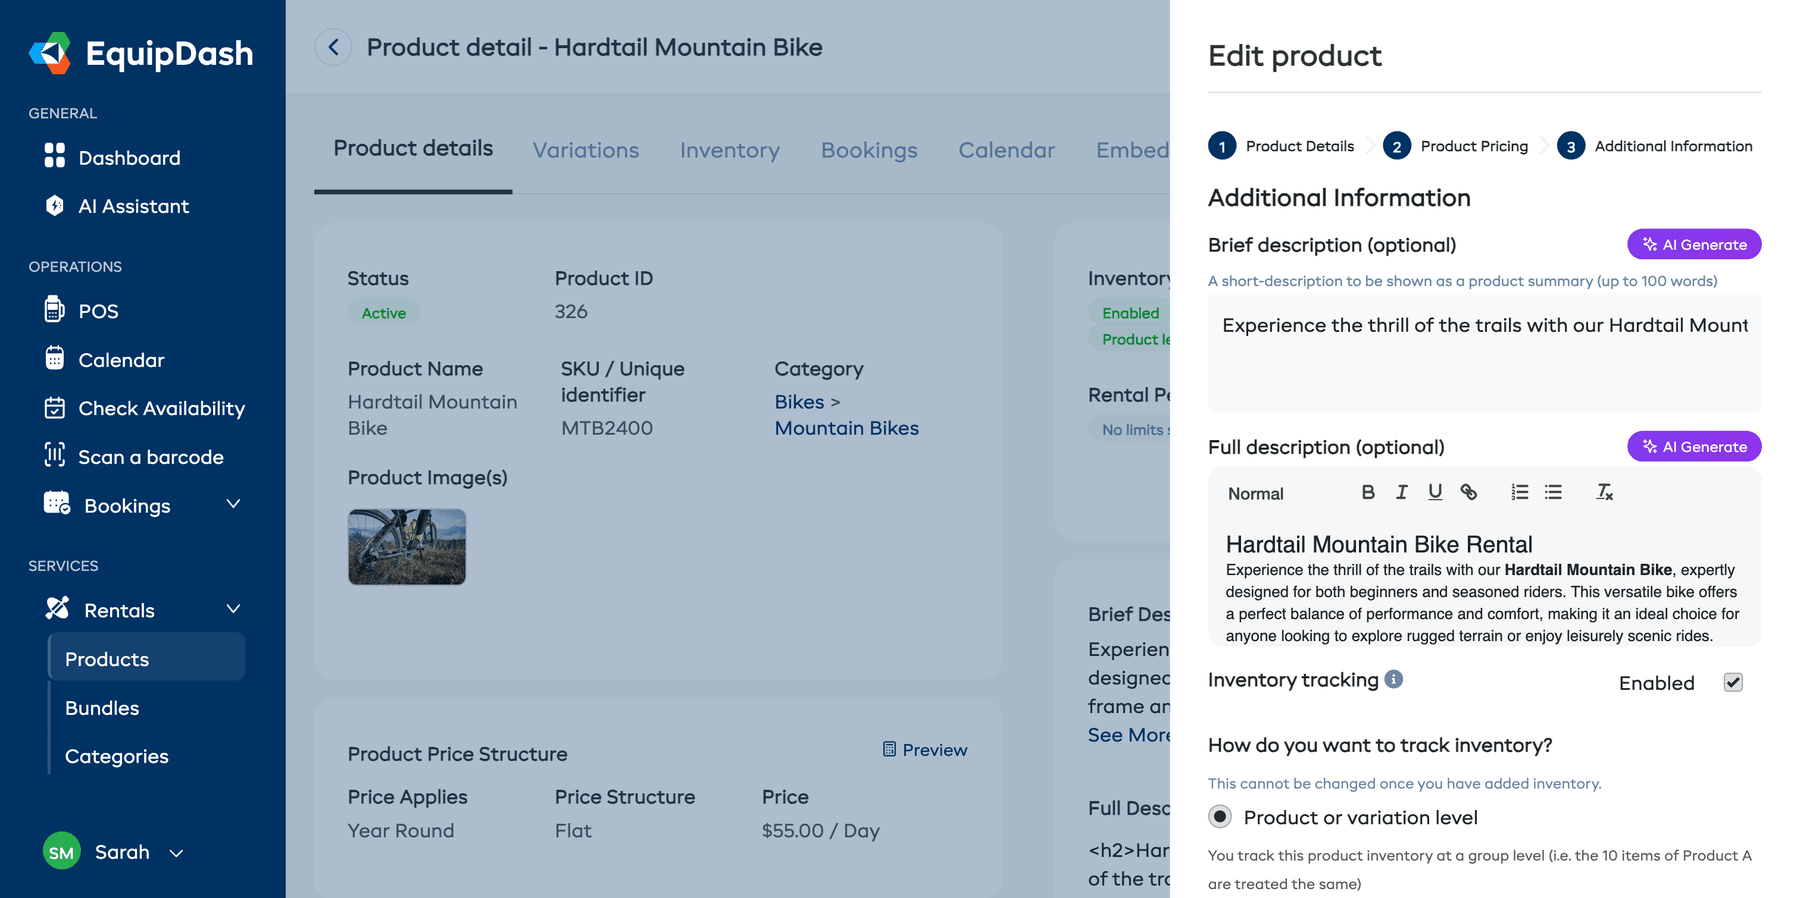
Step 3: Additional Information
The final step lets you add descriptions and configure optional product settings.
Descriptions
- Optionally enter a Brief description -- a short summary of up to 100 words that appears in product listings. Click the green AI Generate button to have EquipDash write one for you.
- Optionally write a Full description using the rich text editor. The editor supports bold, italic, underline, links, ordered lists, unordered lists, and clear formatting. Click the green AI Generate button to generate a full description automatically.
Optional settings
The following toggles let you enable additional features for this product. Each is off by default. Toggle any of them on to configure the details:
| Toggle | Description |
|---|---|
| Inventory tracking | Track physical stock -- either as a total count (group tracking) or as individually identified units (item tracking). See Inventory Units. |
| Buffer time | Add padding time before and/or after each booking for cleaning, preparation, or transit. |
| Rental period limits | Set minimum and/or maximum rental durations for this product. |
| Minimum booking notice | Require a lead time before a rental can start (e.g. for delivery prep). Overrides the Rentals default; leave it off to use the default. |
| Variations | Offer different options such as sizes or colors. See Product Variations. |
| Require participant details | Collect participant information (name, age, etc.) for each person included in a booking of this product. When this is off, the booker is the only person asked for details (and the only one who signs any attached waiver). |
| Participants per item | Appears only when Require participant details is on. How many people use one of these — set 2 for a 2-person kayak or tandem bike. Checkout then lets the customer add up to that many participants; each gives their details and signs any waivers. Only the booker is required, the rest are optional. Leave at 1 for single-person gear. |
| Offer as a rental | On by default. Turn it off for equipment that only runs your tours (e.g. a guided-tour fleet): the product disappears from the widget, POS, and app rental listings but stays fully manageable here. See Run Tours on Your Rental Fleet. |
- Click Add Product to create the product, or click Previous to go back to Step 2.
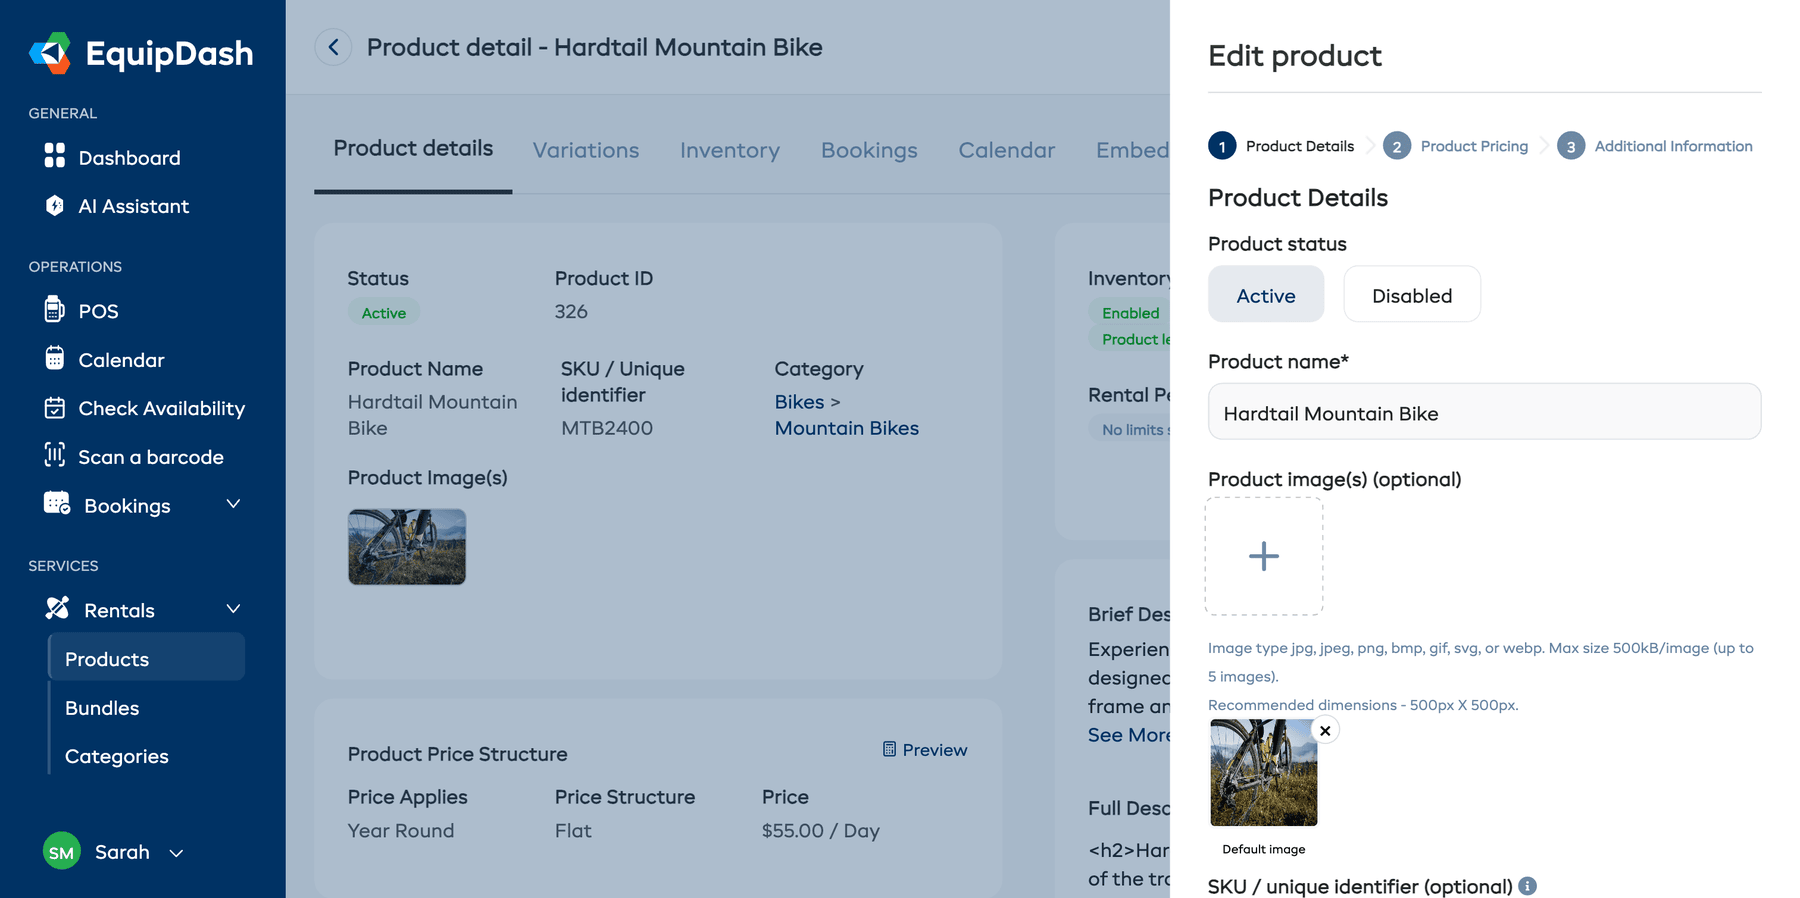
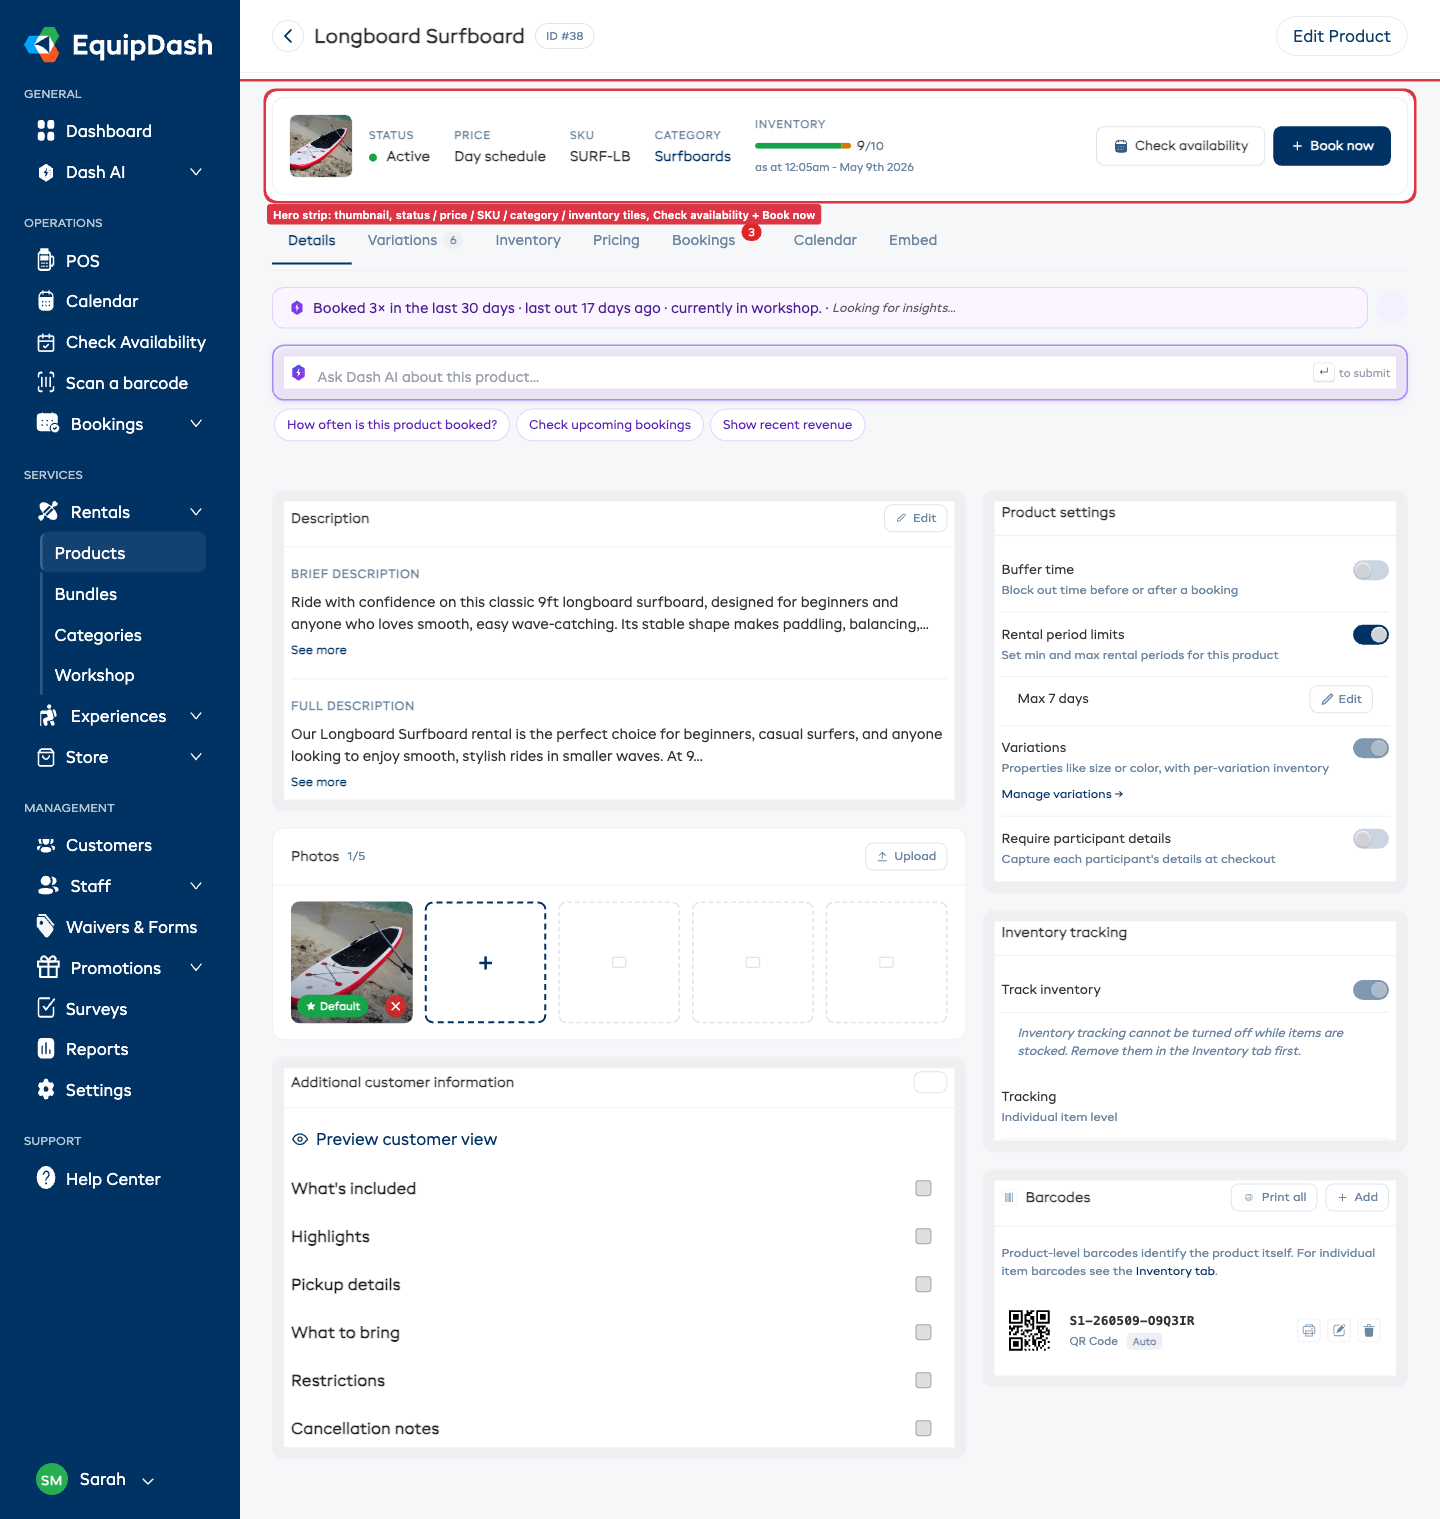
After Creating a Product
Once created, you will be taken to the Product Detail page. From here you can switch between the Details, Variations, Inventory, Pricing, Bookings, Calendar, and Embed tabs to:
- Add inventory units (if inventory tracking is enabled) — Inventory tab
- Fine-tune pricing or apply a pricing template — Pricing tab
- Add or edit variations — Variations tab
- Take a 30-second test booking — + Book now button on the hero strip
- Grab the embed snippet for your website — Embed tab
Related Guides
- Managing Products -- Editing, archiving, and duplicating products.
- Product Pricing -- In-depth guide to pricing options.
- Product Variations -- Adding sizes, colors, and other options.
- Inventory Units -- Managing individual physical items.
- Product Images & Descriptions -- Tips for great product listings.
- Suggest Prices with Dash AI -- Let Dash research competitor pricing and pre-fill Step 2.