Creating a Bundle Growth+This feature requires the Growth+ plan or higher
A bundle groups several things into one package the customer books in a single go - usually at a better price than booking each piece separately. A bundle can mix:
- Rentals - e.g. a mountain bike, a kayak, a tent.
- Experiences - a guided tour or lesson (Growth+, if you run experiences).
- Store add-ons - physical extras like wax or a dry bag (if you run a store).
A bundle that holds rentals and experiences is a mixed bundle - see Rental + Experience Bundles for that flavor. This page covers building a bundle from the start.
Opening the Bundles page
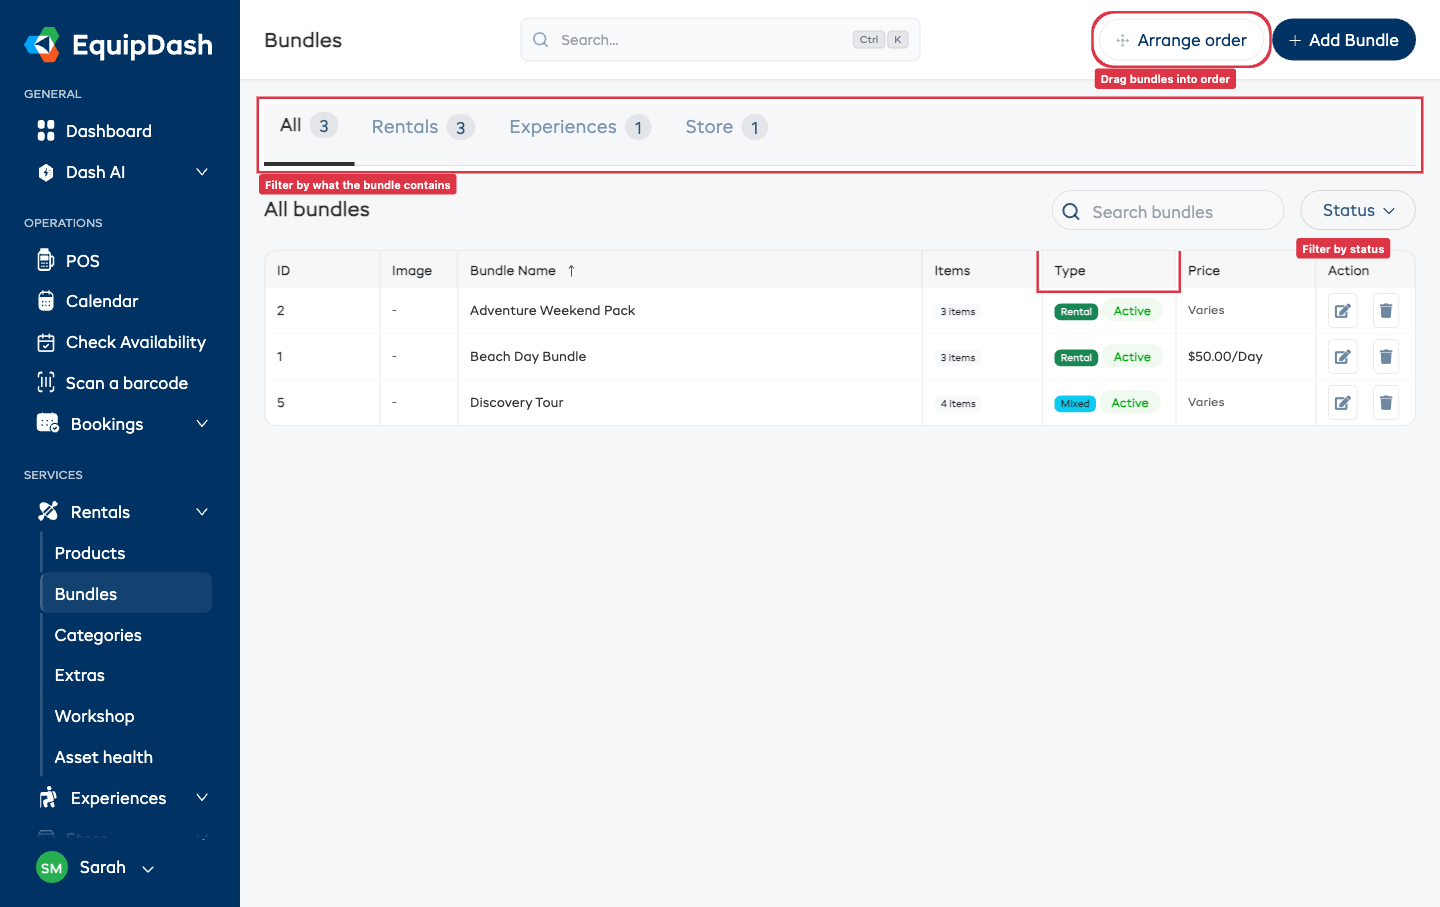
- Go to Rentals → Bundles in the left sidebar. (Bundles also appear under Experiences and Store in the sidebar - same page, pre-filtered.)
- You'll see your bundles listed with their Type (Rental, Experience, Store, or Mixed), how many Items they hold, their status, and their price.
Step 1 - Create the bundle
- Click + Add Bundle in the top-right corner. The Add new bundle panel slides out.
- Enter a Bundle Name (required) - for example, "Adventure Weekend Pack".
- Optionally add a Short Description and a Full Description. AI Generate can write both for you - once the bundle has items, the AI even reads what's inside to describe it.
- Optionally upload a Bundle Image (max 500 kB, recommended 500×500 px). No image? The bundle automatically shows a tidy collage of its items' photos.
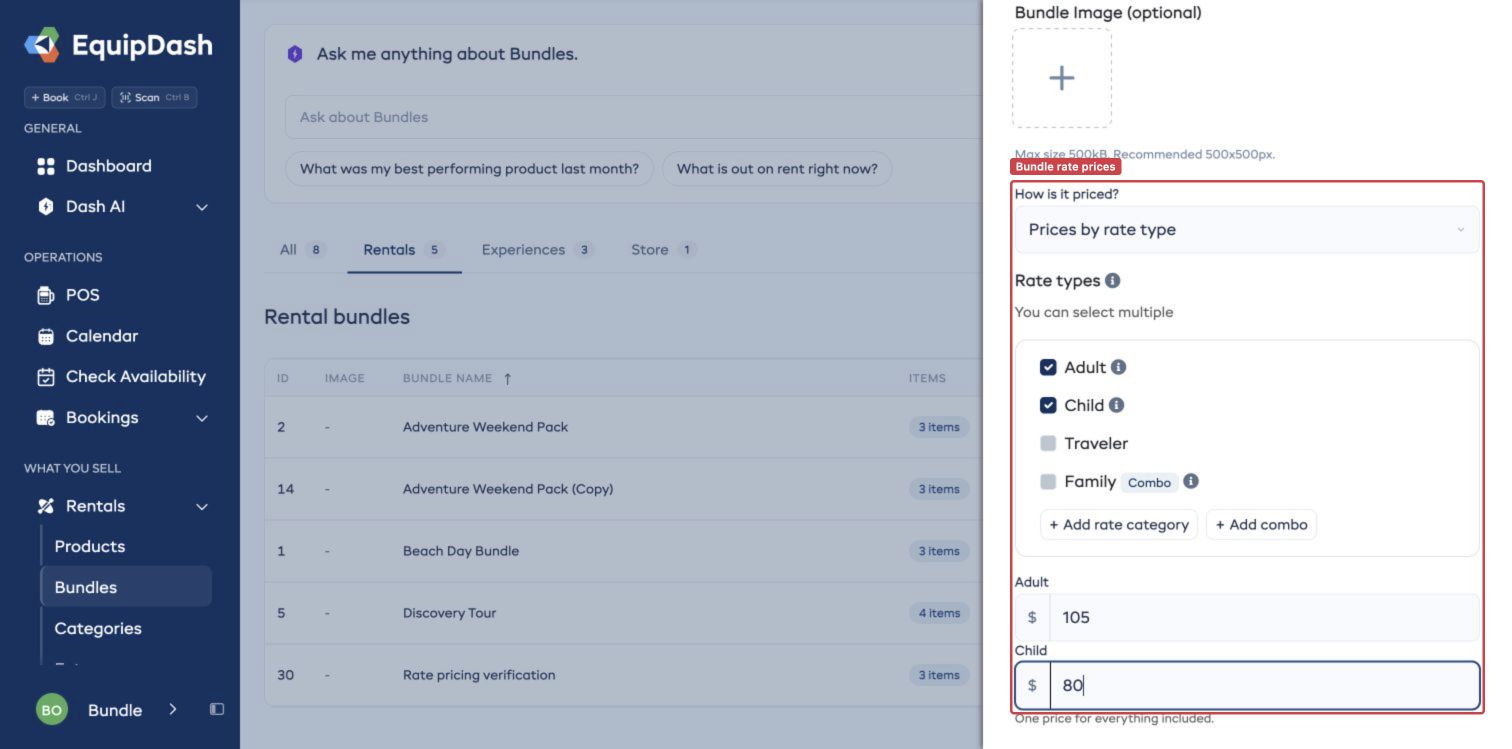
- Choose How is it priced?
- Add up the items (with deals) - the price is each item totaled for the customer's dates, minus any deals you set. Best when the price depends on how long they rent.
- One set price - a single flat price for the whole bundle, whatever the customer picks.
- Prices by rate type - set one whole-bundle price for each selected rate, such as Adult and Child.
- For Prices by rate type, select your existing rates and enter a bundle price beside each. A free rate can have a price of zero. If your role allows it, you can create a rate here.
- Click Create Bundle. You land on the Bundle Detail page.
Step 2 - Add what's in the bundle
Use Details for pricing and What's included to build the bundle. On What's included, use these two buttons:
- Add standard inclusion - something every customer gets (e.g. a dry bag that always comes with the pack). Pick the kind from the dropdown - rental, experience, or store add-on (only the kinds you run show up).
- Add a customer choice (pick one) - a group of alternatives the customer chooses one of (e.g. "pick your watercraft: Single Kayak or Tandem Kayak"). Name the choice in plain words the customer will read.
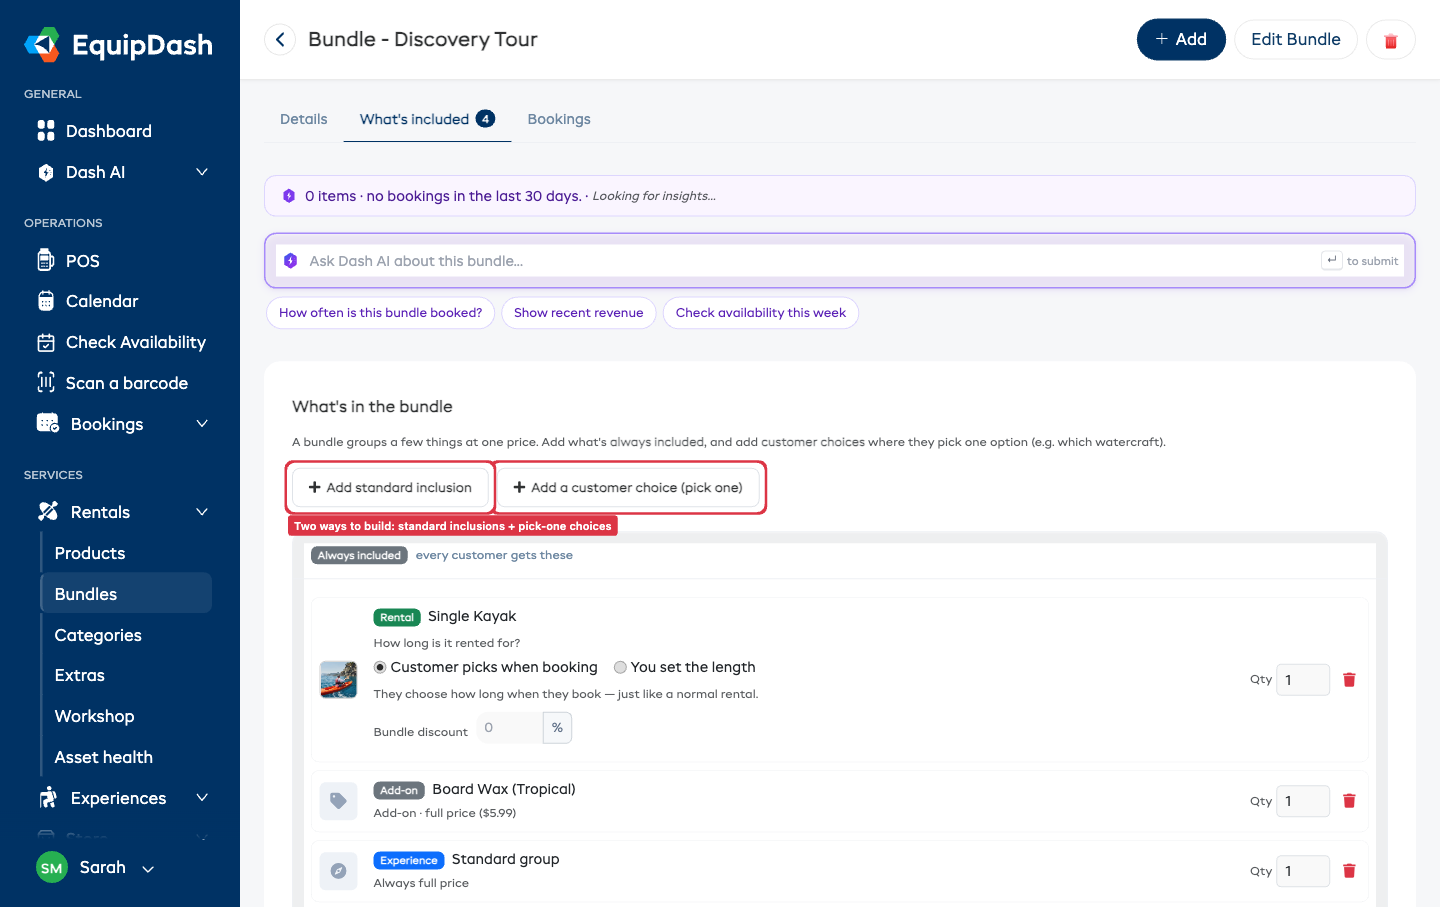
Add as many inclusions and choices as you like. A bundle needs at least 2 items before customers can book it.
Set the rental length
For each rental in the bundle, choose how long it's rented for:
- Customer picks when booking - they choose the length at checkout, just like a normal rental.
- You set the length - you define the exact lengths offered (e.g. 30 minutes, 2 hours, 1 day) and they pick from those.
On a "pick one" group, a How long is it rented for? control sits at the top of the group - set it once and every option in the choice inherits it, so you don't repeat it on each item. Need one item to differ? Open that option and set a different length just for it (a Use the group's length link puts it back to following the group).
Set gear quantities for rate prices
For Prices by rate type, every required experience must offer the bundle's rates. Customers choose their counts once, then select a departure for each experience. Those counts reserve the same people on every included departure.
For each rental or store item:
- Set Applies to to Everyone or one of the bundle's rates.
- Set Quantity is for to Each person or The whole booking.
- Enter Qty. Two for each person reserves six items for three people; two for the whole booking reserves two.
Experience and mixed bundle rate prices cover everything included once. Set the offered rental lengths on each rental item. Each offered length has the same bundle rate price.
Sell an item only in a bundle
Each rental in the bundle has a Can also be booked on its own switch. Turn it off and the item disappears from your booking site, POS, and app as a standalone rental - customers can only get it by booking this bundle (or any other bundle it's in).
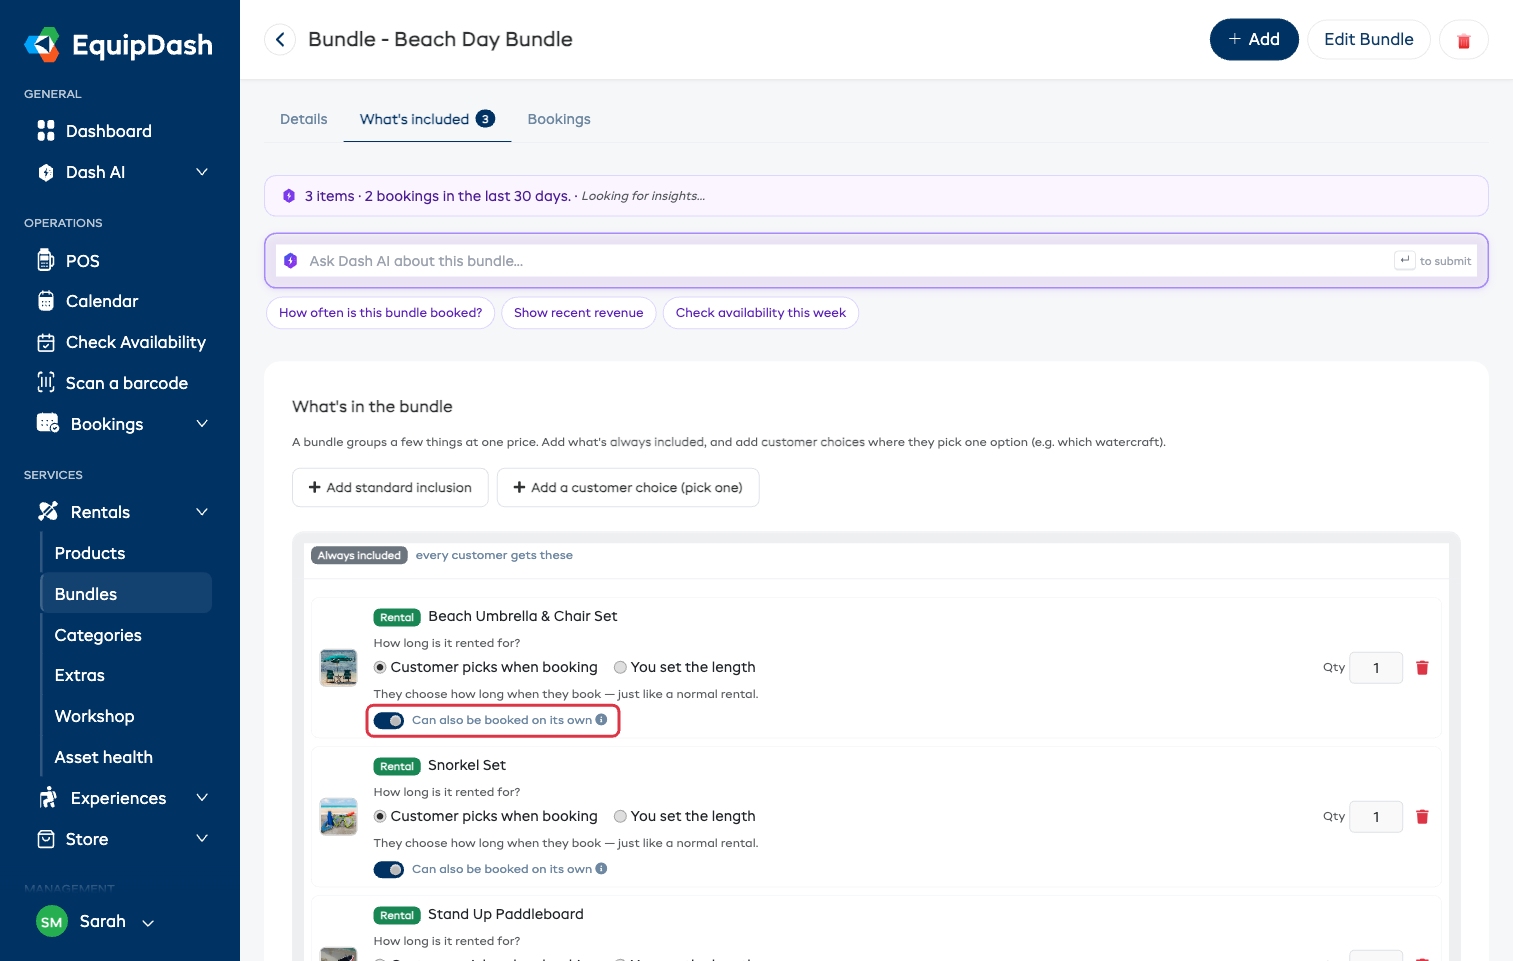
Use it for gear you only offer as part of a package - say a helmet that always ships with the bike pack, or an accessory kit that isn't worth renting alone.
- The same setting lives on the product's own page as Who can book it: Not on its own.
- Turning it off never touches existing bookings, and every bundle holding the item keeps selling it.
- Flip it back on any time to offer the item on its own again.
Put a deal on a rental
If you chose Add up the items (with deals) pricing, each item gets a Bundle discount % field - rentals, experiences, and store add-ons alike. Set the percentage off, and on a rental with fixed lengths you can set a different discount per length (e.g. 20% off a 2-hour hire, 15% off a 4-hour hire). Leave an item blank to keep it at full price.
For a "pick one" choice, set Discount for any choice once at the top of the group and every option inherits it - then override just one option if you want a different rate for it.
The percentage you type stays behind the scenes. Customers only ever see the bundle total and the dollars they save (e.g. "Save $54").
Step 3 - Price, security hold, and photo (Details tab)
On the Details tab you can, all inline:
- Edit the description - click to edit, it saves as you go.
- Edit pricing - choose Add up the items (with deals), One set price for the whole bundle, or Prices by rate type, then click Save.
- Set the security hold - either add up each item's hold, or take one flat hold for the whole bundle (one pre-authorization instead of several).
- Set a cancellation policy - by default a bundle uses the strictest policy among its items; you can override it here.
- Upload a photo - or leave it on the auto collage.
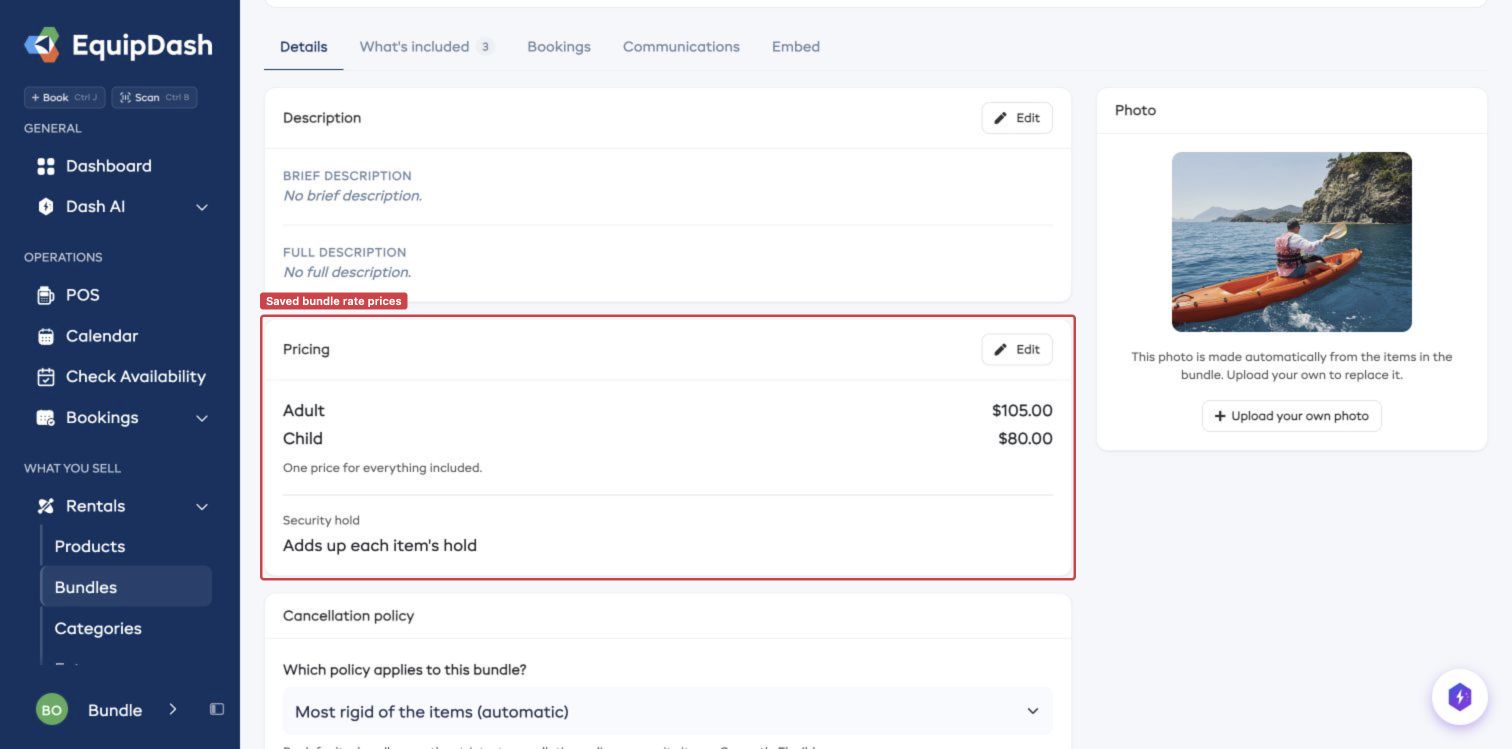
Rental-only bundles with Prices by rate type also offer Charge per: Once, Hour, or Day in Details > Pricing. Experience and mixed bundle rate prices charge once. Earlier bookings keep their sold prices when you change the bundle. In the widget, POS, and mobile app, choose the rate counts once for the bundle, then choose each activity's departure.
For One set price, experience-only bundles show the whole-bundle amount without an hour or day label. Rental and mixed bundles keep their existing hourly or daily charging.
Bundle availability
A bundle is only bookable when all the items the customer picks are available for their dates - the right gear is in stock, and any experience has an upcoming time. If a chosen piece is sold out (or an experience has no upcoming departures), the bundle can't be added until the customer picks an available option.
Related Guides
- Rental + Experience Bundles - building a mixed bundle with a guided experience.
- Managing Bundles - the listing, filters, status, ordering, and deleting.
- Creating a Product - the rentals that go into bundles.
- How Pricing Works - the pricing model behind the deals.