Adding Staff Members Growth+This feature requires the Growth+ plan or higher
Staff members are the people who work in your business. Adding them to EquipDash lets you assign schedules, manage locations, and control what each person can access in the system.
Before You Start
To add staff members, you need the Manage Staff permission. If you do not see the + Add Staff button, contact your account administrator to request access.
How to Add a Staff Member
Step 1 — Open the Add Staff Panel
- Go to Staff in the left sidebar.
- Click the + Add Staff button in the top-right of the staff table.
- A side panel titled Add new staff slides open on the right side of the screen.
The panel uses a 3-step wizard. You can see the steps at the top: 1. Staff Details, 2. Employment Details, 3. Additional Information.
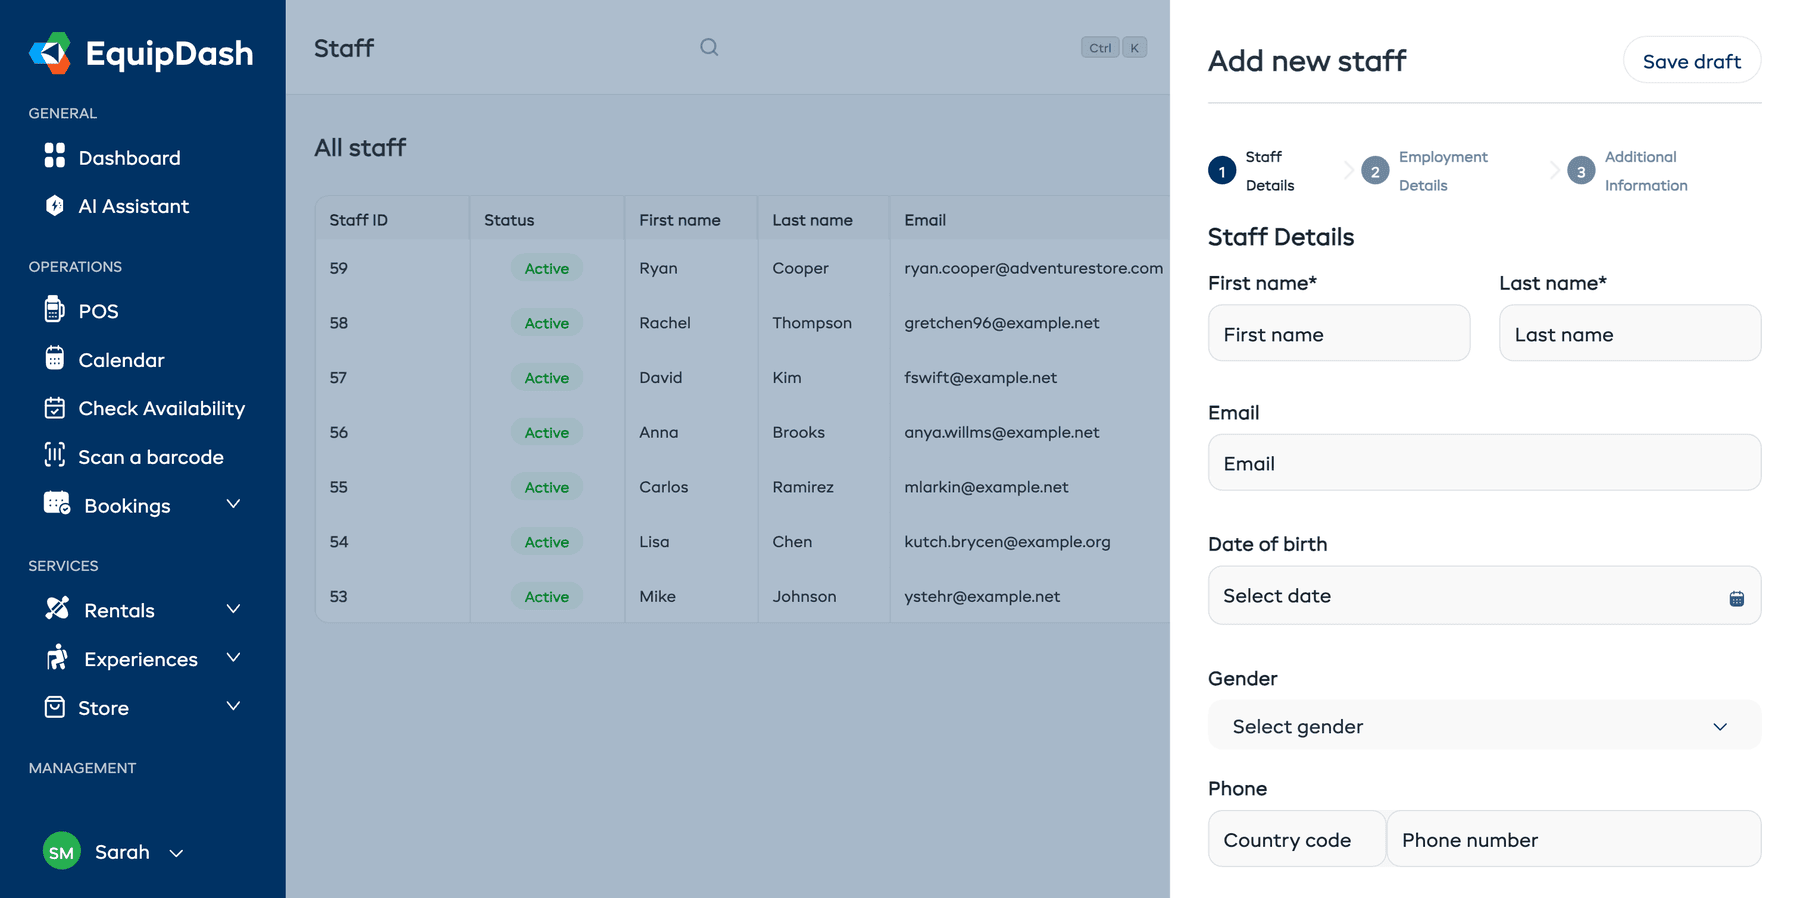
Step 2 — Enter Staff Details (Step 1 of 3)
Fill in the staff member's personal information.
Required fields:
- Enter the staff member's First name.
- Enter their Last name.
- Enter their Email address. This is the email they will use to log in.
Optional fields: 4. Select a Date of birth using the date picker. 5. Choose a Gender from the dropdown. 6. Enter a Phone number — select the country code first, then enter the number. 7. Enter their Address line 1 and Address line 2. 8. Enter their City, State, and Zip/Post Code. 9. Select their Country/Region from the dropdown. 10. Enter Emergency contact details — the contact's name and phone number.
When you are ready, click Next to continue to Step 2.
To cancel without saving, click Cancel at any time.
Step 3 — Enter Employment Details (Step 2 of 3)
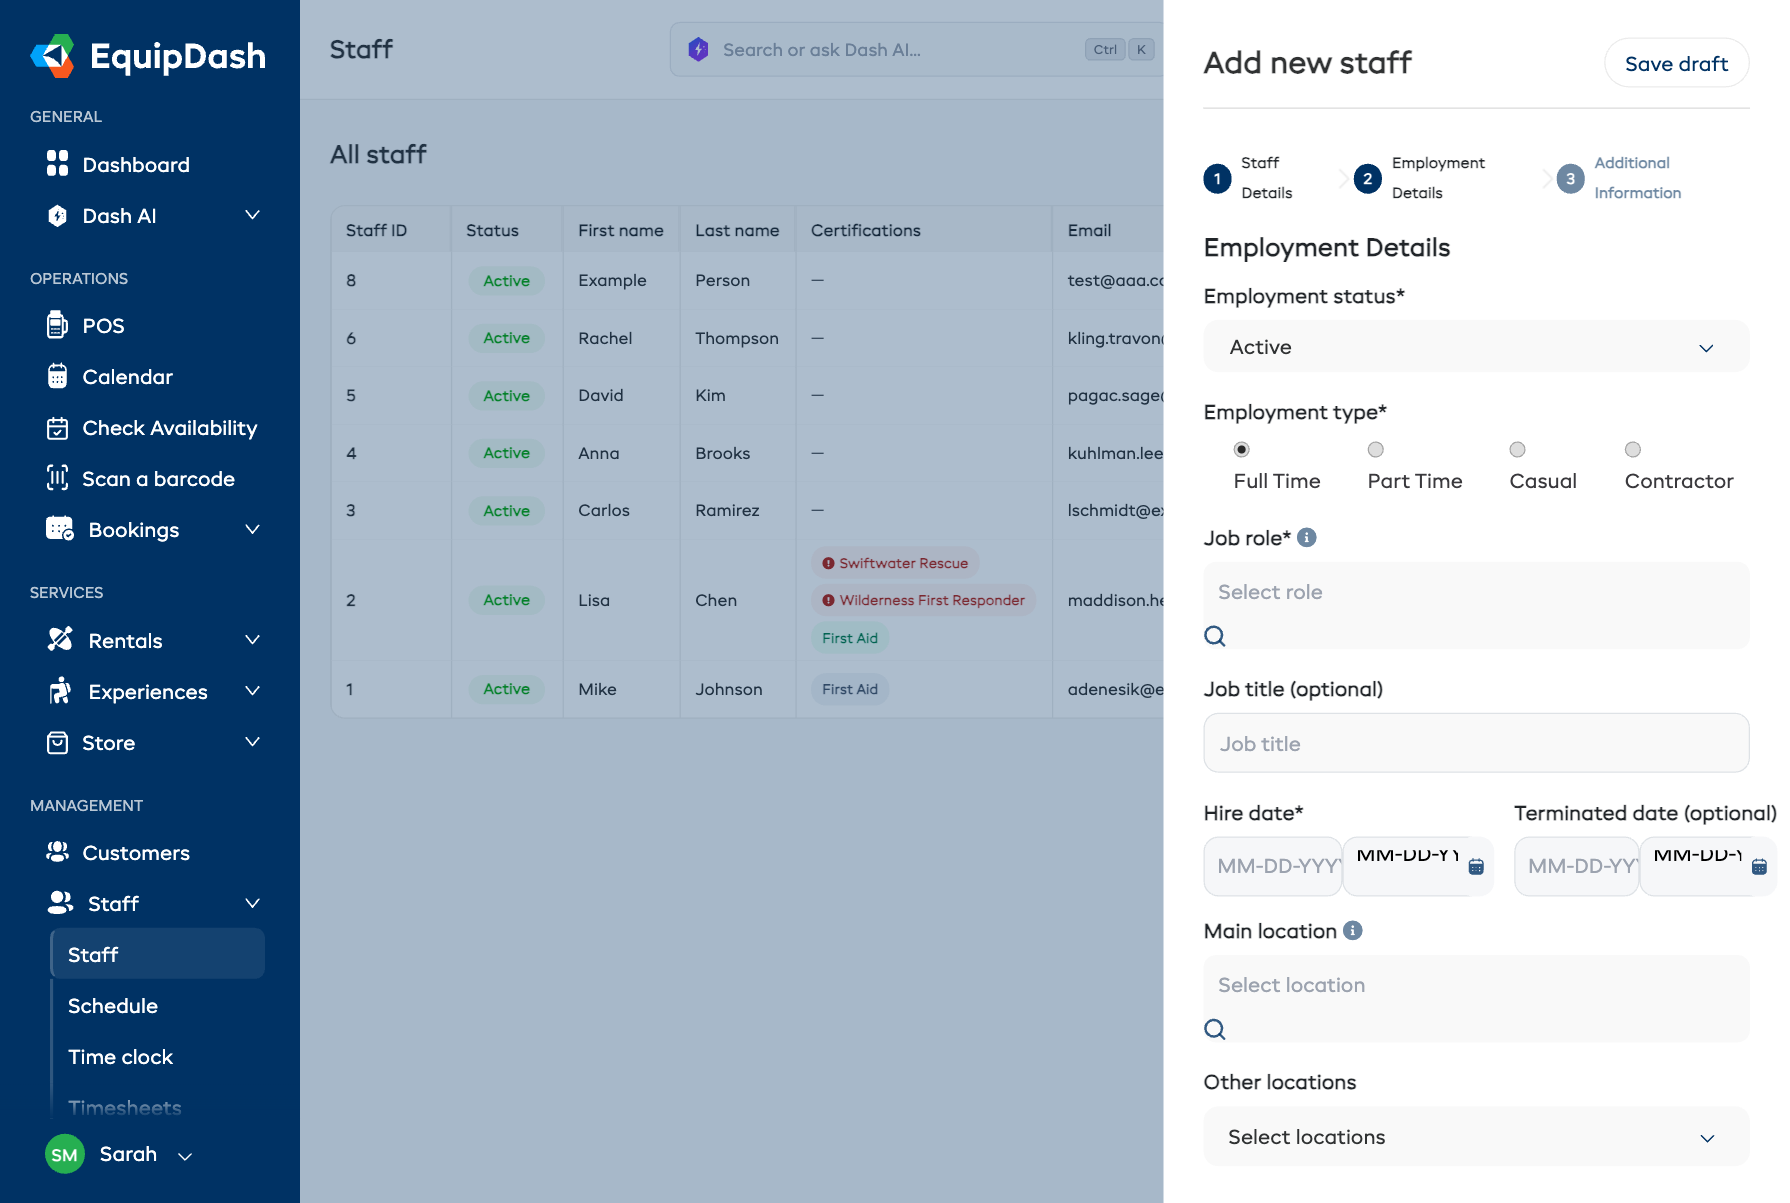
Fill in the staff member's employment and access information.
Required fields:
- Select an Employment status from the dropdown (for example, Active).
- Choose an Employment type using the radio buttons: Full Time, Part Time, Casual, or Contractor.
- Select a Job role from the searchable dropdown. This is the staff member's job title (for example, Guide, Instructor, or Front Desk). Job roles are created at Settings → Staff Roles and are used for scheduling and filtering. They don't grant system access on their own — but a job role can carry a default access level that pre-fills the invite in Step 3 (see below). See Roles & Access for more detail.
- Select a Hire date using the date picker.
Optional fields: 5. Enter a Job title to describe the staff member's role in your business. 6. Enter a Terminated date if applicable. 7. Select a Main location from the searchable dropdown — this is the staff member's primary work location. 8. Select any Other locations they work at using the multi-select dropdown.
When you are ready, click Next to continue to Step 3.
To go back, click Previous.
Step 4 — Additional Information (Step 3 of 3)
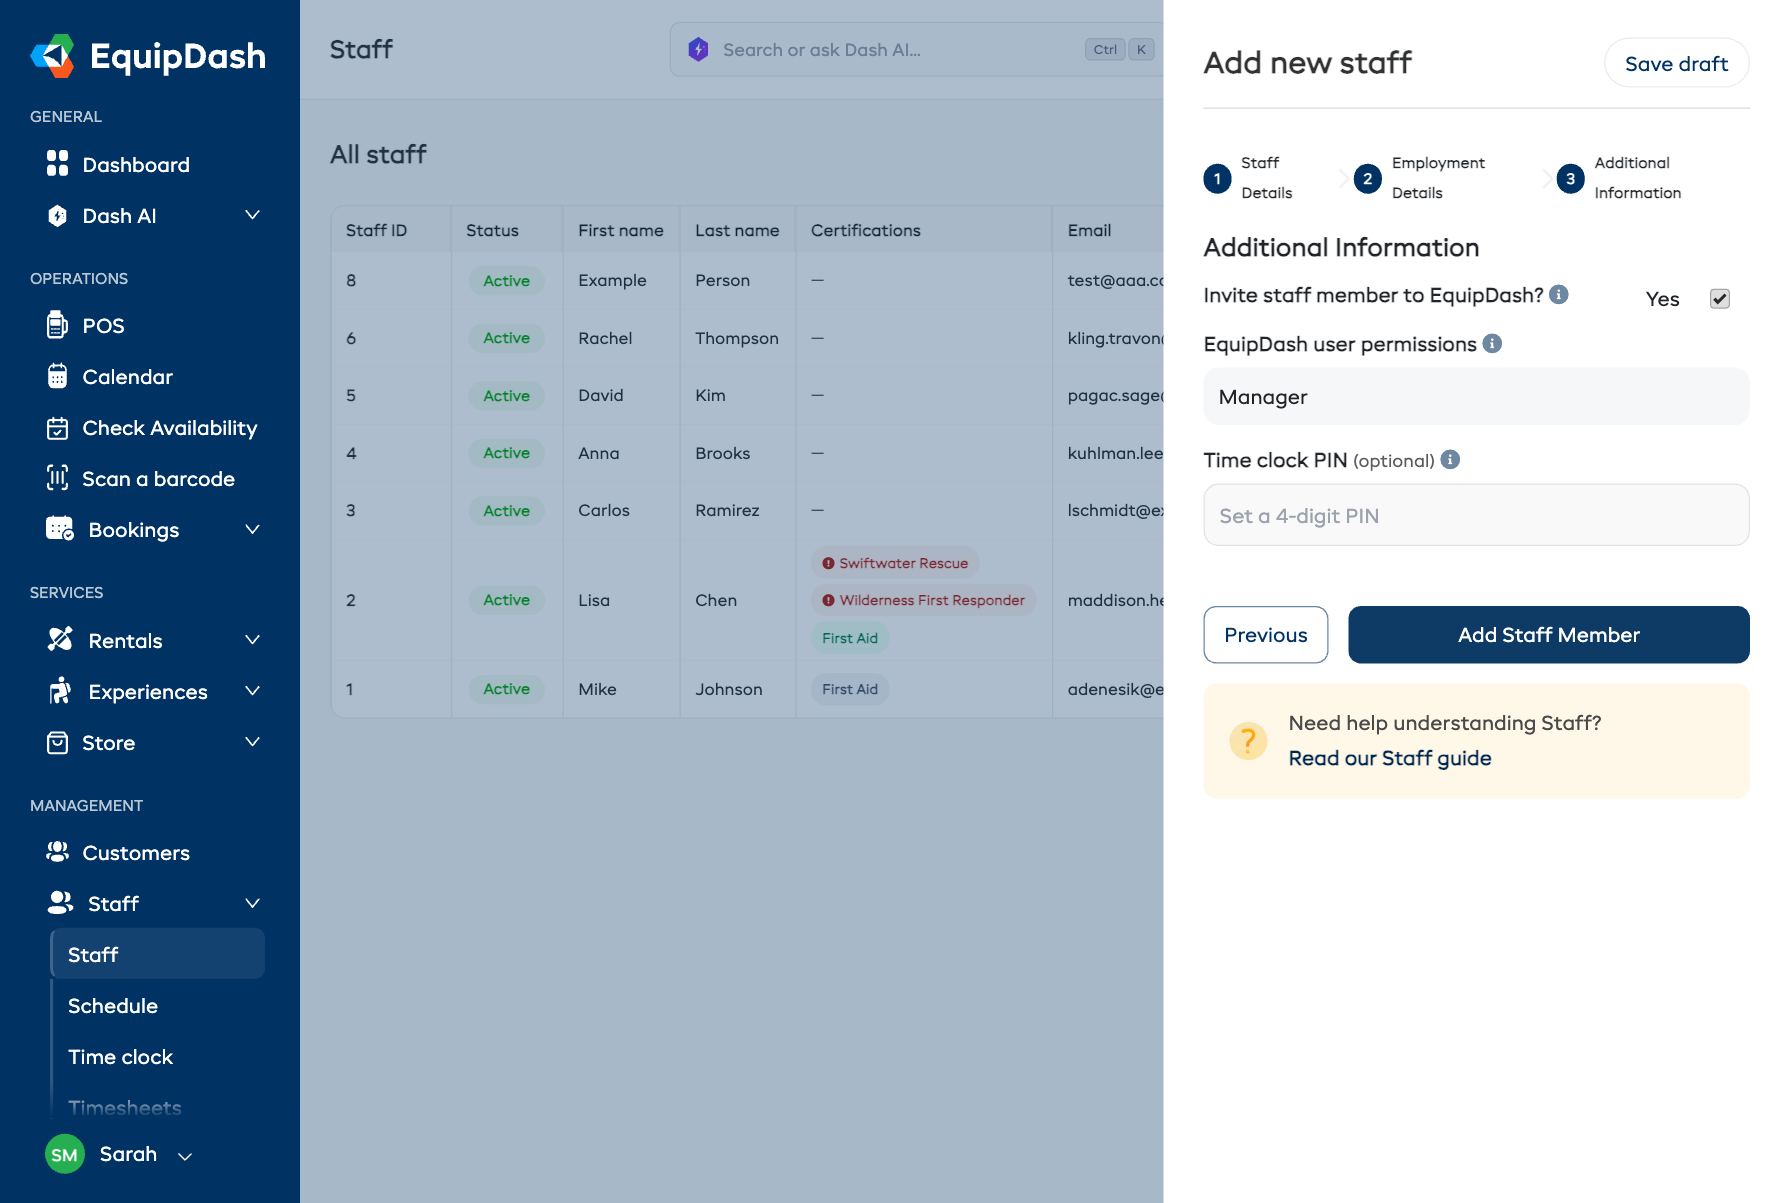
In this final step:
- Toggle Invite staff member to EquipDash? on if this person should be able to log in. When enabled, an invitation email is sent so they can set up their login.
- When the invite is on, choose their EquipDash user permissions — this controls what they can see and do in the portal (Admin, Manager, Staff, or a Custom role). It's pre-filled from the default access set on their job role, and you can change it here for this person. If you choose Custom, pick one of your saved custom roles.
- Optionally set a 4-digit Time clock PIN so they can clock in and out at the time clock.
When you are finished, click Add Staff Member to create the staff profile.
The EquipDash user permissions dropdown only appears for users who can manage your team. If you don't have team-management access, invited staff are added with basic Staff access, and an admin can adjust it later at Settings → Team.
After Adding a Staff Member
Once saved, the staff member appears in your staff table. From here you can:
- Set their availability so they appear correctly in schedules.
- Assign them to locations if you have multiple sites.
- Add them to schedules and shifts.
Tips
- Use the staff member's real email address. This is the email they will use to log in to EquipDash. It cannot be shared with another account.
- Job role and access are separate. The Job role field sets a job title (Guide, Instructor, etc.) used for scheduling and filtering. What a person can see and do is their EquipDash user permissions, which you set when you invite them (and can change any time at Settings → Team). A job role can carry a default access level so the right permissions are pre-filled automatically. See Roles & Access for a full breakdown.
- Set availability early. Adding a staff member to the scheduling system is most useful once their availability is configured. See Setting Availability to do this straight away.
Importing Multiple Staff Members
If you need to add many staff members at once, use the bulk import feature instead.
- In the staff table, click the Action dropdown.
- Select Import staff and follow the on-screen instructions to upload a CSV file.
You can also use Export from the same Action dropdown to download your current staff list.