Creating Store Products
Adding a new store product to EquipDash takes just a few minutes. The product creation wizard guides you through three steps: product details, pricing, and additional details.
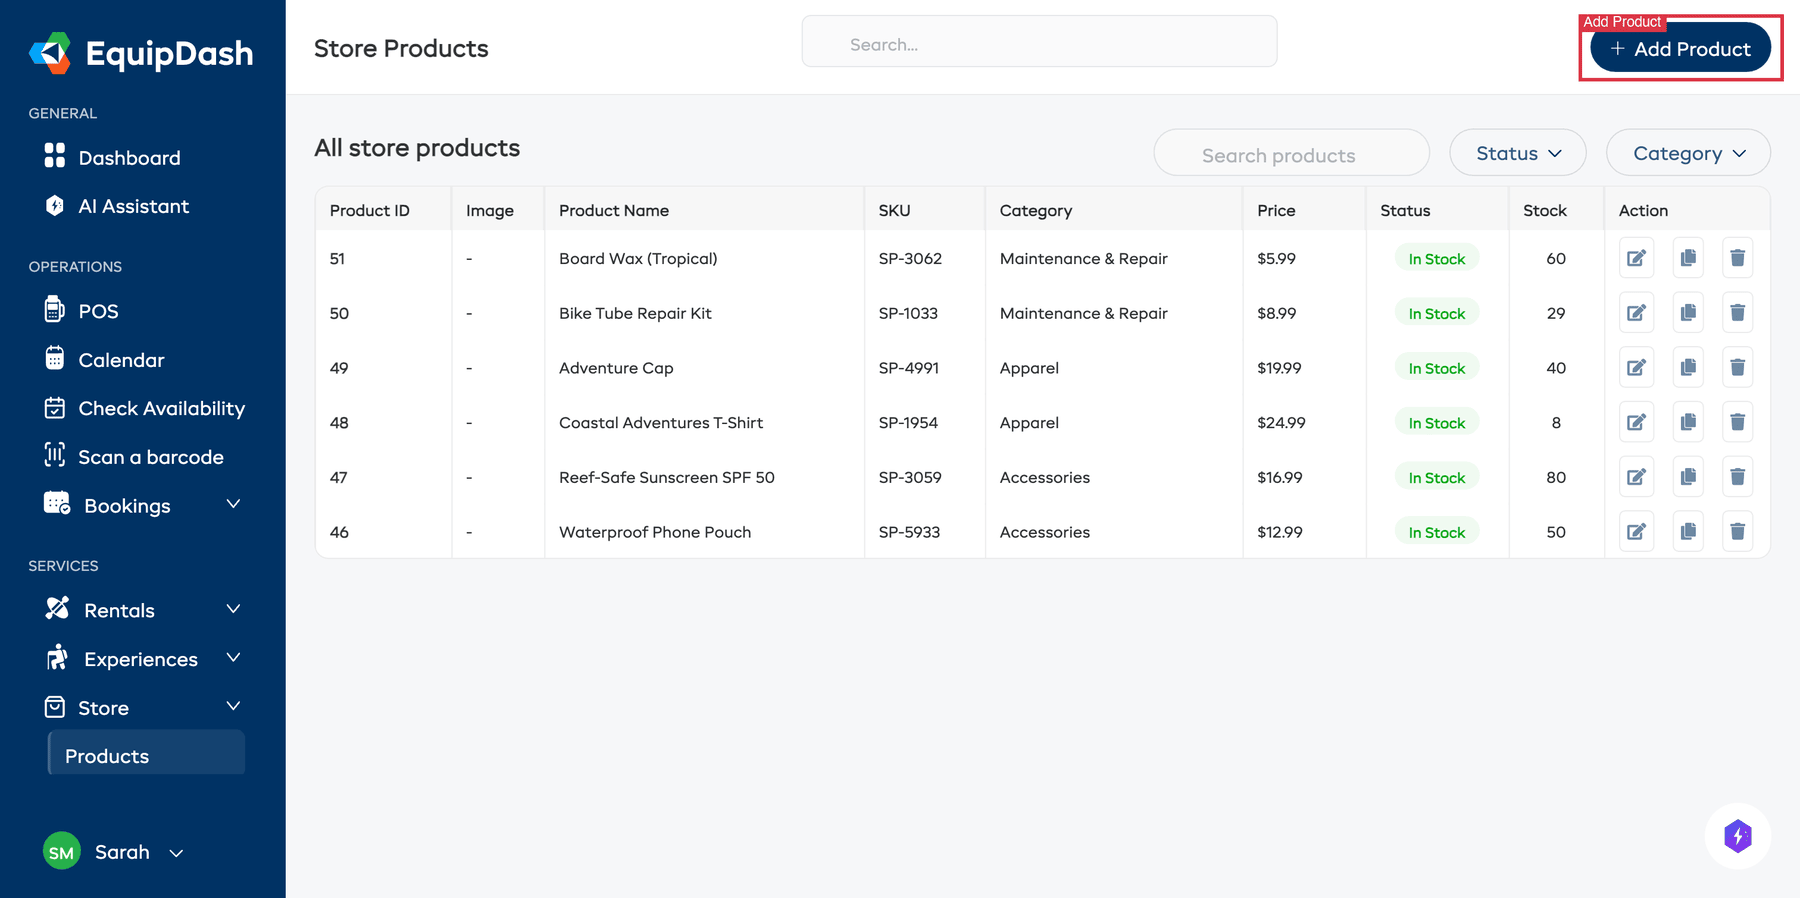
Opening the Product Form
- Go to Store > Products in the left sidebar.
- Click the Add Product button in the top-right corner.
- The product creation wizard will open.
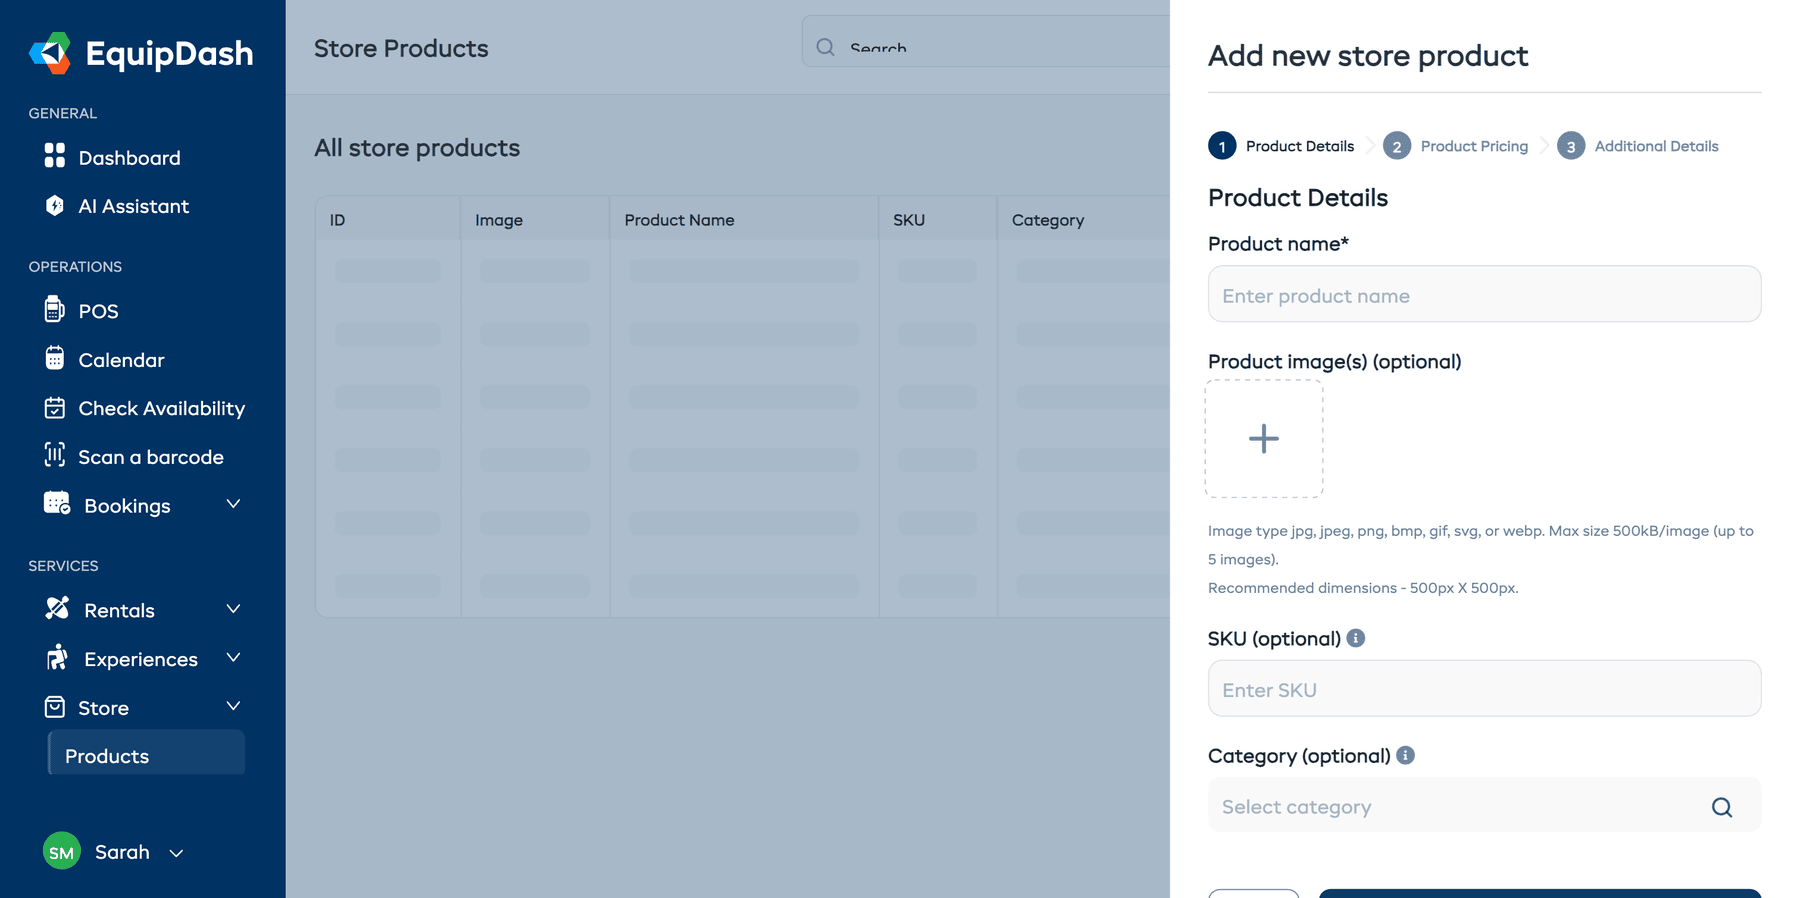
Step 1: Product Details
Fill in the core product information:
- Enter a Product name for the product (e.g., "Ski Wax Kit"). This field is required.
- Optionally upload Product image(s) to showcase your product:
- Click the image upload area or drag files in.
- You can upload up to 5 images (max 500KB each, recommended 500px x 500px).
- Click the star icon on an image to set it as the default image (shown in product listings).
- Click the X to remove an image.
- Optionally enter a SKU (stock-keeping unit) for internal reference.
- Optionally select a Category to organize the product, or leave it uncategorized.
- Click Next to continue to pricing.
Step 2: Pricing
Set the product's pricing:
- Enter the Price -- the amount customers pay.
- Optionally enter a Compare at Price -- an original or RRP price that will be shown with a strikethrough to indicate a discount.
- Click Next to continue to additional details.
At the top of Step 2 you'll see a Suggest prices button. Click it and Dash AI will research what similar items sell for in your area, then suggest a competitive Price and (if applicable) Compare at Price. Click Apply to form to fill the fields. See the full guide: Suggest Prices with Dash AI.
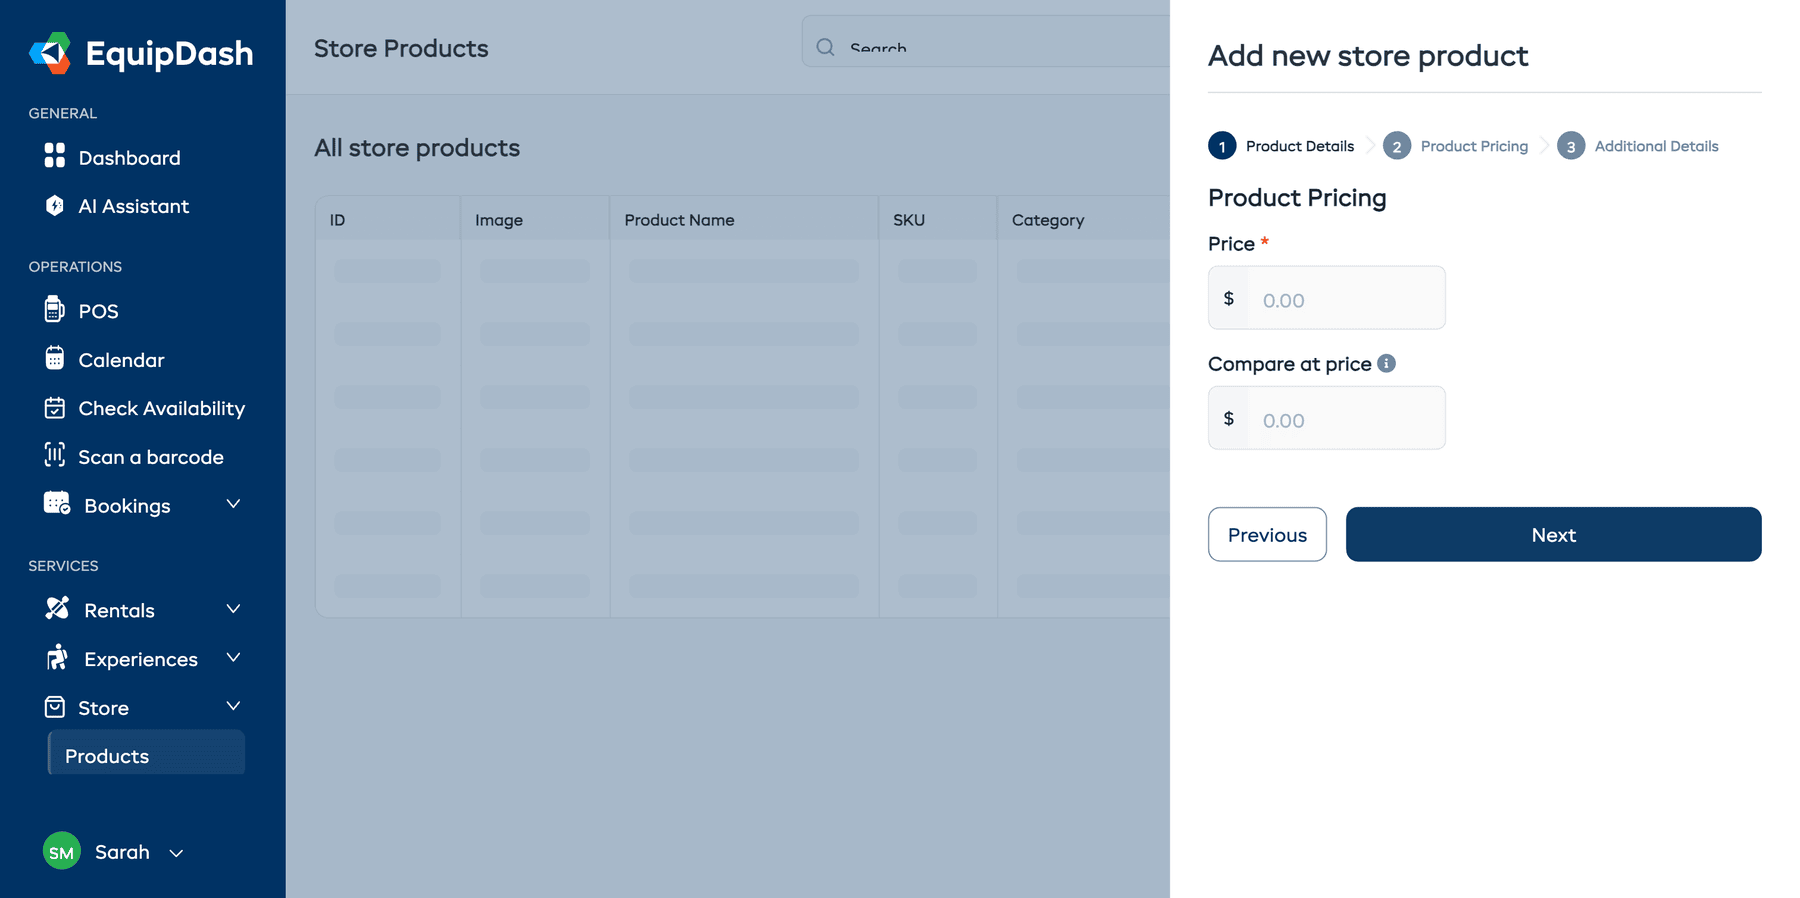
If you set both a price and a compare-at price, customers will see the discount on the store widget (e.g., $59.99 $45.00).
Step 3: Additional Details
Configure the remaining product settings:
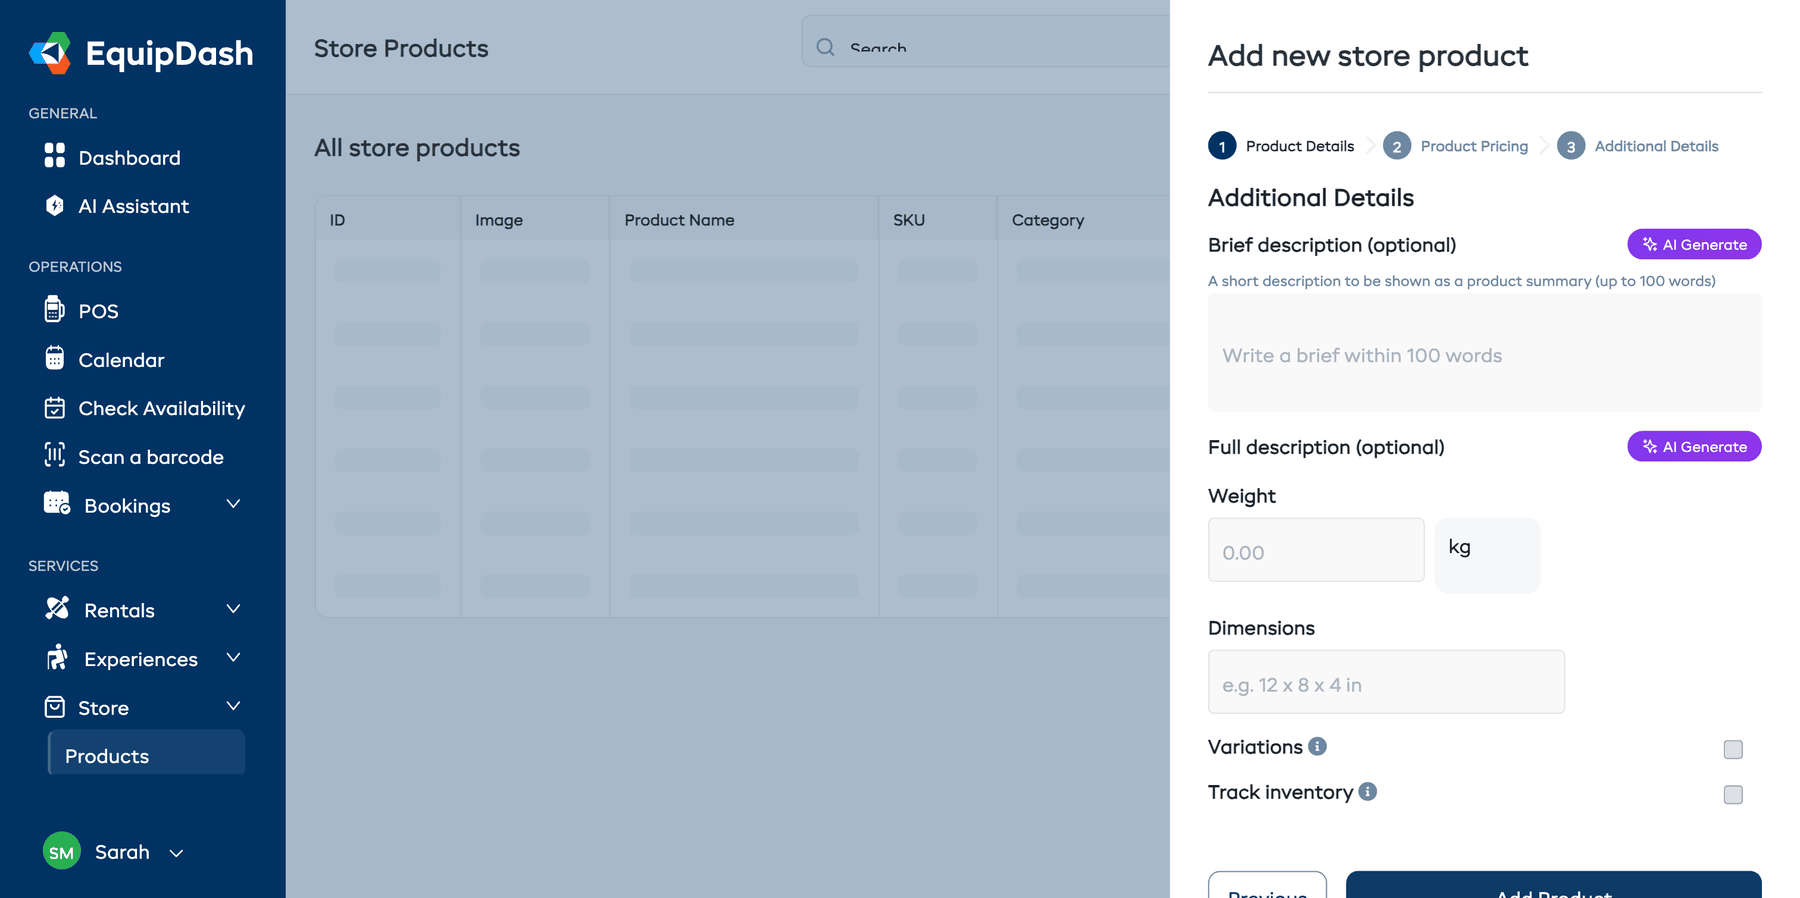
Description
- Enter a short Brief description -- appears in product listings and search results. You can click the AI Generate button to automatically create one based on the product name.
- Use the Full description editor for a detailed product description with rich text formatting. An AI Generate button is also available here.
Weight & Dimensions
These optional fields help with product information display:
- Enter the Weight and select a unit (kg, lb, g, or oz).
- Enter Dimensions as a text string (e.g., "12 x 8 x 4 in").
Weight and dimensions are displayed on the product detail page in the store widget.
Variations
If your product comes in different options (e.g., sizes or colors):
- Toggle Variations on.
- In the Property list, add variation properties by entering a name (e.g., "Size", "Color"). Click + Add property to add more.
- After creating the product, you can add specific variation values (e.g., "Small", "Medium", "Large" for Size) from the product's Variations tab.
For a detailed guide on setting up variations, see Product Variations.
Inventory Tracking
Control stock levels for the product:
- Toggle Track inventory on if you want to monitor stock quantities.
- Choose the Tracking type:
- Group -- Stock is tracked as a total quantity. Best for products where individual items don't need to be identified.
- Item -- Each item is tracked individually with optional identifiers and barcodes. Best for serialized or unique items.
- After creating the product, you can manage stock quantities from the product's Inventory tab.
You can set a low-stock threshold in Settings > Store to receive alerts when products are running low. See Store Settings for more details.
For a detailed guide on both tracking types, see Inventory Management.
Saving
Click Add Product to create the product. You will be taken back to the product listing where your new product will appear.
New products are created with Active status by default, meaning they are immediately visible to customers. You can change the status to Archived at any time from the product detail page to hide it.
Related Guides
- Managing Store Products -- Editing, archiving, and duplicating products.
- Product Variations -- Detailed guide to setting up variations.
- Inventory Management -- Tracking and adjusting stock, including item-level tracking.
- Store Categories -- Organizing products with categories.
- Adding Store Products to Bookings -- Using the POS to sell products.
- Store on the Booking Widget -- Making your store visible to customers.
- Suggest Prices with Dash AI -- Let Dash research competitor pricing and pre-fill Step 2.