Store Widget
The store widget lets your customers browse and purchase your store products directly on your website. It integrates seamlessly alongside your rental and experience widgets, providing a unified shopping experience.
Store products only appear on your widget when the Store module is enabled. Disabling the module hides them across the portal and the widget.
Enabling the Store Widget
Before the store widget is available, you need to enable the Store module:
- Go to Settings in the left sidebar.
- Click Store from the settings menu.
- Toggle Enable Store on.
- Click Update.
Once enabled, the store widget URL becomes available in Settings > Booking widget on the Embed options tab.
For more details on all store settings, see Store Settings.
How Customers Browse
Product Listing
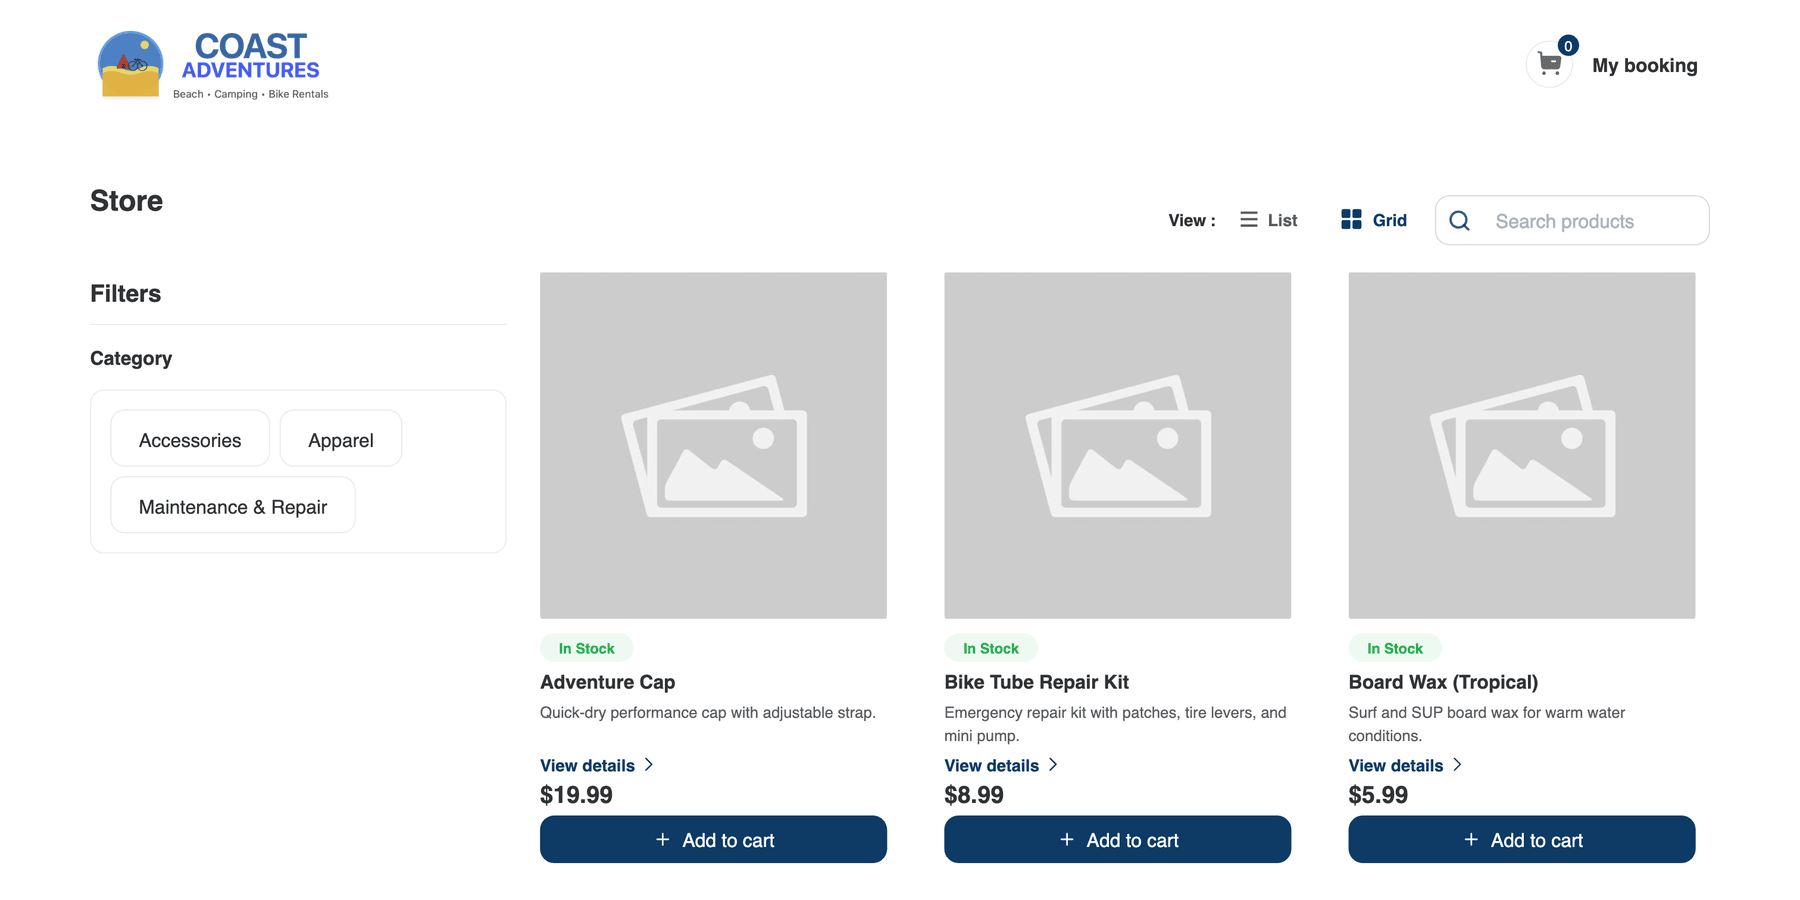
The store listing page shows all your active, standalone products in a browsable grid or list view. Customers can:
- Search — Type a product name or keyword in the Search products bar to filter results.
- Filter by category — Click category chips in the Filters sidebar to narrow results (e.g., "Accessories", "Apparel", "Maintenance & Repair").
- Switch views — Toggle between List and Grid view using the View: toggle.
Each product card shows:
- Rotating image strip — on desktop images cycle, on mobile customers can swipe
- Stock badge (e.g., "In Stock" in green)
- Product name
- Short description
- View details link
- Price
- + Add to cart button
Product Detail
When a customer clicks View details on a product, they see the full product detail page including:
- Image gallery — Browse through all product images with thumbnail navigation.
- Content blocks — Highlights, What's Included, What to Bring, Restrictions, Health & Safety, Cancellation notes
- Breadcrumb home icon in the top-left to return to the listing
- Price — The current price, with a crossed-out compare-at price if set.
- Stock status — Whether the product is in stock, out of stock, or running low.
- Variations — If the product has variations, customers can select their preferred option. See Product Variations for more details.
- Description — The full product description.
- Product details — Weight, dimensions, SKU, and category information.
- Related products — Other products in the same category.
Adding to Cart
When a customer finds a product they want to purchase:
- They select a variation (if the product has variations).
- They choose the desired quantity.
- They click + Add to cart.
- The product is added to their shopping cart.
- They can continue browsing or click My booking to proceed to checkout.
If a product is out of stock and backorders are not allowed, the Add to cart button is disabled.
Unified Cart
The store widget uses a unified cart that combines store products with rental and experience items. This means customers can shop for store products and book rentals or experiences in a single transaction.
Supported Combinations
| Combination | Supported |
|---|---|
| Store products only | Yes |
| Rental items only | Yes |
| Experience items only | Yes |
| Store products + Rental items | Yes |
| Store products + Experience items | Yes |
| Rental items + Experience items | No (separate bookings required) |
How the Unified Cart Works
- When a customer adds store products to their cart alongside rental or experience items, all items appear together in the cart.
- The cart header shows "My booking" for all orders.
- The cart badge displays the combined count of all items.
- At checkout, all items are included in a single booking.
The unified cart means customers do not need to complete separate checkouts for store products and rentals/experiences. Everything is handled in one flow.
Cart Constraints
- Customers cannot combine rental items and experience items in the same cart. If they try, they will be prompted to clear one type before adding the other.
- Store products can always be added alongside any other item type.
Checkout
Store products go through the same checkout flow as rentals and experiences:
- The customer enters their name, email, and phone number.
- They can apply a promo code or voucher if applicable.
- The order summary shows all items together — rentals, experiences, and store products — with pricing, taxes, and the total.
- If online payments are enabled, the customer enters their payment details via Stripe.
- They click Complete Booking.
- A confirmation page appears showing all items and a confirmation email is sent.
For mixed bookings (e.g., rental + store), the booking type follows the primary item. Store products are attached to the booking as additional items.
Embedding the Store Widget
The store widget uses the same embedding approach as your rental and experience widgets.
- Go to Settings > Booking widget.
- Open the Embed options tab and choose an embed type — use Full widget embed to show your whole store, or Single product to embed one item.
- Copy the generated snippet. It's a small
<script>tag plus a<div class="equipdash-widget" data-shop="…">placeholder — paste both where you want the store to appear.
Or use Share a link to link directly to the store URL for a full-page experience.
For detailed embedding instructions, see Embedding the Widget.
Customisation
The store widget inherits the same color and branding settings as your other widgets:
- Primary color — Used for buttons, links, and active states.
- Logo — Displayed in the widget header.
- Business name — Shown alongside the logo.
To customize these, go to Settings > Booking widget. See Widget Customisation for details.
What Customers See
Only products that meet all of the following criteria appear on the store widget:
- Status is Active
- The product is marked as Standalone (add-on-only products do not appear)
- The Store module is enabled in your settings
Products marked as Add-on only (not standalone) will not appear on the store widget but can still be added to bookings through the POS. See Adding Store Products to Bookings for details.
Related Guides
- How the Store Works — Understanding the Store module.
- Creating Store Products — Adding products to sell.
- Product Variations — How variations appear on the widget.
- Inventory Management — Stock tracking and out-of-stock behavior.
- Store Settings — Enabling the store and configuring settings.
- Embedding the Widget — How to add the widget to your website.
- Widget Customisation — Customizing colors and branding.
- Testing Your Widget — Verifying the store widget works correctly.