Adding Store Products to Bookings
Store products can be sold through the Point of Sale (POS) — either as their own standalone order, or pinned onto a rental or experience booking as add-ons. The redesigned POS keeps both flows on a single page with a cart-style right rail.
How It Works
The POS has three booking-type pills at the top of the page: Rental, Experience, and Store. Pick Store for a product-only order. Inside Rental and Experience views there's also a Store (add-on) sub-tab so you can pick up store products in the same cart as a rental or tour.
Adding Store Products to a Standalone Order
Step 1 — Open the POS
Click POS in the left sidebar, or click + New Booking from the Bookings tab.
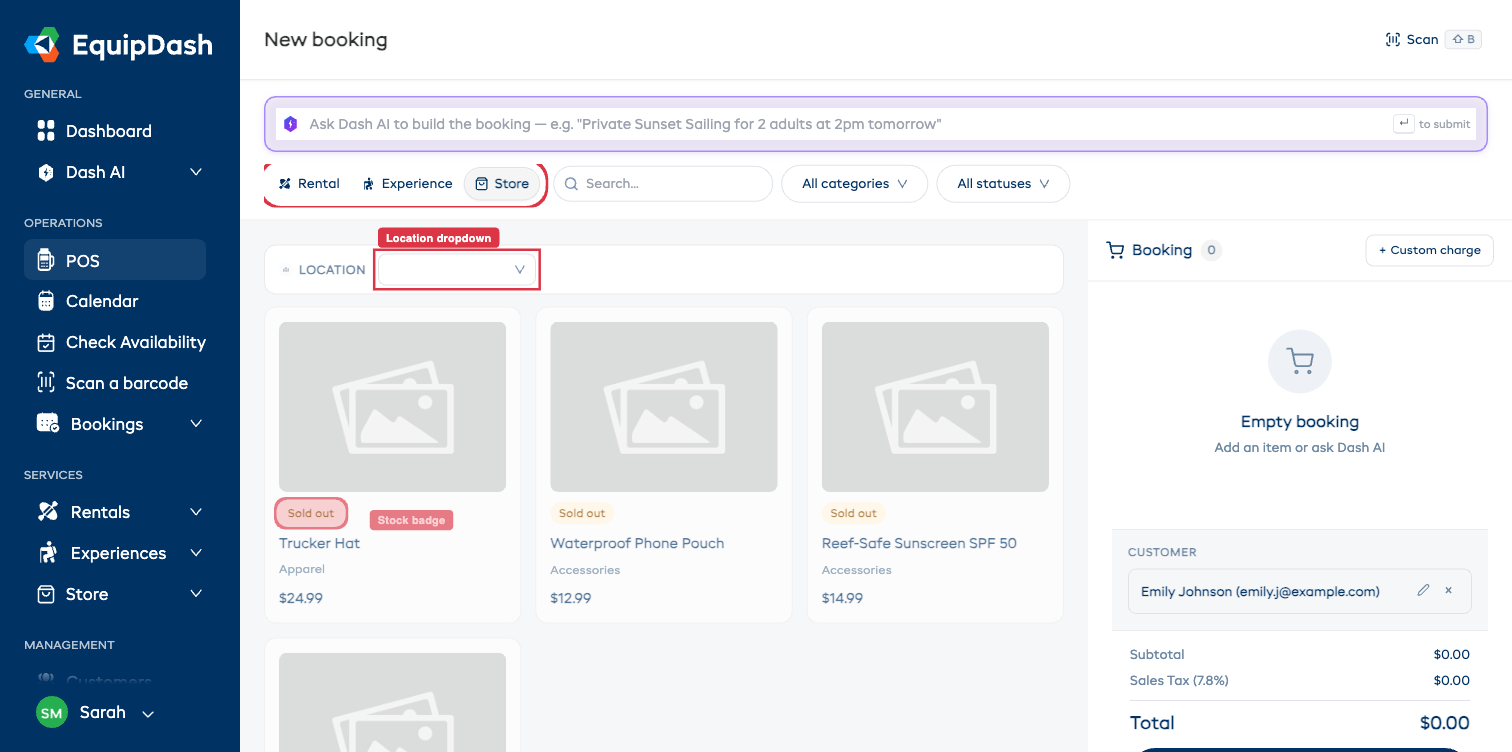
Step 2 — Pick Store as the booking type
Either click the Store tile on the empty-state landing, or click the Store pill at the top.
The store product grid loads with the products available at the selected location.
Step 3 — Find the product
- Use the Search box to filter by product name.
- Use All categories to filter by store category.
- Use All statuses to filter by stock status (in stock / low stock / sold out).
- The location dropdown above the grid scopes to a single location's stock.
Step 4 — Add to cart
Click a product card. The card expands inline showing price, available stock, and a quantity stepper. Set the quantity (or pick a variation) and click Add N to booking.
The product appears in the right-rail Booking cart with its own row, quantity stepper, and trash icon.
Step 5 — Adjust + create
In the cart you can:
- Change quantity with the row's − / + buttons.
- Remove an item with the trash icon.
- Add tags, notes, or a custom charge.
- Add the customer via the Add customer popup.
- Apply a promo code or discount under ADJUSTMENTS.
When you're ready, click Create booking.
Adding Store Products as Add-ons to a Rental or Experience
When the customer is also renting gear or booking an experience:
- Set up the rental / experience side of the booking first (pick the type, dates, products).
- Inside the Rental or Experience view, click the Store (add-on) sub-tab.
- Browse and add store products the same way — they land in the same cart.
The cart can hold any mix of rentals, experiences, bundles, and store products. Totals, tax, discounts, and the waiver toggle apply across the whole booking.
Adding Products to an Existing Booking
You can also add store products to a booking that's already created:
- Go to Bookings and open the booking detail page.
- Click Action ▾ → Edit.
- In the Edit page, switch to the Store sub-tab and add products as above.
- Save the edit. The total is recalculated and the customer is taken through the Reconcile Balance flow if there's a balance owed.
Removing Products from a Booking
- During booking creation: click the trash icon next to the product in the cart.
- On an existing booking: open Edit, remove the line, and save. Stock is restored automatically (when inventory tracking is on).
Stock and Availability
- Products with inventory tracking show their current stock as a badge ("30 available", "Low stock", "Sold out"). You can't add more units than are in stock unless backorders are allowed.
- Products without inventory tracking can be added in any quantity.
- If a product is Sold out and backorders are disabled, the Add button is disabled on the card.
- Adding a product to the cart reserves stock immediately. Removing it (or cancelling the booking) restores stock.
Related Guides
- Creating a POS Booking — full POS walkthrough.
- POS Tips & Shortcuts — speed tips, AI prompts, mobile.
- Creating Store Products — setting up products for sale.
- Product Variations — offering size, color, and other options.
- Inventory Management — how stock is affected when products are added to bookings.
- Store on the Booking Widget — how customers purchase products online.