Guide Forms Growth+This feature requires the Growth+ plan or higher
A guide form is a form your staff fill in before an experience departs — a pre-departure safety sheet, a vehicle or equipment check, a headcount, or a conditions-of-the-day record. Unlike a participant waiver, it is not sent to customers: your guide opens it from the day's departure, fills it in, and saves it. You can download or print the completed sheet as a PDF.
Guide forms are a type of waiver/form, so you build them in the same place and with the same drag-and-drop builder as your customer waivers — they just behave differently once published.
Guide forms attach to experiences, so the option only appears when the Experiences module is enabled. If you only run rentals, you won't see it.
Creating a Guide Form
-
Go to Waivers & Forms in the left sidebar.
-
Click + New waiver/form.
-
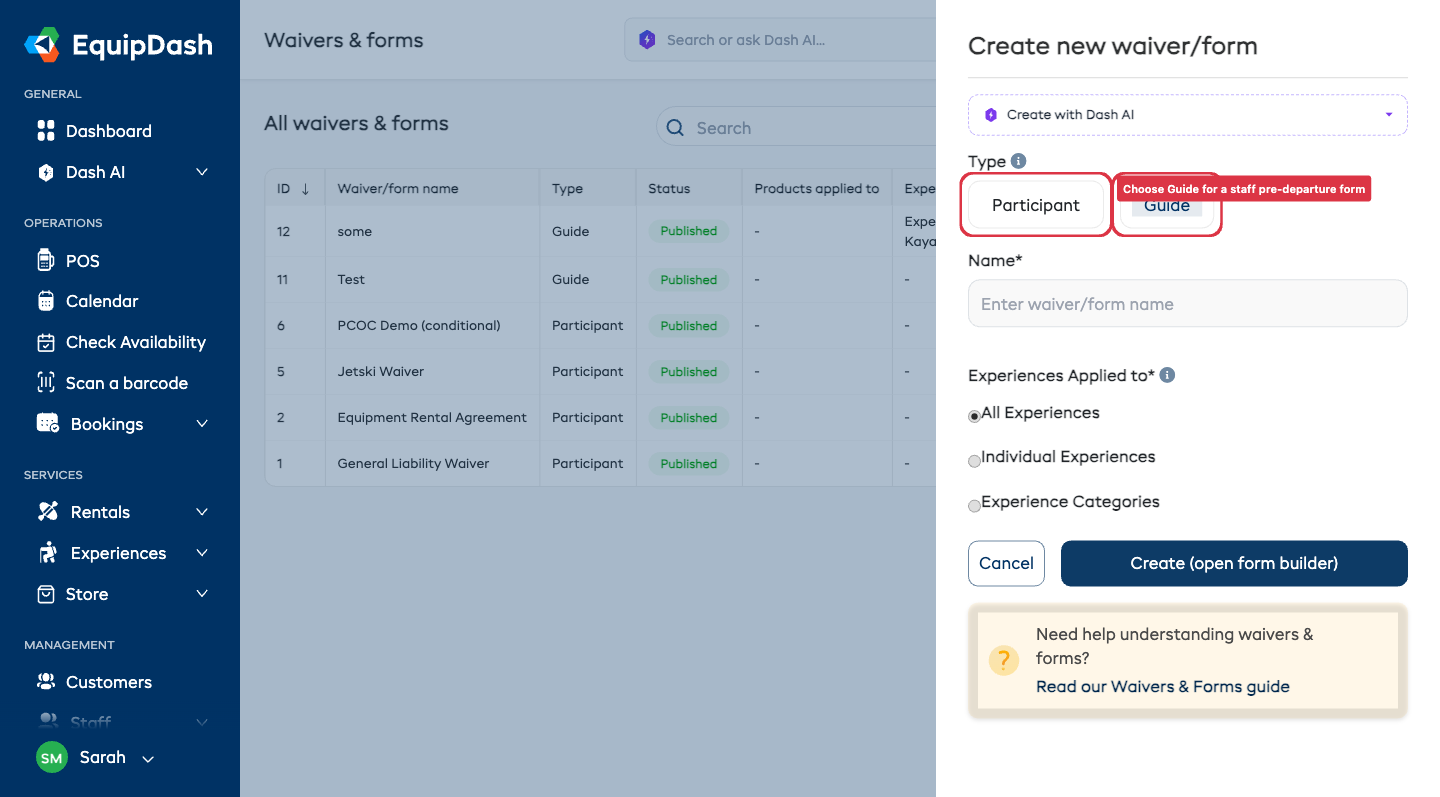
At the top of the panel, under Type, choose Guide. (The default, Participant, is a normal customer-facing waiver/form.)
-
Give it a Name (e.g. "Pre-departure sheet").
-
Choose which experiences it applies to under Experiences applied to — All experiences, Individual experiences, or Experience categories. (Guide forms don't apply to products, so there's no Products option.)
-
Click Create (open form builder).
Building the Form
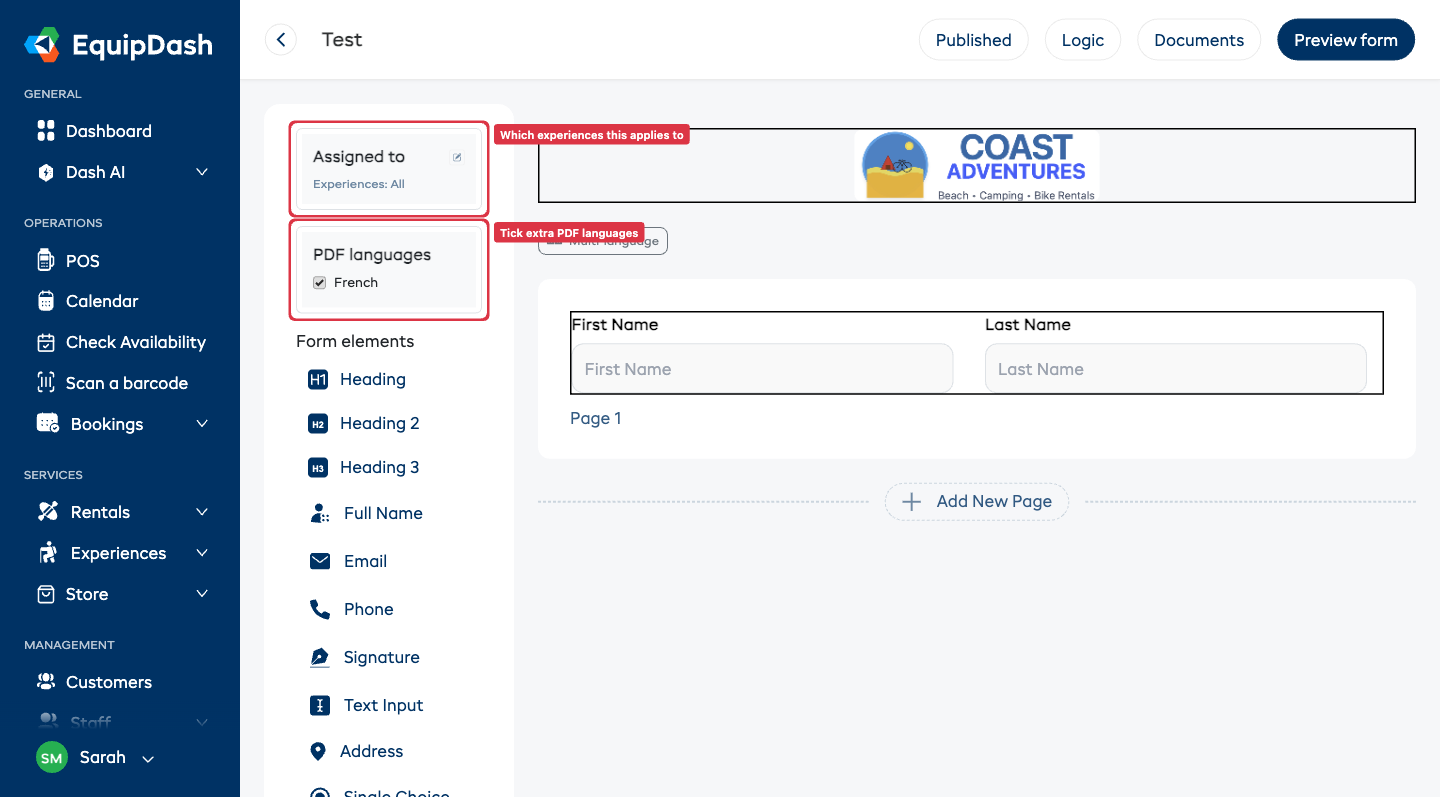
Guide forms use the same builder as waivers — drag fields in from the left, click a field to edit it. Useful field types for a pre-departure sheet include Date, Time, Single Choice (e.g. which route), Multiple Choice (e.g. an equipment checklist), Number (e.g. vehicles, participants), Short/Long Text, and Signature.
Auto-fill from the departure
So your guide types as little as possible, you can pre-fill fields from the departure and the guide filling it in. When editing a text, date, time or number field, open Auto-fill from booking and pick a source under Departure or Guide:
- Departure date, Departure time, Return time
- Number of participants
- Experience name
- Guide name, Guide phone, Guide email
When the guide opens the form, those fields are already filled in — they only complete what's new (conditions, checks, signature).
Producing the PDF in other languages
If your shop has extra languages enabled, a PDF languages box appears in the builder. Tick any language to also produce the completed PDF in it. English is always produced.
When you're done, click Publish. (There's nothing to share with customers, so publishing a guide form simply makes it available on your departures — no public link or QR code.)
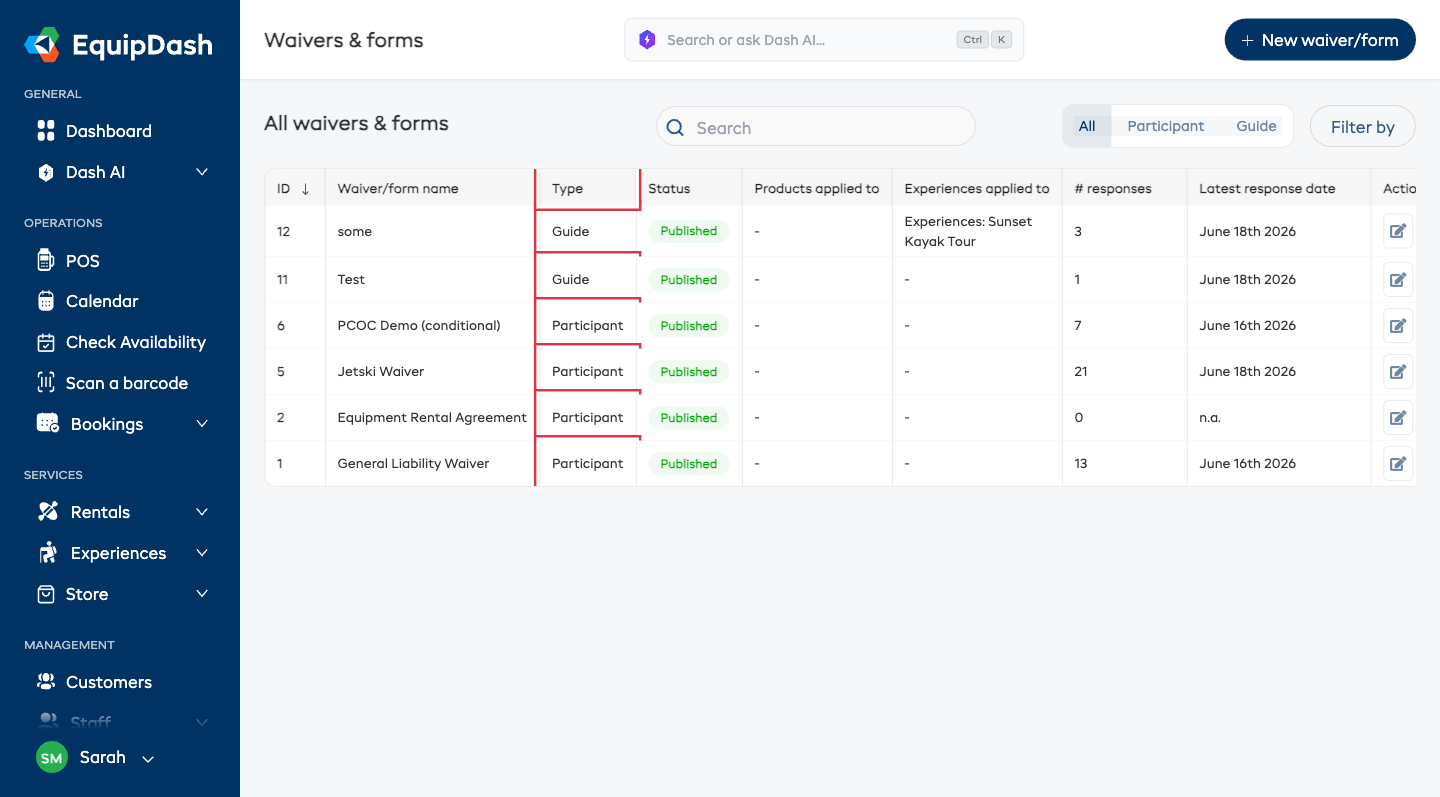
Finding Guide Forms in the List
Back on the Waivers & Forms page, a Type column shows whether each form is a Participant or Guide form, and a filter (All / Participant / Guide) lets you narrow the list. These only appear when the Experiences module is on.
Filling a Guide Form on the Day
Your guides fill the form from the departure itself:
-
Open Experiences → Manifests (or open the departure from the Calendar).
-
Choose the departure for the trip.
-
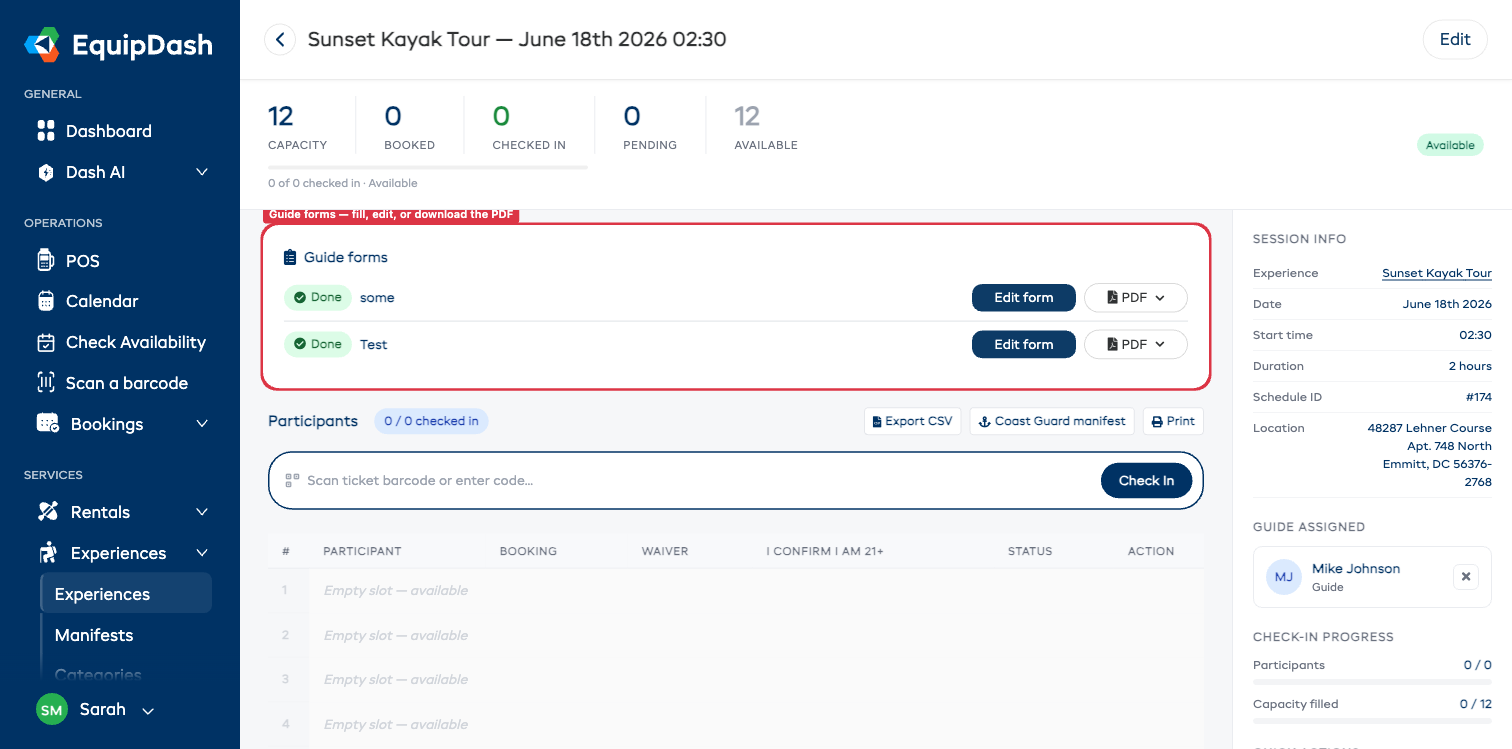
In the Guide forms panel, click Fill form (it reads Edit form once it's been filled).
-
The form opens with the date, time, participant count and guide details already filled in. Complete the rest and click Save sheet.
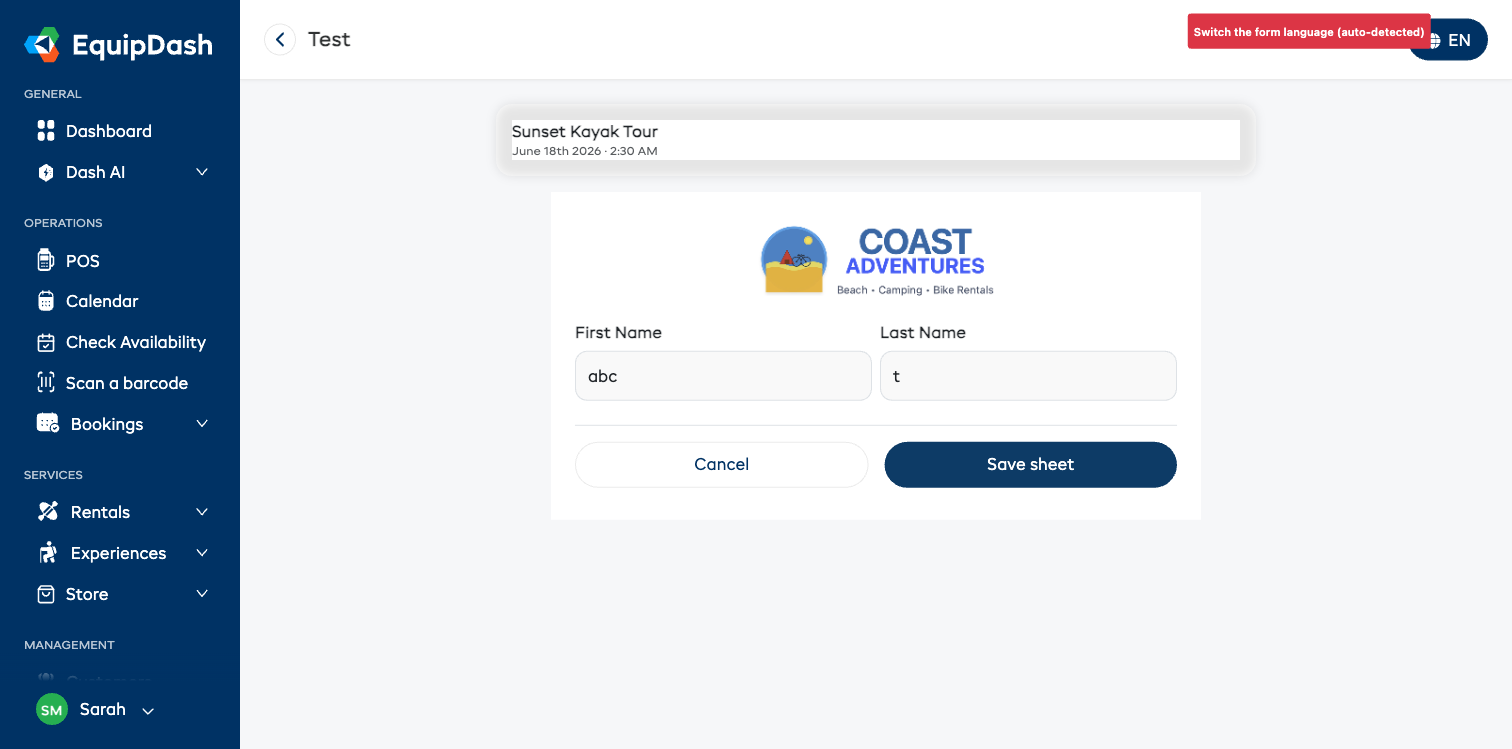
If your shop offers more than one language, the guide can switch the form's language with the globe button at the top right (it also picks up their browser's language automatically).
Guides can also fill the form from their phone. In the EquipDash mobile app, open the departure's manifest and tap the Guide tab — each pre-departure form is listed there with a Done / Not done badge and a Fill form button. The date, time, headcount and guide details are pre-filled, the signature is captured with a finger, and you can switch languages the same way. Filling it on the phone or on the web updates the same departure.
Seeing What's Done
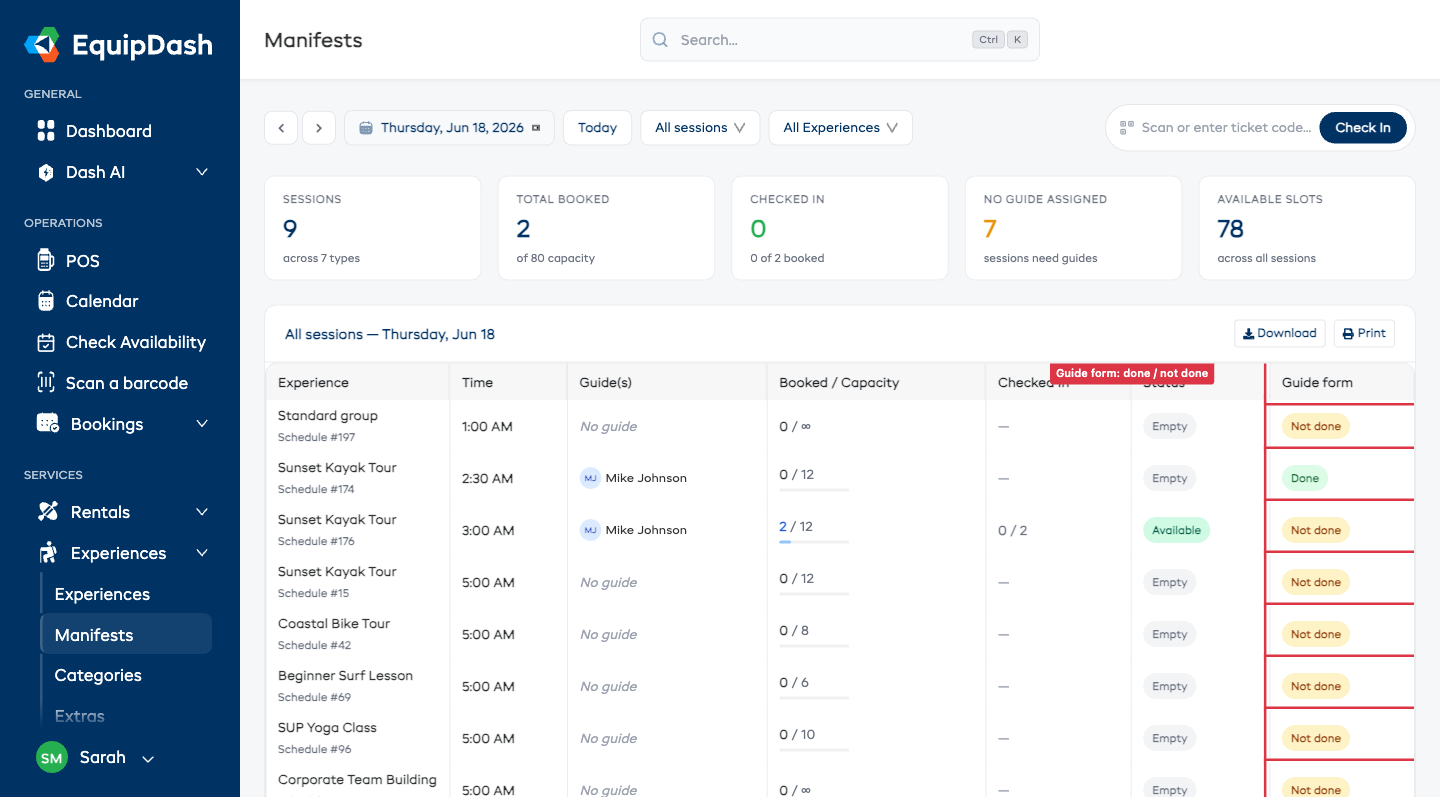
-
On the Manifests page, a Guide form column shows Done or Not done for each departure (only for experiences that have a guide form).
-
On the departure detail page, the Guide forms panel shows the status and a PDF button to download or print the completed sheet. If you produce it in more than one language, the PDF button becomes a menu with one option per language.
Requiring the Form Before Check-in (Optional)
By default the guide form is informational — it never blocks anything. If you want to make it mandatory:
- Edit the experience.
- Turn on Require guide form before check-in.
Now staff can't check participants in until the guide form for that departure is complete. Staff with the right permission can override with a reason, the same as the booking checklist gate.
Who Can Do What
- Building and editing guide forms uses the same permission as waivers — Manage waivers & forms.
- Filling a guide form uses the Check in participants permission, so the guides who run your manifests can fill them without extra access.