Connecting Viator Growth+This feature requires the Growth+ plan or higher
Setup is a 2-step flow. Step 1 happens in EquipDash. Step 2 happens with Viator. Both are required before Viator can sell your experiences.
Step 1: Connect in EquipDash
-
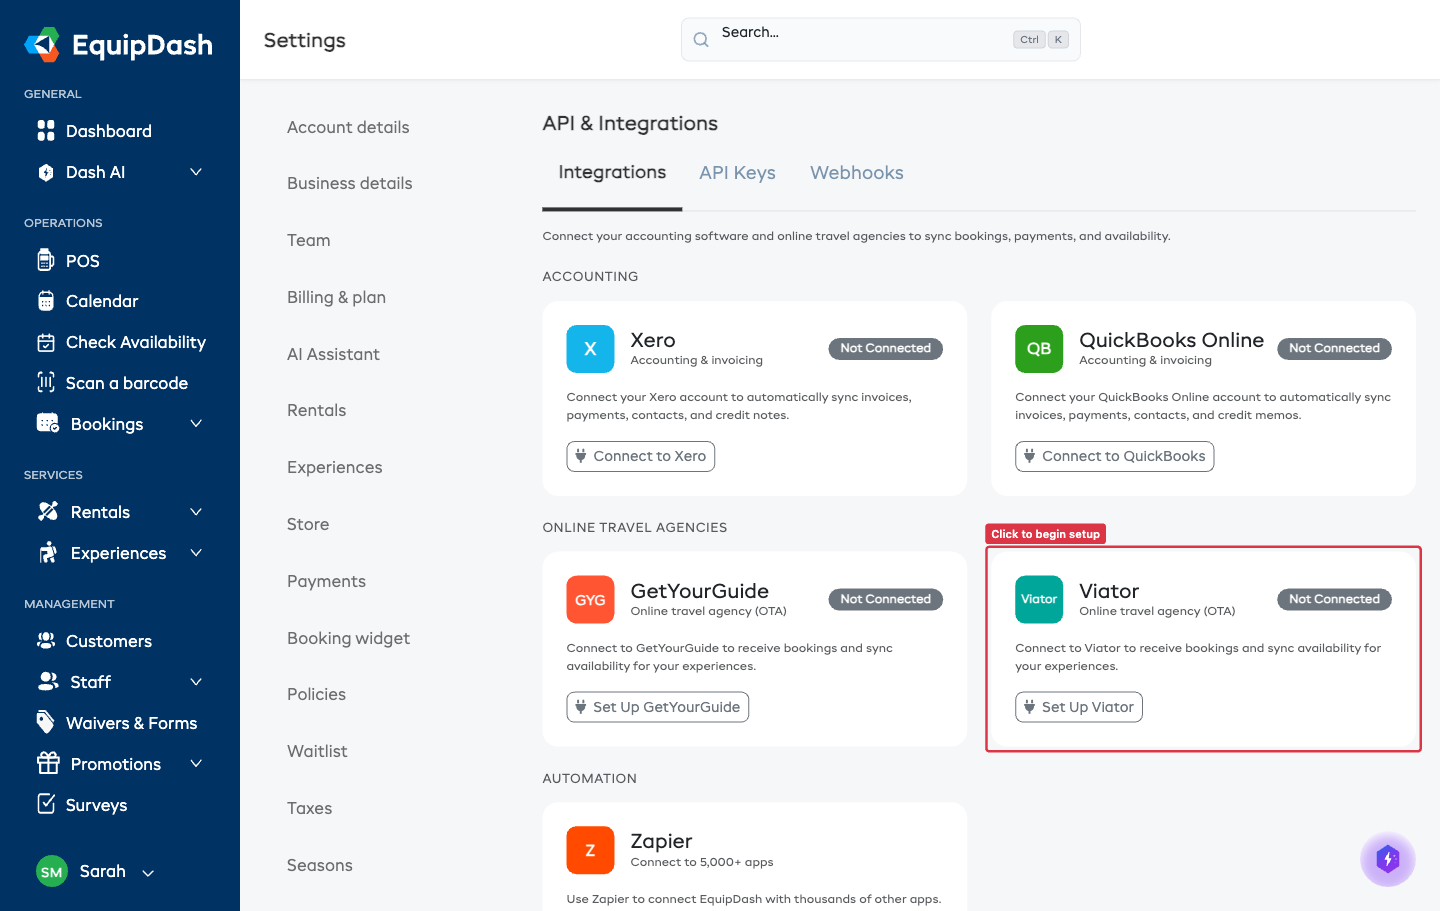
Go to Settings → API & Integrations.
-
Click the Viator tab.
-
Click Connect to Viator.
-
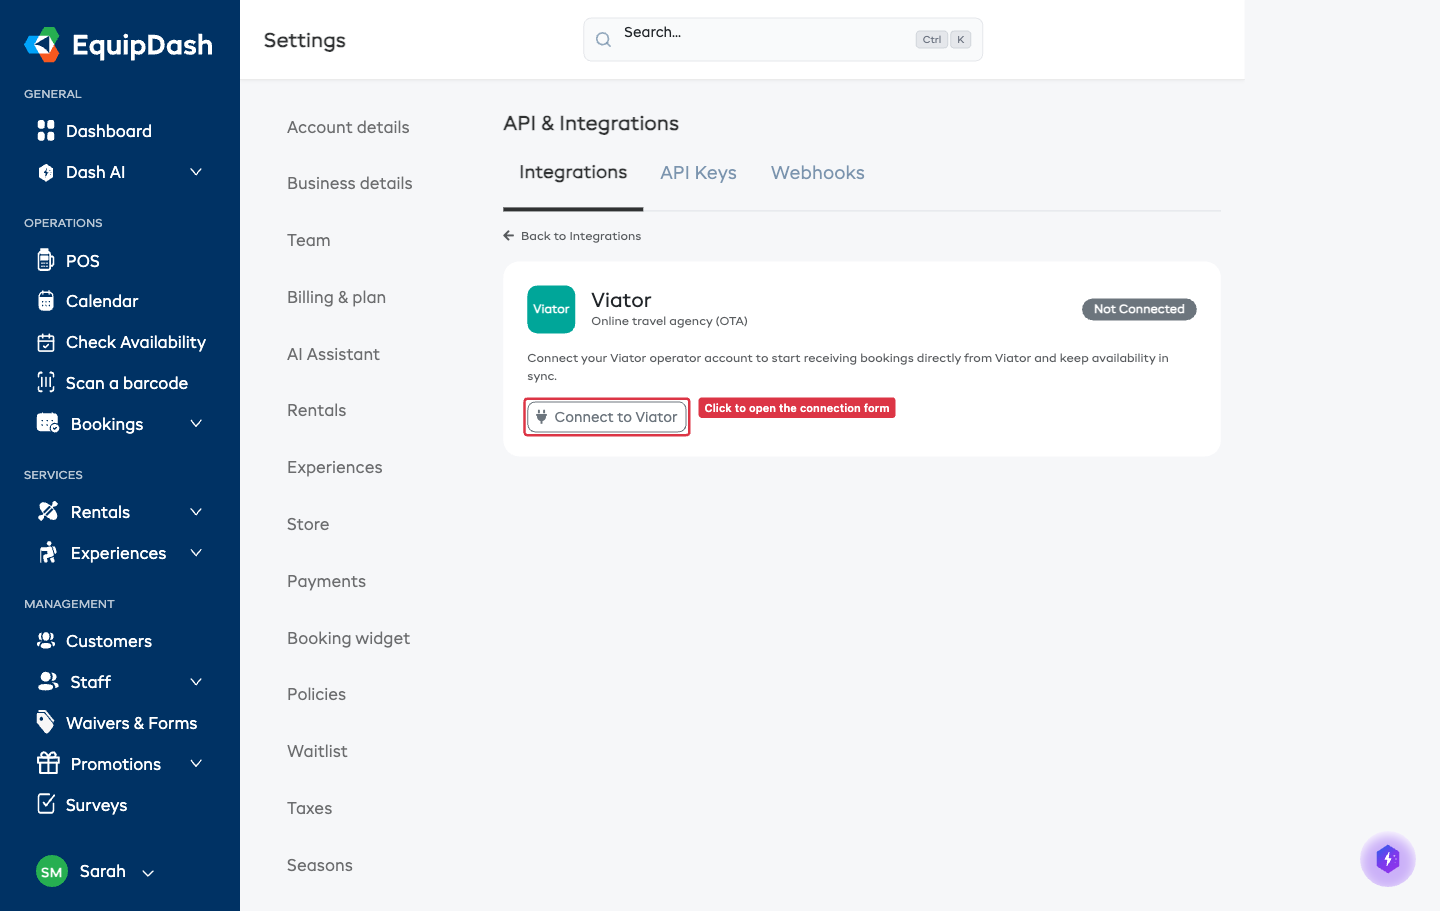
EquipDash generates an inbound API key for you. Click Copy to copy it — this is the key you give to Viator so they can send bookings and availability requests to EquipDash. (You can reveal it with the eye icon, or generate a fresh one.)
-
(Optional but recommended) Enter your Viator Supplier ID — found in your Viator Operator Extranet. It lets EquipDash verify Viator's requests and send updates back to Viator. You can add it later.
-
Click Connect.
That's the entire EquipDash side. All your active experiences are now exposed to Viator automatically — there's no per-experience setup here.
Unlike a username/password, the API key is created on our side. You copy it from EquipDash and hand it to Viator. If you ever need to invalidate it, use Regenerate on the Viator settings page — just remember to send Viator the new key.
Step 2: Hand the key to Viator
Give the inbound API key (and your Viator Supplier ID) to your Viator connectivity manager. Viator uses the key to:
- Pull your catalogue (the list of experiences you sell), and
- Map each of their listings to your EquipDash experiences on their side.
Once Viator has set up the mapping on their end, your experiences go live on Viator. You don't enter any product codes yourself — EquipDash publishes your experiences automatically and Viator links their listings to them.
If the supplier is currently connected to Viator through a different reservation system, Viator will confirm with you before switching the connection over to EquipDash. No action is needed on your side beyond providing the key.
After Connecting
The Viator settings page will show:
- Connected badge and your Viator Supplier ID.
- Connected since — when the connection was established.
- Last synced — the most recent sync activity.
- Your experiences on Viator — every active experience, on by default. See Configuring Viator.
The API key is stored encrypted.
Testing the Connection
Once connected, click Test Connection. EquipDash makes a lightweight call to Viator to confirm the credentials work.
Disconnecting
Open the Viator settings page and click Disconnect. This:
- Stops EquipDash from accepting new inbound requests from Viator.
- Keeps every existing booking untouched.
You can reconnect at any time.
Related Guides
- Viator Overview — what the integration does and how it works.
- Configuring Viator — choosing which experiences sell, sync settings, monitoring.
- Creating Experiences — set up experiences to sell on Viator.
- Rate Categories — configure pricing for different participant types.