Assigning Policies
After creating a policy, you need to assign it to the products or experiences it should cover. You can assign a policy broadly (to all products, all experiences, or both) or selectively (to specific items or categories).
How to Assign a Policy
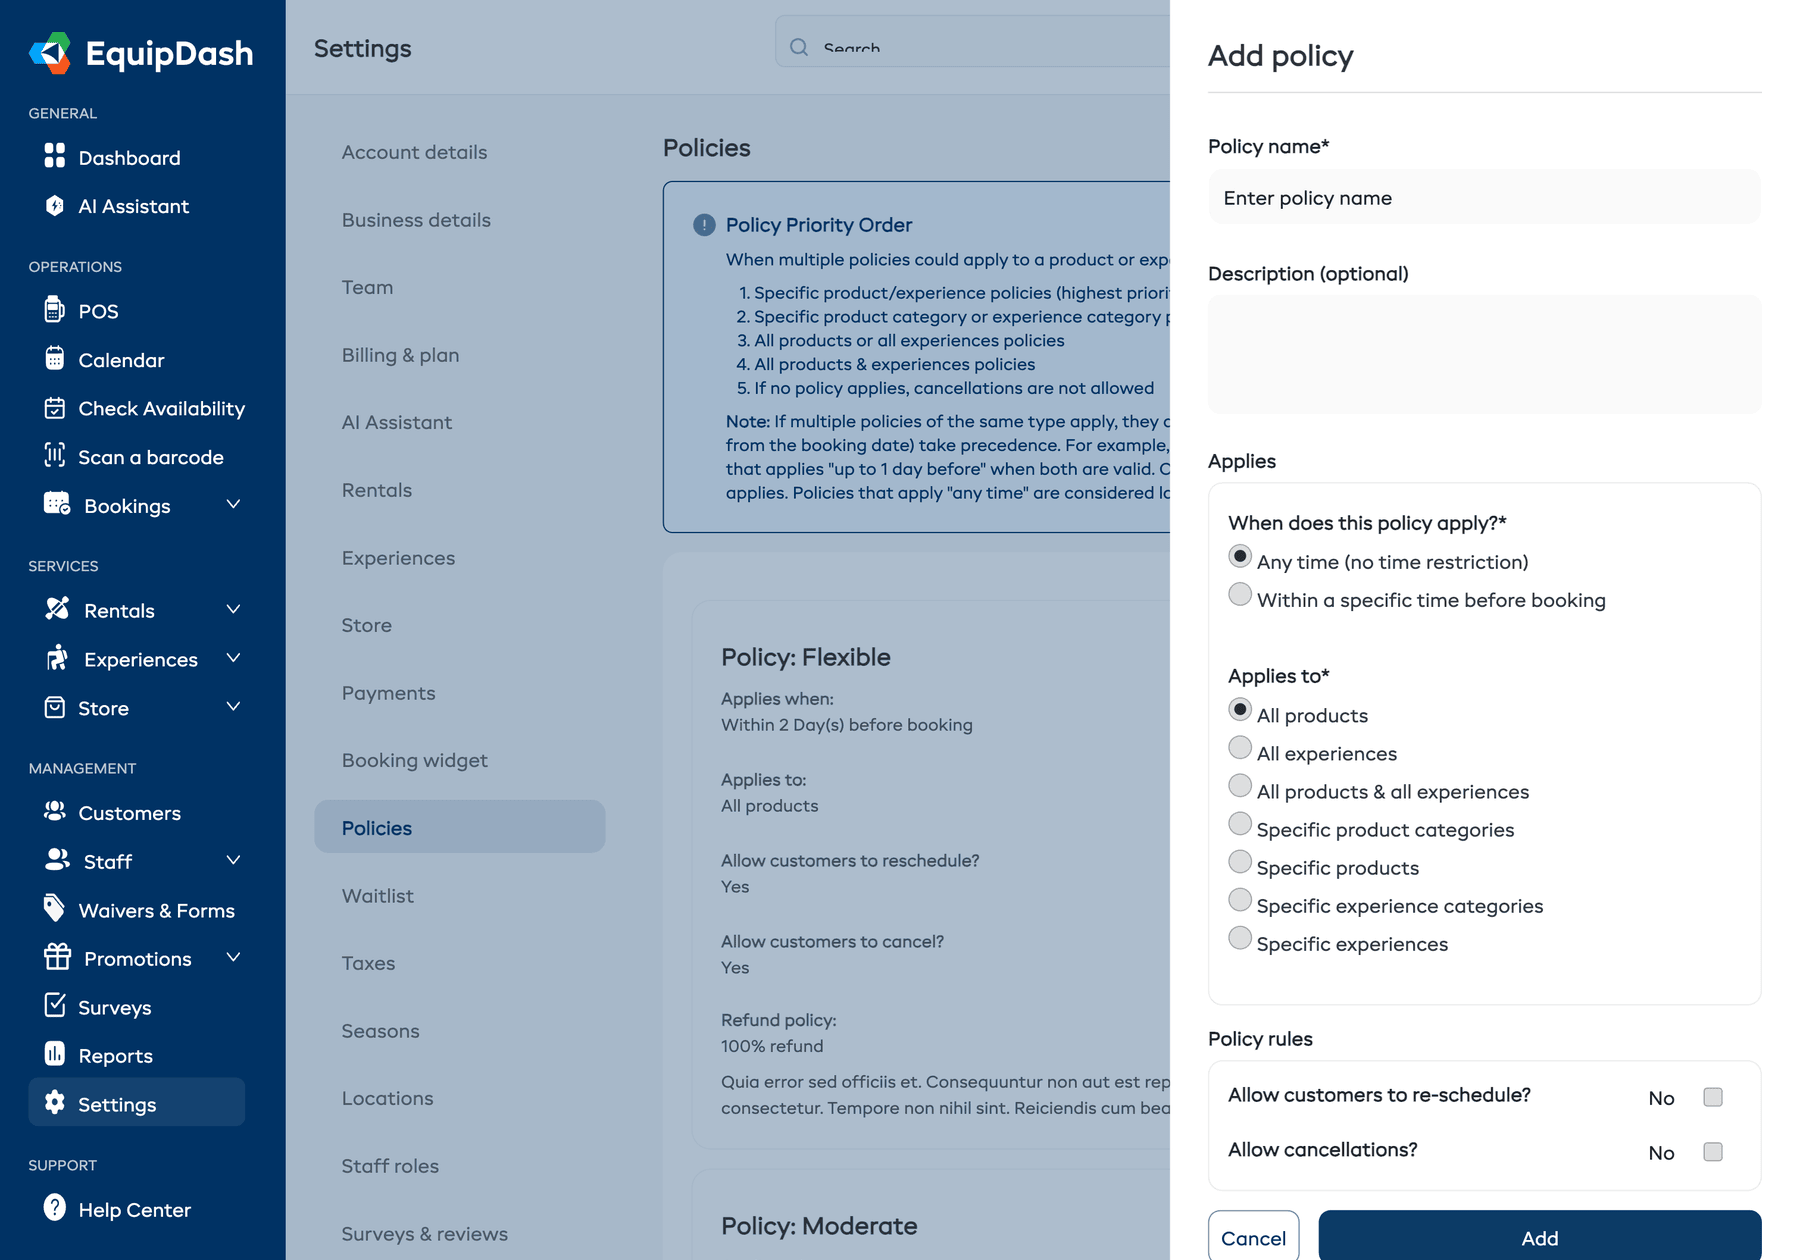
When you create or edit a policy, the Applies to section lets you choose what the policy covers:
-
Open the policy (click + Add policy or the edit icon on an existing policy).
-
In the Applies to section, select one of:
- All products -- the policy applies to every rental product.
- All experiences -- the policy applies to every experience.
- All products & all experiences -- the policy applies to everything.
- Specific product categories -- select one or more product categories from the list that appears.
- Specific products -- select individual products from the list that appears.
- Specific experience categories -- select one or more experience categories from the list that appears.
- Specific experiences -- select individual experiences from the list that appears.
noteOnly options for enabled modules appear. The default selection adapts to your enabled modules.
-
If you chose a specific option, select the items or categories from the list that appears.
-
Click Add (for new policies) or Update (for existing policies).
Viewing Assigned Policies
On the Policies settings page, each policy card shows a summary including what it applies to, when it applies, and the reschedule/cancellation rules. This gives you a quick overview of your policy coverage.
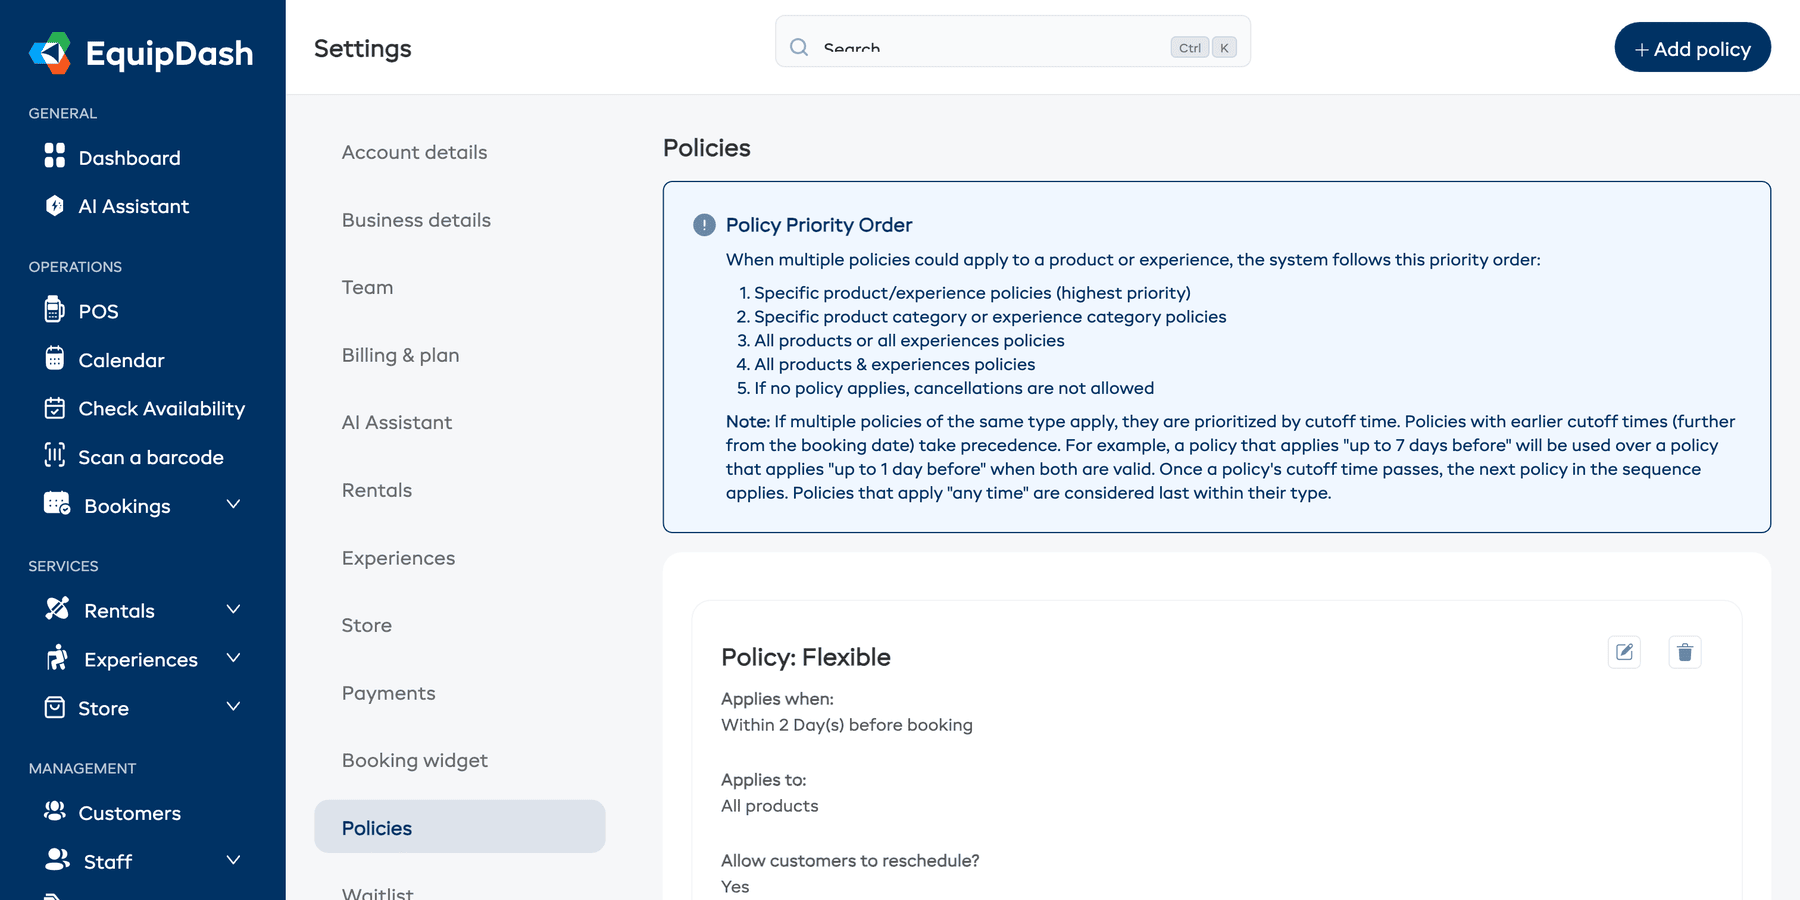
Policy Priority Order
When multiple policies could apply to a product or experience, the system follows this priority order:
- Specific product/experience policies (highest priority)
- Specific product category or experience category policies
- All products or all experiences policies
- All products & experiences policies
- If no policy applies, cancellations are not allowed
If multiple policies of the same type apply, they are prioritized by cutoff time. Policies with earlier cutoff times (further from the booking date) take precedence.
Conflict Prevention
EquipDash prevents you from creating conflicting policies. You cannot assign two policies with the same time period to the same product or experience. If a conflict is detected, you will see an error message explaining which policy already covers those items.
For example, if you already have a policy for "All Products" with a 48-hour cutoff, you cannot create another policy for a specific product with the same 48-hour cutoff. You would need to use a different time period, or update the existing policy.
How Customers See Policies
When a customer books through the booking widget:
- The applicable policy is displayed during checkout with the full tier breakdown — 100% refund up to 48h before, 50% refund 24–48h before, 0% refund after, for example.
- If the policy allows cancellation, the customer will see a Cancel Booking option from their booking confirmation page.
- The refund percentage and any time limits are shown clearly so the customer knows the rules before completing their booking.
- When a booking is cancelled, the confirmation email cites exactly which tier was applied: "Cancelled 30 hours before start — 50% refund."
The widget renders the full tier breakdown at checkout automatically.
Things to Keep in Mind
- A product or experience can have multiple policies with different time periods (e.g., full refund if canceled 7 days before, 50% refund if canceled 24 hours before, no refund after that).
- If no policy is assigned to a product or experience, the default behavior is no cancellation or rescheduling allowed.
- Changing a policy assignment does not affect bookings that were already made under the previous rules.