Managing Time Off Growth+This feature requires the Growth+ plan or higher
EquipDash lets managers and admins record time off directly against a staff member's profile. Recorded time off appears in the Time off calendar and Time off entries cards on the Schedule tab, giving you a clear view of who is away and when.
Recording Time Off
Time off is recorded by a manager or admin on behalf of a staff member.
- Click Staff in the left sidebar and open the staff member's profile.
- Go to the Schedule tab.
- Click Record Time Off.
- The Request Time Off panel opens.
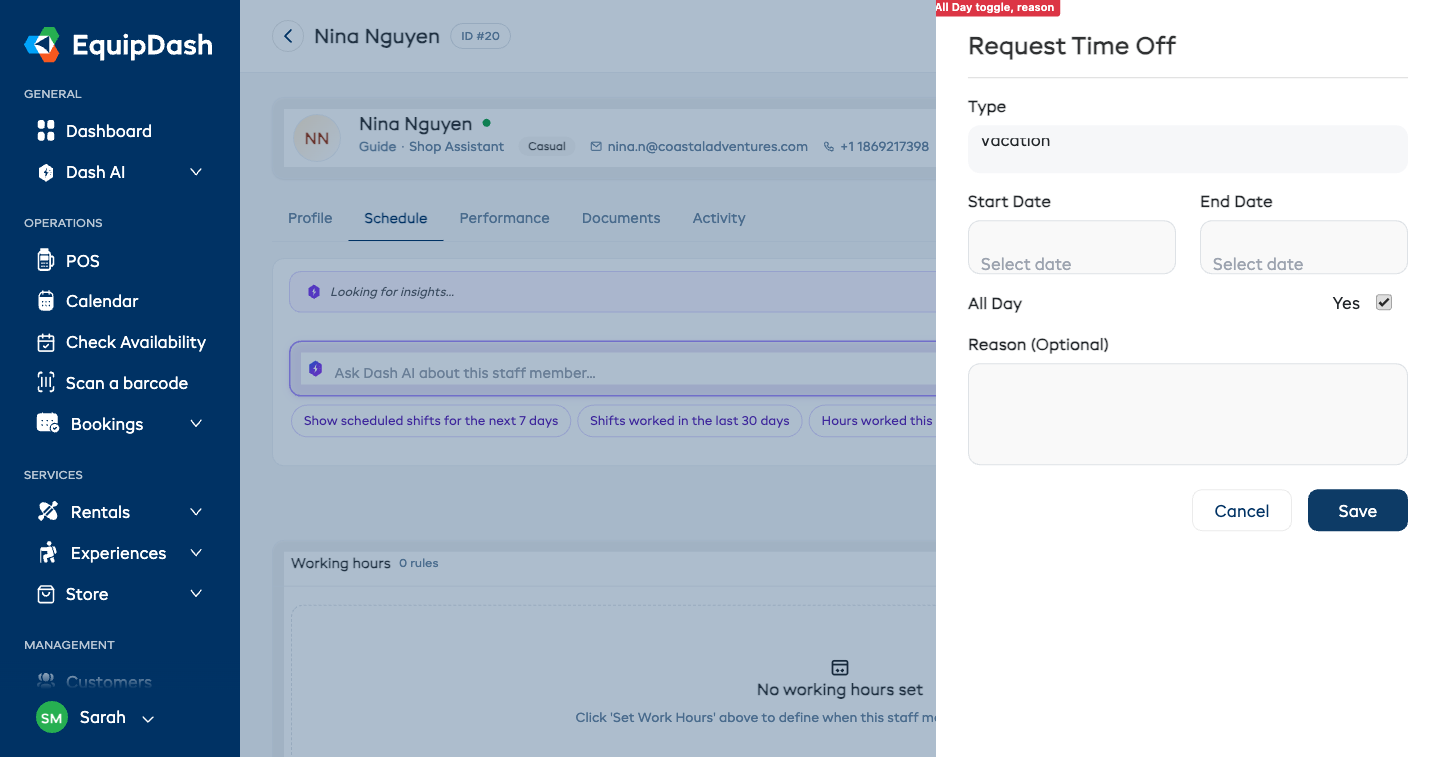
- Select a Type from the dropdown (see types below).
- Set a Start Date and End Date using the date pickers.
- The All Day toggle is on by default. If you need to record a partial-day absence, turn All Day off — additional Start Time and End Time fields will appear.
- Optionally enter a Reason to note why the staff member is away.
- Click Save.
The time off entry appears in the Time off calendar (as a colour-coded dot on the day) and in the Time off entries table on the Schedule tab.
Time-Off Types
| Type | When to use |
|---|---|
| Vacation | Planned holiday or annual leave |
| Sick Leave | Illness or medical absence |
| Personal | Personal appointment or personal day |
| Other | Any absence that does not fit the above categories |
Viewing Recorded Time Off
All recorded time off for a staff member is displayed in two places on their Schedule tab:
- Time off calendar — a month view with a colour-coded dot on each day with an absence. Use the chevrons in the card header to flip between months. Click any dotted day to edit that entry.
- Time off entries — a table below the calendar listing every absence with type, dates, time range, reason and Edit/Delete buttons.
Together they give you both an at-a-glance month view and a complete searchable list so you can plan coverage before building your schedule.
Time Off on the Schedule Grid
Approved time off also appears on the main Staff → Schedule grid as a dedicated Time Off row above the staff rows. Each cell shows the count of staff away for that day so you can spot coverage problems before scheduling.
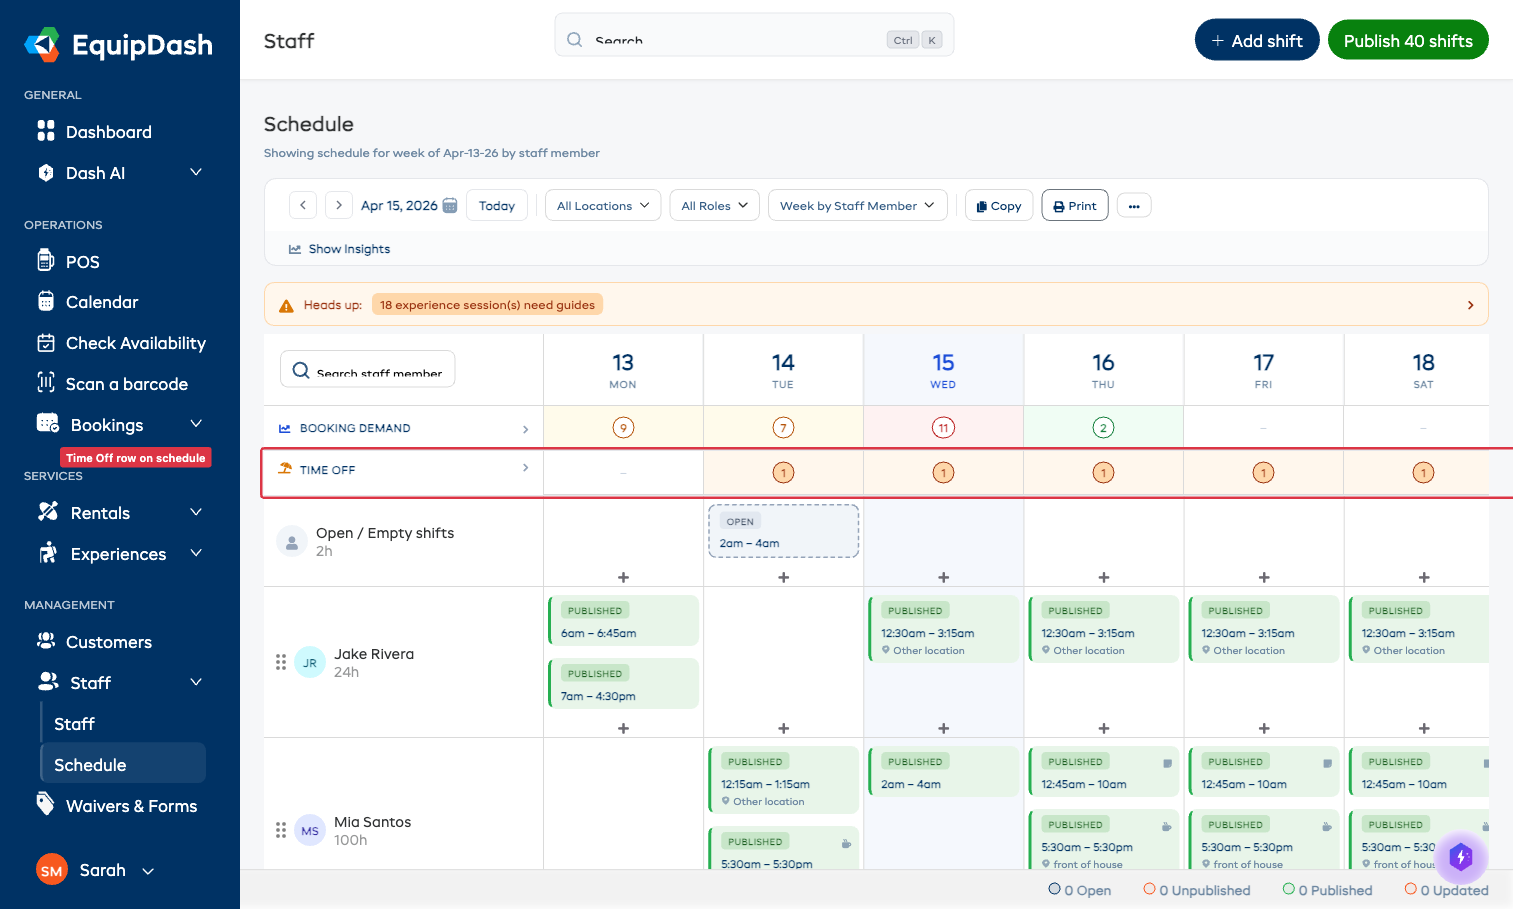
Click into the Time Off row chevron to expand it and see exactly which staff members are away on which days.
This visibility means you can:
- See at a glance who's away in the week you're scheduling
- Avoid accidentally drag-dropping a shift onto a staff member's day off
- Spot when too many people are away on the same day and re-jig coverage
The schedule's auto-suggest guide picker also uses approved time-off as a hard block — a guide on time-off cannot be assigned to an experience session that overlaps their leave.
Approving and Rejecting Time-Off Requests
When a staff member submits a time-off request from the mobile app, it lands in your queue with Pending status. You can review and approve or reject:
- Open the staff member's Schedule tab.
- Find the pending request in the Time off entries table.
- Click Approve to mark it approved — it now appears on the schedule grid and blocks any guide assignments that overlap.
- Click Reject if it can't be accommodated.
Rejected requests stay visible with a Rejected status so the staff member can see the outcome — they don't disappear silently.
Tips
- Record time off before scheduling. Absences recorded after a schedule is published will not automatically remove the staff member from shifts — review the schedule after recording time off to check for conflicts.
- Use the Reason field. A brief reason helps other managers understand the context when reviewing availability later.
- Partial-day absences. Turn off the All Day toggle to record a late start or early finish with specific times.
- Check coverage. Before saving time off, review the Time off calendar on the Schedule tab to confirm you have enough staff available for the affected dates.