Rate Categories
Rate categories let you define different pricing tiers for your experiences -- such as Adult, Child, Senior, or Student. When you create an experience, you assign prices to each rate category so customers can select the right option when booking.
Adding a Rate Category
- Click Settings in the sidebar.
- Select Experiences from the settings menu.
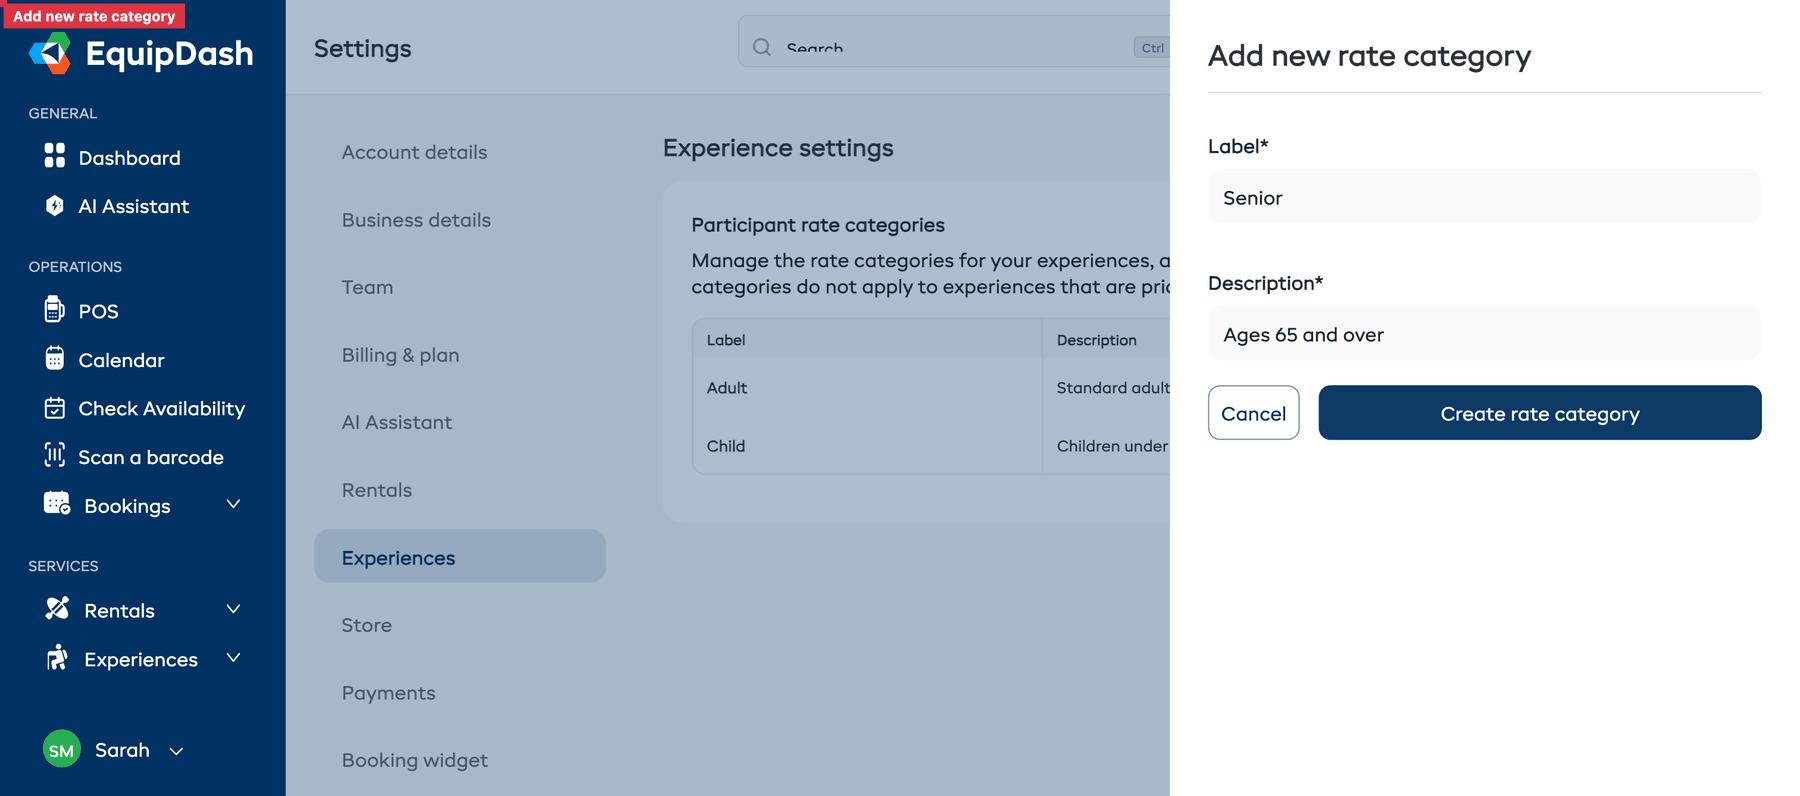
- In the Participant rate categories section, click + Add rate category.
- Enter the following:
- Label -- the label customers will see (e.g., "Adult", "Child (5-12)", "Student").
- Description -- an optional description or age range clarification.
- Click Create rate category.
Managing Rate Categories
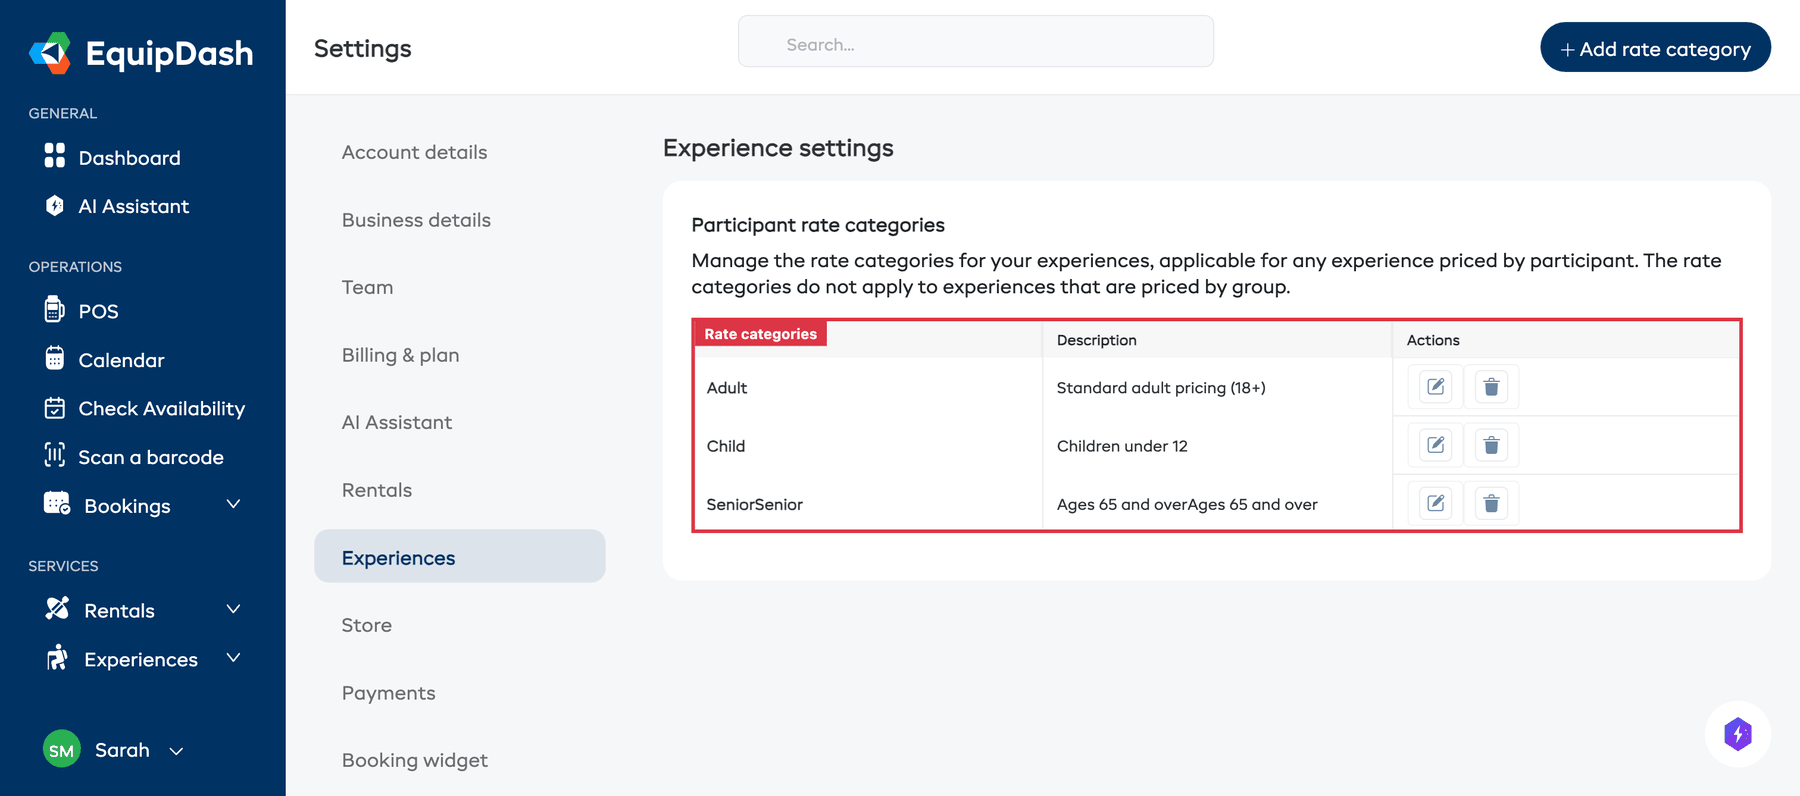
Your existing rate categories are listed on the Experience settings page under Participant rate categories. The table shows Label, Description, and Actions columns. From here you can:
- Edit a rate category by clicking the edit icon to change its label or description.
- Delete a rate category by clicking the delete icon. You will be asked to confirm before it is removed.
caution
Deleting a rate category removes it from all experiences that use it. Make sure no active experiences depend on that category before deleting.
How Rate Categories Work with Experiences
Once you have rate categories set up:
- Go to any experience and open the Pricing tab.
- You will see each rate category listed with a price field.
- Enter the price for each category (e.g., Adult: $65, Child: $35).
- Customers choosing this experience in the booking widget will select from these categories.
Common Examples
| Rate Category | Description |
|---|---|
| Adult | Ages 13 and over |
| Child | Ages 5 to 12 |
| Infant | Ages 0 to 4 (often free) |
| Senior | Ages 65 and over |
| Student | With valid student ID |
| Family | 2 adults + 2 children |