Embedding on Your Website
Once your widget looks the way you want, add it to your website so customers can book. Everything you need is on one screen: Settings > Booking widget > Embed options.
Pick how you want it to appear, copy the code (or link), and paste it on your site. You can use more than one — for example a full widget on your "Book" page and a floating button on every other page.
You can also grab the embed for one specific product, experience, or category straight from its own page — see Embed straight from a product page and Embed a category from its page below. Same options, pre-set to that item.
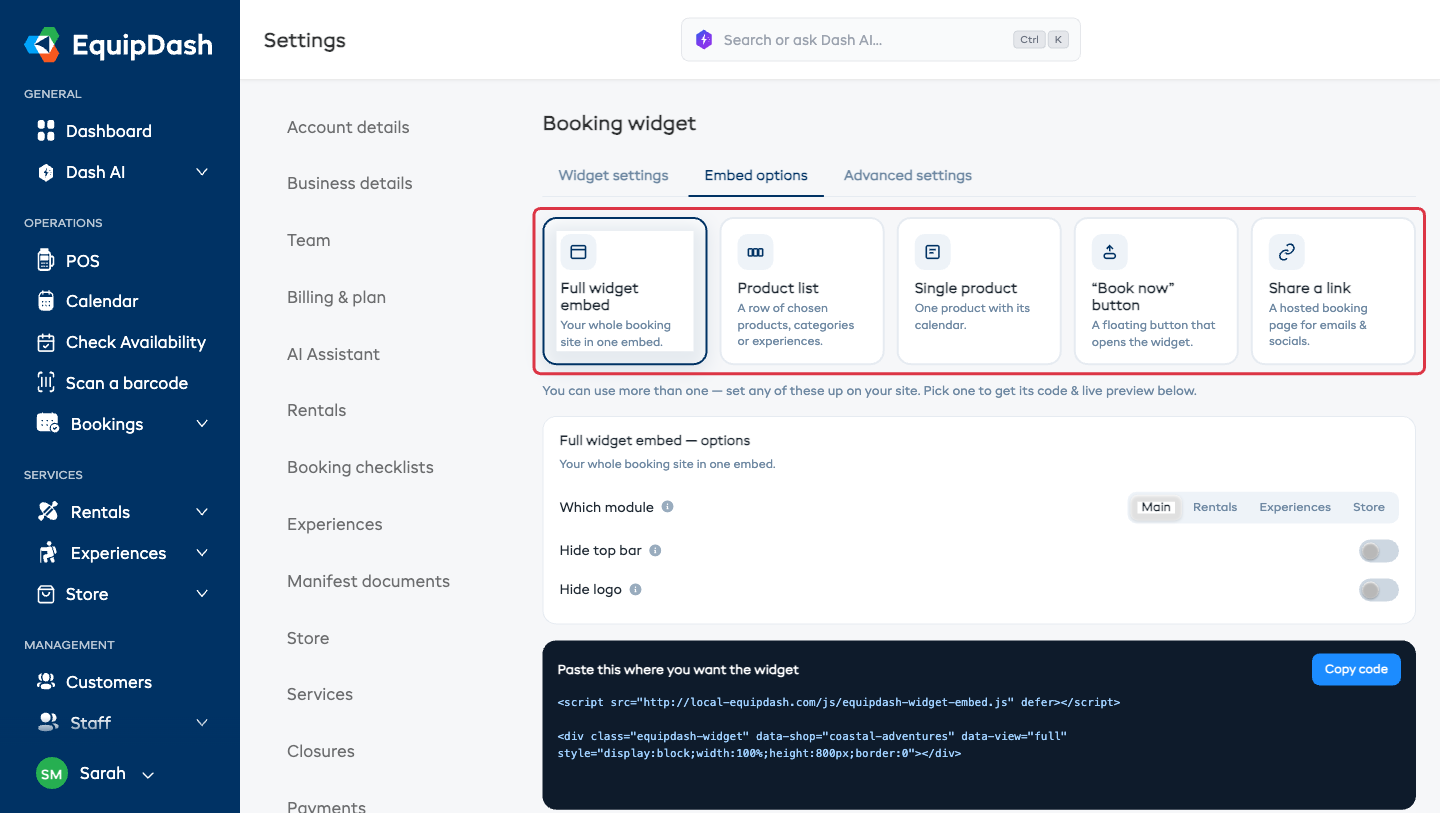
The Five Ways to Embed
| Type | What it is | Best for |
|---|---|---|
| Full widget embed | Your whole booking site — browsing, cart and checkout — in one embed | Your main "Book now" page |
| Product list | A row of chosen rentals or experiences, dropped into your own page | A "Featured" section on your homepage |
| Single product | One item — the full page (photo, price, details + calendar) or just its calendar — embedded inline on your page | A specific product or experience landing page |
| "Book now" button | A floating button on every page that opens the widget in a pop-up | Catching bookings from anywhere on your site |
| Share a link | A hosted booking page you can paste anywhere | Emails, social bios, "Book" menu links |
All five connect to the same widget and produce the same bookings. Pick whichever suits each page.
How to Get Your Code
- Go to Settings > Booking widget.
- Open the Embed options tab.
- Click the type you want — Full widget embed, Product list, Single product, "Book now" button, or Share a link.
- Set any options for that type (they save automatically).
- Click Copy code (or Copy link for a shared link).
- Below the code, the Live preview shows exactly how it will look on a customer's site — click it to open the booking pop-up.
The code you copy is two short lines — a loader script plus a small placeholder. For example, a full widget embed looks like:
<script src="https://app.equipdash.com/js/equipdash-widget-embed.js" defer></script>
<div class="equipdash-widget" data-shop="your-slug" data-view="full"></div>
You don't need to understand the code — just paste both lines where you want the widget.
Your widget uses your business's custom slug (e.g. coastal-adventures) — much more shareable than a numeric ID. If you change your slug later, every old link keeps working via automatic redirect. See Widget URL Slug.
Full Widget Embed
Shows your whole booking site inside your page — customers never leave your website.
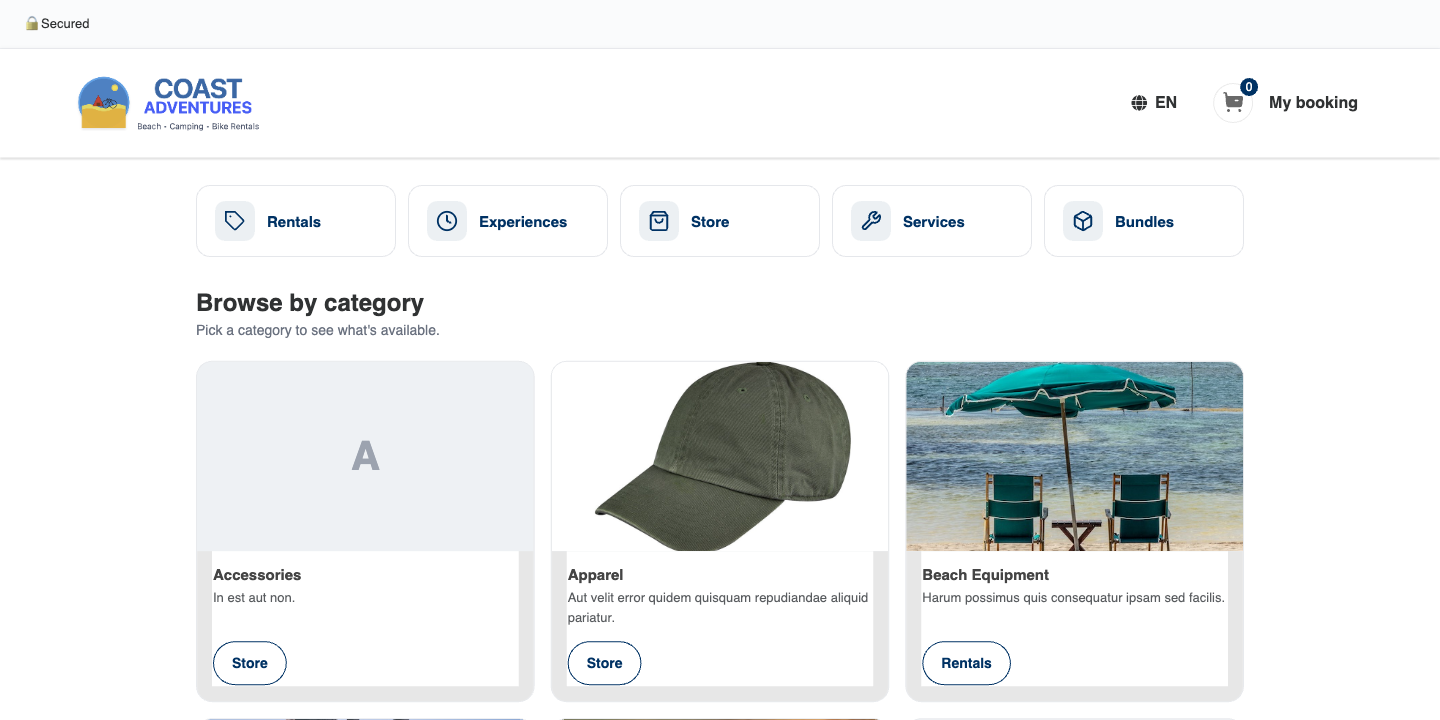
- Choose Full widget embed.
- Which module — pick what it opens to: your Main page, Rentals, Experiences, or Store (only the ones you run appear).
- Hide top bar / Hide logo — optional, for a cleaner fit inside your own header.
- Click Copy code and paste it on your page (see Where to paste it below).
Product List
A curated row of cards for the rentals or experiences you choose — perfect for a "Featured" strip on your homepage. Clicking a card opens that item's booking in a pop-up, right over your page.
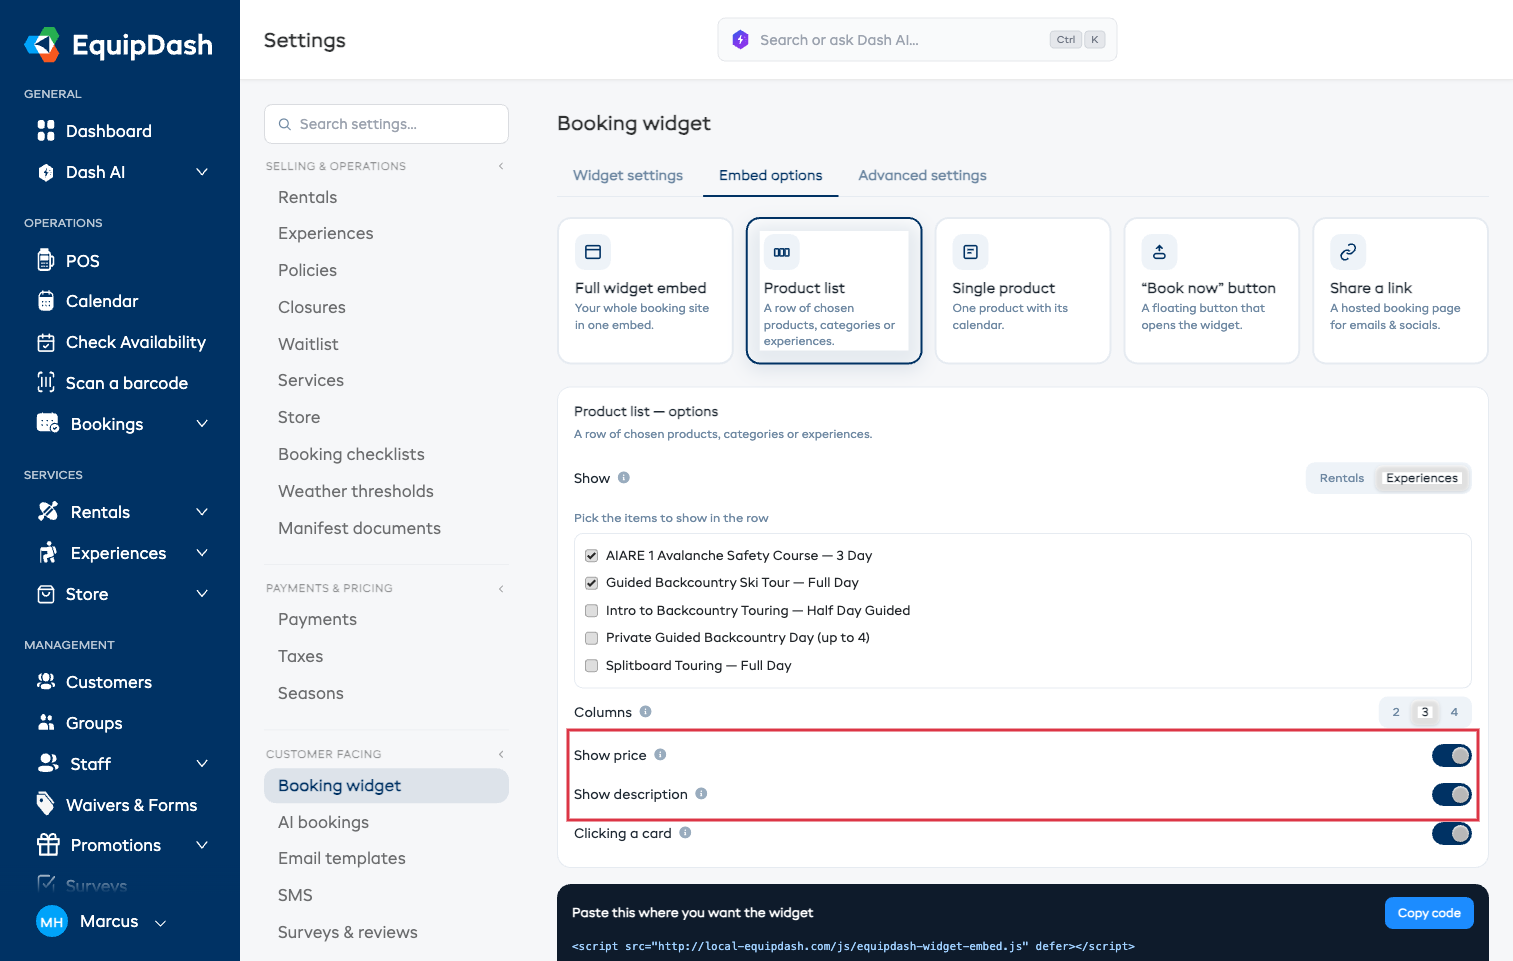
- Choose Product list.
- Show — Rentals or Experiences (only your enabled modules appear).
- Pick the items to show in the row.
- Columns — 2, 3, or 4.
- Show price — on by default, so each card shows a starting "From" price. Turn it off for a cleaner, price-free row.
- Show description — on by default, so each card shows the item's short description. Turn it off for more compact cards.
- Click Copy code and paste it where you want the row.
The selection is baked into each snippet, so you can create several different rows — e.g. a "Bike rentals" row on one page and a "Guided tours" row on another. Just change the picks and copy a fresh snippet each time.
Single Product
Embeds one item straight onto your page — either its full page (photo, price, description and calendar) or just its booking calendar. Best for a specific product or experience landing page. Customers book right there without leaving your site.

- Choose Single product.
- Show — Rentals or Experiences.
- Which item — start typing to search, then pick the rental or experience.
- Embed style — Full page (the item's whole page: photo, price, details and calendar) or Calendar only (just the booking calendar — best when your page already shows the item's details).
- Click Copy code and paste it where you want it to appear.
Let customers pick people right in the embed
For a single experience with named rates (like Adult and Child), you can let customers choose how many of each — and see a running total — inside the embed, before they ever open the booking pop-up.
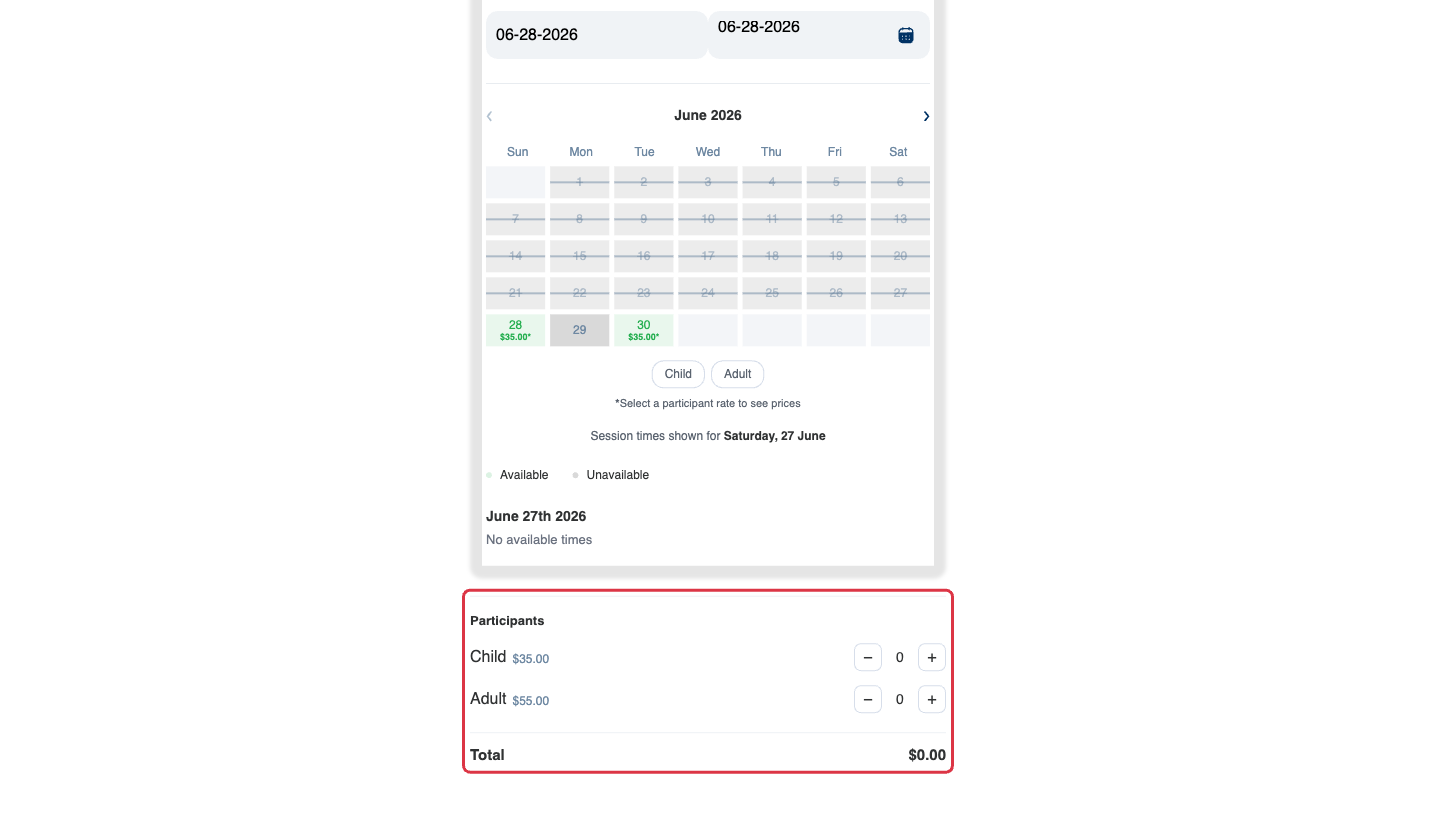
- In Settings → Booking widget, switch on Let customers pick people & see the total in single-item embeds.
- Copy the Single product code as above (with an experience selected). The live preview on the right shows the people pickers right away.
When the customer clicks Book now, the booking opens with their people already filled in — fewer clicks to book. (Extras and any other options are still chosen in the next step.) This applies to experiences that have participant rates; an experience with a single flat price simply shows its normal calendar and Book now.
"Book now" Button
A floating button that sits in a corner of every page and opens the widget in a pop-up.
- Choose "Book now" button.
- Opens — Main, Rentals, Experiences, or Store.
- Set the Button label, Position (bottom-right / bottom-left), and Icon.
- Click Copy code and paste it before the
</body>tag on every page (or in a site-wide footer/custom-code area).
See Floating Book Now Button for more detail.
Share a Link
A hosted booking page — no code at all, just a link.
- Choose Share a link.
- Click Copy link.
- Use it anywhere: a "Book" menu item, an email, an Instagram bio, a QR code. Rich Google results (price, availability) are added automatically.
Embed a Single Product From Its Own Page
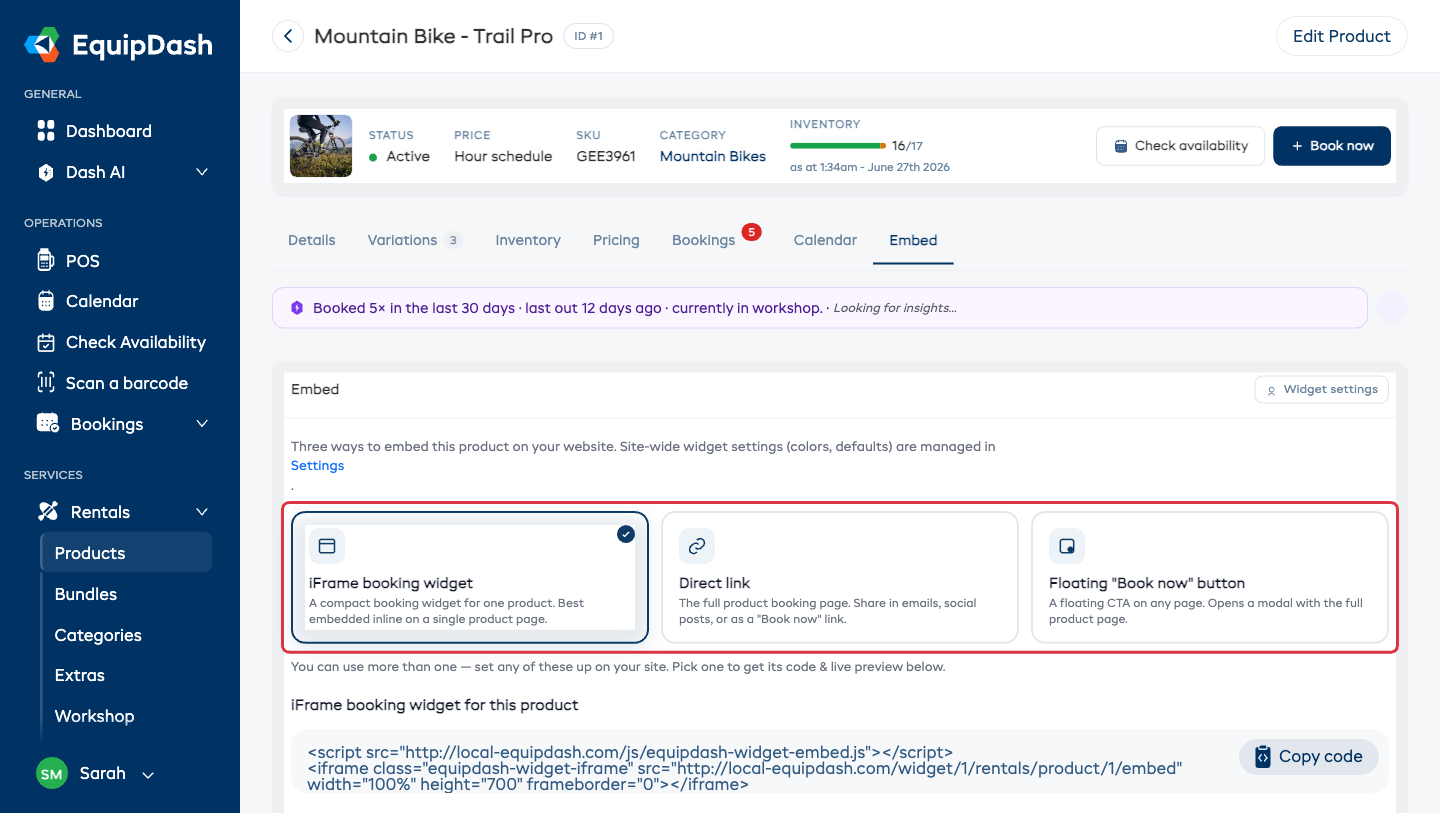
You don't have to go to Settings to embed one specific rental or experience. Every product and experience has its own Embed tab with the same options, already pointed at that item.
- Open a rental (Rentals > your product) or an experience (Experiences > your experience).
- Click the Embed tab.
- Pick how you want it on your site:
- Product widget (on rentals) or Experience widget (on experiences) — that one item embedded inline on its page, as either the full page (photo, price, details + calendar) or just its calendar.
- Direct link — that item's full booking page, for emails, social posts, or a "Book now" link.
- Floating "Book now" button — a floating button on any page that opens the item in a pop-up.
- Click Copy code (or copy the link) and paste it on your site. The Live preview underneath shows exactly how it will look.
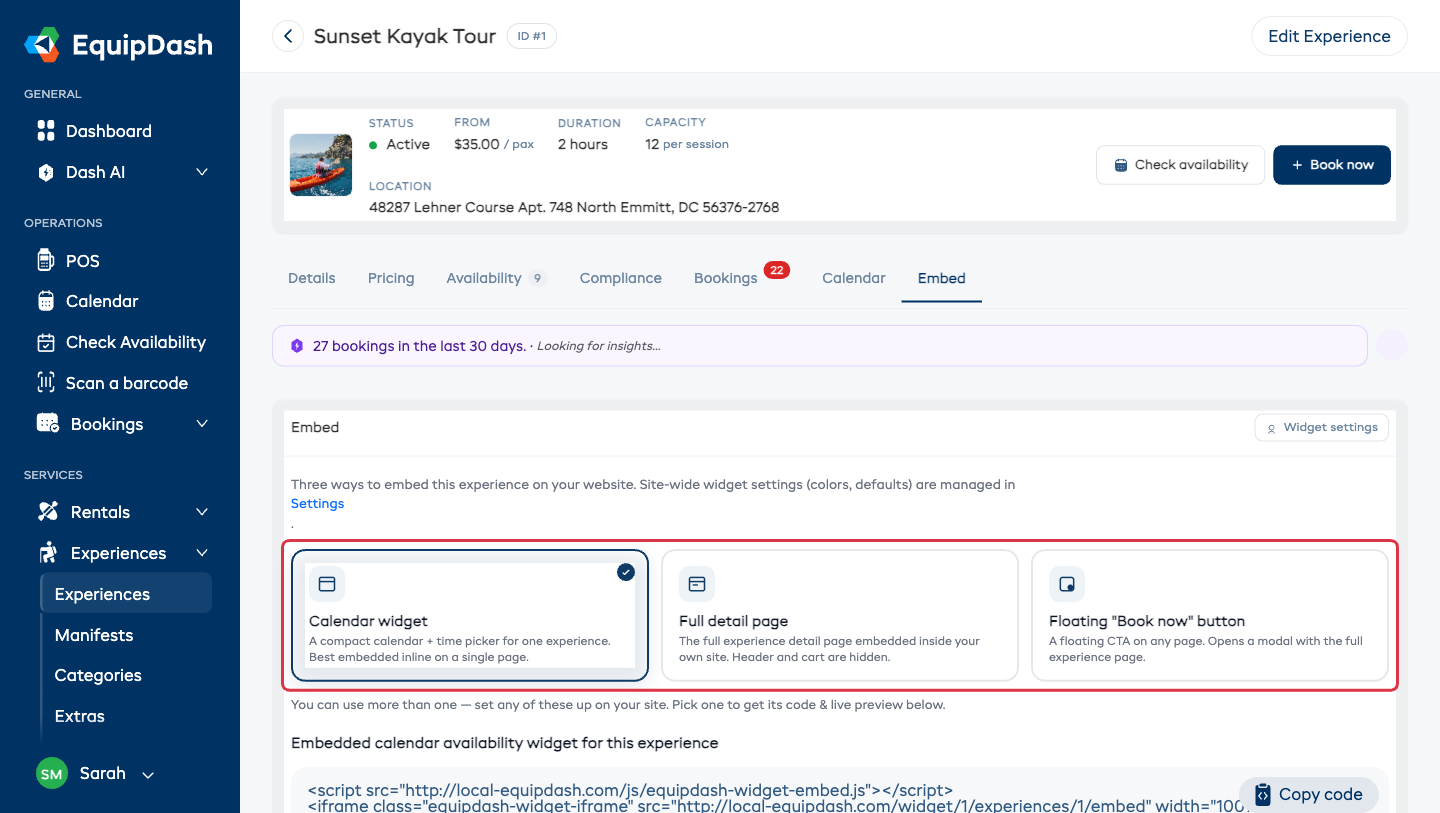
Experiences work the same way — open the experience and click Embed:
Embed a Category From Its Own Page
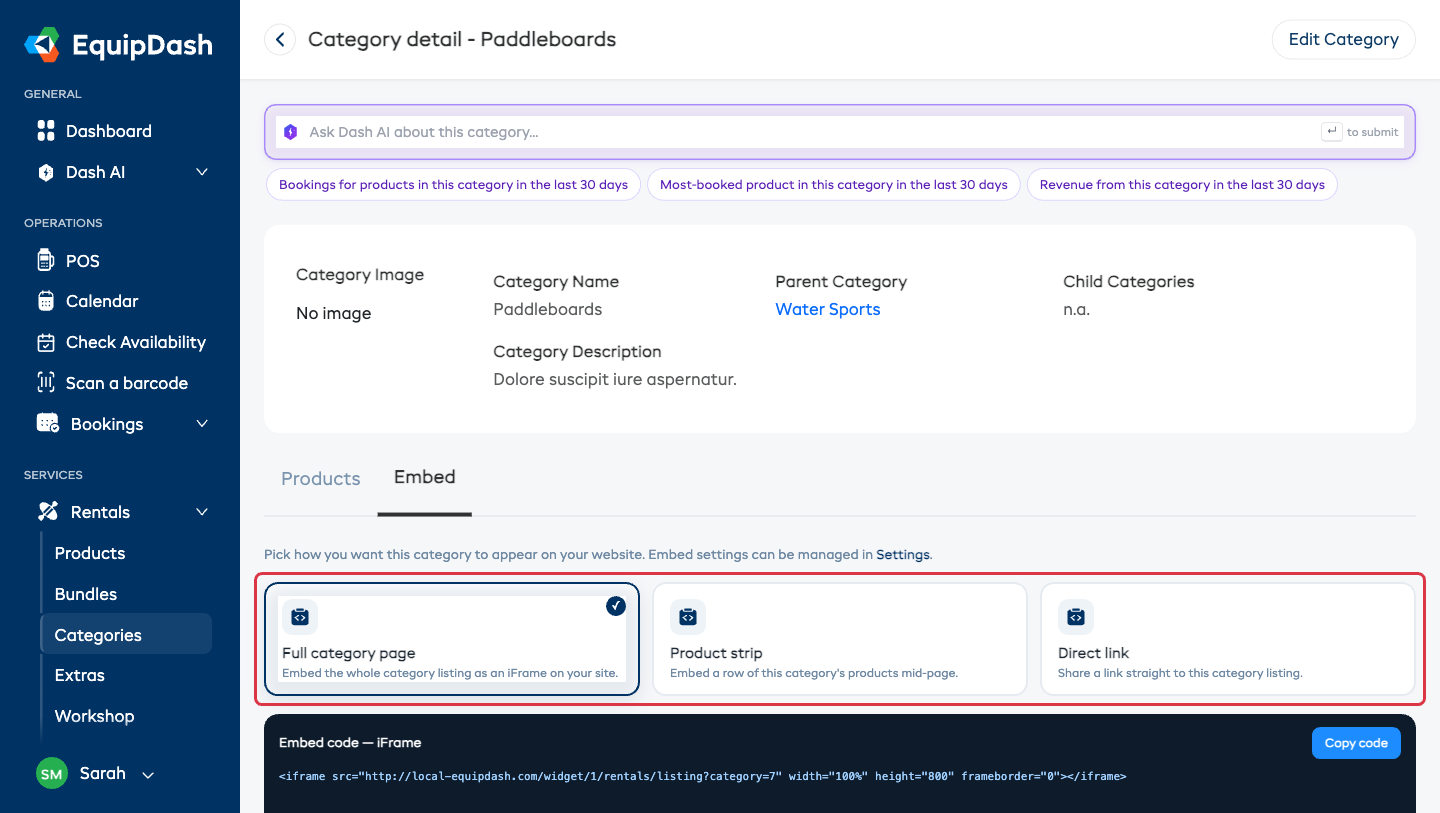
Want to show a whole category — say all your paddleboards, or all your guided tours — on a page of your site? Each category has its own Embed tab too.
- Open a category (Rentals > Categories > your category, or Experiences > Categories > your category).
- Click the Embed tab.
- Pick how you want it on your site:
- Full category page — the whole category listing, as an iFrame on your site.
- Product strip (on rental categories) or Experience strip (on experience categories) — a row of that category's items dropped mid-page, perfect for a "Featured" section.
- Direct link — a link straight to that category's listing.
- Click Copy code (or copy the link) and paste it where you want it.
Experience categories are identical — open the category and click Embed:
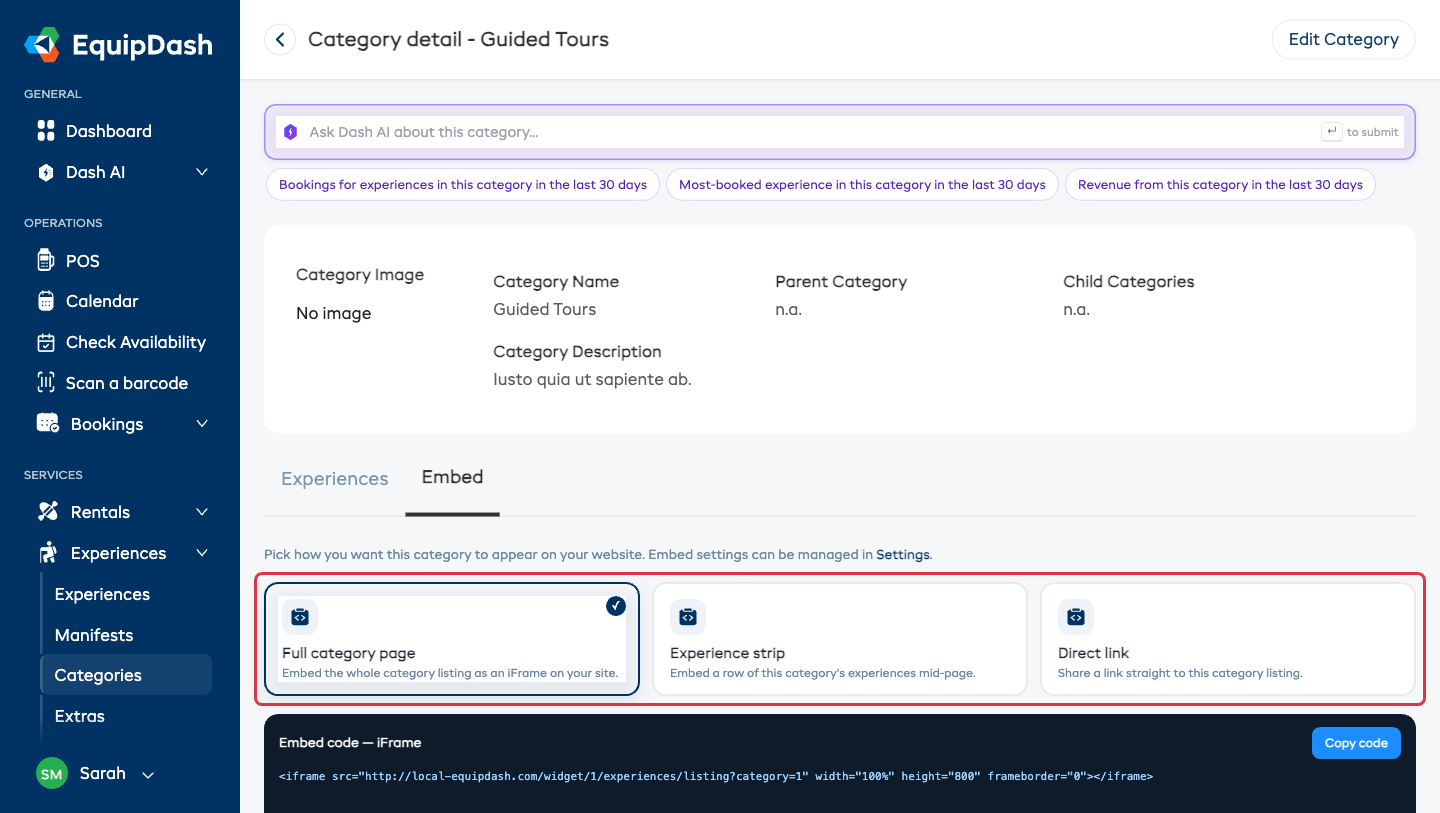
A strip bakes in the items that are in the category right now, so it's an easy way to feature one group — "Bike rentals" on one page, "Guided tours" on another. It's the same as building a Product list in Settings, just pre-filled to this category.
Where to Paste the Code
These steps work for any website where you can add custom HTML. Paste both lines (the script and the <div>) together.
WordPress
- Open the page where you want the widget (or create one).
- Click + to add a block, search for Custom HTML, and add it.
- Paste your copied code into the block.
- Click Preview to check it, then Publish or Update.
If you use the classic editor, switch to the Text tab and paste it there.
Squarespace
- Edit the page where you want the widget.
- Click + to add a block and choose Code.
- Paste your copied code.
- Make sure Display Source is off.
- Click Apply, then Save.
Wix
- Edit the page where you want the widget.
- Click + (Add) > Embed Code > Embed HTML.
- Click Enter Code and paste your copied code.
- Click Update, then resize the box to fit (full width is best).
- Click Publish.
Other Website Builders
Most builders have a "Custom HTML", "Embed", or "Code" block. Find it, paste the code, and publish. If your builder doesn't allow custom HTML, use Share a link instead.
Tips for a Good Embed
- Use more than one type — a full widget on your "Book" page plus a floating button everywhere else catches the most bookings.
- Match your colors — set your brand color under Settings > Booking widget > Widget settings so the widget blends in.
- Preview before you paste — the Live preview in a browser mock-up shows exactly how it'll look (and the pop-up that opens) on a customer's site.
- Test on mobile — the widget is fully responsive; use the device toggles in the preview to check phone and tablet.