Organizing Products by Category
Once you have created categories, you can assign products to them and control the order in which categories and products appear on your booking widget.
Assigning a Product to Categories
A product can belong to more than one category at the same time. For example, an item can sit in both a "type" group and a seasonal or promotional group, so customers find it whichever way they browse. Add as many categories as make sense — the product then appears under every one of them, everywhere categories are used (the category list, filters, and your booking widget).
During product creation
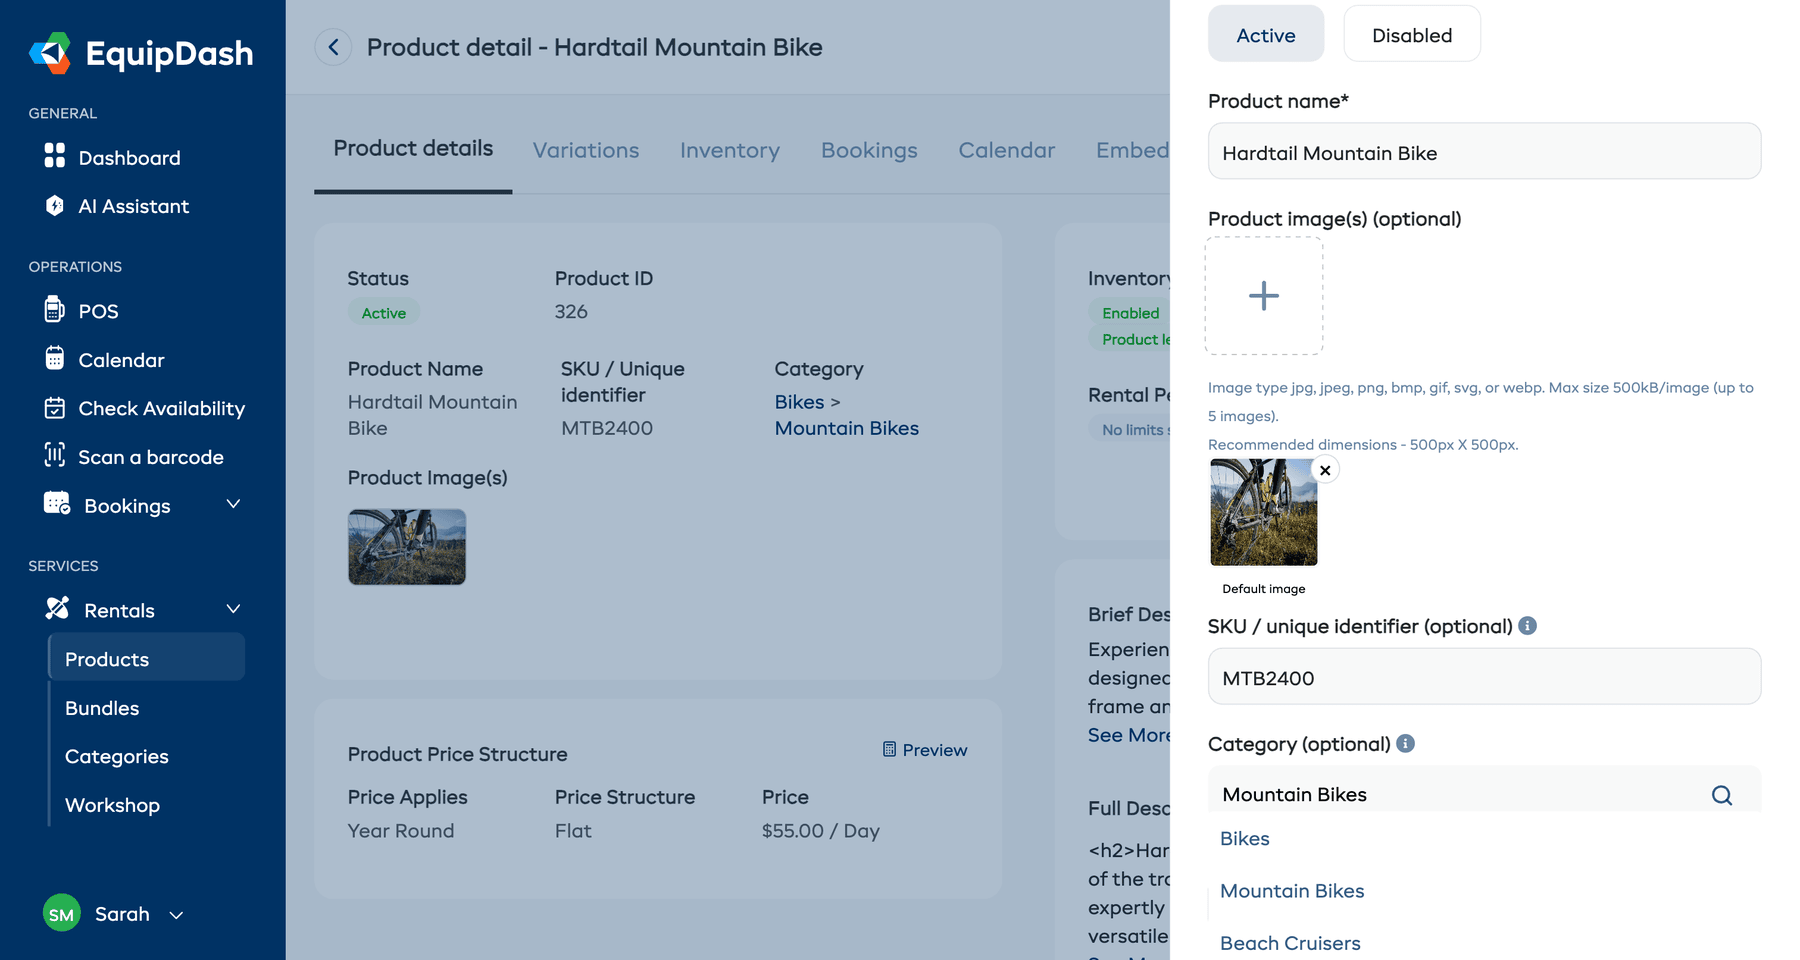
- In the product creation wizard (Step 1: Product Details), click the Categories field.
- Search for and select a category. It appears as a pill below the field.
- Repeat to add more categories. To remove one, click the × on its pill.
- Continue with the rest of the wizard.
For existing products
- Go to Rentals > Products and click the pencil icon on the product row to open the wizard.
- In Step 1: Product Details, add or remove categories in the Categories field.
- Save the product.
There is no separate "primary" category to worry about — just add every category the product belongs in. It will be counted and shown under each of them.
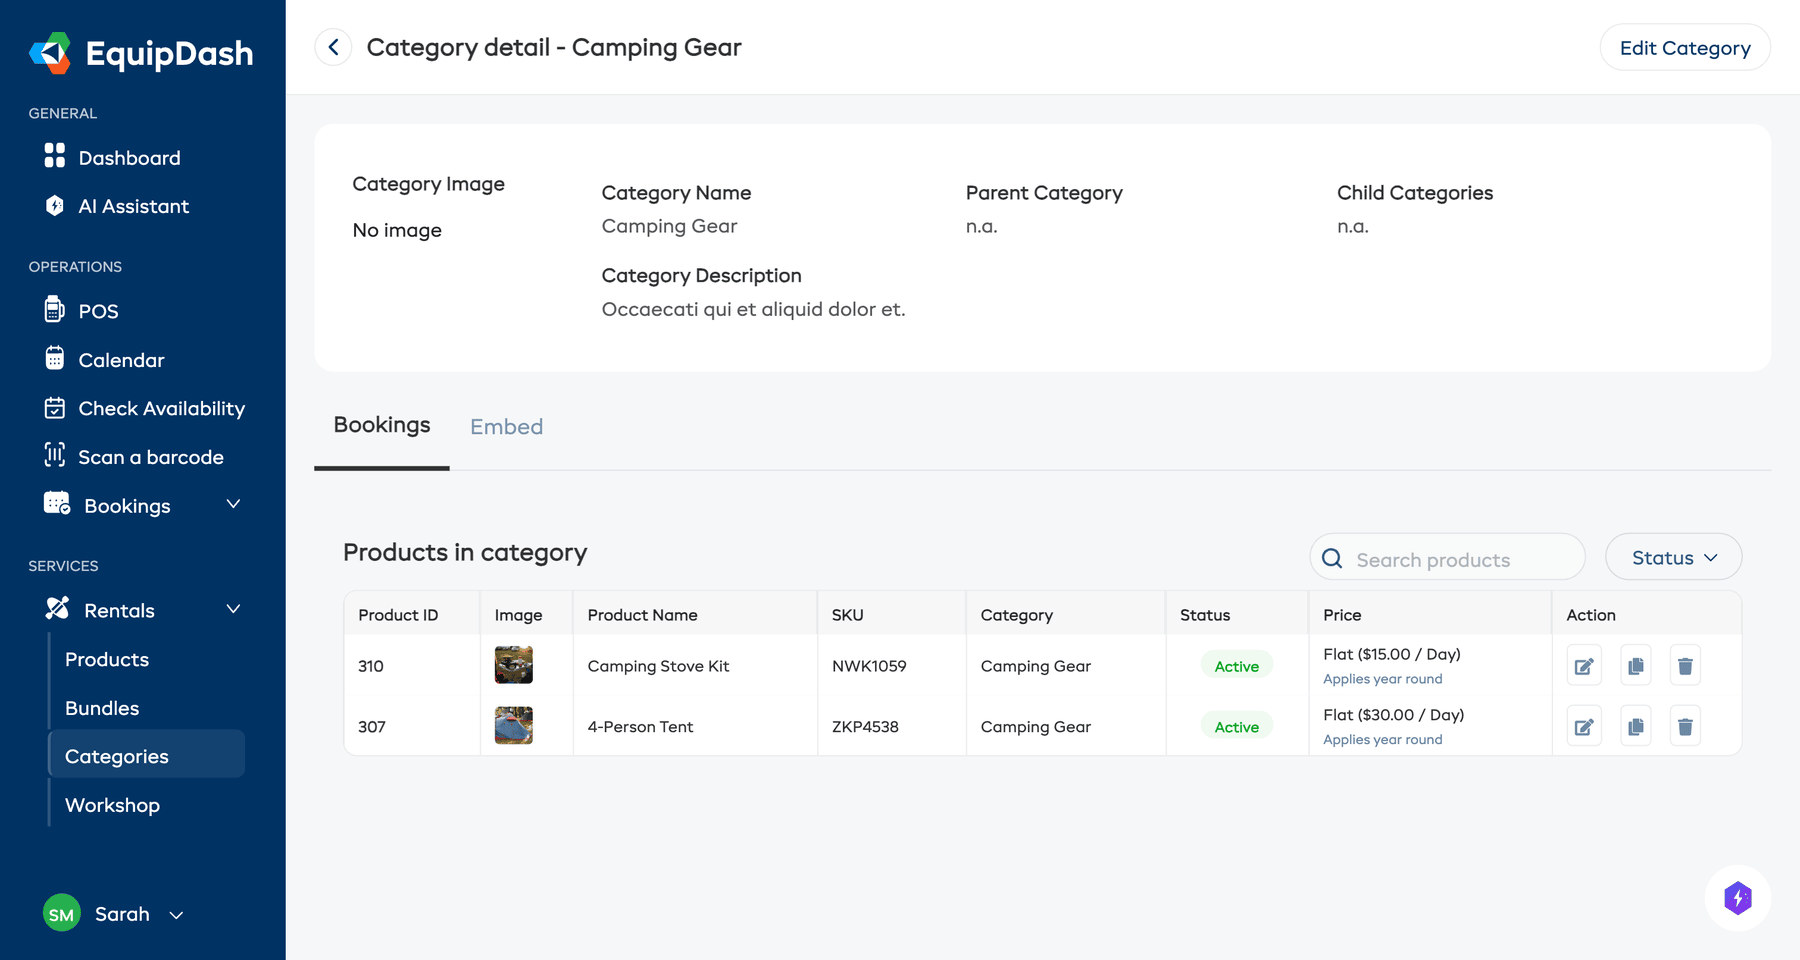
Viewing Products in a Category
- Go to Rentals > Categories.
- Click on a category name in the table to open the Category Detail page.
- The detail page shows the category information at the top and a Products in category table below, listing every product assigned to that category — including products that are in this category alongside others.
From this view you can:
- See all products in the category at a glance.
- Edit or remove products from the category.
How Categories Appear on the Widget
On your public booking widget, categories are displayed as browseable sections. Customers can click a category to see only the products in that group, or browse all products at once.
- Parent categories appear as the main sections.
- Child categories appear as sub-sections that customers can drill into.
- A product in several categories shows up under each of them, so customers find it whichever section they open.
- Products without a category will still appear when customers browse all products.
Bulk Category Changes
If you need to reassign many products at once, the most efficient approach is to:
- Go to Rentals > Categories and click the target category.
- Use the Add Product option from the category detail page to add products to this category directly.
Related Guides
- Creating Categories -- Setting up new categories.
- Creating a Product -- Choosing a category when creating a product.
- Widget: Rentals -- How categories appear on your booking widget.
- Embedding on Your Website -- Put a whole category on your own site.