Agent Approval Modes Growth+This feature requires the Growth+ plan or higher
Approval modes give you control over what a Dash Agent can do on its own and what it needs your permission for. Every tool assigned to an agent has its own approval mode, so you can let the agent look up data freely while requiring your sign-off before it sends an email or cancels a booking.
The Two Modes
Auto-approve
When a tool is set to Auto-approve, the agent runs it immediately without waiting. This is the default for read-only tools like looking up bookings, checking inventory, or viewing customer records.
Use auto-approve for tools where you trust the agent to act independently and the action is low-risk or reversible.
Require Approval
When a tool is set to Require Approval, the agent pauses its run and waits for a team member to approve or reject the action before continuing. The run status changes to Awaiting Approval until someone responds.
Use require approval for tools that make changes you want to review first — sending emails, cancelling bookings, processing refunds, or creating shifts.
Default Approval Settings
When you add a tool to an agent, EquipDash sets a sensible default based on the tool's risk level:
High-risk tools (default to Require Approval):
- Send booking email
- Send form to customer
- Cancel booking
- Delete booking
- Update booking
- Create booking
- Process refund
- Create staff shift
All other tools (default to Auto-approve):
- Looking up bookings, products, customers, and other data
- Checking availability and inventory levels
- Viewing schedules, reports, and analytics
You can change any tool's approval mode — including overriding the defaults. If you are comfortable with an agent sending emails without approval, you can switch it to auto-approve. If you want extra caution on a normally low-risk tool, you can switch it to require approval.
Configuring Approval Modes
- Open the Agent Builder (either when creating a new agent or editing an existing one).
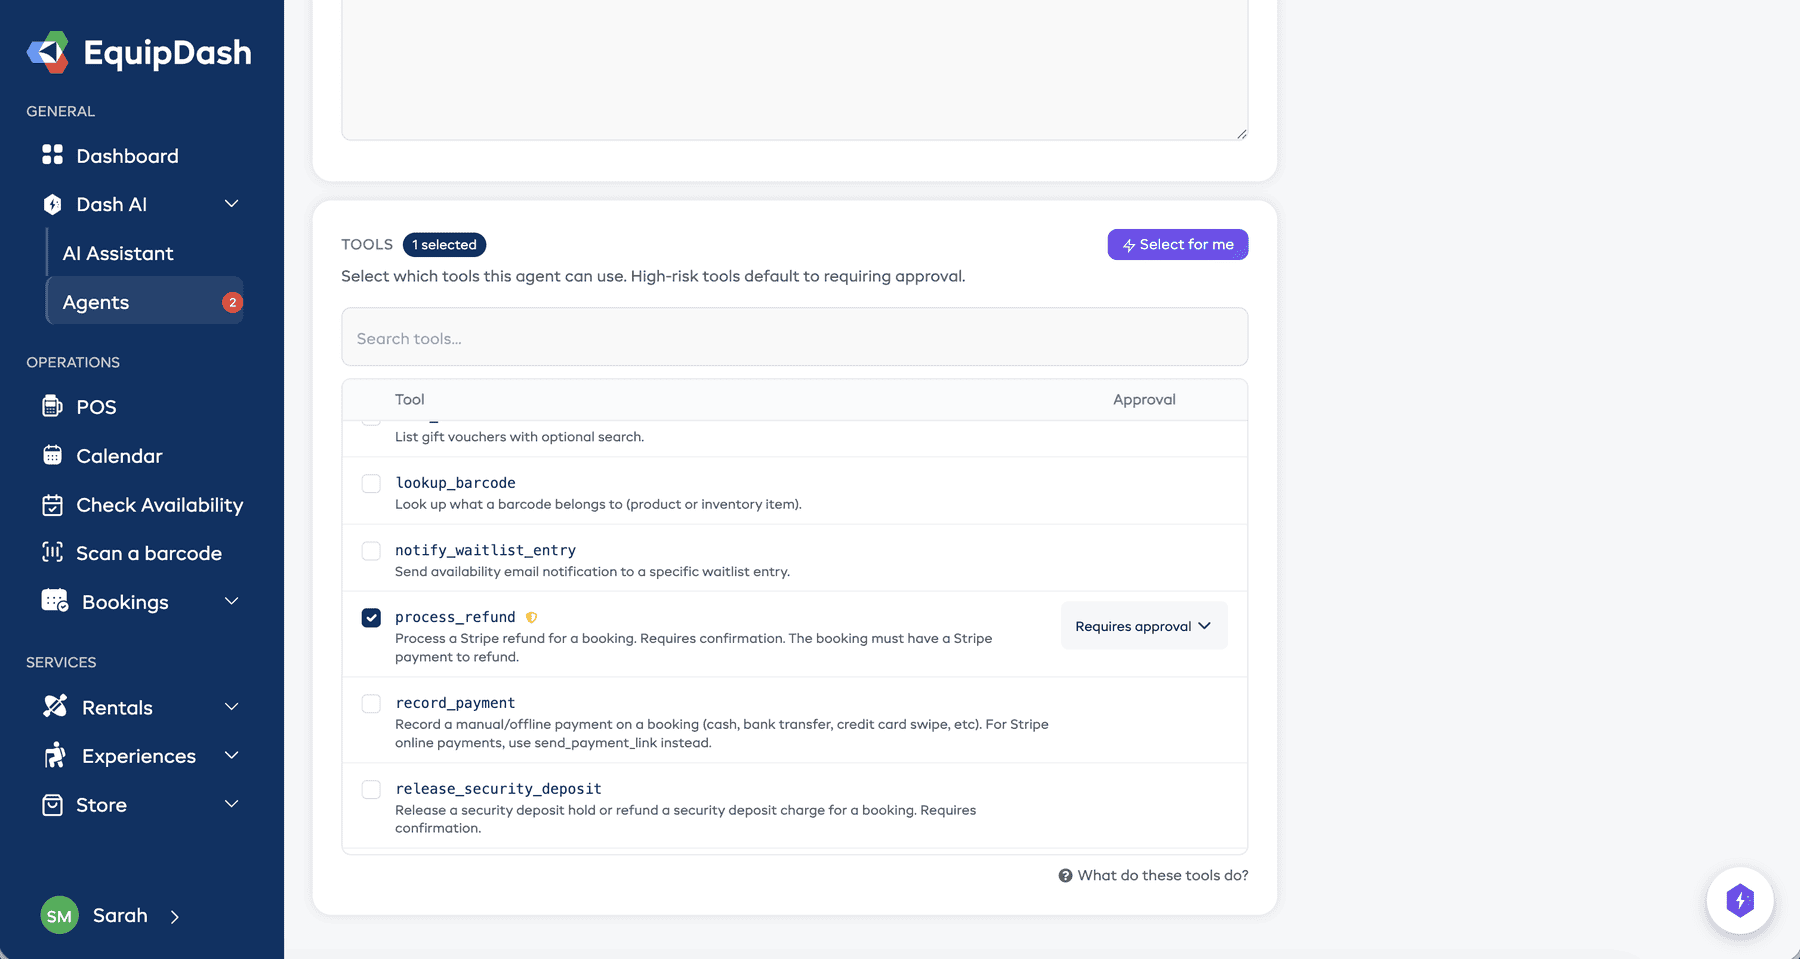
- Scroll to the Tools section.
- Select the tools your agent needs by clicking on them.
- For each selected tool, you will see an approval mode toggle:
- Auto — The agent runs this tool without waiting.
- Approval Required — The agent pauses and asks for your approval.
- Click the toggle to switch between modes.
- Save the agent when you are done.
What Happens When Approval Is Needed
When an agent reaches a tool that requires approval, the following happens:
- The agent pauses its run. It does not skip the action or continue without it.
- The run status changes to Awaiting Approval.
- The pending action appears in the agent's run history with details about what the agent wants to do (e.g., "Send email to john@example.com about overdue return for booking #1234").
- If email notifications for agent runs are enabled, you receive a notification that an agent is waiting for approval.
- The agent stays paused until someone approves or rejects the action.
Approving or Rejecting an Action
- Go to the Agents page and click on the agent with a pending approval, or navigate directly to the agent's Run History.
- Find the run with the status Awaiting Approval.
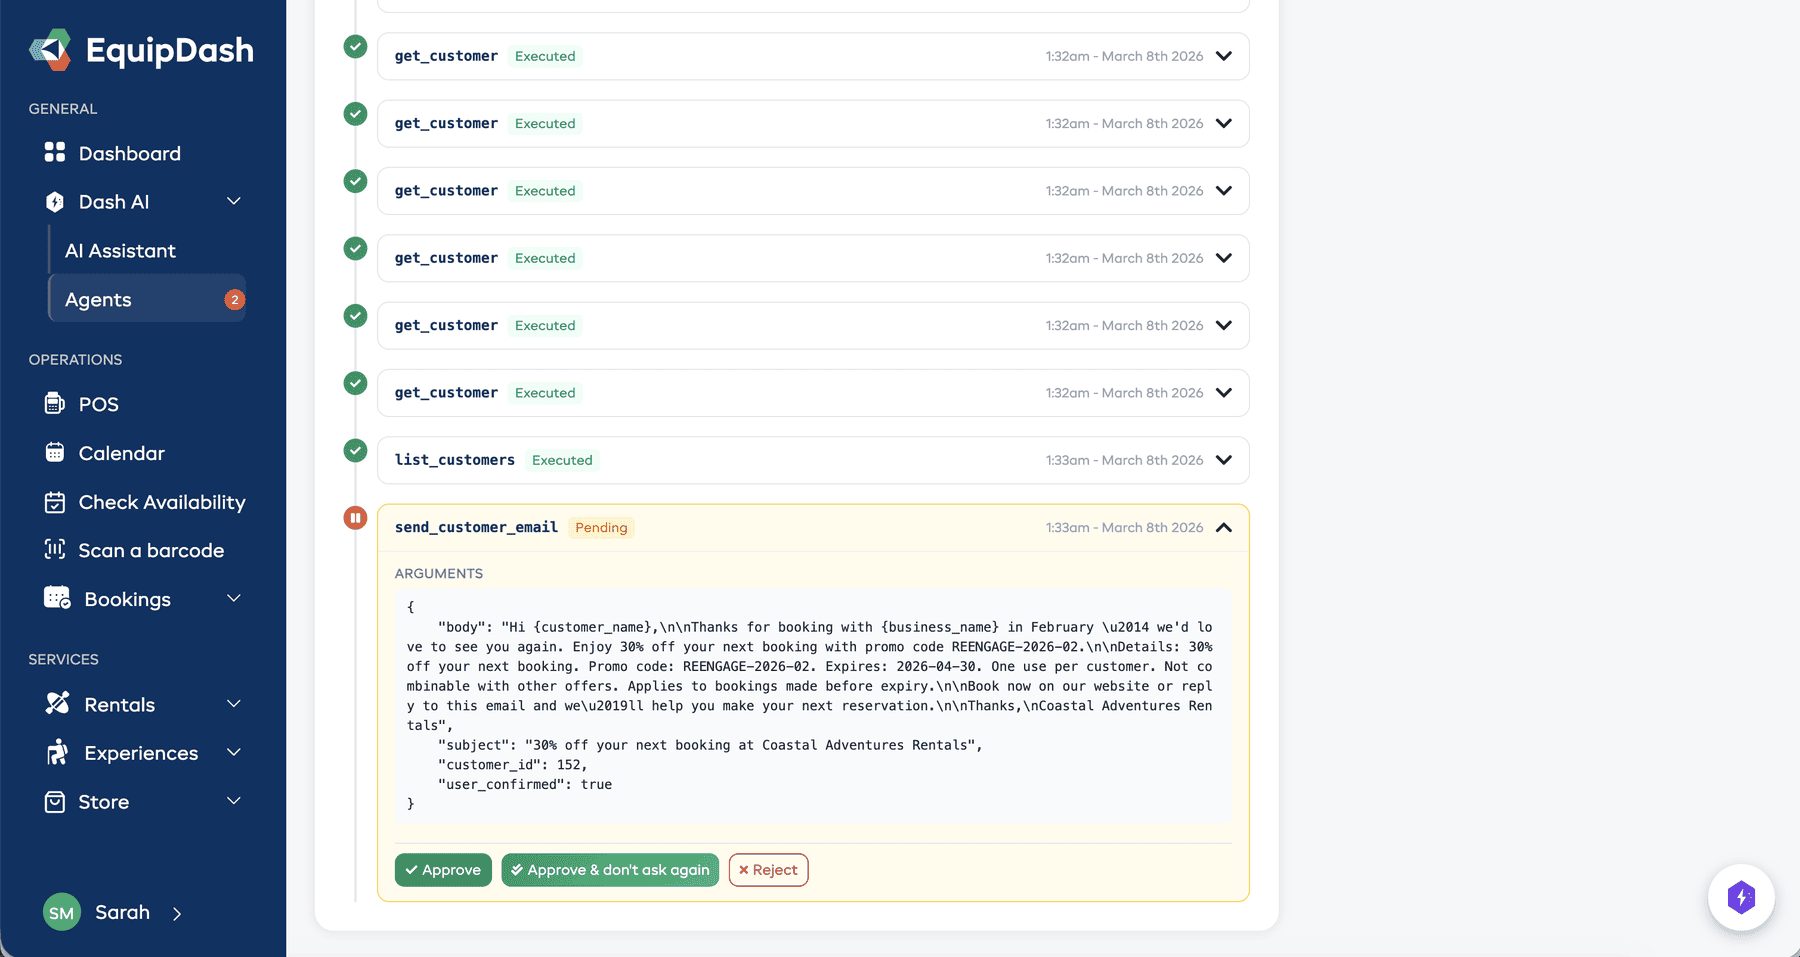
- Click on the run to open its details.
- Review the pending action. You will see:
- The tool name (e.g., Send Booking Email)
- The arguments the agent wants to pass (e.g., which customer, what message content)
- Click Approve to let the agent continue and execute the action.
- Or click Reject to deny the action. Rejecting an action cancels the entire run.
What Happens After You Respond
After Approving
- The agent resumes its run from where it left off.
- The approved tool executes with the arguments the agent specified.
- The agent continues to the next step in its workflow.
- If the agent encounters another tool that requires approval, it pauses again.
After Rejecting
- The pending action is marked as Rejected.
- The entire agent run is cancelled — the agent does not continue to subsequent steps.
- A record of the rejection is saved in the run history, including who rejected it and when.
Tips for Setting Up Approval Modes
- Start with more approvals, relax later. When you first create an agent, lean toward requiring approval for any tool that makes changes. Once you are confident the agent is behaving correctly after a few runs, you can switch those tools to auto-approve.
- Read-only tools are safe to auto-approve. Tools that only look up data (list bookings, get customer, check availability) do not change anything, so auto-approve is a good default.
- Always require approval for email tools at first. This lets you review the message the agent wants to send before it reaches your customer.
- Check the run history regularly. Even auto-approved actions are logged in the run history, so you can review what the agent did after the fact.