Creating an Agent Growth+This feature requires the Growth+ plan or higher
There are three ways to create a Dash Agent: start from scratch using the builder form, use a pre-built template, or describe what you want and let the AI generate it for you. This guide covers all three.
Before You Start
Make sure you have:
- The Agents: Manage permission (Admins have this by default).
- At least a basic idea of what you want the agent to do — for example, "send a reminder to customers with overdue returns every morning."
Opening the Agents Page
- Click Agents in the sidebar navigation.
- The Dash Agents page opens, showing your existing agents (if any) and the template library.
Method 1: Start from a Template
Templates are the quickest way to get started. Each template comes pre-configured with instructions, tools, a trigger, and approval settings.
- On the Dash Agents page, click the Templates tab.
- Browse the available templates. You can filter by category using the category pills at the top (e.g., Operations, Reports, Customer, Inventory).
- Click Use Template on the template you want.
- The Agent Builder opens with all fields pre-filled from the template.
- Review and adjust the settings to suit your needs — the name, instructions, tools, trigger, and approval modes are all editable.
- Click Save & Enable to activate the agent immediately, or Save Draft to save it without enabling it.
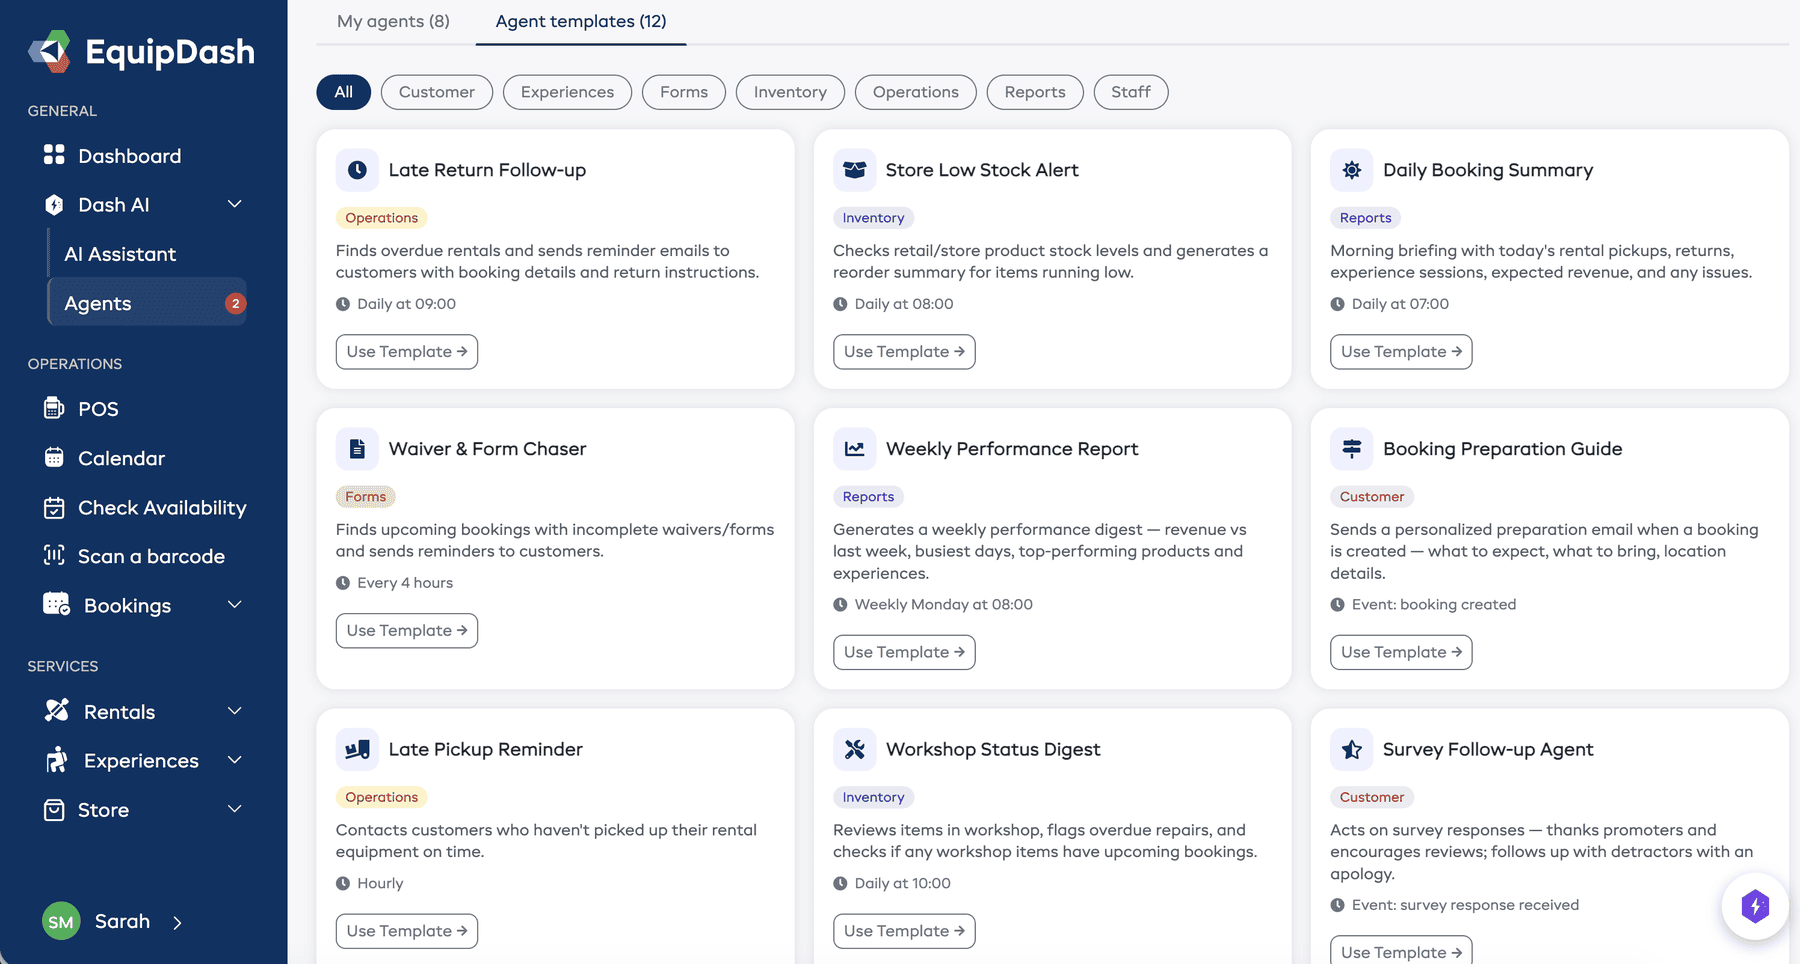
Available Templates
| Template | What It Does | Trigger |
|---|---|---|
| Late Return Follow-up | Finds overdue rentals and sends reminder emails | Daily at 9:00 AM |
| Store Low Stock Alert | Checks store stock levels and generates a reorder summary | Daily at 8:00 AM |
| Daily Booking Summary | Morning briefing with pickups, returns, sessions, and revenue | Daily at 7:00 AM |
| Waiver & Form Chaser | Reminds customers to complete waivers before their booking | Every 4 hours |
| Weekly Performance Report | Revenue, bookings, and top products compared to last week | Weekly on Monday at 8:00 AM |
| Booking Preparation Guide | Sends a "what to expect" email when a booking is created | When a booking is created |
| Late Pickup Reminder | Contacts customers who have not picked up on time | Every hour |
| Workshop Status Digest | Reviews workshop items and flags overdue repairs | Daily at 10:00 AM |
| Survey Follow-up Agent | Thanks promoters and follows up with detractors | When a survey response is received |
| Experience Availability Monitor | Flags under-booked and fully-booked sessions for tomorrow | Daily at 6:00 PM |
| Staff Roster Builder | Reviews next week's bookings and creates staff shifts | Weekly on Sunday at 6:00 PM |
| Customer Re-engagement | Finds customers who have not booked in 30+ days | Weekly on Friday at 10:00 AM |
Method 2: Build from Scratch
If none of the templates fit your needs, you can create an agent from scratch.
- On the Dash Agents page, click the + Create Agent button.
- The Agent Builder opens with empty fields.
Step 1: Name and Description
- Enter a Name for your agent (e.g., "Morning Briefing" or "Late Return Chaser").
- Optionally enter a Description — a short summary of what the agent does. This appears on the agents list page.
Step 2: Instructions
- Write your agent's Instructions in the large text area. Use plain English to describe what the agent should do, step by step.
- Be as specific as you can. Good instructions include:
- What data to look up
- What actions to take
- Any rules or constraints (e.g., "do not send more than one email per customer per day")
- How to format the output
Example instructions:
You are a daily briefing agent. Generate a morning summary of today's operations. Include today's rental pickups and returns with customer names, experience sessions scheduled with participant counts, expected revenue, any overdue returns, and any bookings with incomplete waivers.
Step 3: Select Tools
- Scroll to the Tools section. This shows all available AI tools grouped alphabetically.
- Click a tool to select or deselect it. Selected tools are highlighted.
- Choose only the tools your agent needs — giving an agent fewer, more focused tools makes it faster and more predictable.
- Use the search box to quickly find tools by name or description.
Not sure what a tool does? See the Tools Reference for a plain-English explanation of every tool.
For each selected tool, you can set its approval mode. Tools that could make changes (like sending emails or cancelling bookings) default to Require Approval.

Step 4: Set the Trigger
- Choose a Trigger Type:
- Manual — The agent only runs when you click Run Now.
- Schedule — Choose a frequency (every 15 minutes, every 30 minutes, hourly, every 4 hours, daily, weekly, or monthly) and optionally set a specific time, day, or date.
- Event — Choose the event that should trigger the agent (e.g., booking created, payment received).
Step 5: Configure Advanced Settings
- AI Model — Choose the AI model the agent uses. GPT-5 Mini is recommended for most tasks (uses fewer credits). GPT-5 and Claude Sonnet 4.6 are available for complex reasoning.
- Max Iterations — Set how many tool calls the agent can make in a single run (1 to 50). The default is 10. Higher numbers let the agent do more work but use more credits.
Step 6: Save
- Click Save & Enable to activate the agent immediately.
- Or click Save Draft to save without enabling it. You can enable it later from the agents list.
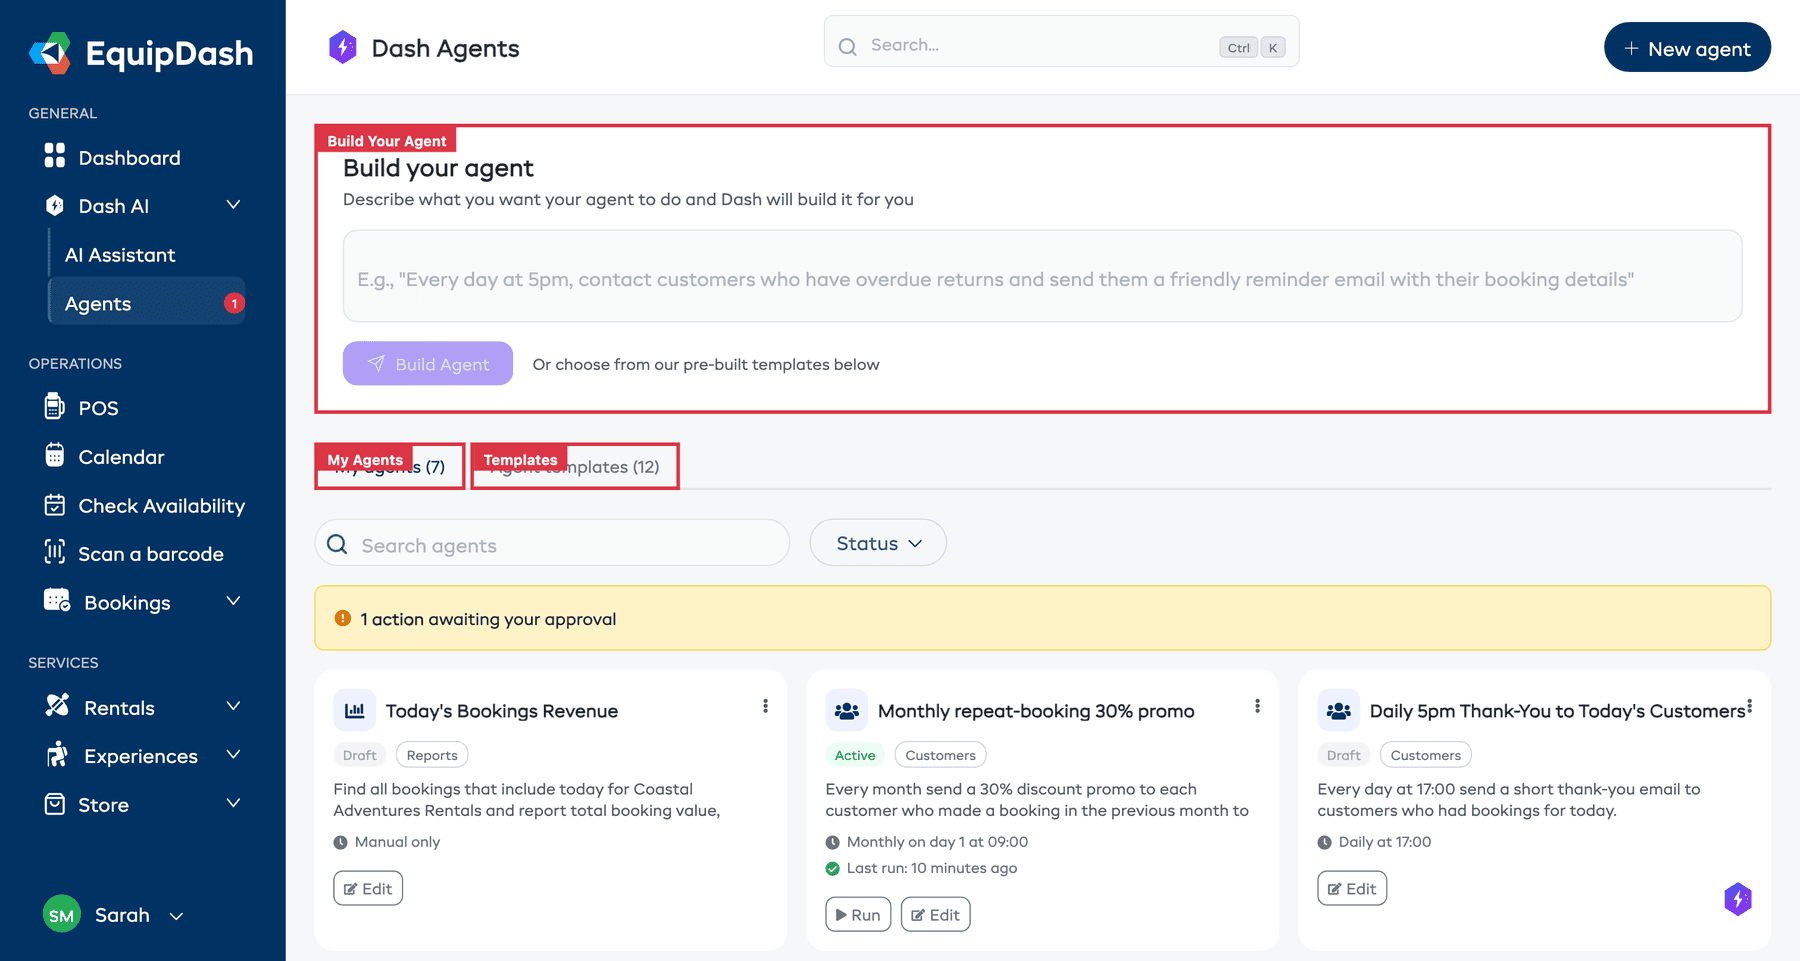
Method 3: Build Your Agent with AI
If you are not sure how to configure an agent, you can describe what you want in plain English and jump straight into the builder.
- On the Dash Agents page, find the Build Your Agent section.
- Type a description of what you want the agent to do. For example: "Every morning, check for bookings starting today that have incomplete waivers and send a reminder email to those customers."
- Click Build.
- The Agent Builder opens with your description pre-filled in the Instructions field.
- Review the instructions, select your tools, set the trigger, and configure approval modes.
- Click Save & Enable or Save Draft.
Editing an Agent
- Go to the Agents page.
- Click the agent you want to edit, or click the Edit button on the agent card.
- The Agent Builder opens with the agent's current settings.
- Make your changes and click Save & Enable or Save Draft.
Enabling and Disabling an Agent
You can toggle an agent on or off without deleting it.
- On the Agents page, find the agent you want to toggle.
- Click the Enable/Disable toggle on the agent card.
- A disabled agent will not run automatically (scheduled or event triggers are paused), but you can still run it manually.
Deleting an Agent
- On the Agents page, click the Delete button on the agent card.
- Confirm the deletion in the modal that appears.
- Deleting an agent is permanent and removes all its run history.