Selling Tour Packages Growth+This feature requires the Growth+ plan or higher
A tour package is a multi-day trip you sell as one product, where the customer answers a couple of questions before they pay — "Which hotel level?", "Which coach?" — and the price updates as they choose. Think a 5-day Thailand tour where the traveler picks Budget, Deluxe, or Premium hotels and a Seater or Sleeper coach, then books and pays online.
A package is just a special kind of experience, so everything you already know — categories, descriptions, departures, the booking widget, confirmation emails — works the same way. The only new part is the choices the customer makes when they book.
Tour packages are included on the Growth+ and Pro plans. If you don't see the package option when creating an experience, check your plan under Settings → Billing.
What makes a package different
| A normal experience | A tour package | |
|---|---|---|
| Length | A few hours (e.g. a 2-hour kayak tour) | Several days (e.g. "5 Days / 4 Nights") |
| Times | Runs at a set clock time | Dates only — no clock times |
| Price | One fixed per-person or per-group price | Built from the choices the traveler makes |
| Booking | Pick a time, pick travelers | Pick a date, pick travelers, choose hotel + coach |
Creating a tour package
- Click Experiences in the sidebar, then select Experiences.
- Click Add Experience (top-right), then choose the Tour package type.

- Give the package a Name (e.g. "Thailand 5 Days / 4 Nights"), add images and a category just like any experience. Click Next.
Set the trip length
A package is measured in days, not hours. Enter the Trip length (days) and EquipDash shows you the friendly label your customers will see:
- 5 days shows as "5 Days / 4 Nights".
- 1 day shows as just "1 Day".
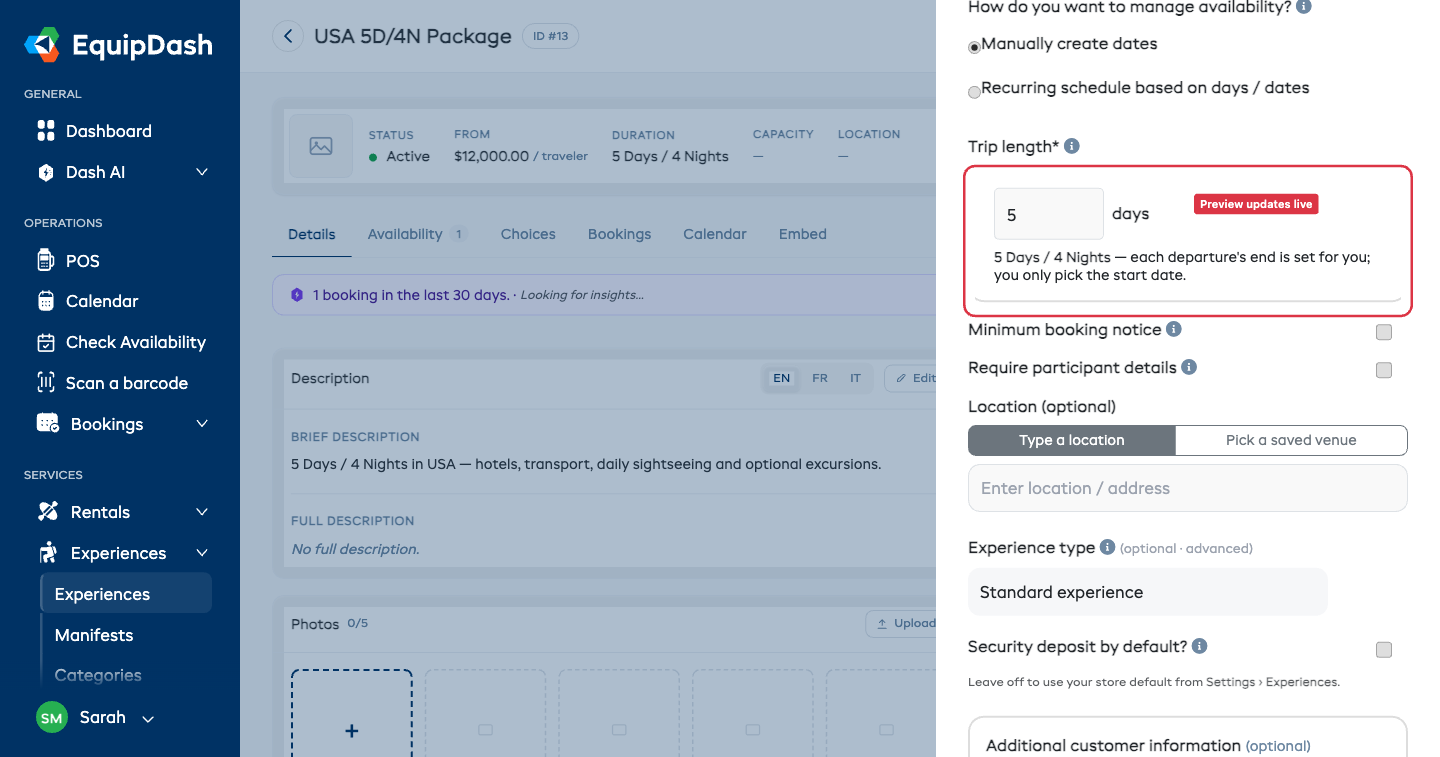
You set the trip length once. EquipDash works out the end date of every departure for you, so you never type an end date by hand. If you change the trip length later, every future, unbooked departure re-stretches to match — already-booked trips keep the length the customer paid for.
Adding the choices
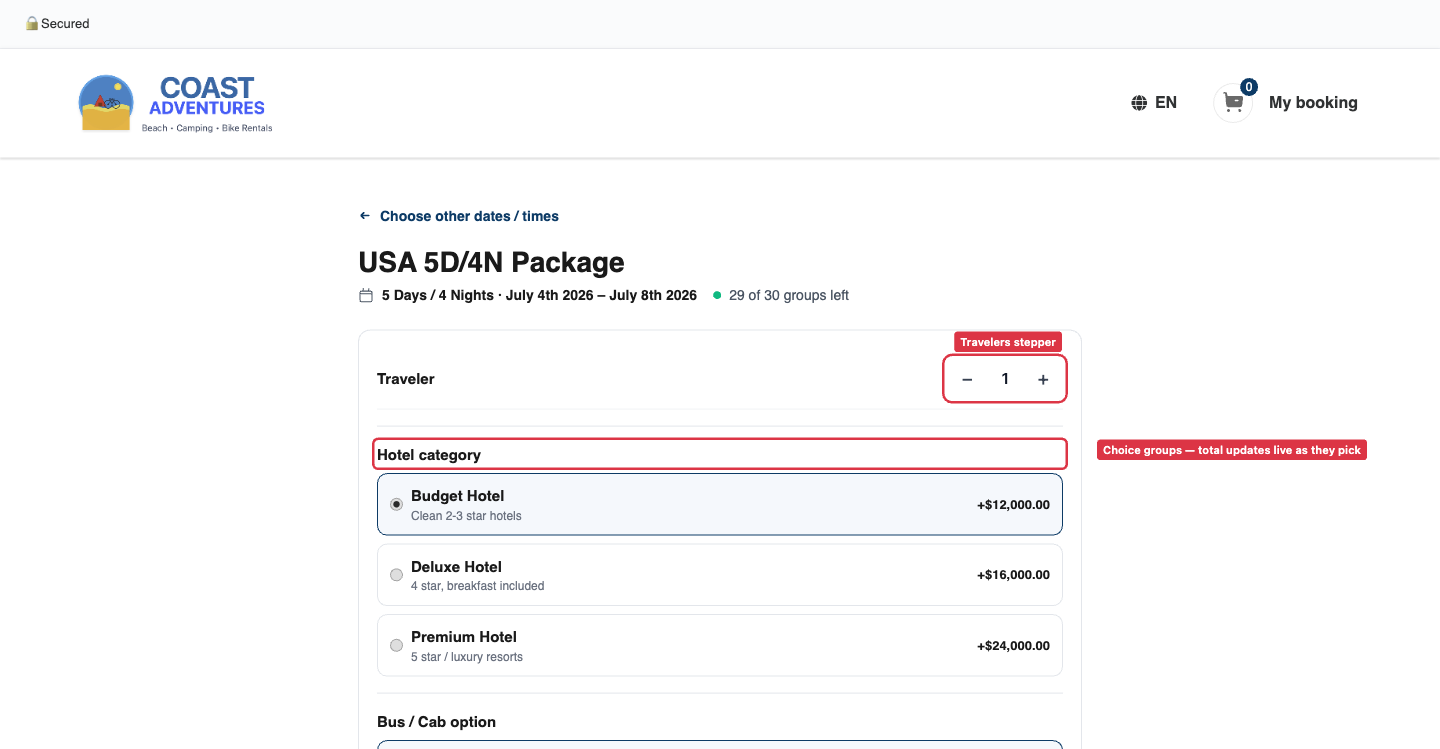
This is the heart of a package. A choice group is one question the traveler answers, and each option carries a price per traveler.
In the Choices step:
- Click Add choice group and name it (e.g. "Hotel category").
- Add an option under it for each level — Budget, Deluxe, Premium — and type the price per traveler next to each. Add a short one-line description if it helps (e.g. "4-star, central").
- Click Add choice group again to add a second question — "Coach type" — with options like Seater and Sleeper, each priced.

Every package needs at least one choice group — that's what the package is priced on. If you try to save without one, EquipDash reminds you to add a choice like "Hotel category" first.
The price each traveler pays is simply added up from the options they pick. There's no grid of every combination to fill in — the groups are independent, so "Deluxe + Sleeper" works out on its own. For a 2-traveler Deluxe + Sleeper booking, EquipDash charges each option twice and shows the running total.
Add optional activities (extras)
Want to offer add-ons like a day trip or a sightseeing tour? Add them as extras, priced per person, the same way you add extras to any experience. Customers tick the ones they want when they book. See How Experience Pricing Works for more on extras.
Setting capacity
A package controls how many people can come on each departure. By default a package is Private — perfect for a group tour that belongs to one party.
- Private (on by default) — set Max people per group (the most travelers one booking can have) and Groups per day (how many separate groups can depart on the same date). Leave Groups per day blank for unlimited.
- Shared (Private off) — instead you set one Default capacity, the total number of seats sold per departure, and individual travelers fill them up until it's full.
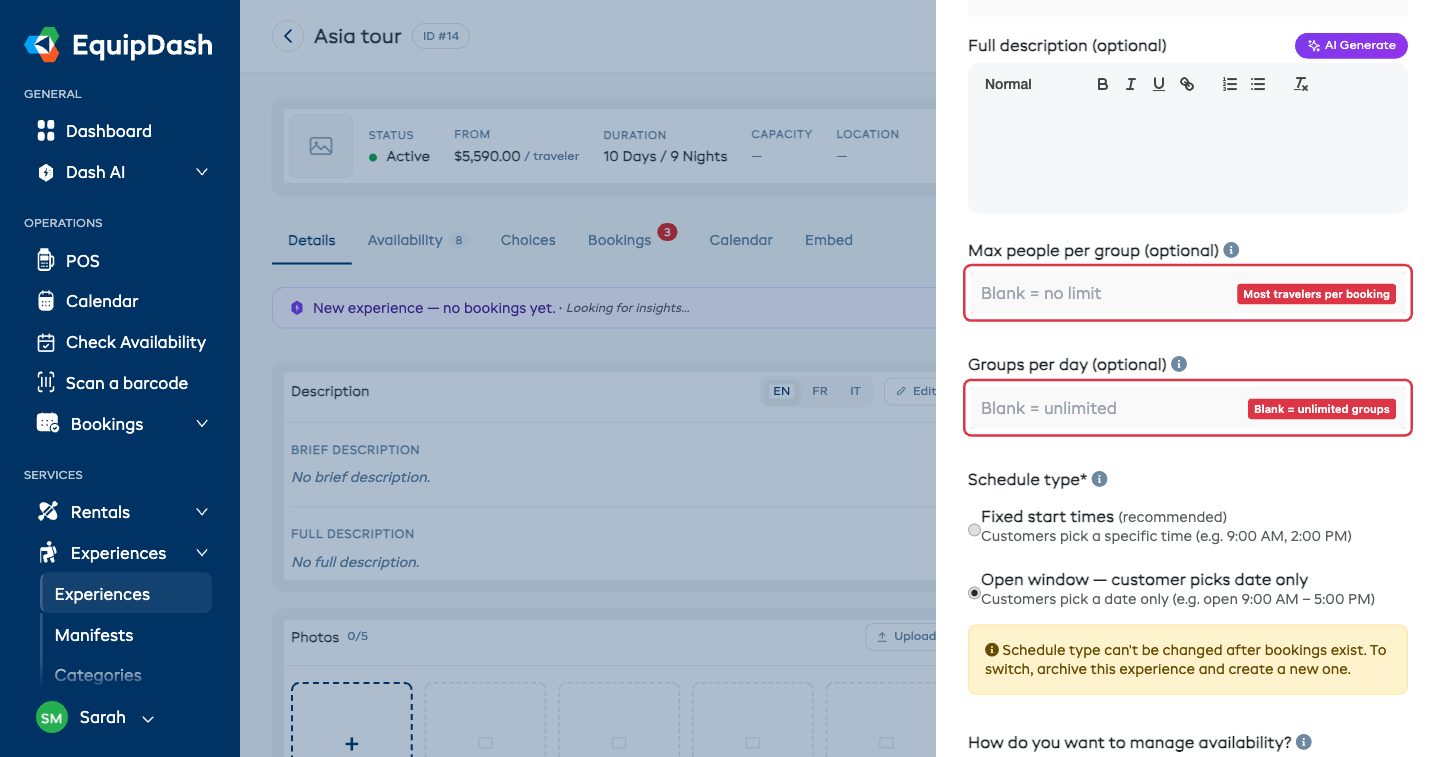
You can set capacity in the wizard, and you can change it later inline on the experience's Details tab without reopening the whole wizard.

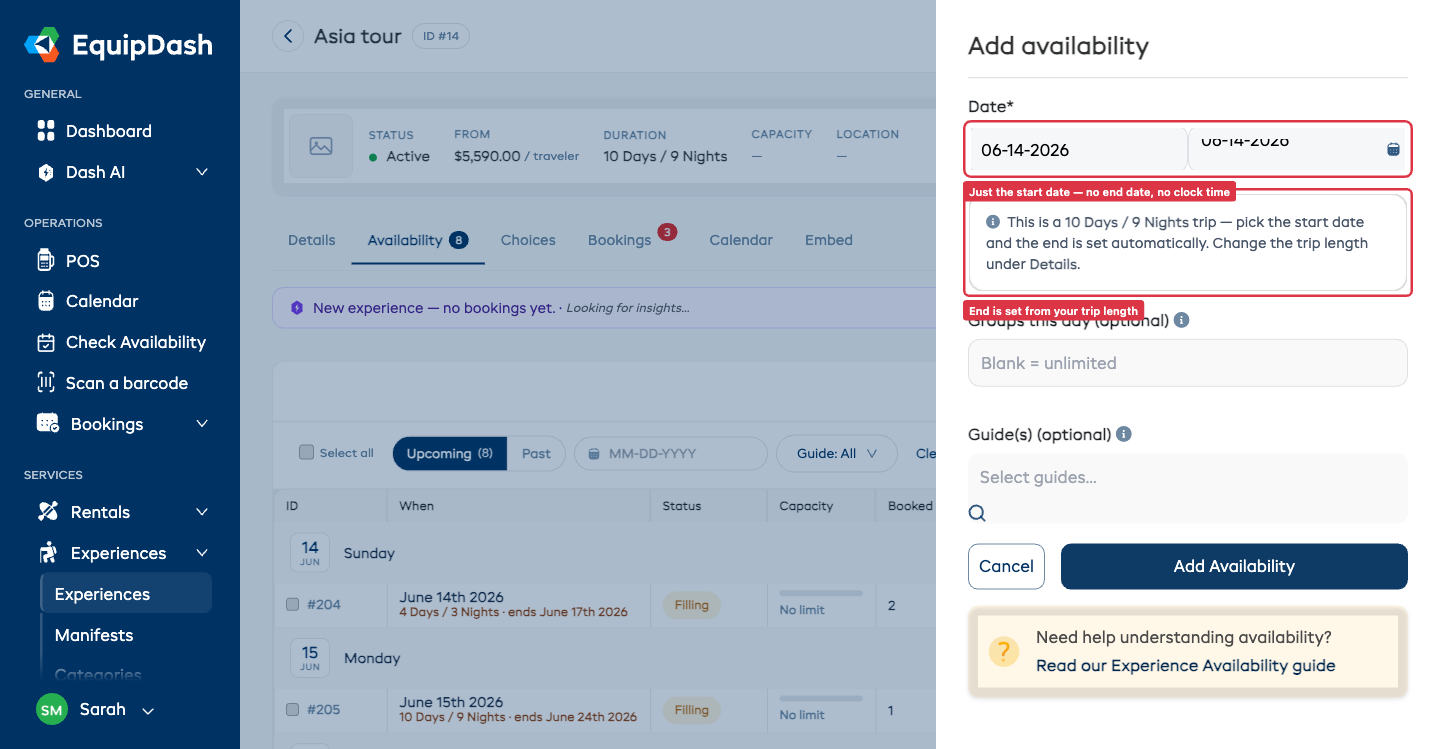
Adding departure dates
Packages run on dates only — there are no clock times to set.
Add one departure
On the package's detail page, add a departure by picking a start date. That's it — EquipDash fills in the end date automatically from your trip length (a 5-day package starting Mon 1st runs through Fri 5th). You never type an end date.
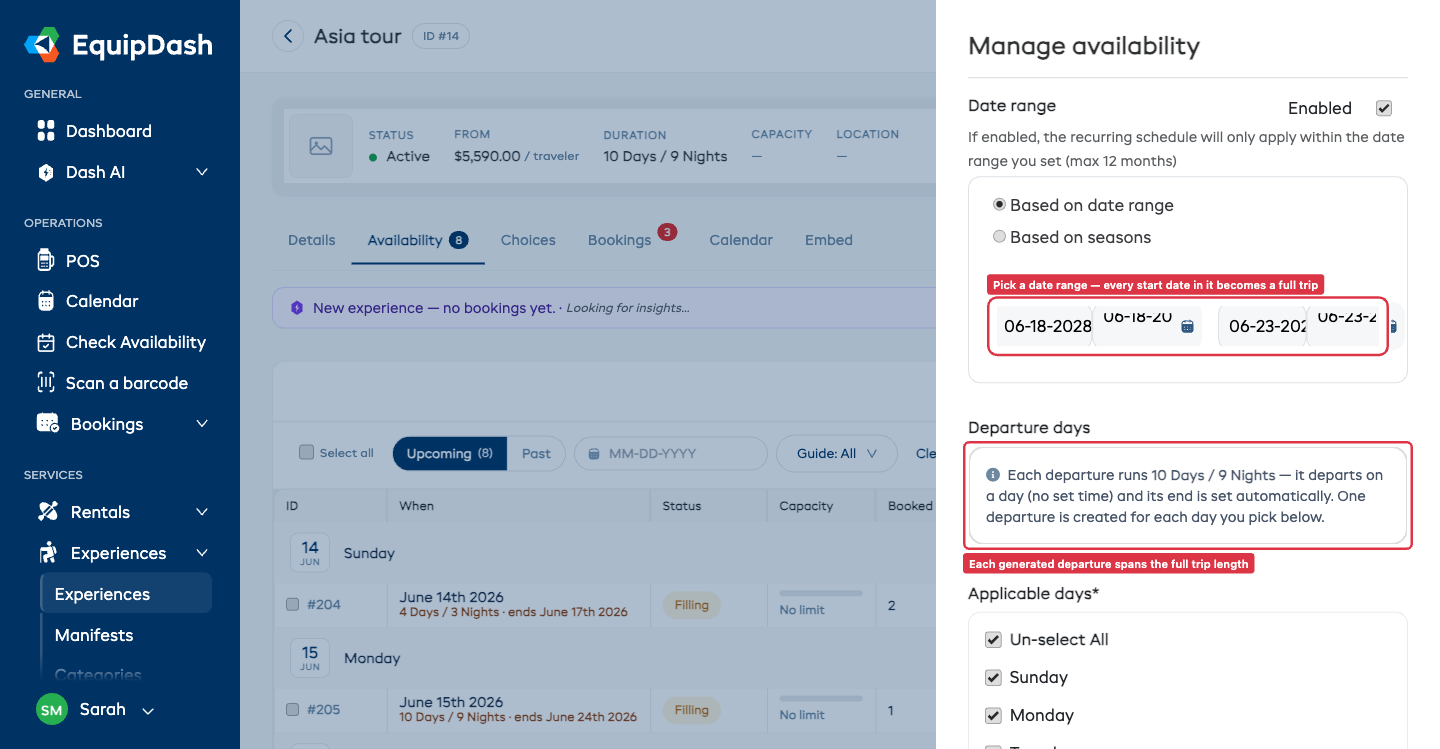
Add a whole season at once
To open up lots of dates, use Manage availability to generate recurring departures — for example "every Saturday from June to September". Each generated departure automatically spans the full trip length, so a week of start dates becomes a row of full multi-day trips, not single days.
How customers book a package
On your booking widget (or your website), the traveler:
- Picks a departure date from the available dates.
- Chooses how many travelers are coming, using the Travelers stepper (the + / − buttons or the number dropdown). It won't go above your Max people per group.
- Makes their choices — Hotel category, Coach type — and ticks any optional activities. The price updates live as they choose.
- Enters traveler details and pays online.
Their selections follow the booking everywhere — the cart, the confirmation page, the confirmation email, and the customer's magic link all show the chosen hotel level, coach, travelers, and dates. Your team can also take a package booking in person from the Point of Sale the same way.
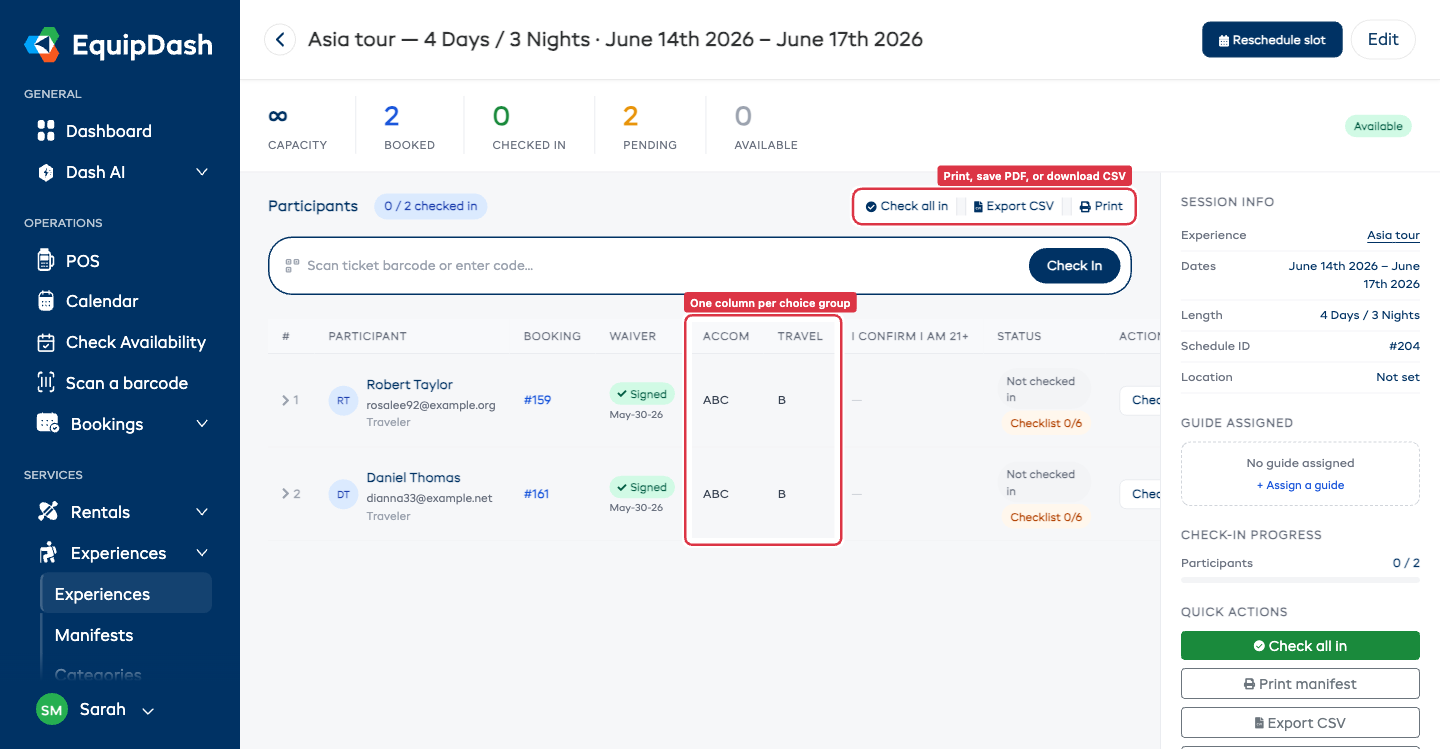
The day sheet (manifest)
Every departure has a manifest — your day sheet of who's coming and what they chose. Open it from the package's departures, and you can view it on screen, Print it, save a PDF, or download a CSV to share with a coach company.
Each traveler's choices appear as their own columns — one per choice group (a Hotel column, a Coach column) — so you can see at a glance who's on which hotel level and which coach. Because packages are date-only, no clock times appear on the manifest.
See Trip Manifests for everything the manifest can do.
Changing prices and choices later
You can rename a choice (e.g. "Deluxe" → "Deluxe Plus") or change a price any time. Existing bookings keep what the customer actually paid — their booking, receipt, and email still show the price and choice from when they booked. Only new bookings use the updated names and prices.