Manifest Documents (Custom Print-Outs)
A manifest document is your own version of the participant list. You choose which columns appear, what order they're in, and what each heading says — then download it as a PDF or spreadsheet (CSV) from any experience session or booking.
Build it once in settings and it's available everywhere. Use it for a guide run sheet, a front-desk check-in list, a Coast Guard manifest, or anything else your team needs.
Building a manifest document
- Go to Settings > Manifest documents.
- You'll already have a Standard manifest to start from. Click New manifest to create another.
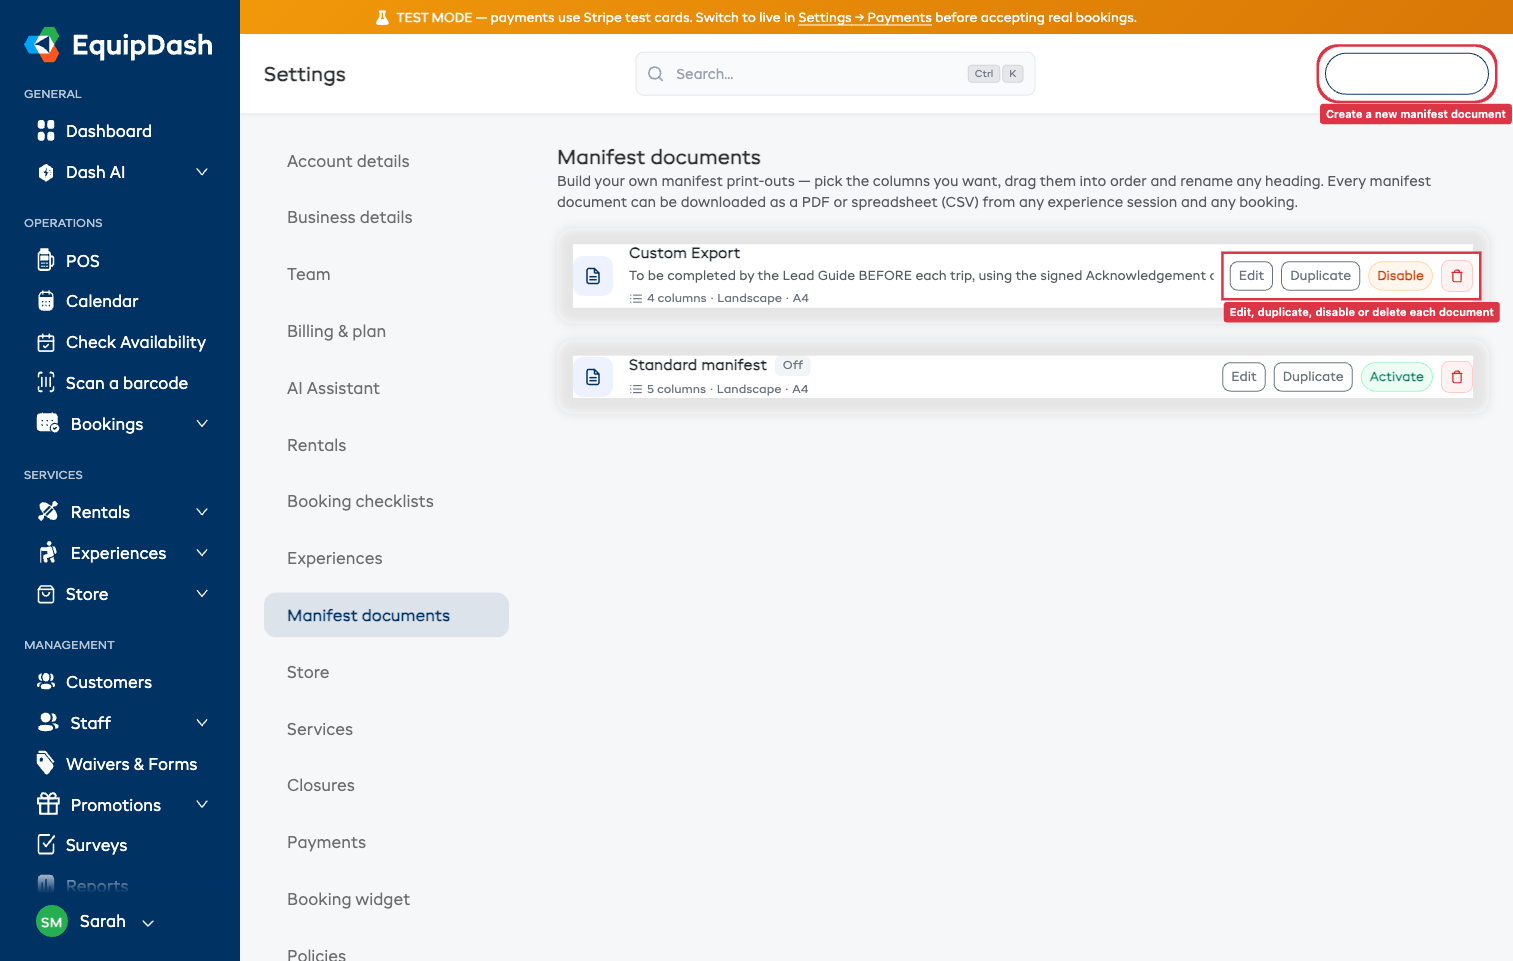
- Each document is one row. Click anywhere on a row (or the Edit button) to open the builder.
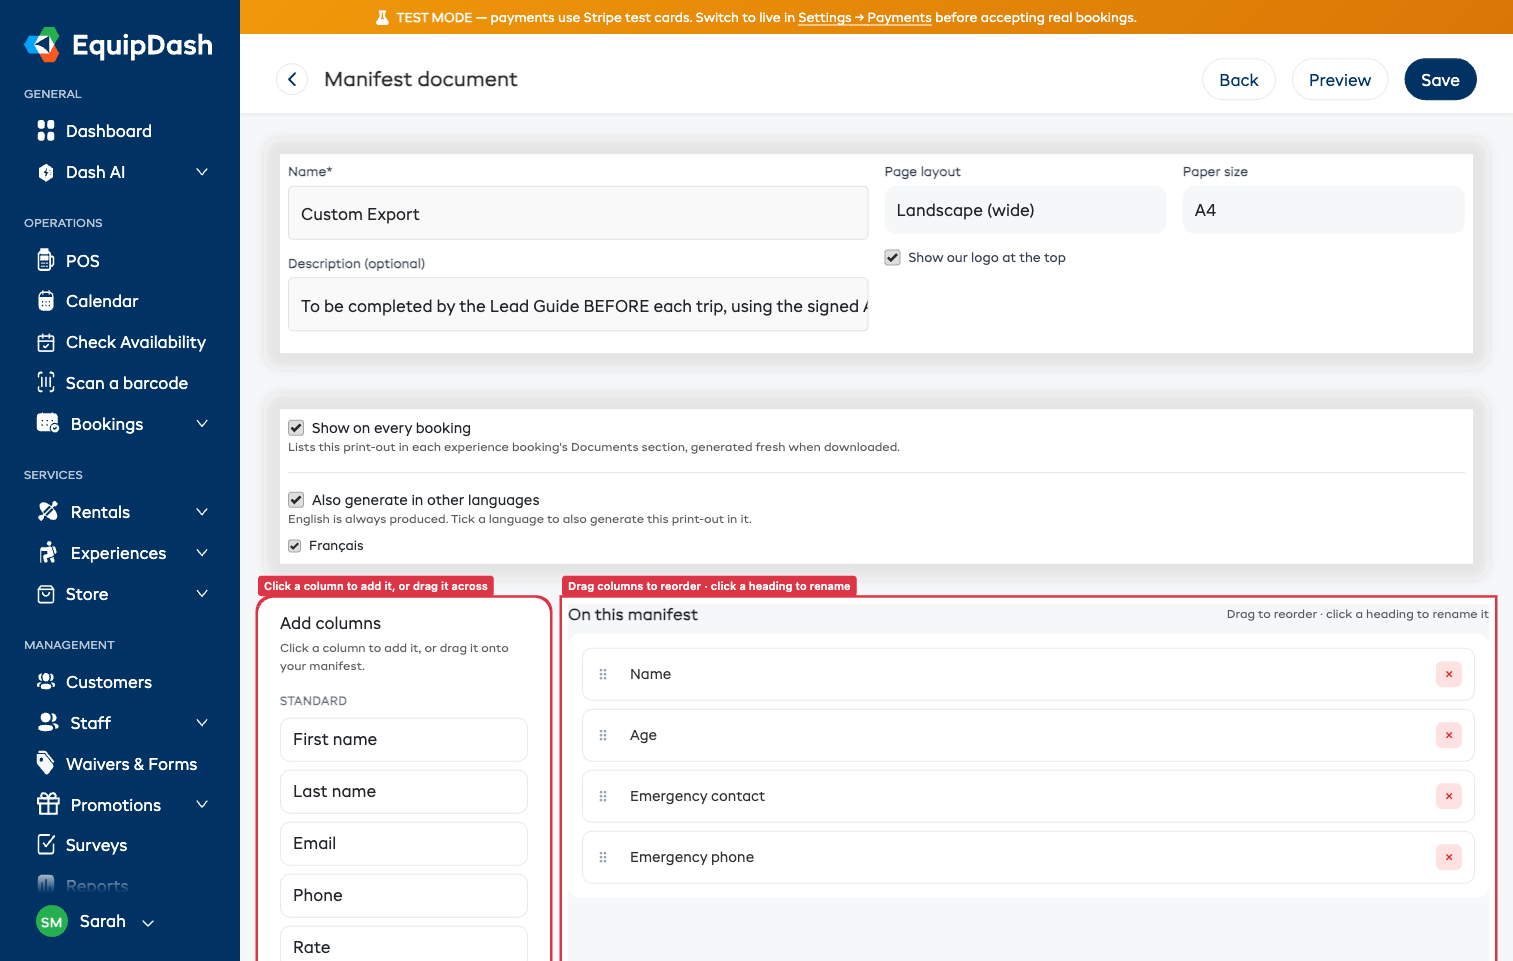
- Give it a Name (for example, "Guide run sheet") and an optional description.
- In Add columns, click a column to add it — or drag it onto your manifest. Columns are grouped (Standard, your own Custom fields, Package choices).
- Drag the columns in On this manifest into the order you want them printed.
- Click any heading to rename it (for example, rename "Name" to "Guest").
- Click Save. Use Preview at the top to open a sample PDF and check the layout.
Page setup
At the top of the builder you can set the Page layout (Landscape or Portrait), the Paper size (A4 or Letter), whether to show your logo at the top, and whether to show the weather forecast.
- Show weather forecast — adds a weather line at the top of the print-out (temperature, wind, visibility and rain) for the session being printed. It only appears when the experience has a location set with map coordinates, and only for upcoming sessions within about 7 days; otherwise the manifest prints as normal with no weather line. On by default. See Map coordinates & the weather forecast.
Document options
Below the page setup, two options control where and how the document is produced:
- Show on every booking — when on, the document appears in the Documents section of every experience booking, generated fresh each time it's downloaded. Turn it off for documents you only want from the manifest screen.
- Also generate in other languages — only shown if your business has more than one language enabled. Tick a language to also produce the print-out in it. The column headings and status labels translate; guests' own details (names, etc.) print exactly as entered. English is always produced.
Downloading a manifest document
You can download any document as a PDF or spreadsheet (CSV) from two places:
- A session manifest — open Experiences > Manifests, open a session, and use the Documents group in the right-hand Quick Actions.
- A booking — open any experience booking and use the new Documents section (alongside the invoice, tickets and signed waivers).
If a document is set up in more than one language, you'll see each language listed (for example, "PDF (Français)").
What you can put on a manifest
Most columns are always available — guest name, email, phone, rate, booking reference, waiver status, checked-in status, check-in time, notes, age, date of birth, emergency contact and emergency phone — plus any participant custom fields and tour-package choices you've set up.
A couple of useful notes:
- Age is worked out automatically from each guest's date of birth — you don't enter it separately. As long as you collect date of birth, the Age column fills in.
- Emergency contact and emergency phone only have values if you collect them at checkout. You can turn these on for any experience under Settings > Booking widget > Customer details > Participant details (they're off by default). See Checkout Field Requirements.
Who can do what
- Anyone who can view manifests can download your manifest documents.
- Only team members who can manage manifests can build or change the documents in settings.