Managing Bundles Growth+This feature requires the Growth+ plan or higher
Once you've created bundles, manage them all from the bundles listing - filter by what they contain, set the order customers see them in, turn them on or off, and edit or delete them.
The bundles listing
Go to Rentals → Bundles. The table shows:
| Column | Description |
|---|---|
| ID | The bundle's unique identifier |
| Image | The bundle photo, or an auto collage of its items |
| Bundle Name | The bundle's name |
| Items | How many things the customer gets (a "pick one" choice counts as one) |
| Type | Rental, Experience, Store, or Mixed - what the bundle contains |
| Price | A set amount, Prices by rate type, or Varies when totaled from the items |
| Action | Edit and delete |
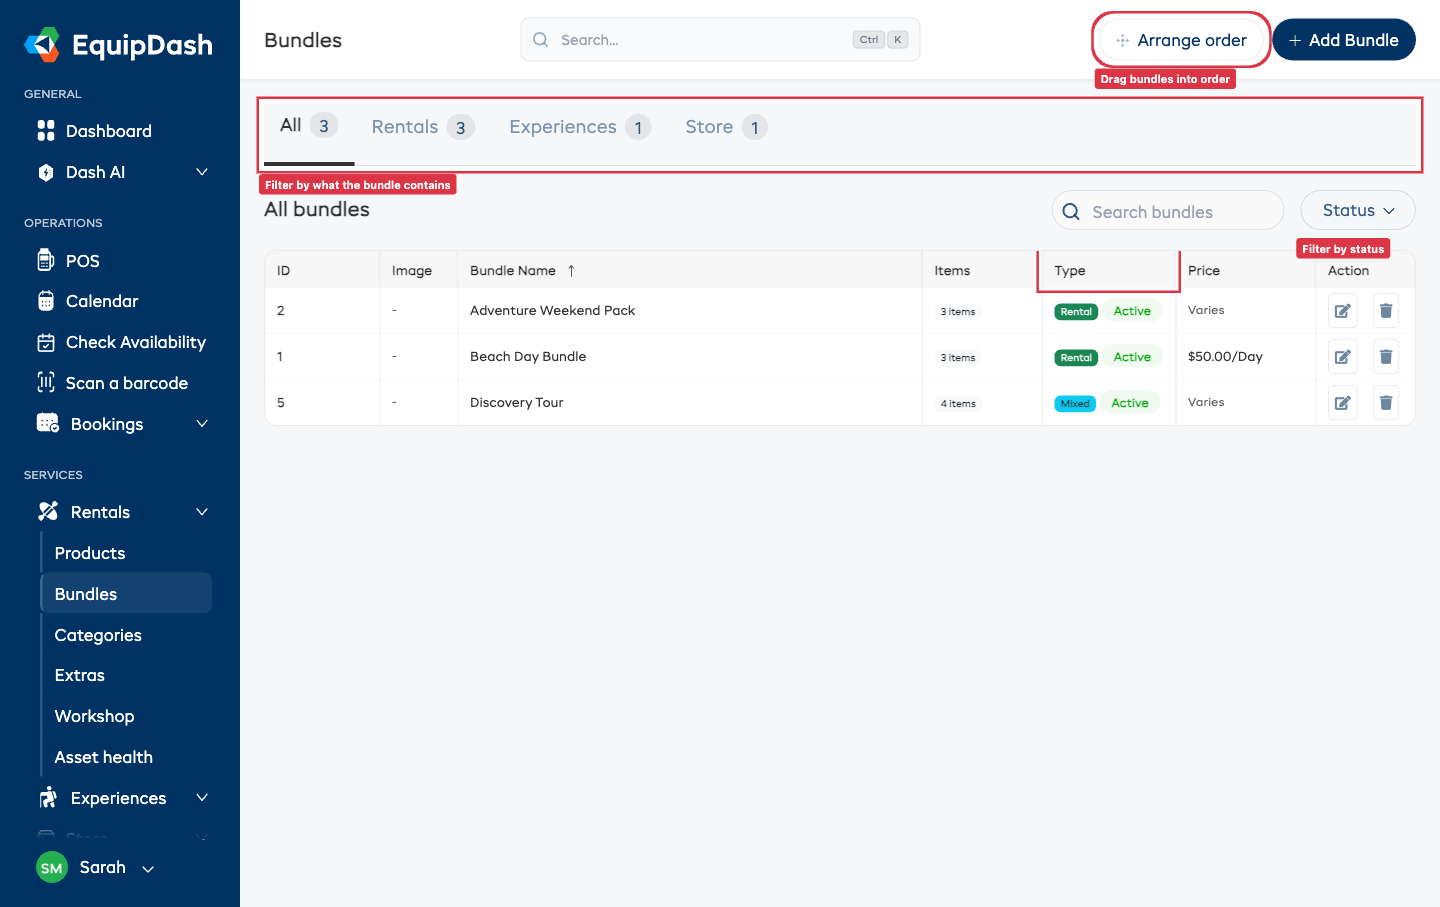
Filter by type
The tabs across the top - All · Rentals · Experiences · Store - filter the list by what each bundle holds. A mixed bundle (e.g. a kayak + a tour) shows under every category it touches, so it appears in both Rentals and Experiences. Opening Bundles from the Experiences or Store sidebar menu lands you here pre-filtered.
Filter by status
The Status dropdown (next to the search box) narrows the list to Active, Disabled, or All bundles.
Order them the way customers see them
Click Arrange order (top-right) to drag your bundles into the order you want. That order is exactly what customers see on the widget, in the POS, and in the app - so put your best sellers first.
Editing a bundle
- Click a bundle's name (or the Edit pencil) to open it.
- On the Details tab, edit the description, pricing, security hold, cancellation policy, and photo - all inline, saving as you go.
- On the What's included tab, add or remove items, change "pick one" choices, set rental lengths, and adjust deals.
See Creating a Bundle for the full builder walkthrough.
To change it on the booking page your customers see, click Visual editor at the top of the page. See Visual Editor.
Naming, pinning and ordering items
On the What's included tab, each item has its own controls under its name:
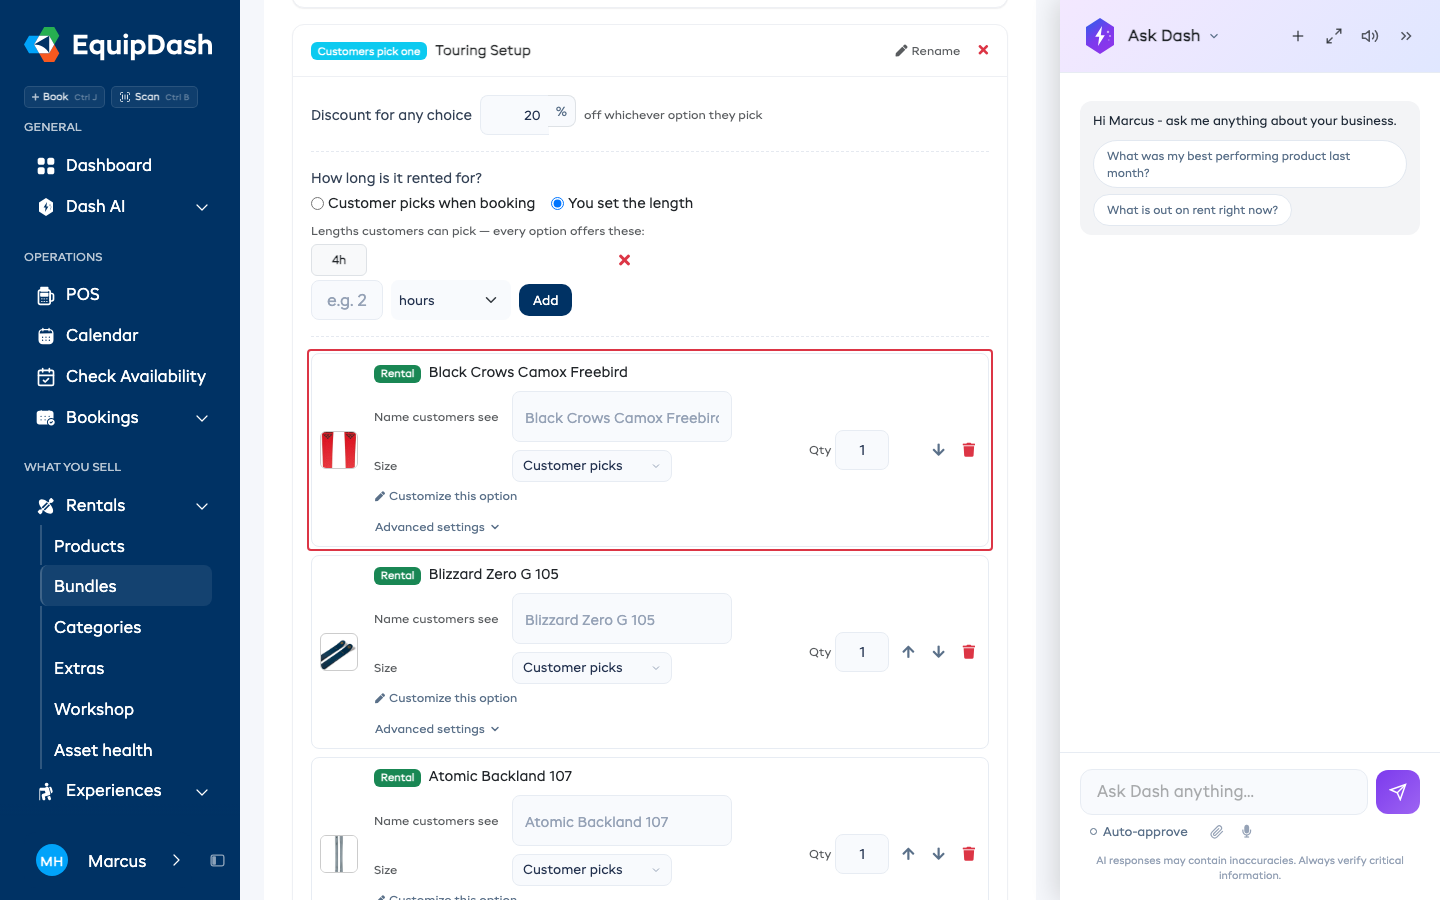
- Name customers see - the name of an option in a "pick one" group, for example "Half day" instead of the item's full name.
- Price - pin the rate an experience sells at in this bundle, for example Adult. Leave it on the customer's pick to let them choose.
- Size - pin the size of a rental, or leave it for the customer to choose.
- Up and down arrows - move the item within its group. Customers see the items in this order.
Each change saves straight away.
Changing prices by rate type
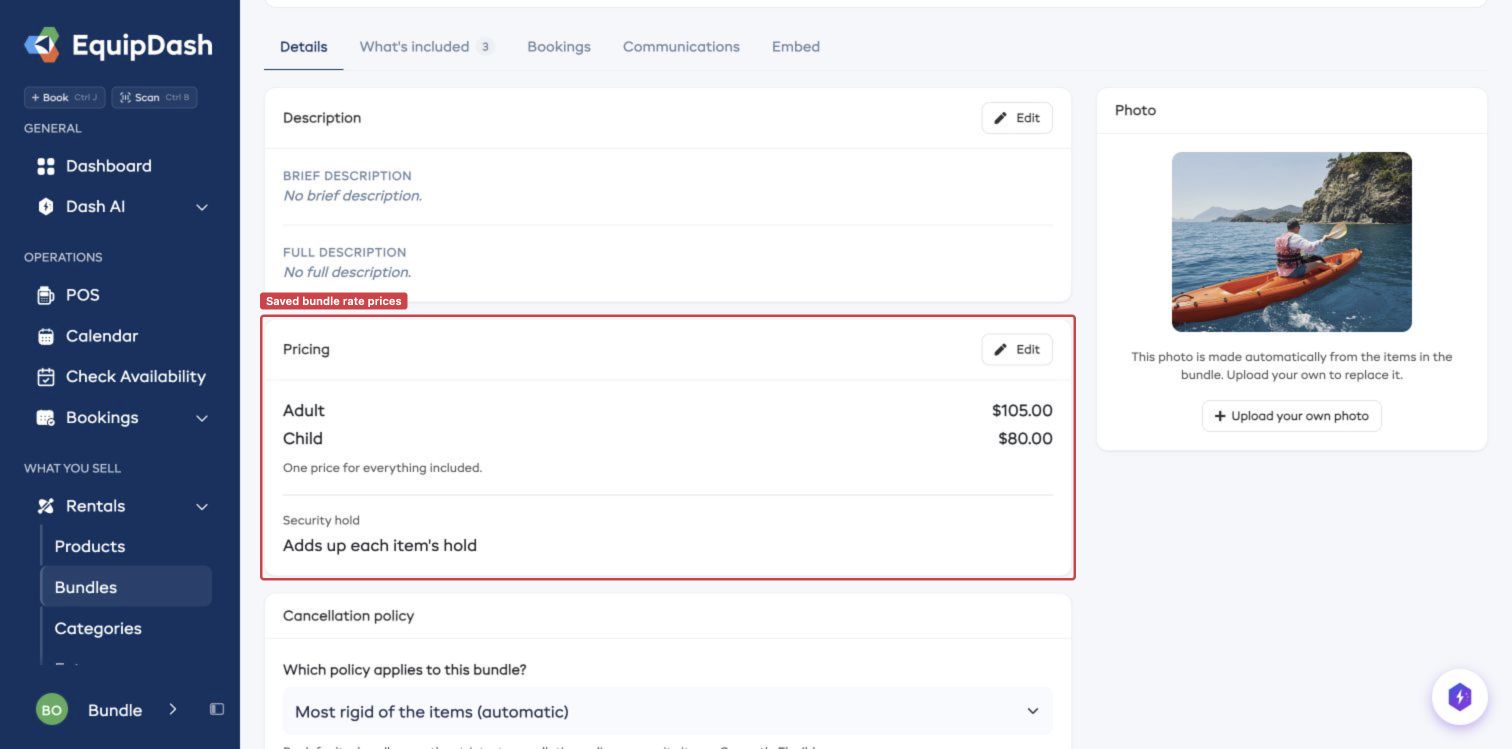
Open Details > Pricing > Edit to change the offered rates or their prices. Save in place. Check every required experience offers those rates before making the bundle available. Changing the catalog price applies to new bookings; earlier bookings keep their sold prices.
Duplicating a bundle
Start from a program that already works instead of rebuilding it:
- Click the Duplicate (copy) action on the bundle's row.
- Confirm in the dialog.
A copy named "… (Copy)" is created with every item, price rule, and discount - starting Disabled, so customers never see a half-edited clone. Tweak it, then set it Active when you're happy.
Save a booking as a bundle
Built the perfect one-off combo for a customer? Turn it into a reusable program:
- Open the booking.
- Choose Actions → Save as bundle.
- Give it a name and save.
Every rental, experience, and store line on the booking becomes a bundle item with its quantity. The new bundle starts Disabled so you can review it first - the booking itself is untouched.
Active and Disabled bundles
Every bundle is either Active or Disabled:
- Active - live everywhere customers can book: the widget, the POS, the app, and the API.
- Disabled - hidden from customers everywhere and not bookable, but still here for you to edit.
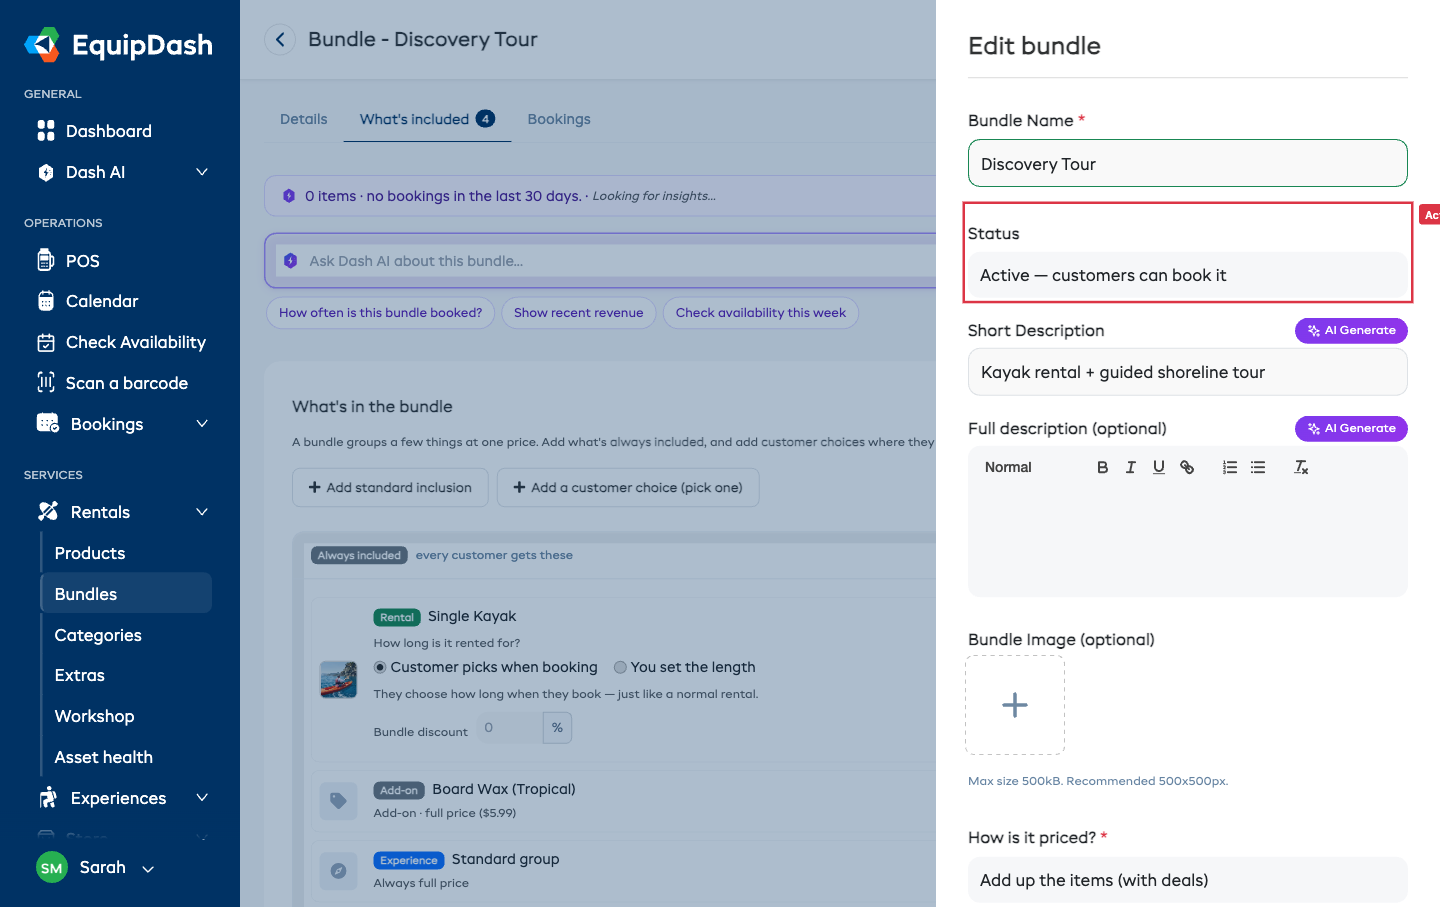
To change it: open the bundle, click Edit Bundle, set Status to Active or Disabled, and save. The listing shows each bundle's status as a colored pill, and you can filter by it. Disabling is handy for a seasonal bundle you only want live part of the year.
Changing Several Bundles at Once
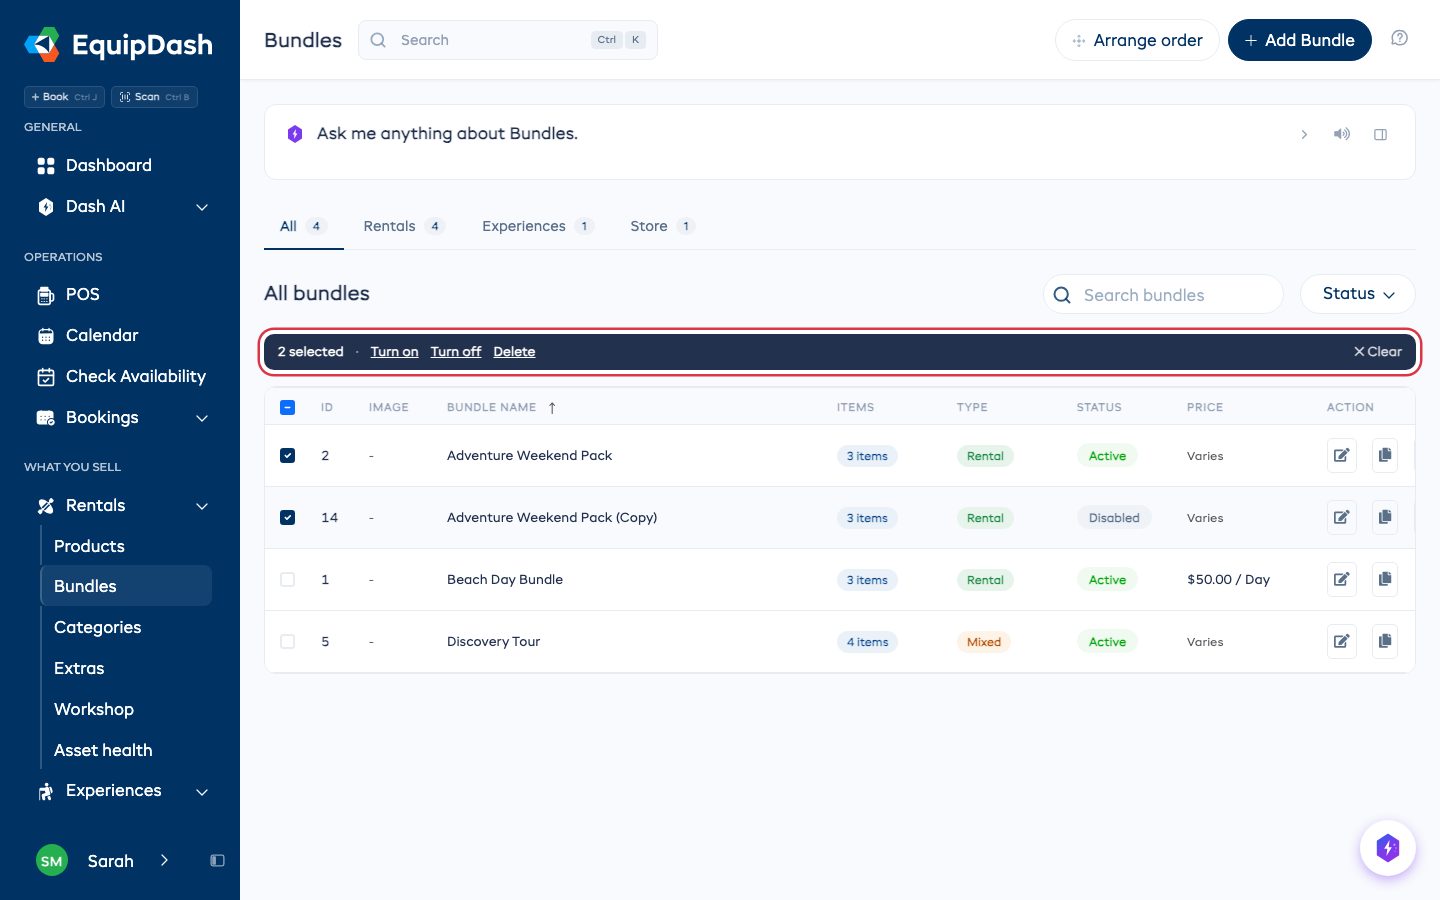
Tick the box at the start of each row, or the box in the header to tick the whole page. A dark bar appears above the table with what you can do to them together:
- Turn on or Turn off - make them bookable, or hide them from customers.
- Delete - bundles with bookings are kept, and the confirm tells you how many before anything is deleted.
To reach more than one page, tick the header box, then click Select all in the bar. It picks every bundle your search and filters match.
Deleting a bundle
- Click the Delete (trash) action on the bundle's row.
- Confirm in the dialog.
Deleting a bundle is permanent. The individual rentals, experiences, and store products inside it are not affected - only the bundle grouping is removed. Past bookings that used the bundle keep their historical records.
Related Guides
- Creating a Bundle - building a bundle and its items.
- Rental + Experience Bundles - mixed bundles with a guided experience.
- Widget: Rentals - how bundles appear to customers.