General Settings
The Rentals General Settings tab lets you configure default values that apply to new rental products. These include pickup and return times, same-day rental options, security deposit defaults, rental period limits, and your business opening hours.
The page is split into collapsible sections — Pickup & return, Deposits, Booking rules, and Advanced — so you only open what you need. After making changes, click Update at the bottom of the page to save.
Accessing Rental Settings
- Click Settings in the sidebar.
- Select Rentals from the settings menu.
- You will land on the General Settings tab.
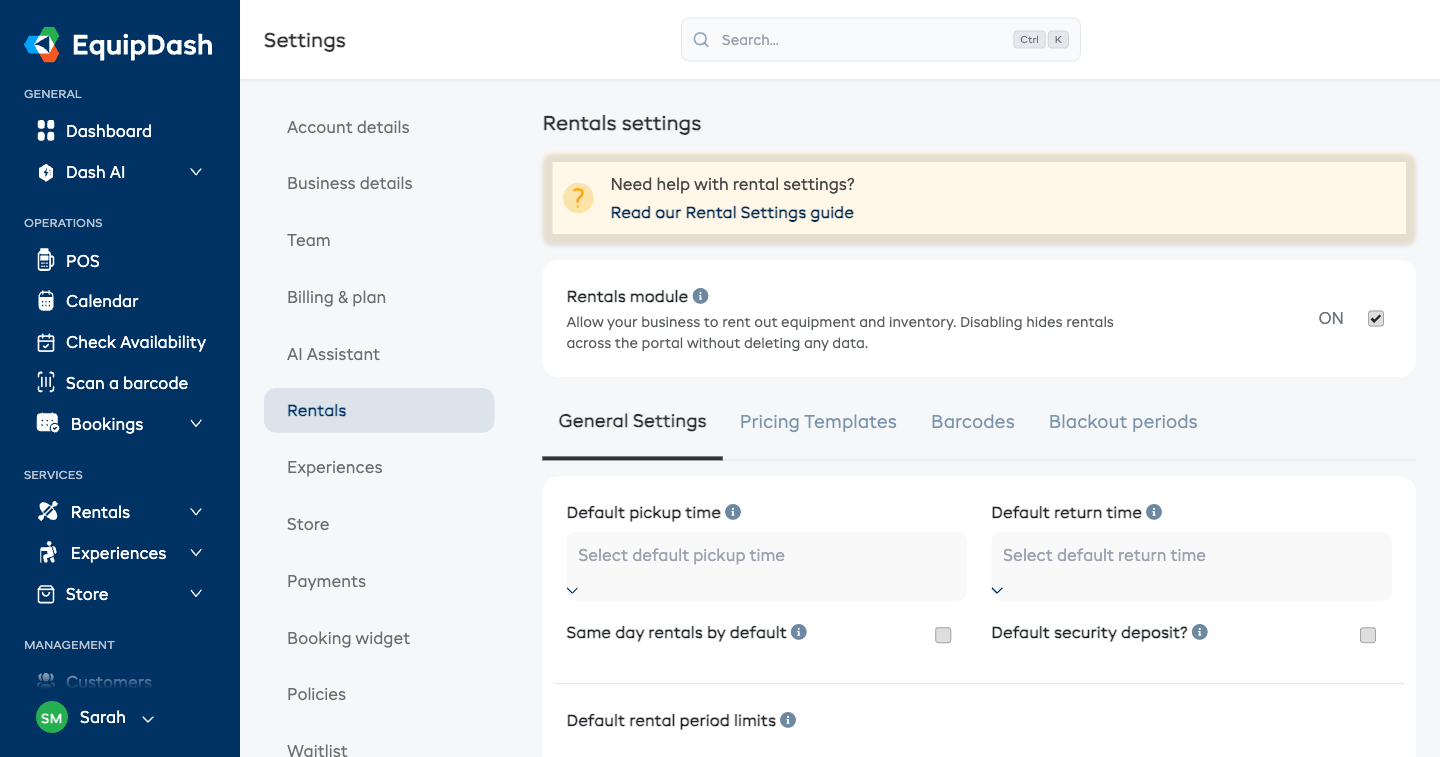
Default Pickup and Return Times
- Default pickup time -- the default time customers can collect their rental (e.g., 9:00 AM). This can be changed for each booking individually.
- Default return time -- the default time customers are expected to return their rental (e.g., 5:00 PM). This can be changed for each booking individually.
Select a time from the dropdown in 15-minute increments.
Same-Day Rentals
- Same day rentals by default -- when enabled, new rental bookings will default to same-day return. This can be changed for each booking individually.
How Customers Choose Rental Length
Control whether customers can pick any return time, or only a set list of durations. This setting lives in the Advanced section. The choice you make here applies everywhere a rental is booked -- your website widget, the point of sale, and the API.
- Customer picks the return time (default) -- customers choose both a pickup and a return time. Any combination is allowed.
- Customer picks from a list of durations -- customers choose a pickup time and a duration (e.g., 2 hours, Full day); the return time is calculated automatically. They never see a return-time field.
When to use each mode
- Use Customer picks the return time if your pricing handles any return time gracefully (per-hour or per-minute pricing) or if customers expect to choose exact return times (e.g., before a flight).
- Use Customer picks from a list of durations if your price schedule has set tiers (2 hours, 4 hours, full day, weekend, week) and you want every booking to land on a tier instead of on an "odd" in-between time that has to be estimated. This is the simplest option for most rental businesses.
Setting your allowed durations
When you choose Customer picks from a list of durations, the Allowed durations list appears below:
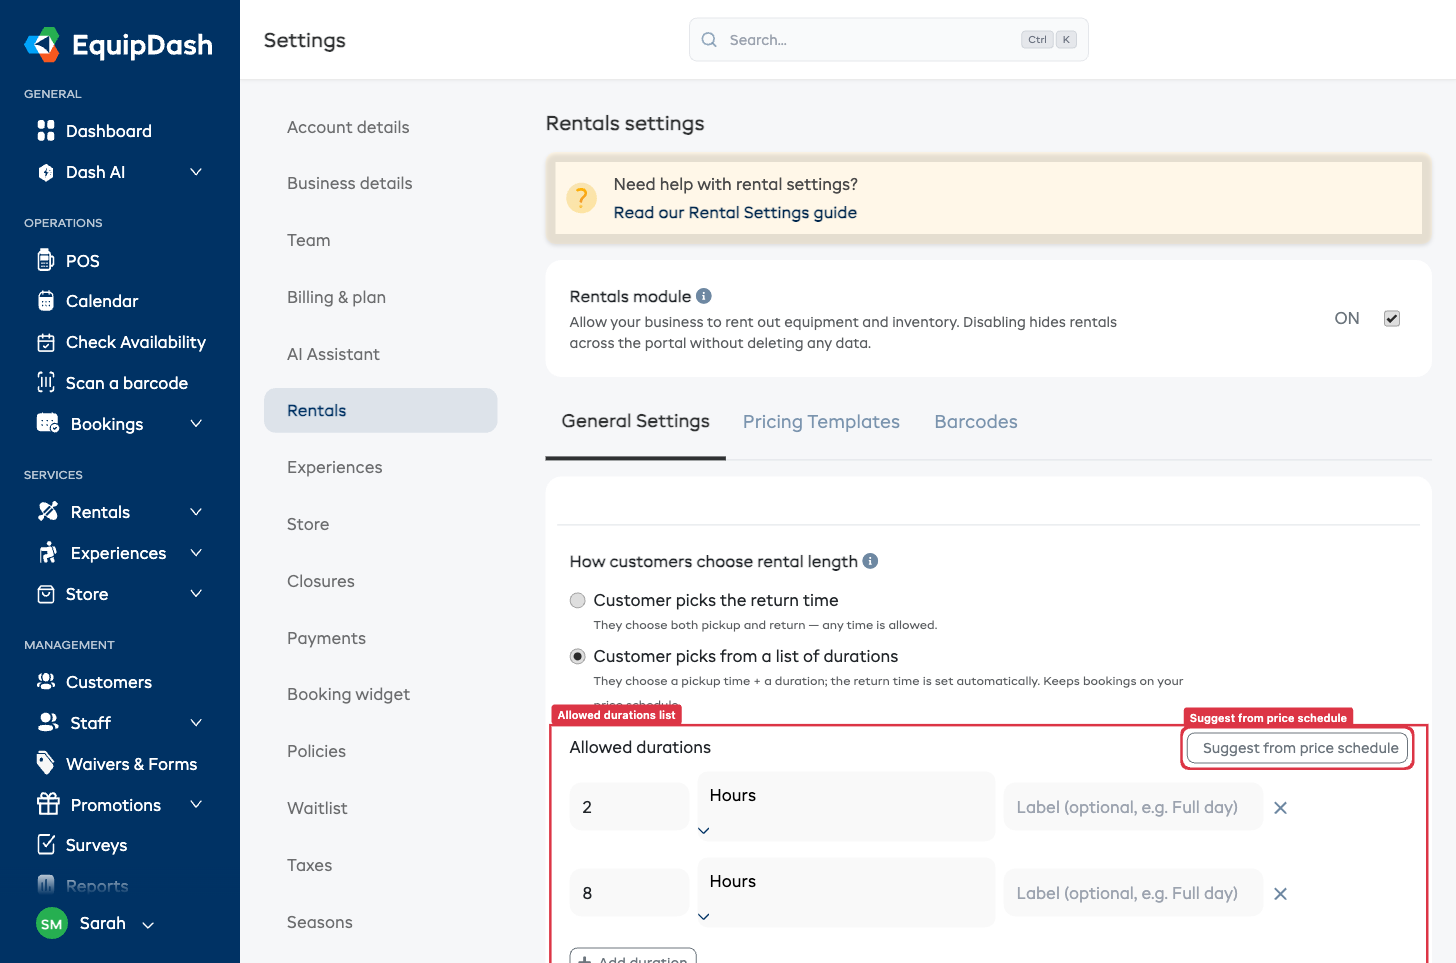
- Click Suggest from price schedule to fill the list from the duration tiers you already charge for across your products. This is the quickest way to start -- it pulls the exact intervals you've priced (e.g., 2 hours, 4 hours, 1 day, 1 week).
- Or add durations manually with Add duration: enter a Length, pick the Unit (Hours, Days, or Weeks) from the dropdown, and (optionally) type a friendly Label such as "Full day" or "Weekend".
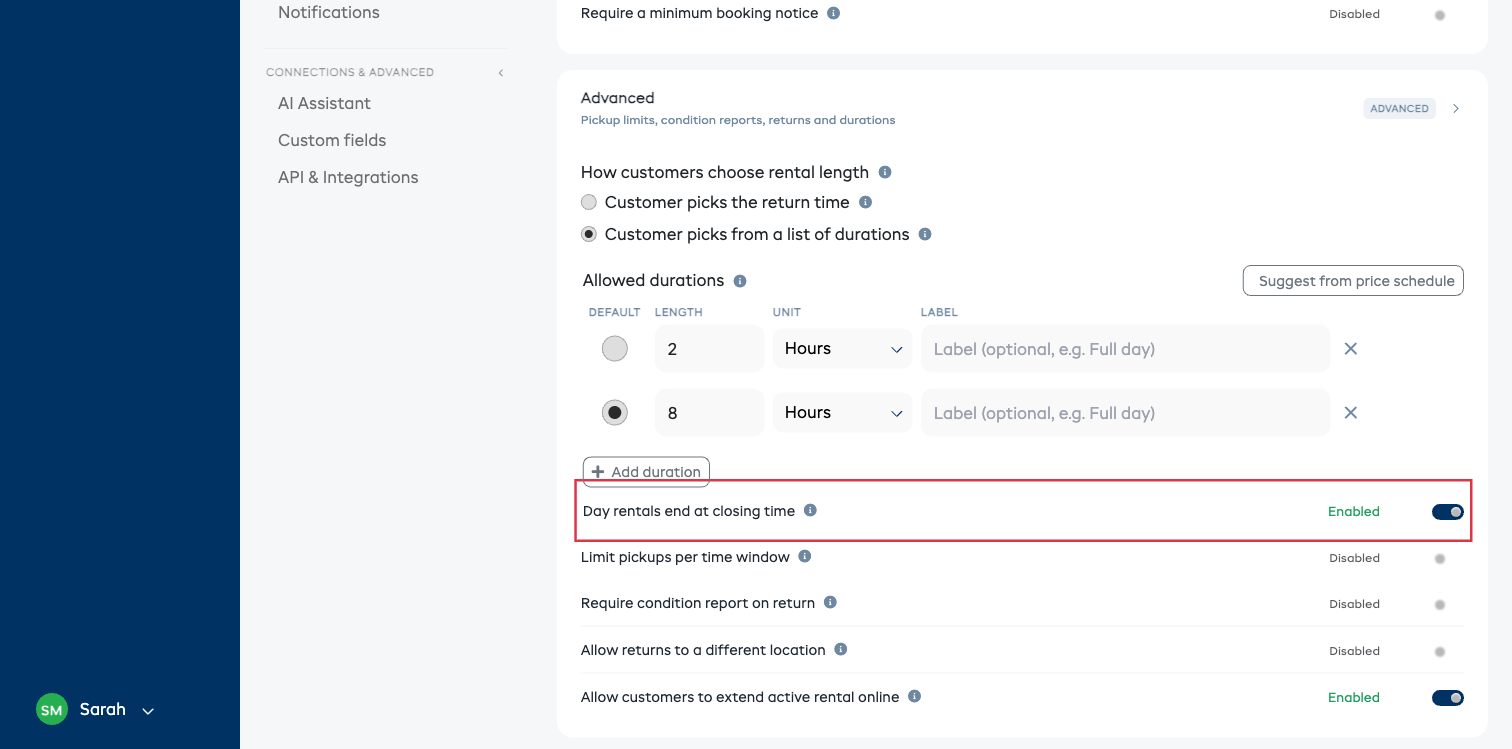
- Use the Default radio at the start of a row to set which duration is preselected for customers in your widget and at the point of sale. They can still pick another.
- Use the × at the end of a row to remove a duration.
- Click Update at the bottom of the page to save.
If you add a duration that isn't on any product's price schedule, EquipDash shows a small warning next to that row -- its price would be estimated rather than matching a listed tier. Using Suggest from price schedule avoids this.
Day rentals end at closing time
By default, a day duration runs a full 24 hours -- a "Full day" picked up at 9:00 AM is due back at 9:00 AM the next morning. That suits businesses that rent overnight, such as camping gear or tools kept overnight.
If you run day-use rentals -- bikes, kayaks, e-bikes, anything that goes out in the morning and comes back the same day -- turn on Day rentals end at closing time. Then:
- Full day returns by your closing time that day (for example, a 9:00 AM pickup is due back at 5:00 PM the same day), not the next morning.
- A multi-day duration such as 2 Days returns by closing time on the last day.
- Hourly durations are unchanged -- a "4 hours" duration is always four hours from pickup.
- The price still follows the duration the customer picked, so a "Full day" always charges your full-day rate -- even for a late-afternoon pickup.
This option only appears when you've chosen Customer picks from a list of durations, and it applies everywhere a rental is booked -- your website widget, the point of sale, and the API. It's off by default, so nothing changes until you turn it on.
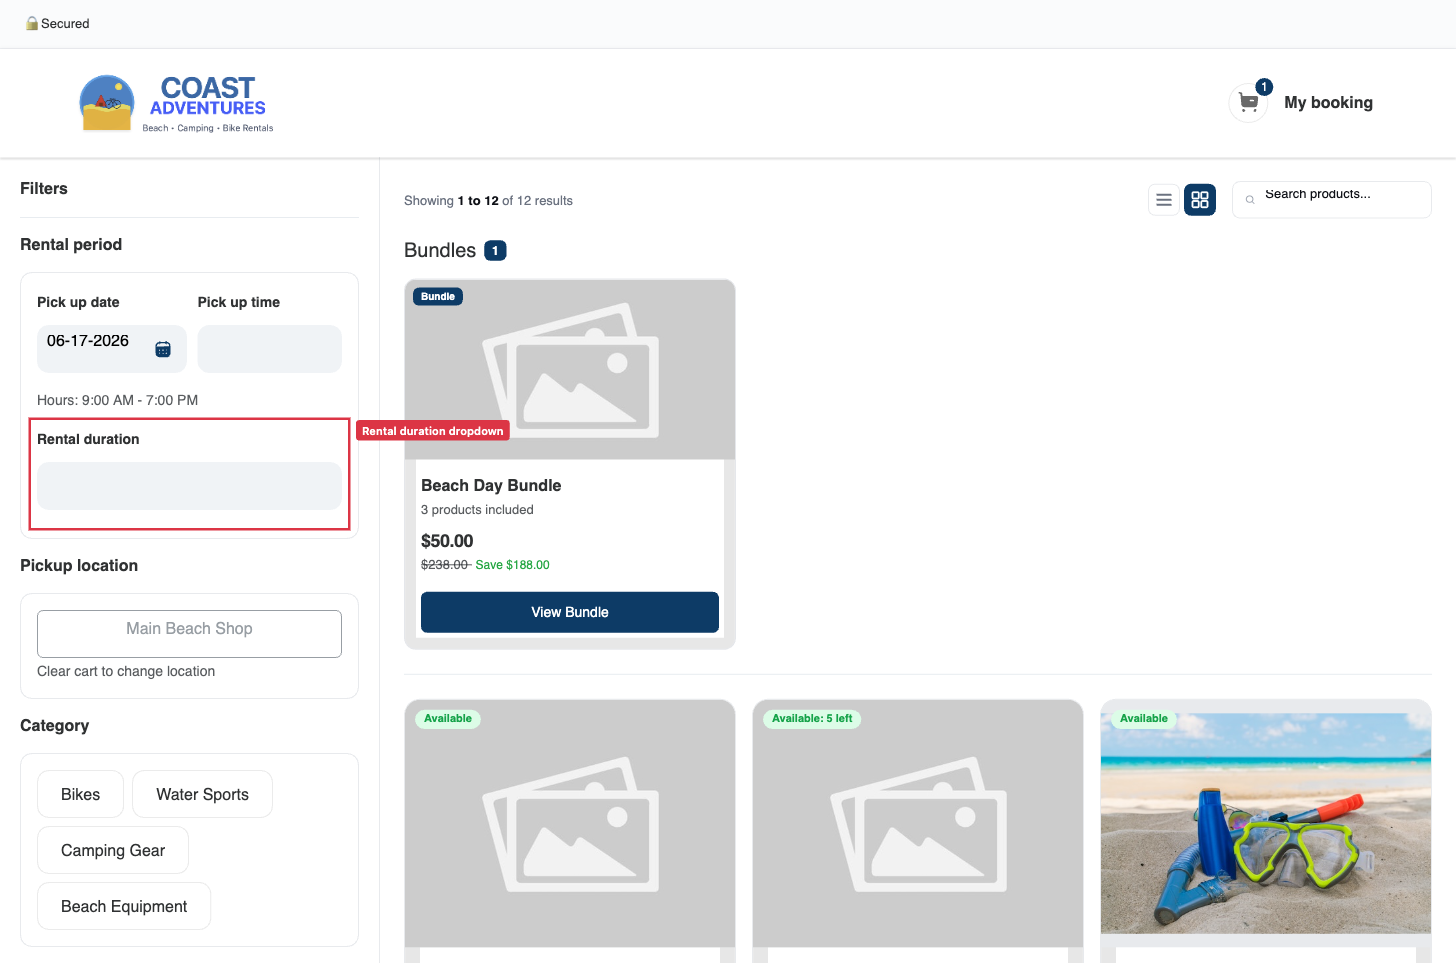
What customers and staff see
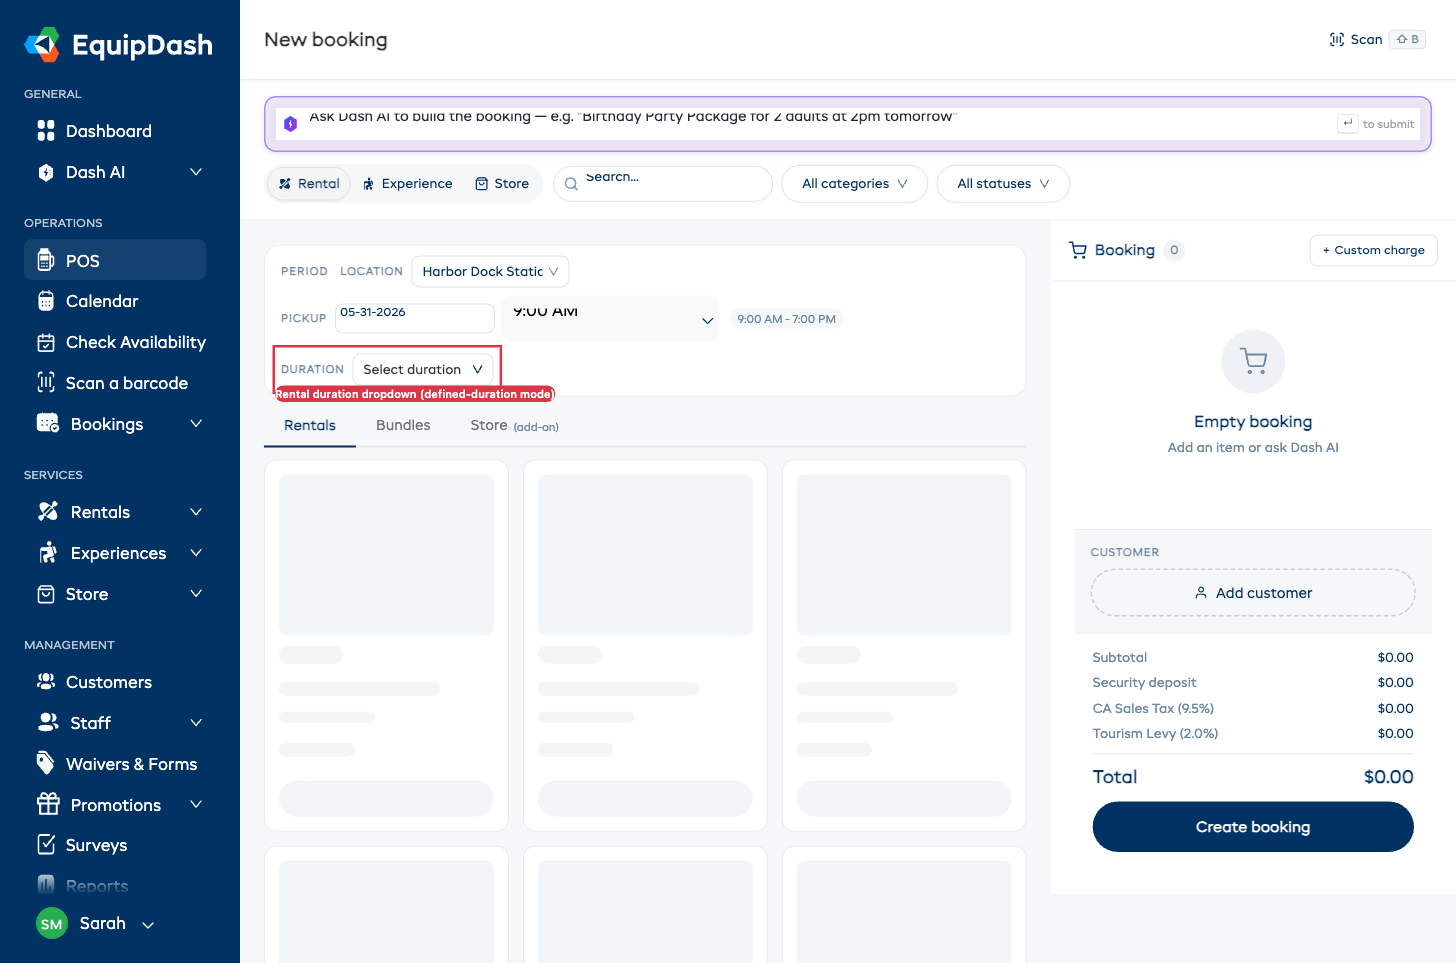
On your website widget, the Return date and Return time fields are replaced by a single Rental duration dropdown:
In the point of sale, the rental period strip shows PICKUP + DURATION instead of pickup and return:
The API behaves the same way: requests can pass a duration value (e.g., "8 hours") instead of a return date and time. See the API docs for the exact field names.
Default Security Deposit
This setting lives in the Deposits section.
- Default security deposit -- when enabled, every rental product collects a security deposit by default. Individual products can override this from their detail page (see Per-Product Security Deposit).
- Choose the deposit type:
- Fixed -- a set dollar amount (e.g., $50 per rental).
- Percentage -- a percentage of the rental subtotal (e.g., 20%). Percentage deposits are calculated against the pre-tax subtotal, not the tax-inclusive total.
- Enter the deposit amount or percentage value.
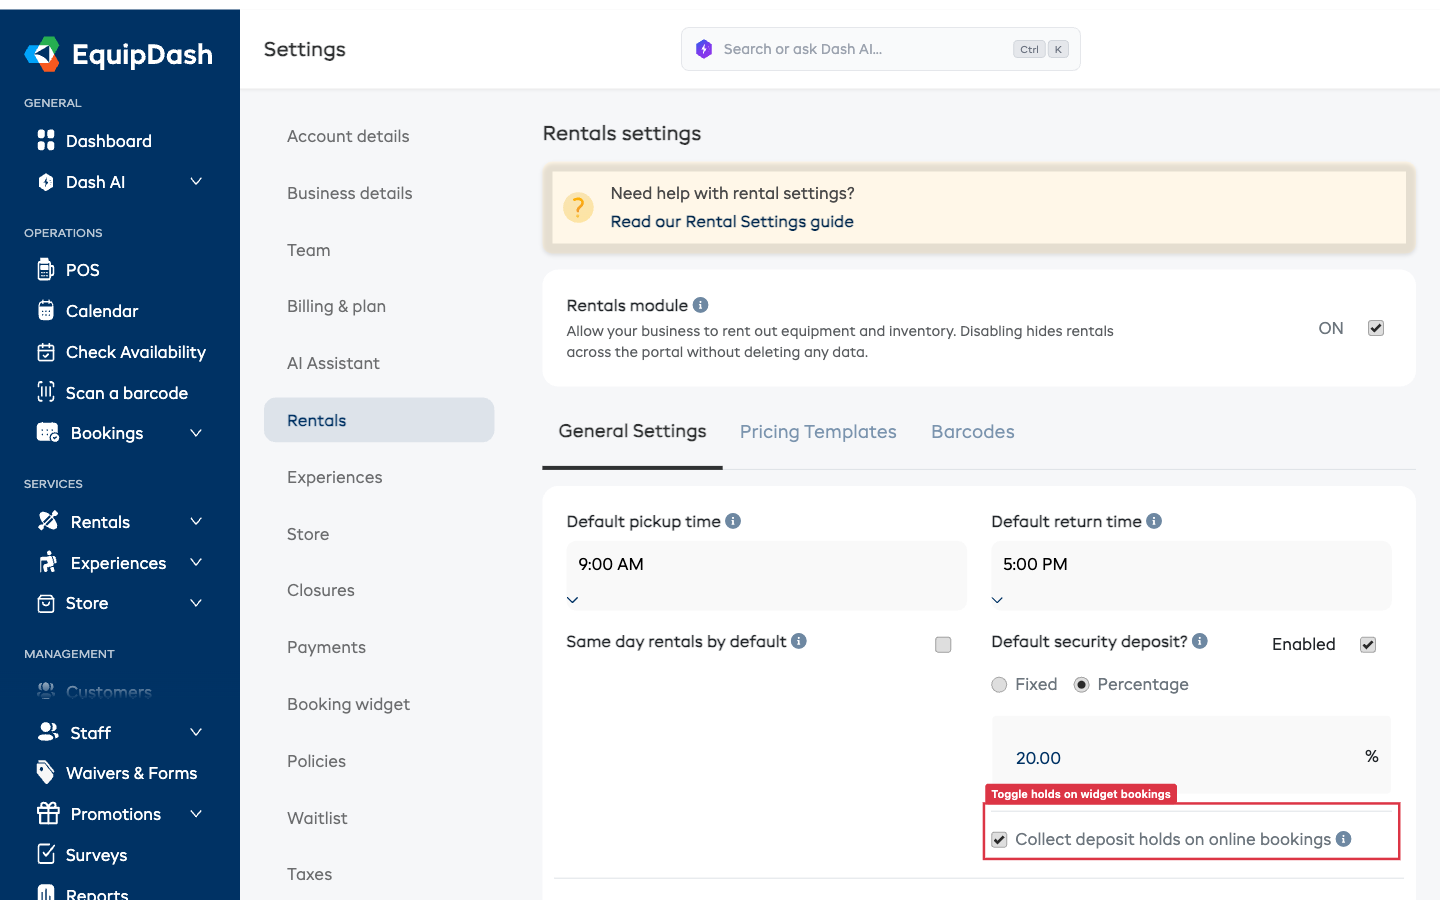
The Collect deposit holds on online bookings toggle is no longer on this page. It now lives in Settings → Booking widget → Checkout. Turn it on there to place an automatic pre-authorization hold on the customer's card when they book through your website widget. See Widget Deposit Holds for the full flow.
Default Rental Period Limits
Set default minimum and maximum rental periods. These apply to all products unless overridden at the product level. This setting lives in the Booking rules section.
Each limit is one row: a number box next to a unit dropdown.
- Minimum rental period -- type a number, then pick the unit (Minutes, Hours, or Days). For example, "2 Hours" means customers cannot book shorter than two hours.
- Maximum rental period -- type a number, then pick the unit. For example, "14 Days" means customers cannot book longer than two weeks.
Leave either limit empty — or use the × at the end of the row to clear it — to enforce no limit for that setting.
Default Minimum Booking Notice
Require a minimum lead time before a rental can start. This is useful when you need time to prepare equipment or arrange delivery, so customers cannot book at a moment's notice. This setting lives in the Booking rules section.
- Turn on Require a minimum booking notice.
- In Notice period, type a number and pick the unit (Minutes, Hours, or Days) from the dropdown beside it. For example, "2 Hours" means a rental cannot be booked to start within the next two hours.
How the rule is applied depends on who is booking:
- Customer widget and API -- the pickup is blocked. Customers (and automated integrations) cannot choose a start time inside the notice window.
- Point of sale and the AI assistant -- your staff can still book inside the window when they need to. The item stays bookable and a warning is shown on the cart line, so the override is deliberate and visible.
The default applies to all products unless overridden at the product level. Leave the toggle off to enforce no minimum notice.
Ask for Each Participant's Details
Collect every participant's name and details at checkout — not just the person booking. Turn this on once and it applies to all your rental products; any product can still override it from its own page (Require participant details → Shop default / On / Off). This setting lives in the Booking rules section.
When it's off, only the booker gives their details (and signs any attached waiver). When it's on, checkout asks for each participant, and each participant signs their own waiver copy.
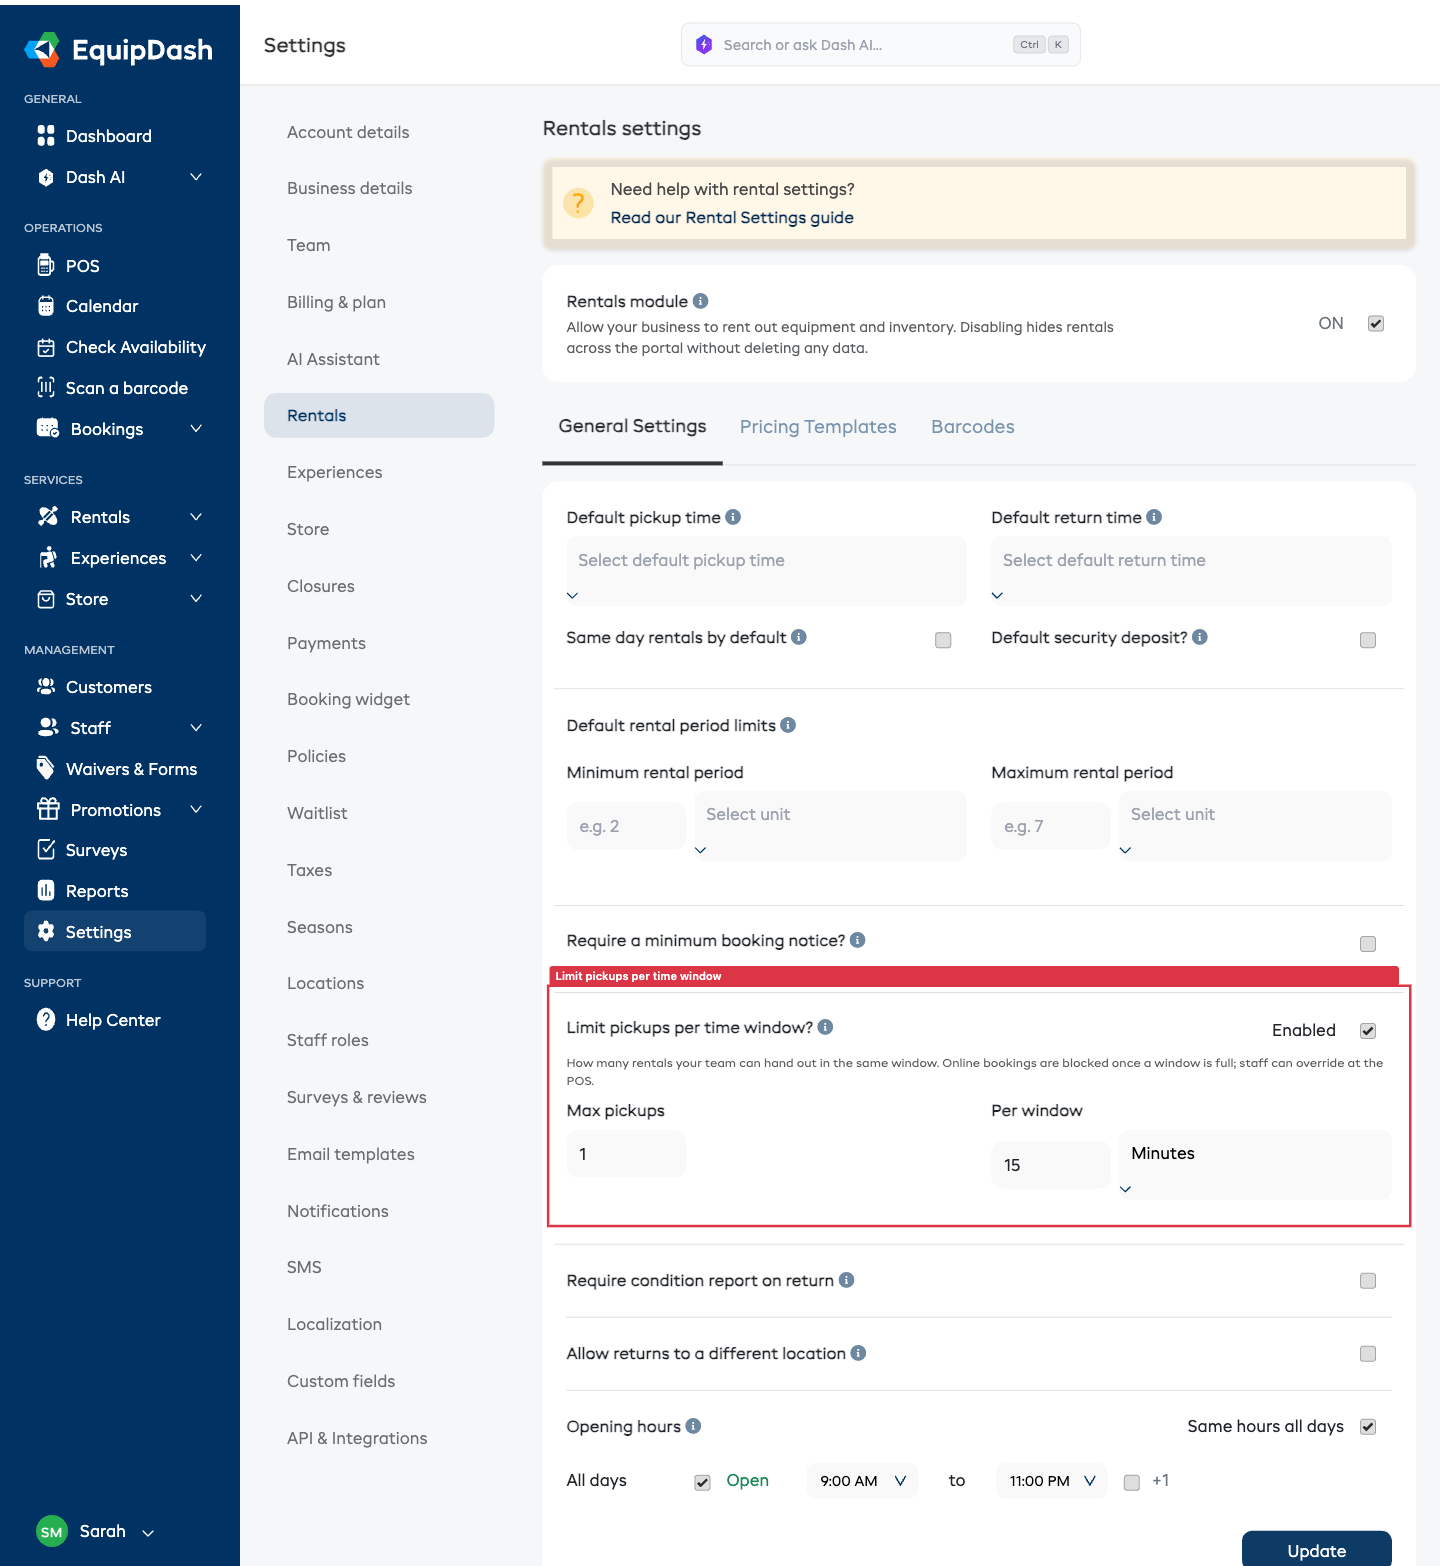
Limit Pickups Per Time Window
Cap how many rentals can be picked up in the same time window, so a rush doesn't overwhelm your counter. This is a business-wide throughput limit, completely separate from each product's stock count -- it limits how many bookings start in a window, no matter which products they are for. This setting lives in the Advanced section.
- Turn on Limit pickups per time window.
- Set Max pickups (e.g. 5), then set Per window -- a number box next to a unit dropdown (Minutes or Hours), e.g. "5 pickups per 15 Minutes" or "1 pickup per Hour".
How the limit is counted
- Windows are fixed buckets aligned to the start of the day in your business timezone. With a 15-minute window, the buckets are 9:00-9:15, 9:15-9:30, and so on.
- EquipDash counts how many bookings have a pickup (start) time that falls inside the bucket. It does not count active rentals that are merely out during that time, and it does not count returns.
- One pickup counts as one booking, regardless of how many items are on it.
What happens when a window is full
Once a window reaches the cap, the rule is applied differently depending on who is booking -- the same way minimum booking notice works:
- Customer widget and API -- that pickup time is blocked. In the product listing the item shows as Not available, and on the product page a Fully Booked banner explains the window is full. Customers (and automated integrations) cannot add or book that pickup time.
- Point of sale and the AI assistant -- your staff can still book into a full window when they need to. The item stays addable and a warning ("Max pickups for this window reached -- you can still add it.") is shown so the override is deliberate and visible.
This is enforced from one central place, so the listing, product page, cart, and final booking creation all behave the same way.
Opening Hours
Set your business opening hours. Customers can only pick up and return rentals during these hours.
- Toggle Same hours all days on if your hours are the same every day, or leave it off to set hours per day.
- For each day, toggle whether you are Open or closed.
- Set the Open time and Close time from the dropdowns.
- If you close after midnight (e.g., a nighttime operation), enable the +1 toggle next to the close time.
These are your normal weekly hours. To open with different times on a specific date — a holiday, an event, or a short day — use Special hours. The Set special hours link under the opening-hours grid takes you straight there.

After configuring all settings, click Update at the bottom of the page.
These are defaults only. You can override any of these values on individual products after creating them. Changing these defaults does not affect products that already exist.