Managing Waitlist Entries Growth+This feature requires the Growth+ plan or higher
The waitlist page gives you a complete view of everyone waiting for availability. From here you can filter entries, send notifications manually, and convert entries into bookings.
Viewing Waitlist Entries
- Click Waitlist in the sidebar (under Bookings).
- The waitlist table loads with all entries, most recent first.
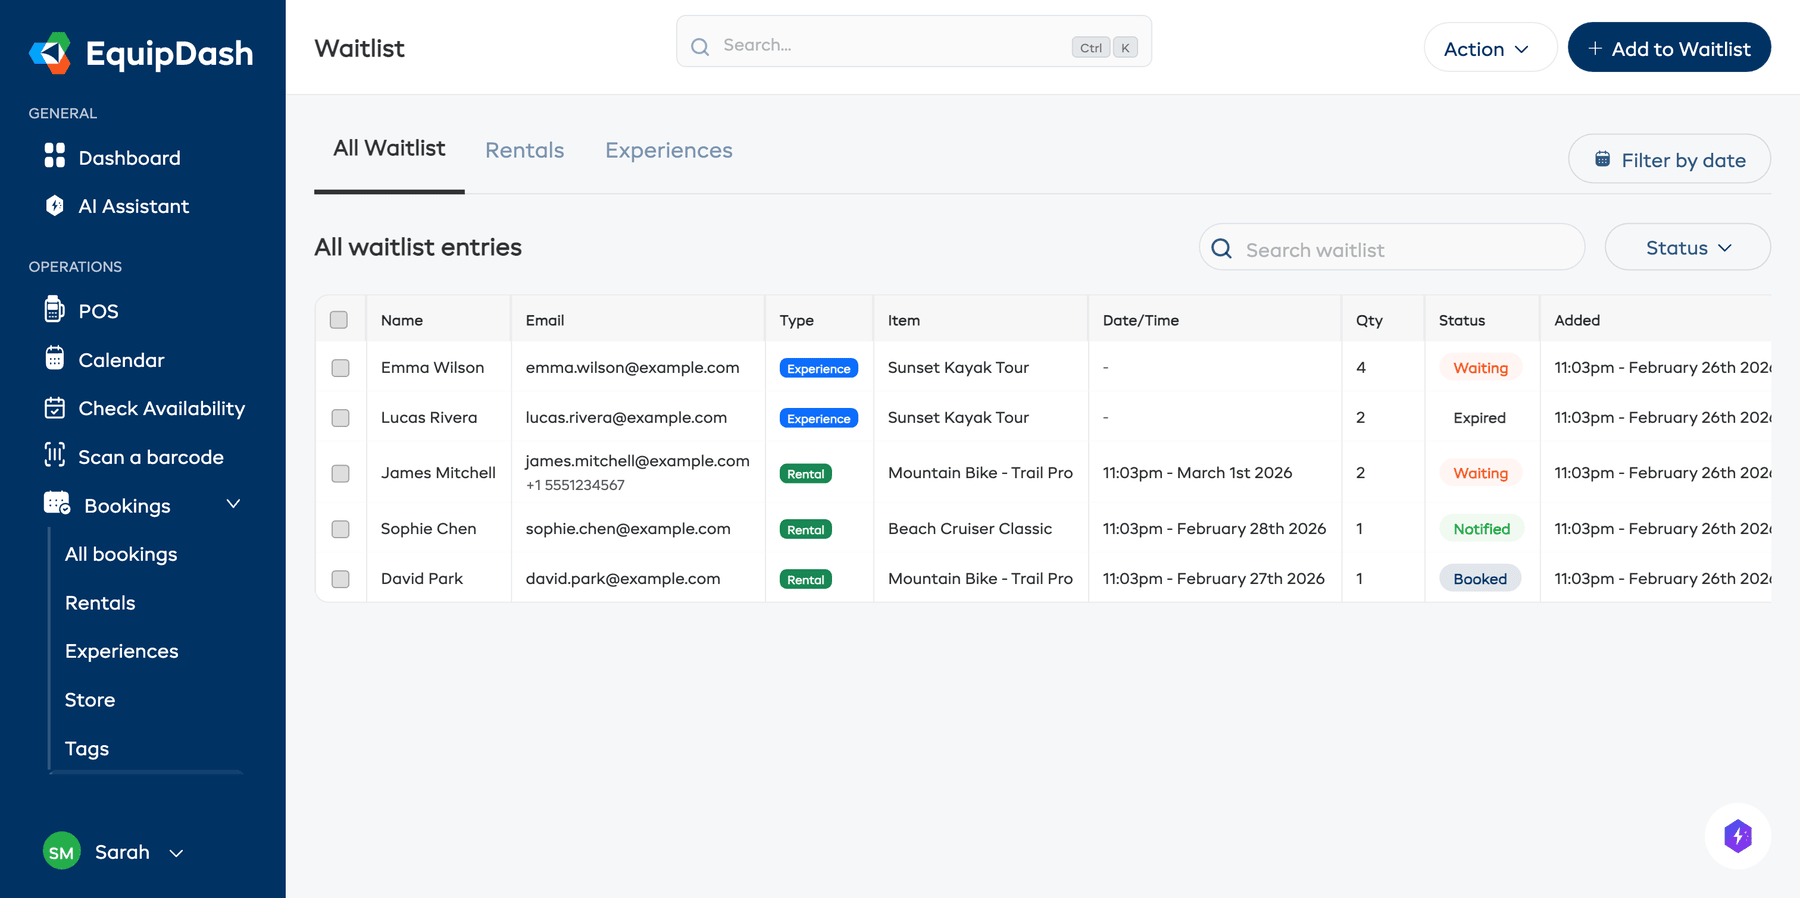
Quick-View Tabs
Above the table, tabs let you quickly filter by type:
- All Waitlist -- every waitlist entry
- Rentals -- entries for rental products only
- Experiences -- entries for experiences only
Table Columns
The table shows:
| Column | Description |
|---|---|
| Name | The customer's name. |
| The customer's email address. | |
| Type | Whether the entry is for a Rental product or an Experience. |
| Item | The specific product or experience they are waiting for. |
| Qty | The quantity the customer is waiting for. |
| Status | The current waitlist status (Waiting, Notified, Booked, Expired, Cancelled). |
| Created | When they joined the waitlist. |
| Actions | Quick action buttons for managing the entry. |
Click the gear icon near the top of the table to customize your columns. Tick a column under Available columns to show it, untick one under Active columns to hide it, and drag columns into the order you prefer. Your layout is saved and shared with your whole team.
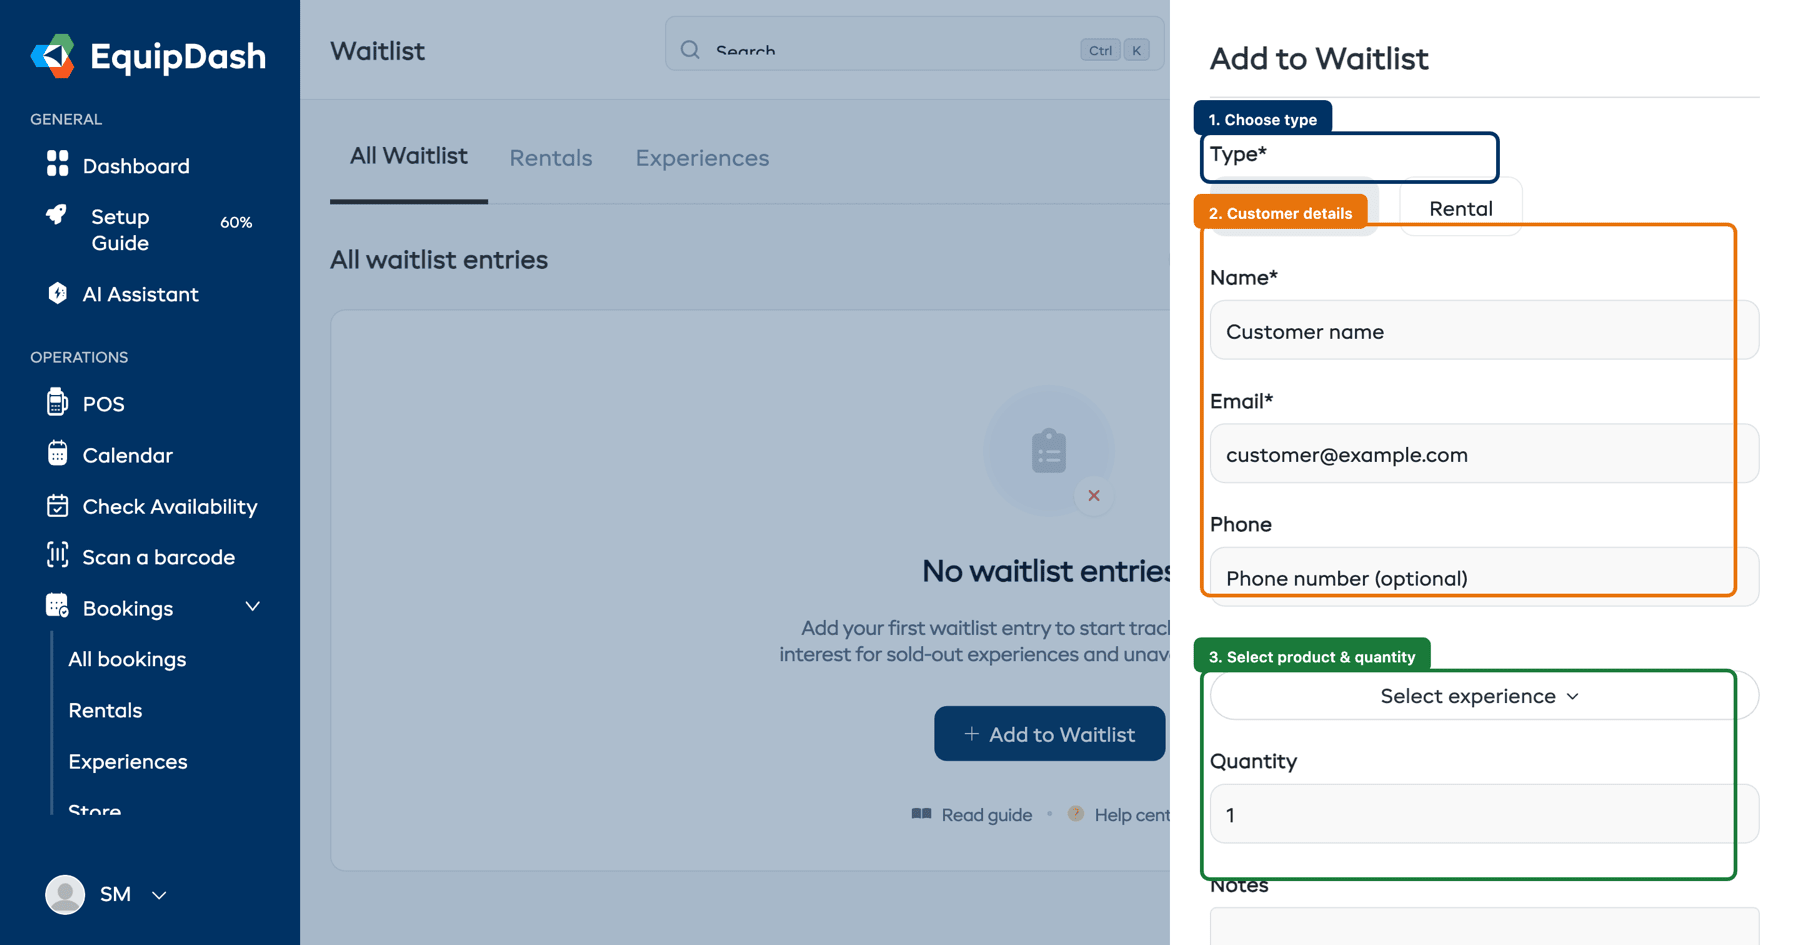
Adding a Waitlist Entry Manually
You can add customers to the waitlist yourself by clicking the + Add to Waitlist button in the top-right corner.
Filtering Entries
Use the filters above the table to narrow down the list:
- Search waitlist -- Type a customer name, email, or product/experience name to search.
- Status -- Use the Status dropdown to filter by Waiting, Notified, Booked, Expired, or Cancelled.
- Filter by date -- Click the Filter by date button to filter by date range.
Viewing Entry Details
Click a waitlist entry to open its detail page. Here you can see:
- Full customer details (name, email, phone)
- The item they are waiting for (product, variation, or experience session)
- Desired dates and quantity
- Any notes the customer provided
- The entry's status history
- Notification history (when notifications were sent and whether they were opened)
From the detail page, use the Action dropdown to send a notification, create a booking, cancel the entry, or delete it.
Manually Notifying a Customer
If you have not enabled auto-notify, or if you want to notify a specific customer ahead of others:
- Open the waitlist entry.
- Click the Send Notification button.
- Confirm the action.
The customer receives an email letting them know availability has opened up, with a link to complete their booking. The entry status changes to Notified.
You can only notify entries that are in Waiting status.
Cancelling a Waitlist Entry
If a customer no longer wants to wait, or you need to remove an entry:
- Open the waitlist entry.
- Click Cancel Entry.
- Confirm the cancellation.
The entry status changes to Cancelled. The customer is not notified of the cancellation.
Customers can also cancel their own waitlist entry using a link in their confirmation email.
Converting to a Booking
When a waitlisted customer books the item they were waiting for, their waitlist entry is automatically marked as Booked. This happens whether they book through the widget link in the notification email or you create the booking for them through the POS.
To manually convert a waitlist entry:
- Note the customer's details and desired item from the waitlist entry.
- Create a new booking for that customer with the desired item and dates.
- The waitlist entry updates to Booked automatically.
Expired Entries
Waitlist entries automatically expire when the desired date passes without the customer making a booking. Expired entries are kept for your records but no longer trigger notifications.