Creating a Booking
The fastest way to create a booking is through the Point of Sale (POS). This guide covers the general flow — for the full POS walkthrough see Creating a POS Booking.
Before You Start
Make sure you have:
- At least one rental product or experience set up
- Your pricing configured
- A payment method connected (if you want to accept card payments)
Opening the POS
You can open the POS from several places:
- Click POS in the sidebar.
- Click the + New Booking button on any bookings table page (Rentals, Experiences, or Store).
Both take you to the same New booking page.
What the POS Looks Like
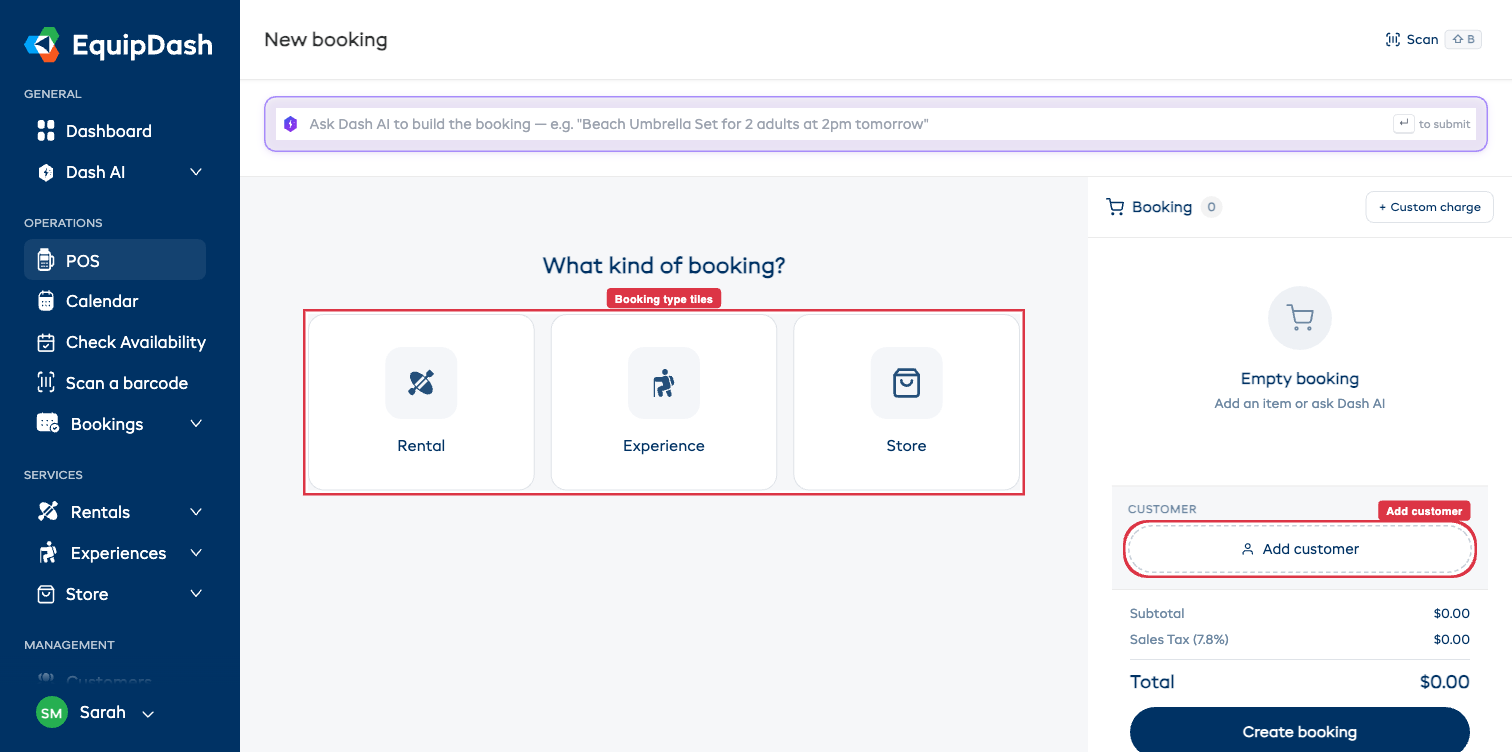
- A Dash AI bar at the top to build a booking from a plain-English description.
- A booking-type pill (or empty-state tiles) to pick Rental, Experience, or Store.
- A working area in the middle for dates, products, and options.
- A right-rail Booking cart that fills as you add items, with sections for Customer, Tags, Notes, Adjustments, and Create booking at the bottom.
Creating a Rental Booking
- Click the Rental tile (or pill).
- Set dates — Pick a Pickup date / time and a Return date / time. Toggle Same-day for a one-day rental.
- Find the product — Use the search, category filter, or scroll the product grid. Switch to the Bundles sub-tab to browse bundles, or Store (add-on) for store extras.
- Add to cart — Click a product card. Set the quantity in the inline expand panel. Click Add N to booking.
- Add the customer — Click Add customer in the right-rail cart. Search or quick-add a new one inline.
- Create — Click Create booking.
Creating an Experience Booking
- Click the Experience tile (or pill).
- Pick a date in the dropdown above the grid. Each experience card shows that day's available time chips.
- Pick a session — click a time chip (or Select time). The card expands inline showing the rate-category steppers.
- Set rate-category quantities (Adult, Child, etc.). Click Add N to booking.
- Capture participant details (when needed) — open the Participants · N/M assigned chevron in the cart for inline per-seat fields.
- Add the customer + create — same as for rentals.
Applying Discounts
The Adjustments section in the cart handles discounts:
- Promo / Voucher Code — paste the code and click Apply.
- Discount — toggle on to apply a custom % or fixed amount.
What Happens After Confirmation
Once you click Create booking:
- The booking status is set to Confirmed.
- Inventory is reserved (rentals) or seats are held (experiences).
- A confirmation email is sent to the customer (if email notifications are enabled).
- If the cart contained an item that triggers a waiver and the Email waiver link to customer toggle was on, the waiver email goes out automatically.
- The booking shows up in your Calendar and bookings table.
Related Guides
- Creating a POS Booking — full POS walkthrough
- POS Tips & Shortcuts
- Editing a Booking
- Recording a Payment
- Bookings Overview