Publishing Rosters Growth+This feature requires the Growth+ plan or higher
When you create or update shifts in EquipDash, they are not visible to your staff until you publish them. Publishing sends an email to each affected team member with their shift details.
Shift Statuses
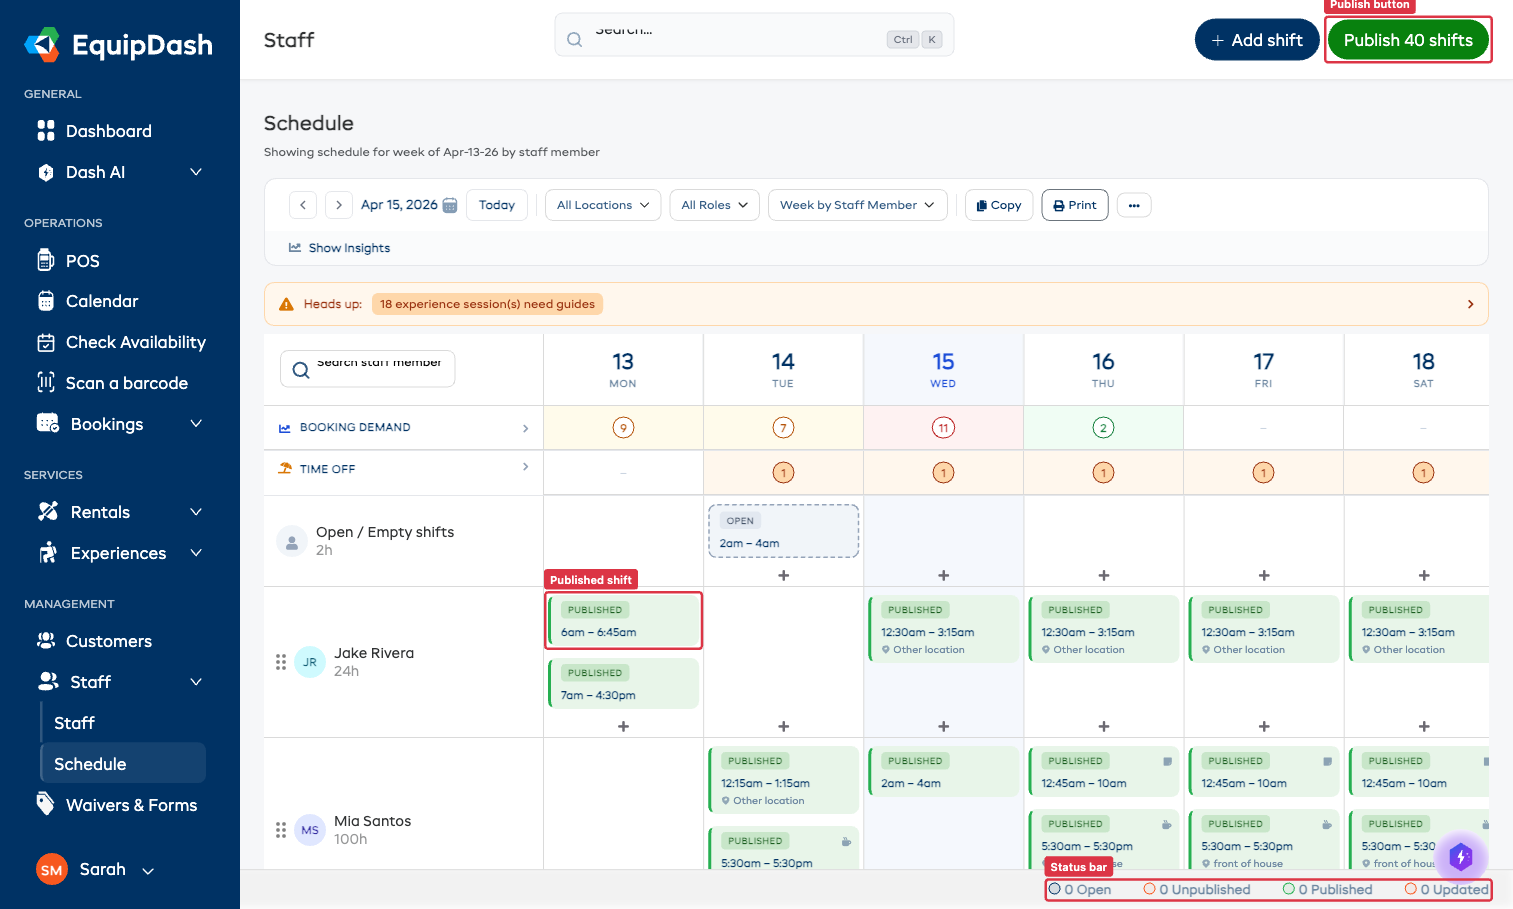
Every shift on the schedule has a status badge. The status bar at the bottom of the schedule page shows a running count for the current week:
| Status | What It Means |
|---|---|
| Open | The shift has no staff member assigned yet |
| Unpublished | The shift has been created but has not been published to the assigned staff member |
| Published | The shift is live and visible to the assigned staff member — shown in green on the grid |
| Updated | The shift was published previously, but changes have been made since the last publish |
How to Publish a Roster
Step 1 — Check Your Shifts
Before publishing, review the schedule grid and confirm:
- All shifts have the correct start and end times
- All shifts are assigned to the right staff member (no shifts left as Open if they should be assigned)
- The correct location is set on each shift
- The status bar totals look as expected for the week
See Creating a Schedule if you still need to add or adjust shifts.
Step 2 — Click Publish
When you have unpublished or updated shifts, a Publish button appears in the top-right corner of the schedule page. The button shows the number of shifts waiting to be published — for example, Publish 1 shifts.
- Click the Publish button.
- The Publish Roster modal opens.
Step 3 — Choose a Publish Type
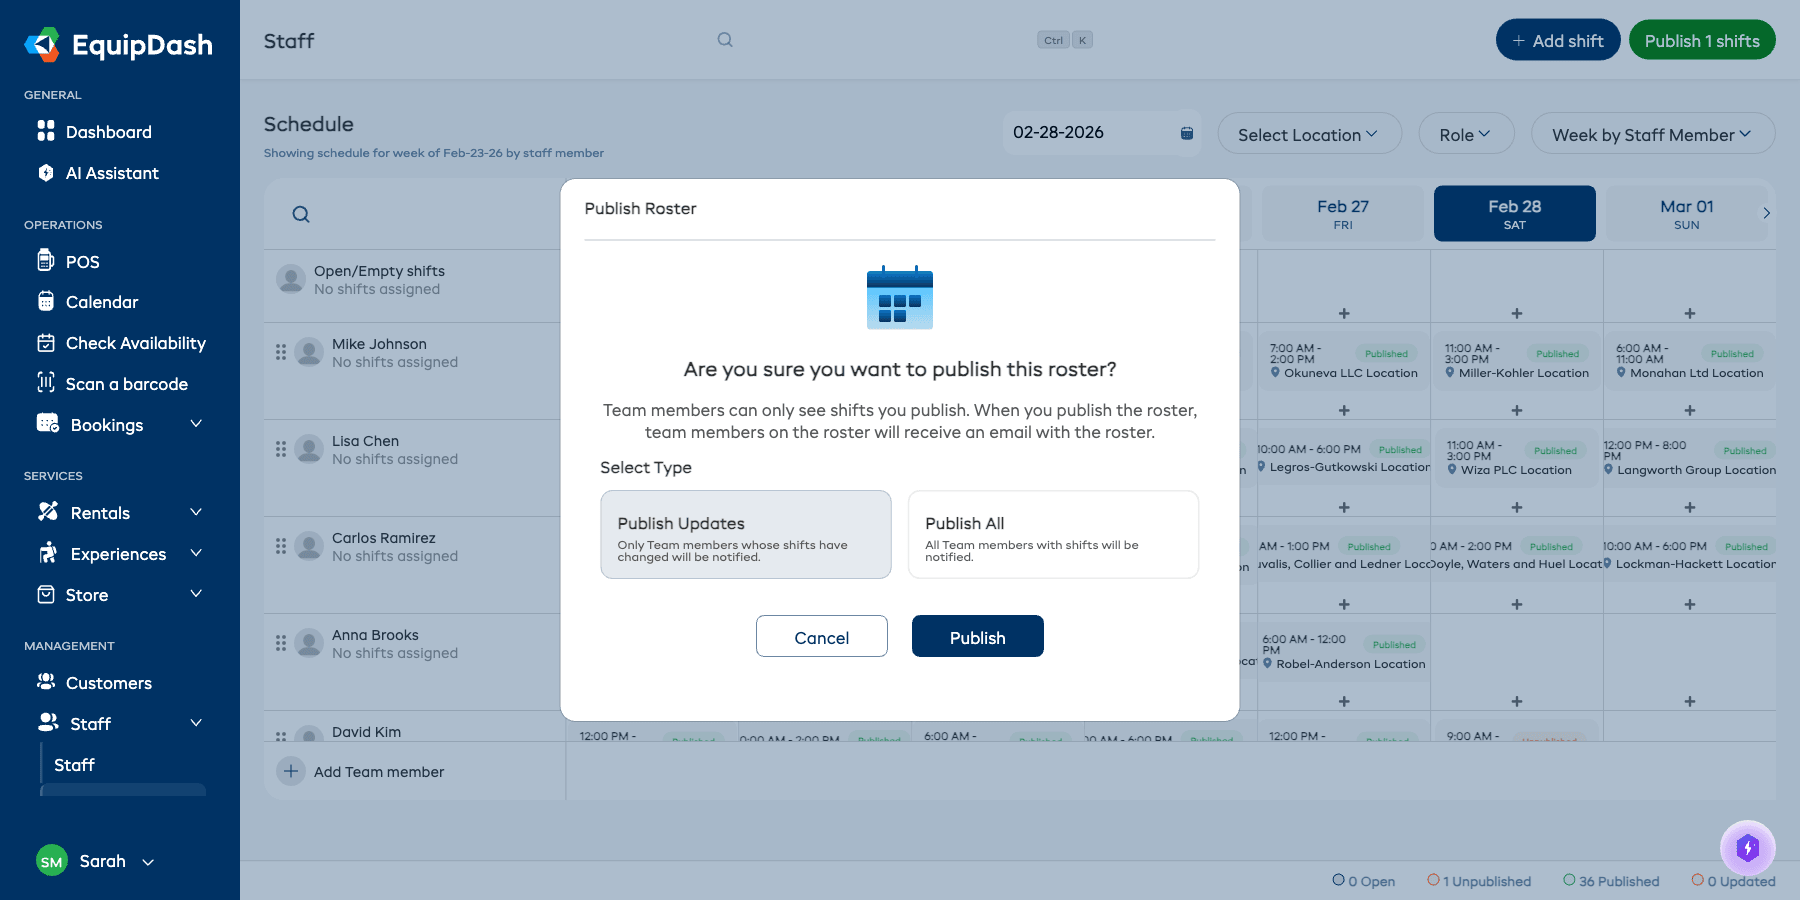
The modal asks: "Are you sure you want to publish this roster?" and explains that team members can only see shifts you publish. Choose one of two options:
| Option | What It Does |
|---|---|
| Publish Updates | Only team members whose shifts have been added or changed since the last publish will receive an email notification. Use this when you have made a small change and do not want to re-notify everyone. |
| Publish All | All team members who have shifts for the week will receive an email notification, even if their shifts have not changed. Use this when you want to send a fresh copy of the full roster to the whole team. |
- Select Publish Updates or Publish All.
- Click Publish.
Once published, all affected shifts change to Published status (green badge) and the status bar updates to reflect the new counts.
What Happens When You Publish
- Each affected team member receives an email with their shift details for the week.
- Publish Updates emails only staff whose shifts are new or have changed.
- Publish All emails every staff member with shifts, regardless of whether anything changed.
- Published shifts display a green Published badge on the schedule grid.
Tips
- Assign open shifts before publishing. Shifts with Open status have no assigned staff member. Assign them first so the right person receives their schedule.
- Check the status bar before you finish. The bottom bar gives you a quick summary — if the Unpublished count is higher than expected, you may have missed some shifts.
- Published shifts appear in green. Use this as a quick visual check to confirm which shifts are live on the grid.
- Use Publish Updates for small changes. If you only adjusted one shift, there is no need to re-notify the entire team — Publish Updates targets only the affected staff.