Testing Your Widget
Before sharing your widget with customers, it is important to test it thoroughly. This guide walks you through previewing the widget, making a test booking, and checking that everything works end to end.
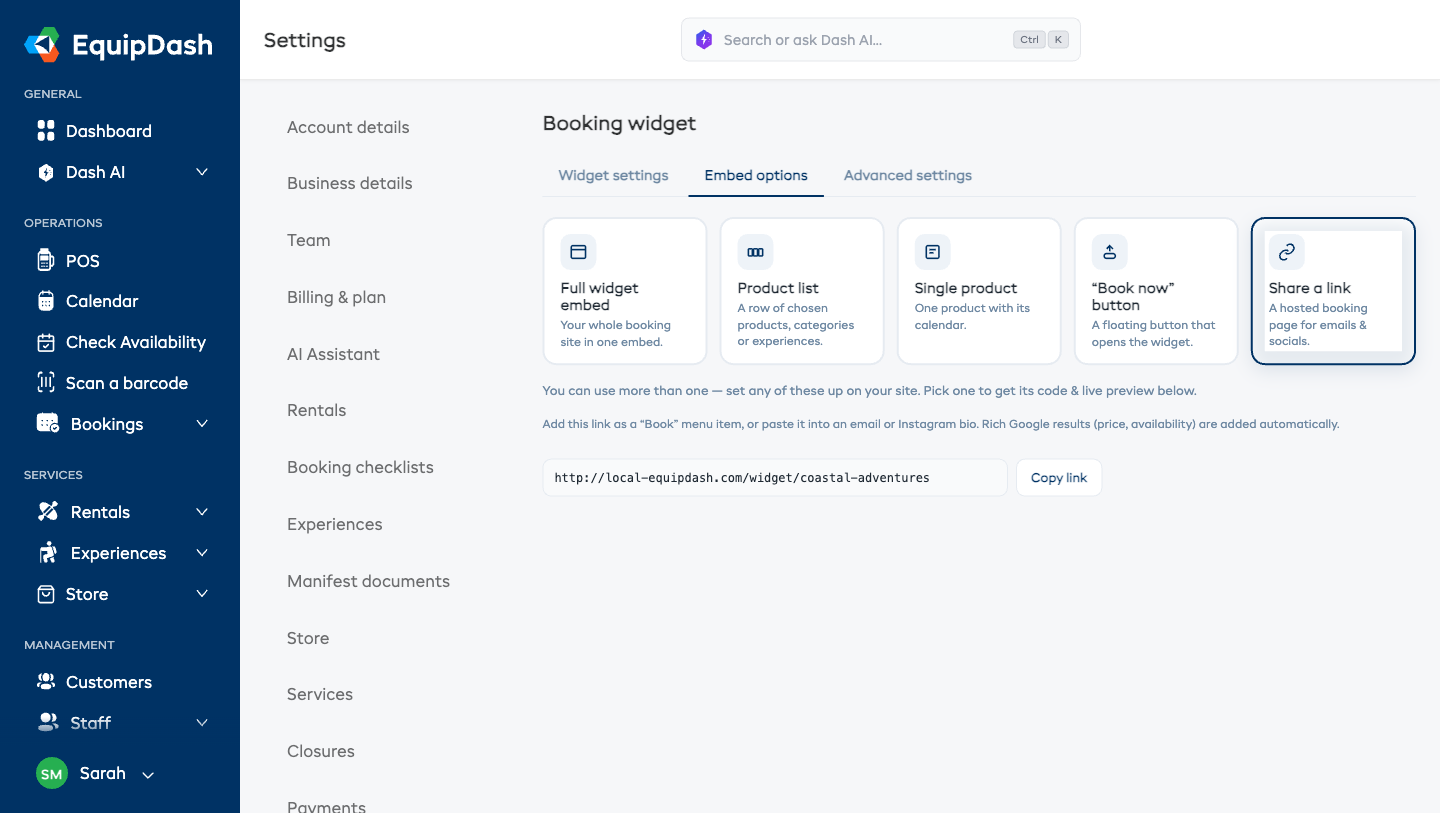
Previewing the Widget
The quickest way to see your widget is to open the direct link in your browser.
- Go to Settings > Booking widget.
- Open the Embed options tab.
- Choose Share a link and copy the link for your rentals, experiences, or store widget.
- Open the link in a new browser tab.
This shows you exactly what customers will see. You can browse products, check availability, and go through the full booking flow.
Most bookings now come from phones. Open your widget on a real phone — or use your browser's dev-tools device toolbar at 375px width — and walk through the flow end-to-end. Tap the Filters button on a listing, open an item, add to cart, step through checkout. The mobile filter offcanvas and sticky checkout totals behave differently from desktop — make sure both feel right.
Testing the Full Booking Flow
Walk through the entire booking process as if you were a customer.
For Rentals
- Open the rentals widget using the direct link.
- Browse the product catalog and verify that product names, images, and prices look correct.
- Click on a product to open the detail page.
- Select a pickup date and return date.
- Confirm that the availability shows the correct number of units.
- Confirm that the price calculates correctly for the selected dates.
- Set a quantity and click + Add to booking.
- Open My booking and verify the items, dates, and prices are correct.
- Proceed to checkout.
- Enter test customer details (use your own email so you receive the confirmation).
- If online payments are enabled, complete the payment with a Stripe test card.
- Verify that the confirmation page appears with the booking reference.
- Check your email for the confirmation email.
- Log in to EquipDash and verify the booking appears in Bookings.
For Experiences
- Open the experiences widget using the direct link.
- Browse the experience listings and check names, images, and prices.
- Select an Experience date in the Filters sidebar and verify the available time slot chips appear on each card.
- Click a time slot chip and check that the participant options appear.
- Click View details on an experience to open the detail page and verify the full description.
- Set participant quantities for each rate category.
- Click + Add to booking and verify the booking summary.
- Complete the checkout process with test details.
- Verify the confirmation and check that the booking appears in EquipDash.
For Store
- Open the store widget using the direct link.
- Browse the product listing and verify product names, images, prices, and stock badges look correct.
- Use the category chips to filter by category and confirm the filters work.
- Click View details on a product and verify the detail page shows images, description, price, and stock status.
- Set a quantity and click + Add to cart.
- Open My booking and verify the items and prices are correct.
- Complete the checkout process with test details.
- Verify the order appears in EquipDash.
For Vouchers
- Open the voucher widget using the Purchase page link.
- On Step 1: Select Value, click a preset amount button or enter a custom amount, then click Continue.
- On Step 2: Details, enter the recipient's name, an optional message, and your own details, then click Continue.
- On Step 3: Payment, complete the purchase (with a test payment if applicable).
- Check that the voucher appears in Promotions > Vouchers in EquipDash.
Stripe Test Cards
If you have Stripe payments enabled, use these test card numbers to simulate payments without being charged:
| Card Number | Result |
|---|---|
4242 4242 4242 4242 | Successful payment |
4000 0000 0000 0002 | Card declined |
4000 0000 0000 3220 | 3D Secure authentication required |
Use any future expiry date, any CVC, and any postcode.
Make sure your Stripe account is in test mode when running test payments. You can switch between test and live mode in your Stripe dashboard.
Checking on Mobile
The widget is fully responsive, but you should test it on a mobile device (or use your browser's responsive mode) to make sure everything looks good on smaller screens.
- Open the widget direct link on your phone, or use your browser's developer tools to simulate a mobile screen.
- Check that products display correctly in the grid/list view.
- Test the date pickers — make sure they are easy to use on a touch screen.
- Go through the checkout process on mobile to check form fields and buttons are accessible.
Testing the Embedded Widget
If you plan to embed the widget on your website, test it there too. The embed code is a small <script> snippet plus a <div> placeholder (from the Embed options tab) — not an iframe.
- Embed the widget on a test or staging page on your website.
- Open the page and verify the widget loads correctly.
- Check that the widget colors match your website.
- Scroll through the widget to make sure it fits the page nicely.
- Complete a test booking through the embedded version to make sure the checkout works.
Cleaning Up Test Bookings
After testing, you may want to clean up the test bookings you created:
- Go to Bookings in EquipDash.
- Find the test bookings (search by the test customer name or email).
- Cancel the test bookings to free up the inventory.
If you created a test customer, you can leave the profile in your system — it will not affect anything.
Pre-Launch Checklist
Before sharing the widget with real customers, run through this checklist:
- Products, experiences, and store items display with correct names, images, and descriptions
- Pricing calculates correctly for different date ranges
- Availability shows accurate counts
- The checkout flow completes without errors
- Confirmation emails are received and look correct
- Bookings appear in the EquipDash dashboard
- Widget colors match your brand
- The widget looks good on mobile devices
- The embedded version works correctly on your website
- Stripe payments process successfully (if using online payments)