Equipment Check-In / Check-Out Systems for Rental Shops

A line of customers at the counter. Gear stacked behind you. One person asking about a damage waiver, another returning a paddleboard with a fresh ding, and a third just wants to grab their reservation and go.
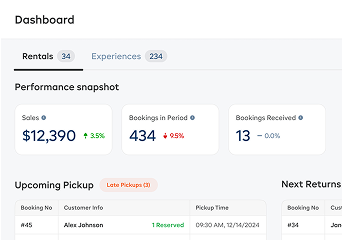
Your equipment check in check out system is the bottleneck — or the thing that makes this all feel manageable. Most rental shops start with a clipboard and a handshake. That works when you're doing five rentals a day. At fifteen, it falls apart. At thirty, you're losing gear, missing damage, and burning customer patience.
This guide breaks down the check-out and check-in workflow step by step — from customer arrival to gear return — so your counter runs faster, your fleet stays protected, and nothing slips through the cracks. For the broader picture of tracking and managing your gear, see our complete guide to rental inventory management.
The Ideal Check-Out Workflow (Step by Step)
A good equipment checkout system follows the same steps every time, regardless of who's working the counter. Consistency is what prevents mistakes on a busy Saturday.
Here's what the process should look like:
- Pull up the reservation. Customer arrives, you find their booking by name, confirmation number, or phone number. If they're a walk-in, create the booking on the spot.
- Confirm the items. Match the reserved gear to what you're handing over. If you rent by category (e.g., "mountain bike — large"), assign the specific unit now and record its ID or serial number.
- Quick condition check. Before the customer touches the gear, note its current state. Is it clean? Any pre-existing scuffs? This takes 15 seconds and saves you from a damage dispute later.
- Collect signatures and waivers. Digital waivers speed this up dramatically. The customer signs on a tablet instead of filling out a paper form you'll never find again.
- Hand over the gear. Give the customer a quick orientation — how the gear works, when it's due back, and where to return it. Confirm the return time out loud.
Total time per customer: 2–4 minutes if your system is dialled in. That's the difference between a smooth morning rush and a parking-lot queue.
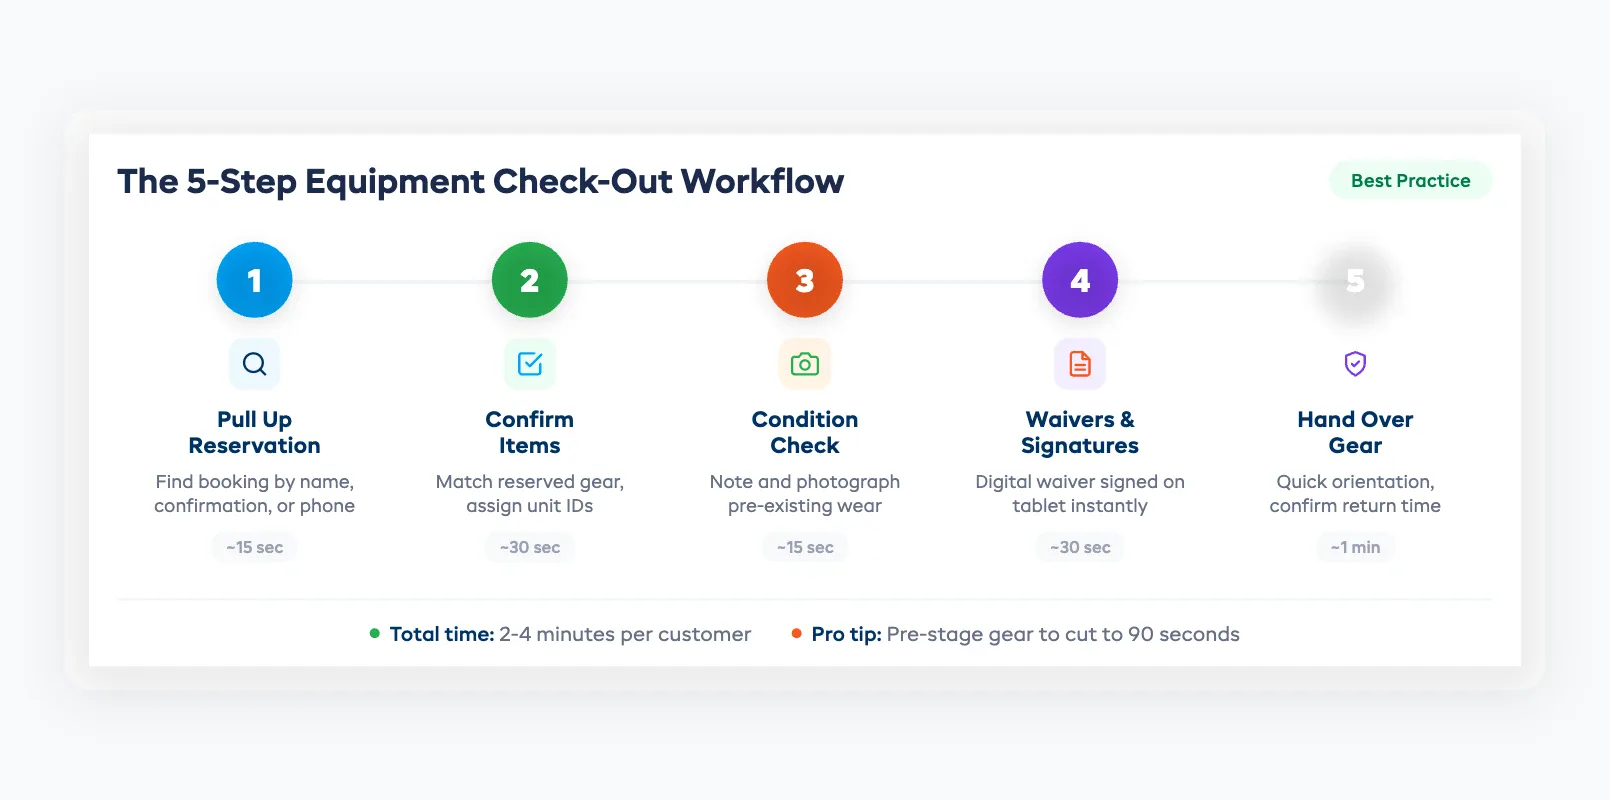
Pro tip: Pre-stage gear for reservations the night before. Pull the items, tag them with the customer's name, and line them up near the counter. Morning check-outs drop to under 90 seconds each.
The Return and Check-In Process
The rental check in process is where most shops cut corners — and where the real problems start. A customer drops off a kayak, your staff gives it a glance, and it goes back on the rack. Two days later, someone discovers a cracked hull.
A solid check-in workflow prevents this:
- Scan or log the item back in. Update its status from "rented" to "returned" immediately. This makes the item available for the next booking in real time.
- Inspect the gear. Check every item against the condition noted at check-out. Look for scratches, dents, missing parts, and cleanliness. This takes 30–60 seconds per item.
- Flag any damage. If something's wrong, document it before the customer leaves. Photos, a quick written note, and the customer's acknowledgement. Don't wait — once they drive away, you lose leverage.
- Route the item. Is it ready for the next rental? Does it need cleaning? Maintenance? Assign it to the right queue so it doesn't sit in limbo.
The goal is simple: every item that comes back gets inspected, logged, and routed within five minutes of return. No exceptions, no "I'll do it later."
Documenting Condition: Photos, Notes, and Damage Reports
Damage disputes cost rental shops hundreds of dollars per incident — and far more in customer goodwill. The fix is documentation at both ends of the rental.
At check-out: Take 2–3 photos of the item from standard angles. Store them linked to the booking. If the item already has wear, note it. A timestamped photo taken before the customer leaves with the gear is your best defence against "it was already like that."
At check-in: Repeat the photos. Compare side by side with the check-out images. Any new damage gets documented with:
- A photo of the damage
- A written description (location, severity, estimated repair cost)
- The customer's signature acknowledging it — or a note that they refused to sign
This paper trail protects you whether you're filing an insurance claim, charging a damage deposit, or just deciding whether to repair or retire the item. If you're tracking equipment across your fleet, these condition logs feed directly into your equipment tracking workflow.
Speeding Up the Counter During Peak Hours
Peak hours expose every weakness in your gear check out rental process. Here's how to keep the line moving:
Batch your check-outs. If you have three families arriving for 10 AM kayak rentals, stage all the gear together and process them as a group rather than one at a time.
Move waivers off the counter. Send digital waivers by email or text before arrival. By the time the customer shows up, the paperwork is done. This alone shaves 2–3 minutes per transaction.
Separate check-outs from returns. If your space allows it, create a dedicated return zone away from the main counter. Returns don't need the same face-to-face time — a trained staff member can inspect and log items while your counter person handles new check-outs.
Use a scanner, not a keyboard. QR codes or barcodes on each item let staff scan gear in and out in seconds instead of typing serial numbers or searching a list. Fewer keystrokes, fewer errors, faster throughput.
On a busy Saturday, these changes can double your check-out speed without adding staff.
Digital vs Paper Check-In/Out
Paper check-in/out sheets have been the standard for decades. They're cheap, they're simple, and they fail in predictable ways:
- Illegible handwriting leads to lost records
- Sheets get misplaced, wet, or damaged
- There's no real-time visibility — you can't tell what's out without digging through a stack
- Damage documentation is a separate process (if it happens at all)
A digital equipment checkout system solves all of these. Staff scan items on a tablet or phone, condition photos attach automatically, and inventory updates in real time across your entire team. When a customer calls to ask if a bike is available at 2 PM, you check the screen — not the clipboard.
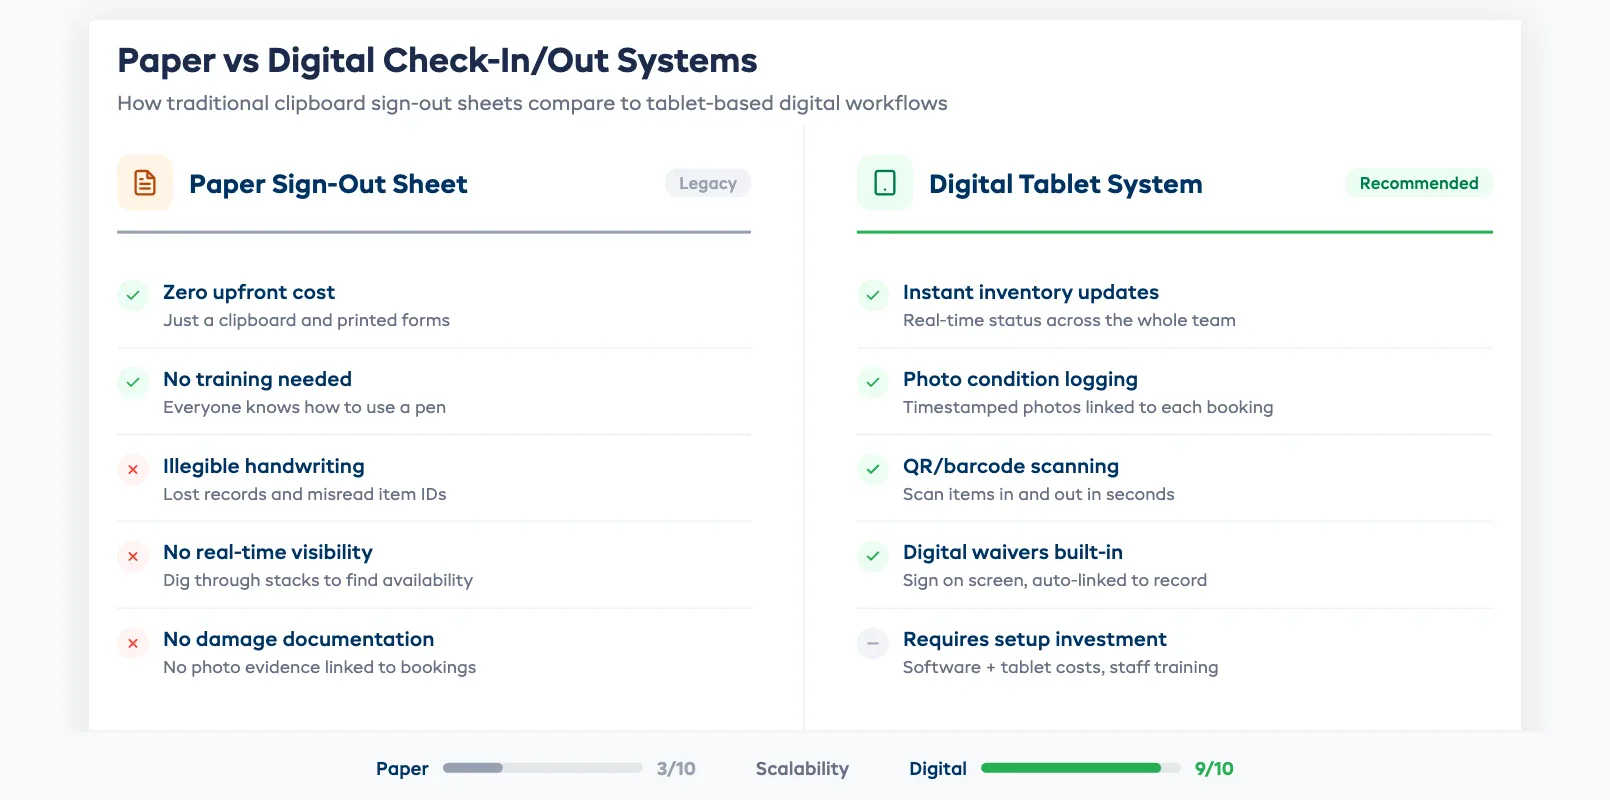
The trade-off is cost. Paper is free (minus the printing). Digital systems require software, hardware (tablets, scanners), and a learning curve for your team. But for any shop doing more than 10 rentals per day, the time savings and error reduction pay for the system within the first month.
If you're weighing this decision alongside your broader inventory approach, our comparison of spreadsheets vs dedicated software covers the full cost-benefit picture.
FAQ
What should an equipment check-out form include?
At minimum: customer name, contact info, item ID or serial number, condition at check-out (with photos), expected return date and time, and a signed waiver or rental agreement. Digital forms capture all of this automatically and link it to the booking record.
How long should a check-out take per customer?
With a well-designed system, 2–4 minutes per customer including waiver signing and gear orientation. Pre-arrival waivers and pre-staged gear can drop this under 90 seconds.
Should I photograph every item at check-out?
Yes. It takes 15–30 seconds and protects you from damage disputes worth hundreds of dollars. Use standard angles so check-out and check-in photos are easy to compare side by side.
Can I automate the check-in process?
Partially. QR code scanning, automatic status updates, and digital condition logging can be automated. The physical inspection still needs a human — no software can spot a cracked paddleboard hull. But automating everything around the inspection cuts the process from 5 minutes to under 2.
What's the biggest mistake shops make with check-in/out?
Skipping the return inspection when it's busy. A customer returns a damaged item, staff waves them through to keep the line moving, and the damage gets discovered days later with no documentation and no recourse.
How do I handle damage found at check-in?
Document it immediately with photos and a written description. Show the customer before they leave and get their acknowledgement. Reference the check-out photos to confirm the damage is new. Then follow your damage policy — charge the deposit, file an insurance claim, or negotiate a repair fee.
Is a paper sign-out sheet enough for a small rental shop?
For under 10 rentals per day with a single staff member, paper can work. But it caps your growth. The moment you add a second employee, a busy weekend, or an online booking channel, paper becomes the weakest link. Most shops that switch to digital wish they'd done it sooner.
in one place