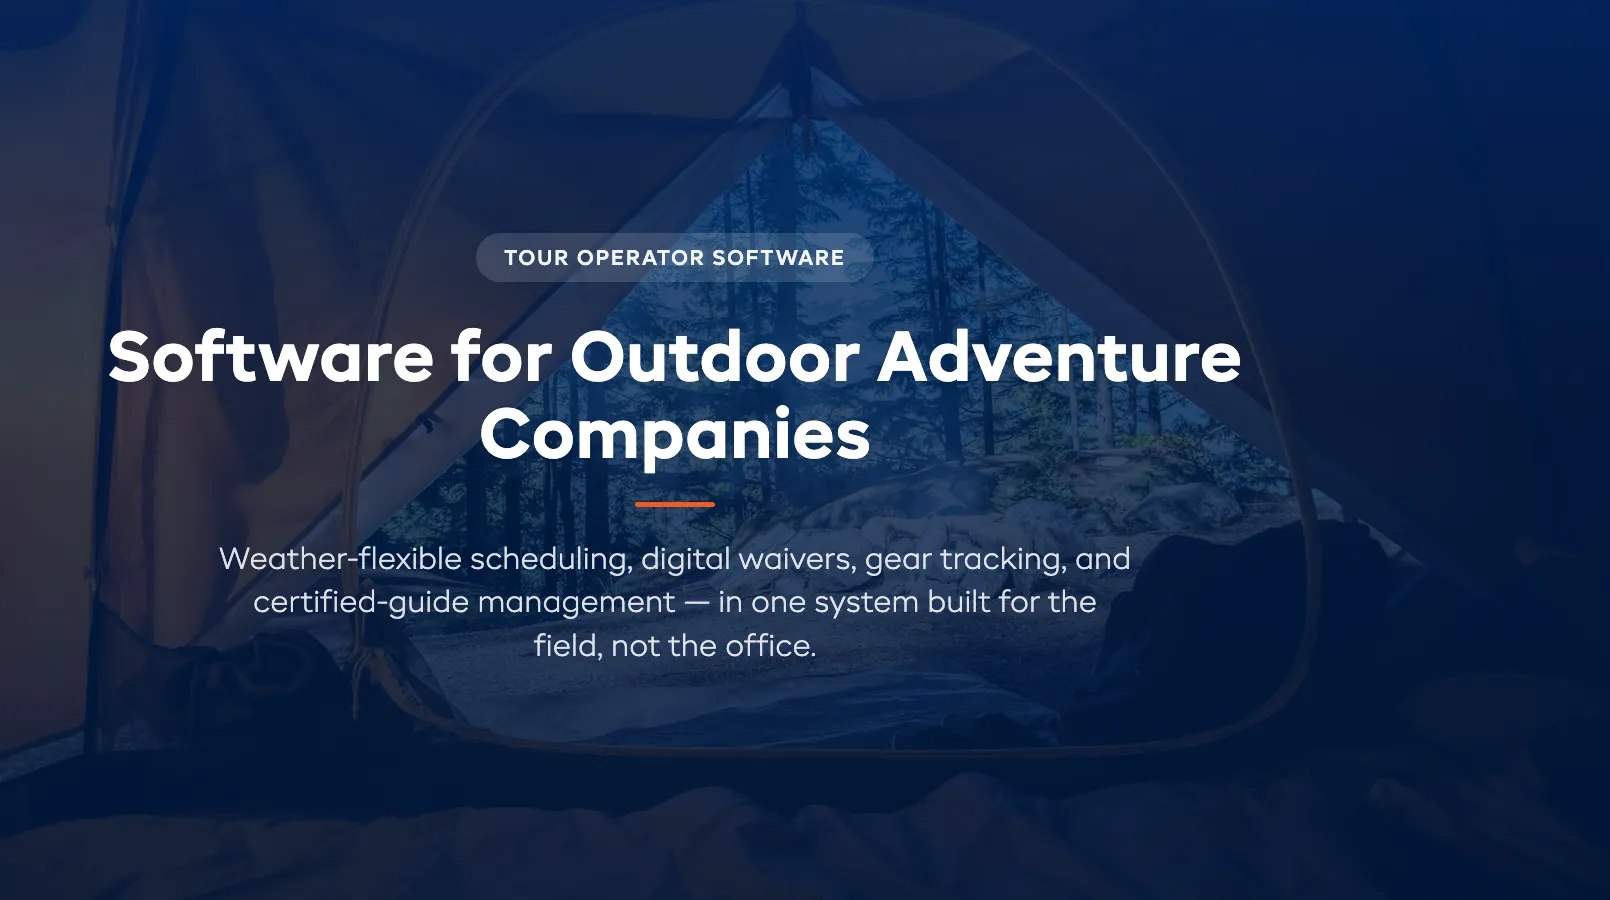
How to Track Rental Equipment (Step by Step)
You bought the gear. Customers are booking it. But do you actually know where every item is right now — who has it, when it's due back, and what condition it's in?
Most rental operators start tracking equipment with a notebook or a spreadsheet. That works until it doesn't. The moment your fleet grows past 20 items or you hire a second person, gaps appear. Gear goes missing. Items get rented out when they should be in for service. Two customers show up for the same paddleboard.
This guide walks you through five practical steps to track rental equipment properly — from building your first master list to automating the whole process with software. Whether you run a bike shop, a kayak outfitter, or a multi-location ski rental, these steps work at any scale. For the full picture of how tracking fits into your broader operations, see our complete guide to rental inventory management.
Step 1: Create Your Equipment Master List
Before you can track anything, you need a single, complete record of every item you own. This is your equipment master list — and it's the foundation of every tracking method that follows.
For each item, record:
- Item name and category (e.g., "Mountain Bike — Large Frame")
- Unique identifier (serial number, asset number, or a number you assign)
- Purchase date and cost (for depreciation and retirement decisions)
- Current condition (new, good, fair, needs repair)
- Assigned location (if you operate from multiple sites)
Keep this list in one place. A Google Sheet works at this stage. A rental software platform works better — but the key is having one source of truth, not three notebooks and a whiteboard.
Pro tip: Photograph every item when it enters your fleet. A timestamped baseline photo protects you in damage disputes and speeds up insurance claims.
![]()
Step 2: Choose a Tagging Method (Barcodes, QR Codes, RFID)
Once your master list exists, each item needs a physical tag that connects it to its digital record. The right method depends on your environment, budget, and fleet size.
Barcodes are the cheapest option. Print them on adhesive labels for under $0.10 each. They scan fast with any handheld scanner or smartphone app. The downside: barcodes scratch off easily on outdoor gear exposed to water, mud, and UV.
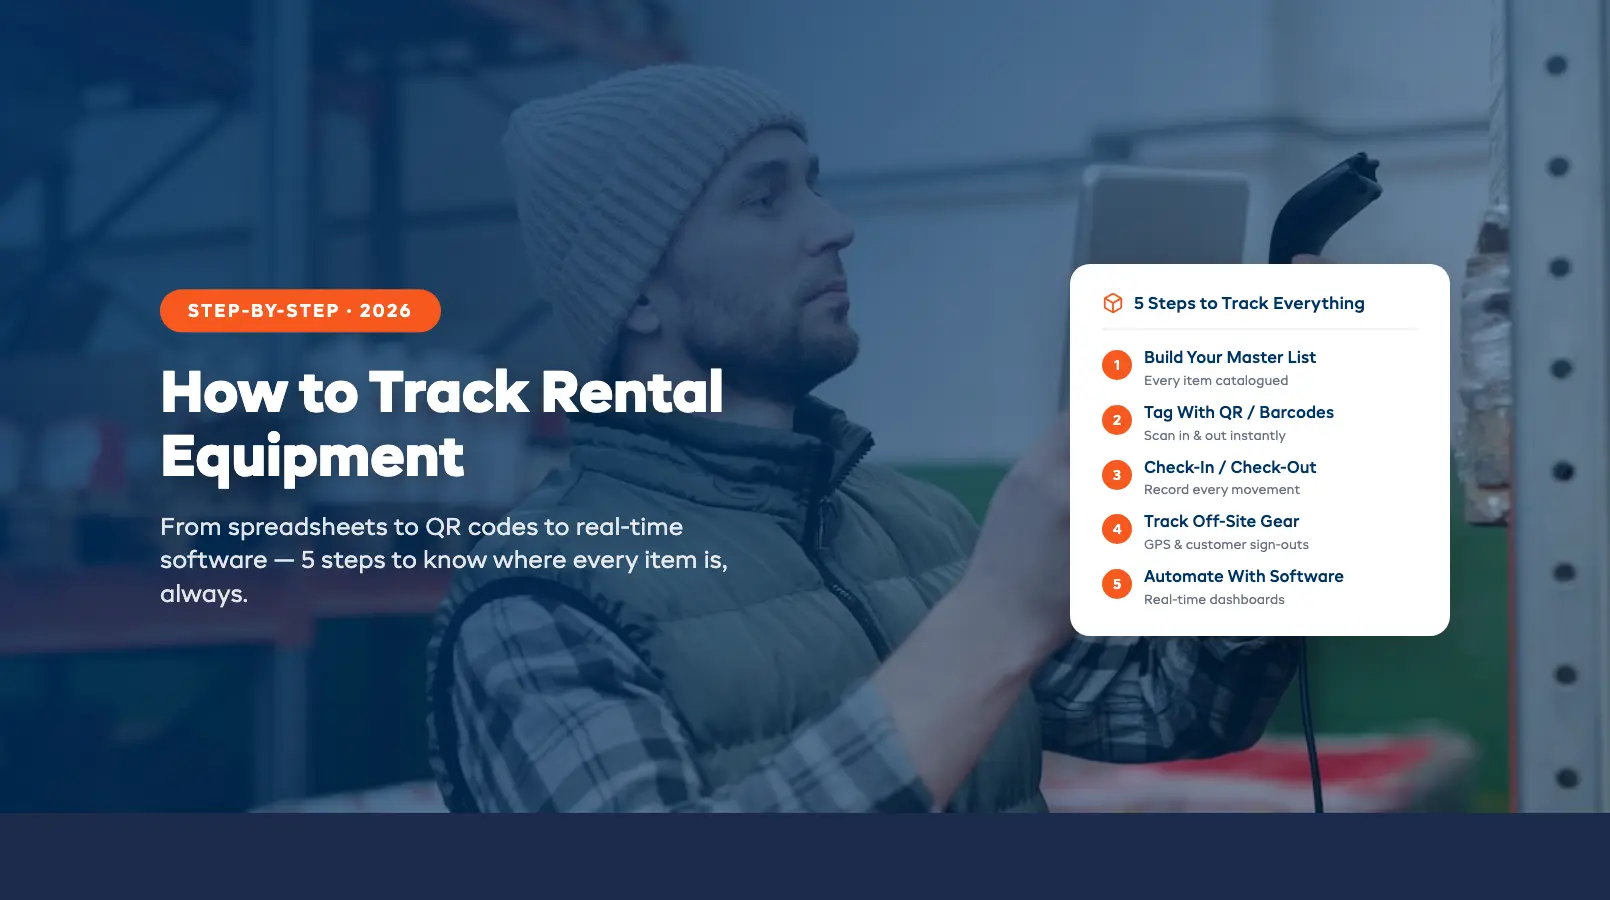
QR codes are the sweet spot for most rental shops. They cost about the same as barcodes but hold more data, scan from wider angles, and survive partial damage. A weatherproof QR label on a kayak or bike frame lasts an entire season. Staff scan it with their phone at check-out and check-in — the item's status updates instantly in your system.
RFID tags are the premium option. They don't require line-of-sight scanning — walk past a reader and every tagged item registers automatically. RFID makes sense for large fleets (200+ items) or high-value assets where the $1–$5 per-tag cost pays for itself in speed. Most small and mid-sized rental shops don't need RFID yet.
Our recommendation: Start with QR codes. They're cheap, durable with weatherproof labels, and work with any smartphone. Record the manufacturer's serial number as a backup identifier for insurance and warranty purposes.
Step 3: Set Up Check-In / Check-Out Workflows
Tagging your gear is only useful if every rental creates a record. A check-in/check-out workflow captures who has what, when it left, and when it came back — every single time.
Here's what a solid workflow looks like:
At check-out:
- Scan the item's QR code or barcode
- Link it to the customer's booking
- Note the item's condition (quick visual check)
- Confirm the expected return date and time
At check-in:
- Scan the item back in
- Inspect for damage — log anything new with a photo
- Update the item's status to "available" or "needs maintenance" (see our equipment maintenance tracking guide for scheduling service intervals)
- Trigger any automatic notifications (e.g., next customer's pickup reminder)
This workflow takes under 60 seconds per item once your team is trained. The payoff is huge: real-time visibility into your entire fleet, a paper trail for damage disputes, and no more guessing which items are out and which are sitting in the back room.
Without a consistent check-in/check-out process, even the best tagging system falls apart. If you're still using pen and paper for this step, our equipment sign-out sheet template covers the essential fields — but you're one busy Saturday away from a double booking or a missing item. For a deeper dive into designing your full counter workflow — including damage documentation and peak-hour speed tips — see our guide to equipment check-in/check-out systems.
Step 4: Track Location for Off-Site Gear
Indoor rental shops have it easy — your gear is either on the shelf or out with a customer. But if you rent bikes, boats, camping gear, or construction equipment that leaves your premises, location tracking adds a critical layer.
For short-duration rentals (hours to a day): Your check-out record is usually enough. You know who has the item and when it's due back. Set up automated reminders so customers return gear on time, and flag overdue items immediately.
For multi-day or remote rentals: Consider GPS trackers for high-value assets. A small GPS unit on an e-bike or boat trailer lets you see where the item is in real time. This protects against theft, helps you locate unreturned gear, and gives customers peace of mind with geofenced usage areas.
For multi-location businesses: Your tracking system needs to show which items live at which location — and handle transfers between sites. When you move five paddleboards from your lakeside shop to your downtown store for the weekend, the inventory at both locations should update instantly.
Location tracking doesn't need to be complicated. For most rental shops, the combination of a consistent check-out workflow plus automated return reminders covers 90% of the tracking need. GPS is a worthwhile addition only for high-value or long-duration rentals where the cost of a lost item justifies the tracker cost.
Step 5: Automate With Software (When You're Ready)
Steps 1 through 4 can all be done manually with spreadsheets and printed labels. But manual tracking has a ceiling. Once you hit 30+ items, multiple booking channels, or a second staff member, the gaps start costing you money.
Rental equipment tracking software automates what you've been doing by hand:
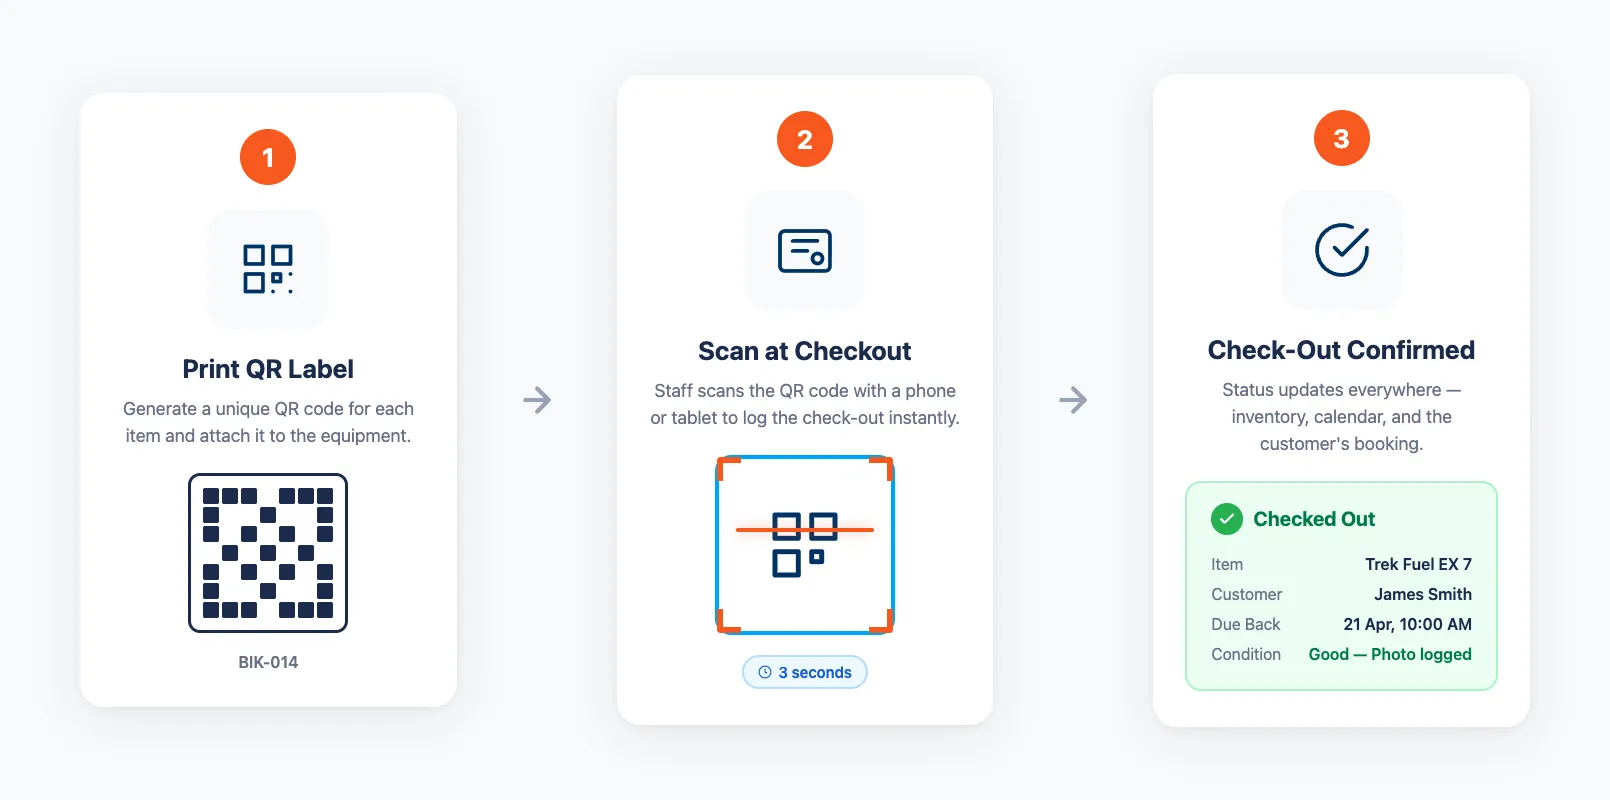
- Real-time status updates — Every scan, every booking, every return updates inventory across all channels instantly. No manual entry, no lag, no conflicts.
- Automated alerts — Overdue returns, maintenance due, low stock on popular items. You find out before it becomes a problem.
- Customer self-service — Customers check availability and book online. The inventory updates without your team touching anything. This eliminates the phone-tag availability checks that eat hours every week.
- Reporting — Which items have the highest utilisation? Which ones cost more to maintain than they earn? Software answers these in seconds. Spreadsheets take hours — if they can answer them at all. These utilisation and cost metrics are the foundation of fleet management — deciding what to keep, what to retire, and where to allocate gear.
If you're weighing whether to stick with your current spreadsheet or make the move, our spreadsheet vs software comparison breaks down exactly when the switch makes sense and how to migrate without losing data.
![]()
The bottom line: start simple with Steps 1–3 and upgrade to software when manual tracking starts holding you back. Most operators who make the switch wish they'd done it sooner.
Quick-Start Checklist
Not sure where to begin? Here's your first-week action plan:
| Day | Task |
|---|---|
| Day 1 | List every rental item in one spreadsheet or system |
| Day 2 | Order weatherproof QR code labels (or print barcodes) |
| Day 3 | Tag every item and link each tag to its master list record |
| Day 4 | Train staff on the check-out and check-in workflow |
| Day 5 | Run a test day — track every rental and return |
| Day 6–7 | Review gaps, fix workflow issues, go live |
Within a week, you'll know where every piece of gear is, who has it, and when it's coming back. That's the foundation of rental inventory management — and it only gets better from here.
![]()
FAQ
What's the simplest way to start tracking my rental equipment today?
Create a master list of every item with a unique ID, current condition, and location. A spreadsheet works to start. Then add QR code labels to each item so staff can scan gear in and out instead of writing it down. This two-step foundation — a digital list plus physical tags — eliminates most tracking blind spots immediately.
Should I use barcodes, QR codes, or RFID tags for my gear?
QR codes are the best starting point for most rental shops. They cost under $0.50 per weatherproof label, scan with any smartphone, and survive outdoor conditions. Barcodes work for indoor operations but scratch off easily. RFID is worth the investment only for large fleets (200+ items) or high-value assets where walk-through scanning saves significant time.
How do I track items that go off-site (boats, bikes, camping gear)?
For short rentals, your check-out record plus automated return reminders is usually enough. For multi-day or high-value rentals, GPS trackers provide real-time location data and theft protection. The key is having a consistent check-out workflow that logs who has the item and when it's due back — every time, no exceptions.
How does tracking equipment prevent double bookings?
When every item has its own record and every rental creates a check-out entry, your system knows exactly which items are available at any moment. Two customers can't book the same kayak because the system blocks it the instant the first booking confirms. Without item-level tracking, you're relying on memory and manual checks — which fail during busy periods.
When should I switch from manual tracking to software?
The clearest signals: you manage more than 30 items, take bookings from multiple channels (website, phone, walk-ins), employ more than one person managing inventory, or you've experienced your first double booking. Any of these means manual tracking can't keep pace. Most shops complete the switch in under a week.
in one place