Setting Up Your Agreement
Everything about the wording lives in one place: Settings → Rentals → Agreement.
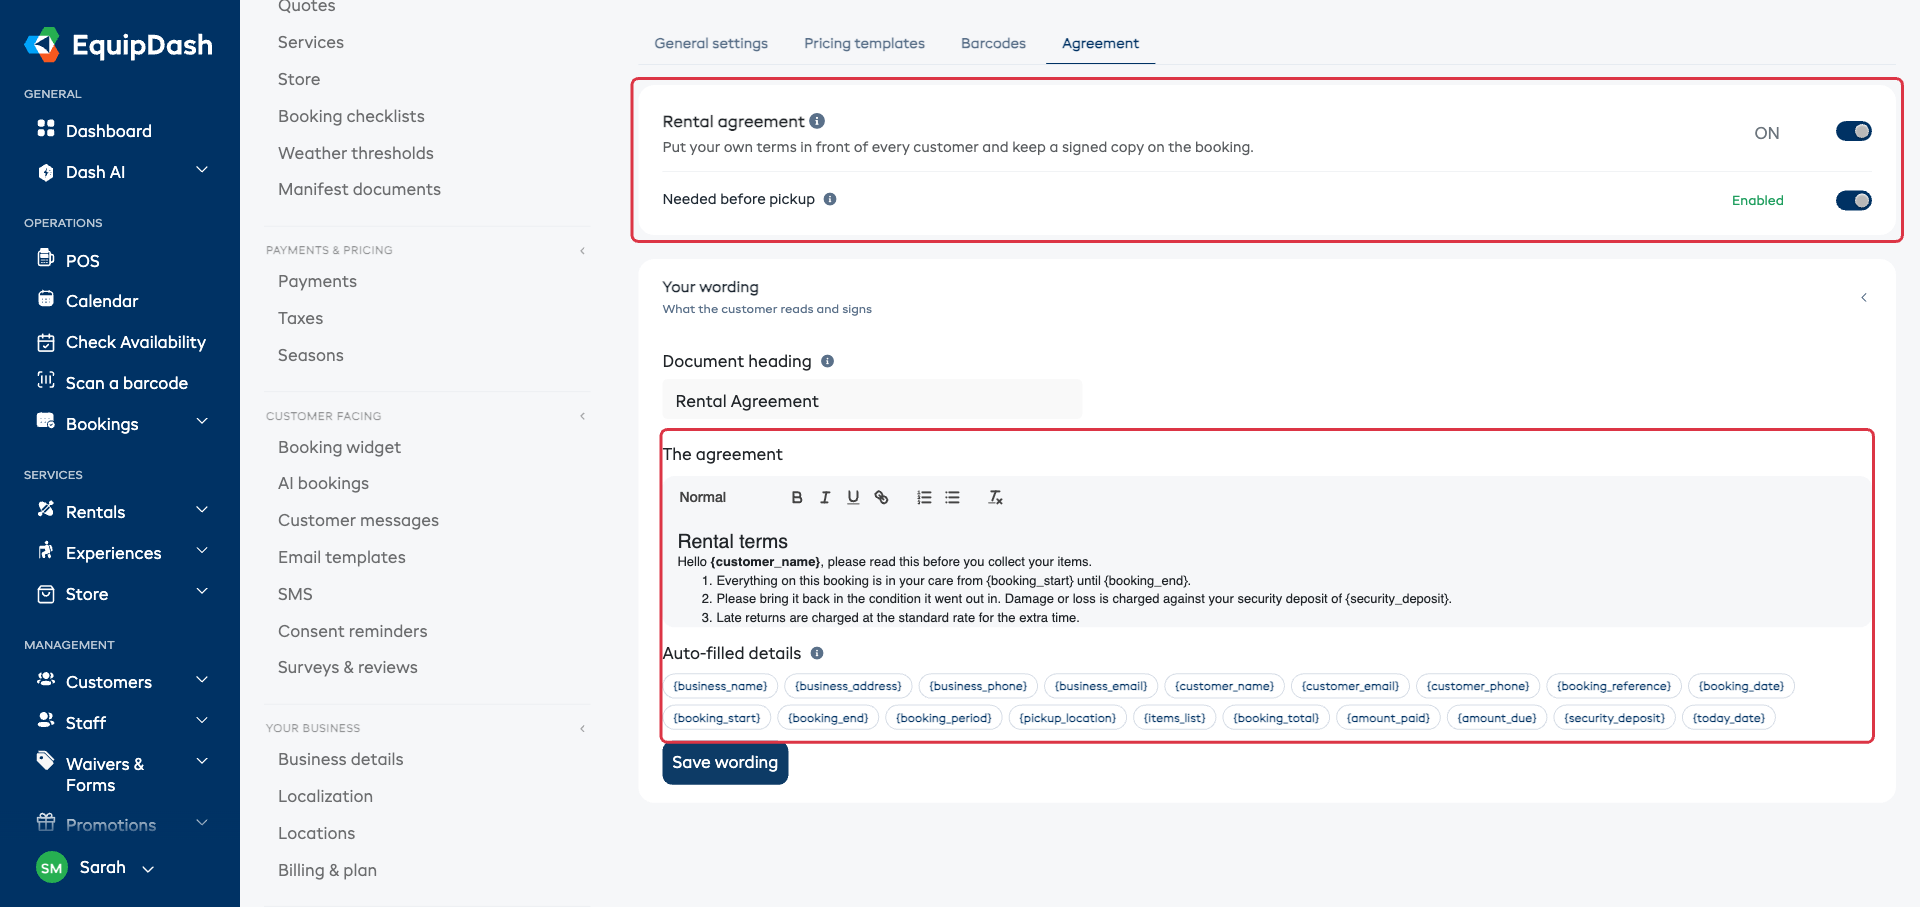
Turn It On First
Switch Rental agreement to ON. That's what opens up the wording box underneath — while the agreement is off there's nothing to write, so the box stays out of your way.
Nothing reaches a customer yet. Until you've written and saved your wording, you'll see a line reminding you that customers are only asked to sign once it's there. Bookings carry on exactly as before in the meantime.
Turning it off later hides the agreement everywhere. Nothing already signed is deleted, and a customer who has already signed can still open their copy.
Write Your Wording
The agreement starts empty. These are your terms, so the words are yours — we don't put any in for you, and there's no standard wording to fall back on.
- Set the Document heading. It's printed at the top of the agreement and used as the subject of the email. "Rental Agreement" is fine for most businesses.
- Write your terms in The agreement box, or paste in wording your own lawyer gave you.
- Click Save wording.
The box is a proper editor — the same one you use for a product description. You can make text bold, italic or underlined, add a heading, build bullet or numbered lists, and add a link. Pasted wording keeps its formatting.
EquipDash doesn't give legal advice and doesn't supply any wording. If your agreement has to hold up somewhere specific, have someone qualified write it or read it over.
Tags That Fill Themselves In
Anything in curly brackets — like {customer_name} — is a tag. When an agreement is created for a booking, each tag is swapped for that booking's real detail.
Click any tag under Auto-filled details to drop it in where your cursor is.
The tags you can use:
| What you want | Tag |
|---|---|
| Your business name | {business_name} |
| Your address, phone, email | {business_address}, {business_phone}, {business_email} |
| The customer's name | {customer_name} |
| Their email and phone | {customer_email}, {customer_phone} |
| The booking reference | {booking_reference} |
| The date it was booked | {booking_date} |
| When it starts / ends | {booking_start}, {booking_end} |
| Both together, on one line | {booking_period} |
| The location on the booking | {pickup_location} |
| Everything booked, one per line | {items_list} |
| The booking total | {booking_total} |
| Paid so far / still owing | {amount_paid}, {amount_due} |
| The refundable security deposit | {security_deposit} |
| Today's date | {today_date} |
You don't have to use any of them — the items, dates and amounts are already printed above your terms on every agreement. The tags are for when you want to mention something inside a sentence.
Flagging It as Needed Before Pickup
Needed before pickup sits in the same box as the on/off switch, and only appears once the agreement is on. It makes an unsigned agreement stand out on the booking so nobody hands anything over without it. It's a reminder for your team, not a lock — a handover is never blocked.
Changing the Wording Later
Editing the wording here affects new agreements only. An agreement a customer has already been sent keeps the wording they were shown, so nobody ever signs one thing and has it change afterwards.
Need a one-off change for a single booking? See Getting It Signed.
Who Can Do What
Three separate permissions, so the front desk can take a signature without being able to rewrite your terms:
| Permission | What it lets someone do |
|---|---|
| View rental agreements | See the agreement on a booking, and read it |
| Send agreements and take signatures | Email the link, and sign at the counter |
| Edit the agreement wording | Change your terms in Settings, and tweak them on one booking |
Set these per person under Settings → Team.
The Email That Goes Out
The "please sign" email is editable like every other customer email — Settings → Email templates → Agreement to Sign. You can change the subject and the wording around the button; the booking details and the button itself stay put.