Product Images & Descriptions
Great images and clear descriptions help customers understand what they are renting and make confident booking decisions. Everything you add here appears on your public booking widget.
Adding Images
During product creation
- In the product wizard, navigate to Step 1: Product Details.
- Click the image upload area or drag and drop image files into it.
- You can upload up to 5 images. Supported formats: JPG, JPEG, PNG, BMP, GIF, SVG, and WebP. Maximum file size is 500 kB per image.
- Recommended image size is 500 px x 500 px.
On an existing product
Photos are managed inline on the Details tab of the product detail page:
- Go to Rentals > Products and click the product name.
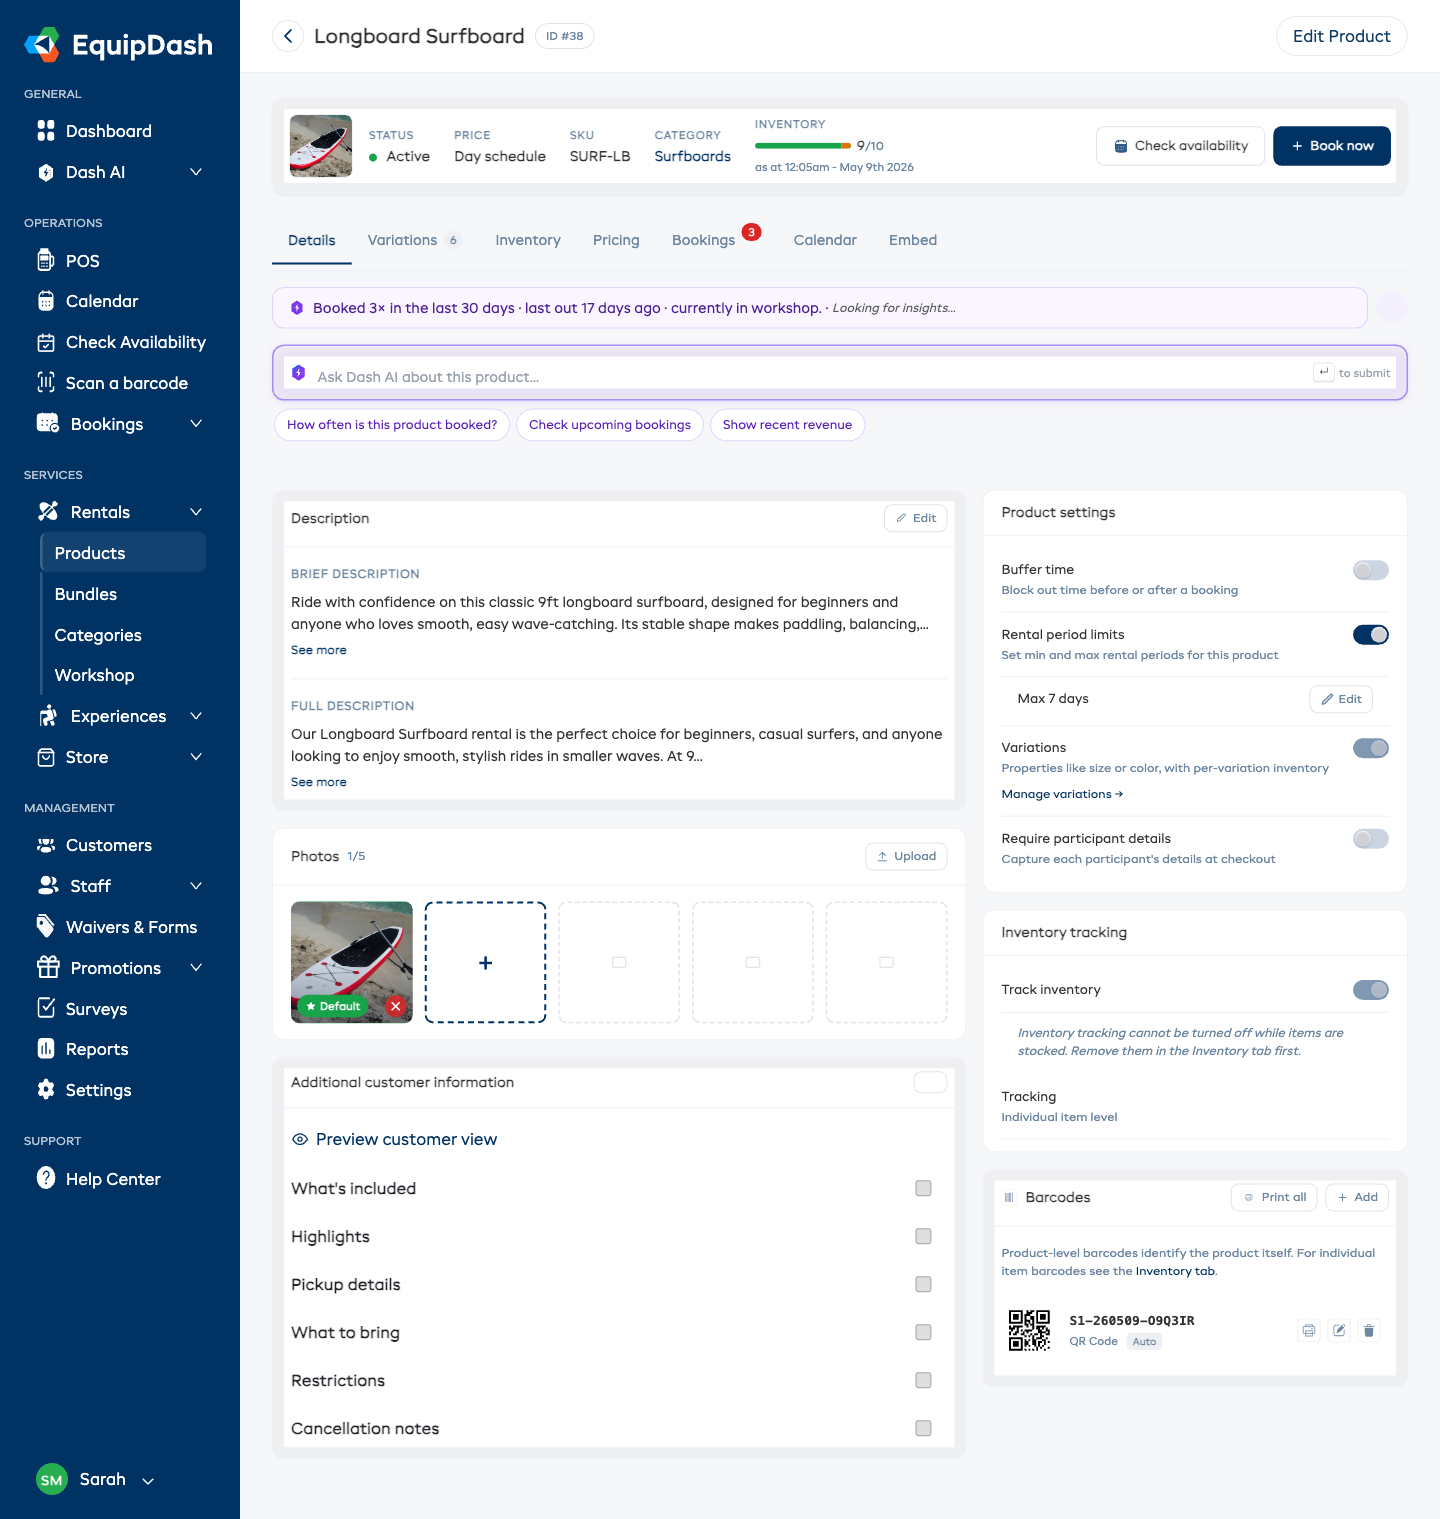
- The Details tab opens by default. Scroll to the Photos card on the left column.
- The Photos card shows up to five image slots. Click an empty slot to add a photo, or click the X in the corner of an existing photo to remove it.
- The Default badge marks the main photo customers see in product listings.
- Drag any photo to a new spot to change the order customers see in the widget gallery. The new order saves automatically.
Reordering Images
Photos appear in the widget gallery in the same order as the Photos card. To change the order, simply drag a photo to its new position — the order saves the moment you drop it, and a green confirmation pill appears. Reordering doesn't change the default image; use the Default button for that.
Default Image
The first image you upload is used as the main photo shown in product listings and search results. It is the first thing customers see. To change the main image, hover over your preferred photo and click the Default star button.
Removing Images
- Hover over the image you want to remove on the Photos card.
- Click the X icon in the corner of the image.
- The image will be removed immediately.
Adjusting a Photo (Crop, Zoom & Rotate)
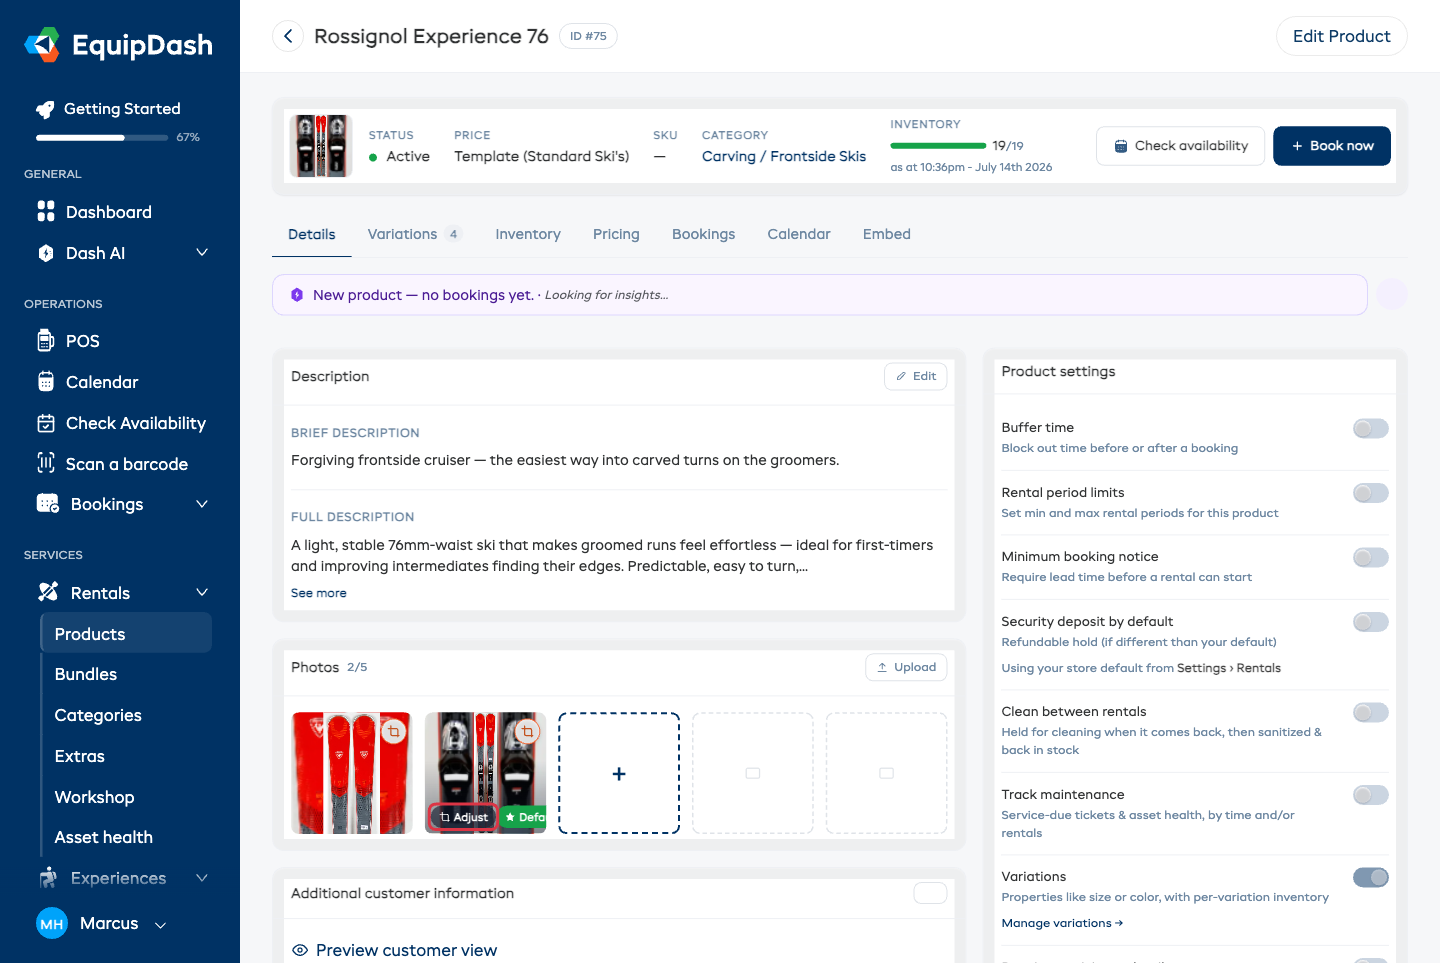
If a photo isn't framed the way you want — the item sits off-center, there's too much empty space around it, or it was taken sideways — you can adjust it right on the Photos card. No photo-editing software needed.
- Go to Rentals > Products and click the product name. The Details tab opens by default.
- On the Photos card, hover over the photo and click Adjust.
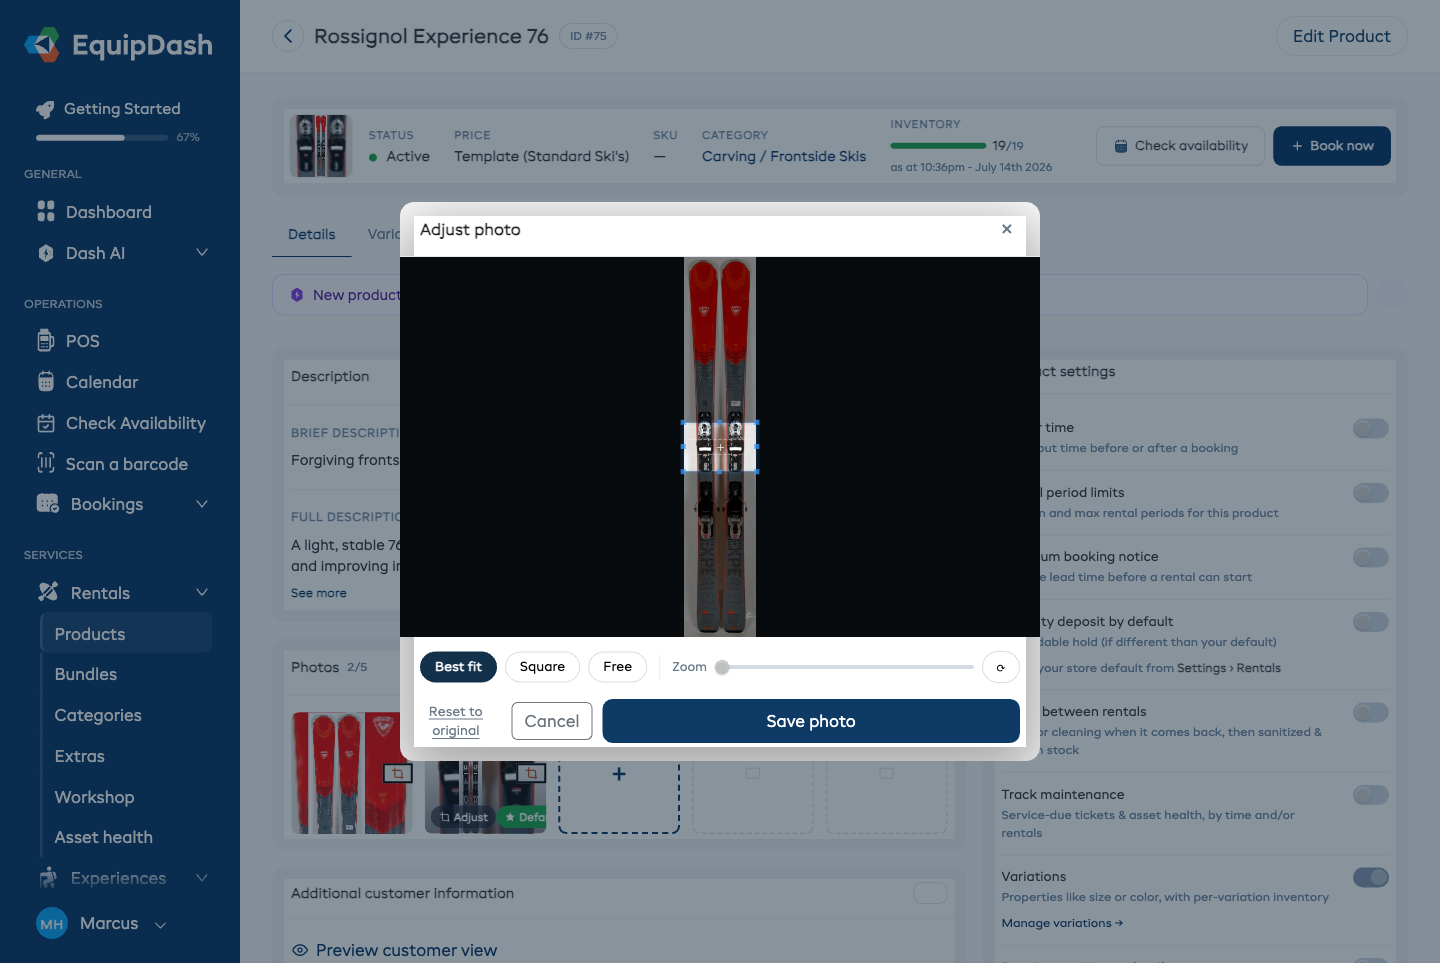
- The Adjust photo window opens with your photo inside a crop frame:
- Drag the frame (or the photo) to choose which part shows.
- Use the Zoom slider to get closer to the item.
- Click the rotate button to turn a sideways photo upright — each click turns it 90 degrees.
- Pick the shape of the frame with the chips above the buttons:
- Best fit (recommended) -- the shape your booking site uses. One crop here looks right everywhere: product page, listing cards, and thumbnails.
- Square -- a 1:1 frame.
- Free -- drag the frame to any shape you like.
- Click Save photo. The updated photo appears everywhere — your booking site, product listings, and the point of sale — after a refresh.
Your original photo is always safe
Adjusting never overwrites your upload. Open Adjust again at any time and your previous framing is still there to fine-tune — or click Reset to original to bring back the untouched photo exactly as you uploaded it.
The "Adjust framing" hint
If a photo is much taller or wider than the frames your booking site uses, a small crop-icon badge appears in its corner on the Photos card. It's just a suggestion — click it to open the editor with the photo ready to adjust. The photo still displays nicely in the meantime (see unusually shaped photos below).
Small photos
If you upload a photo that is quite small, EquipDash shows a gentle note that it may look blurry on your booking site. The upload still goes through — but if you have a larger version, use it for a sharper result.
Photos of an Unusual Shape
You don't need to do anything for very tall or very wide photos to look right. When a photo's shape doesn't match the display frame, your booking site automatically shows the whole item over a soft, blurred backdrop instead of zooming into the middle of it. This happens everywhere photos appear — the product page gallery, listing cards, and the point of sale. Photos that already match the frame keep filling it edge to edge, just like before.
If you'd rather choose the framing yourself, use Adjust — your crop always wins.
Writing a Brief Description
The Brief description is a short summary (like a tagline) that appears alongside the product image in listings. It is limited to 100 words. Keep it concise and descriptive.
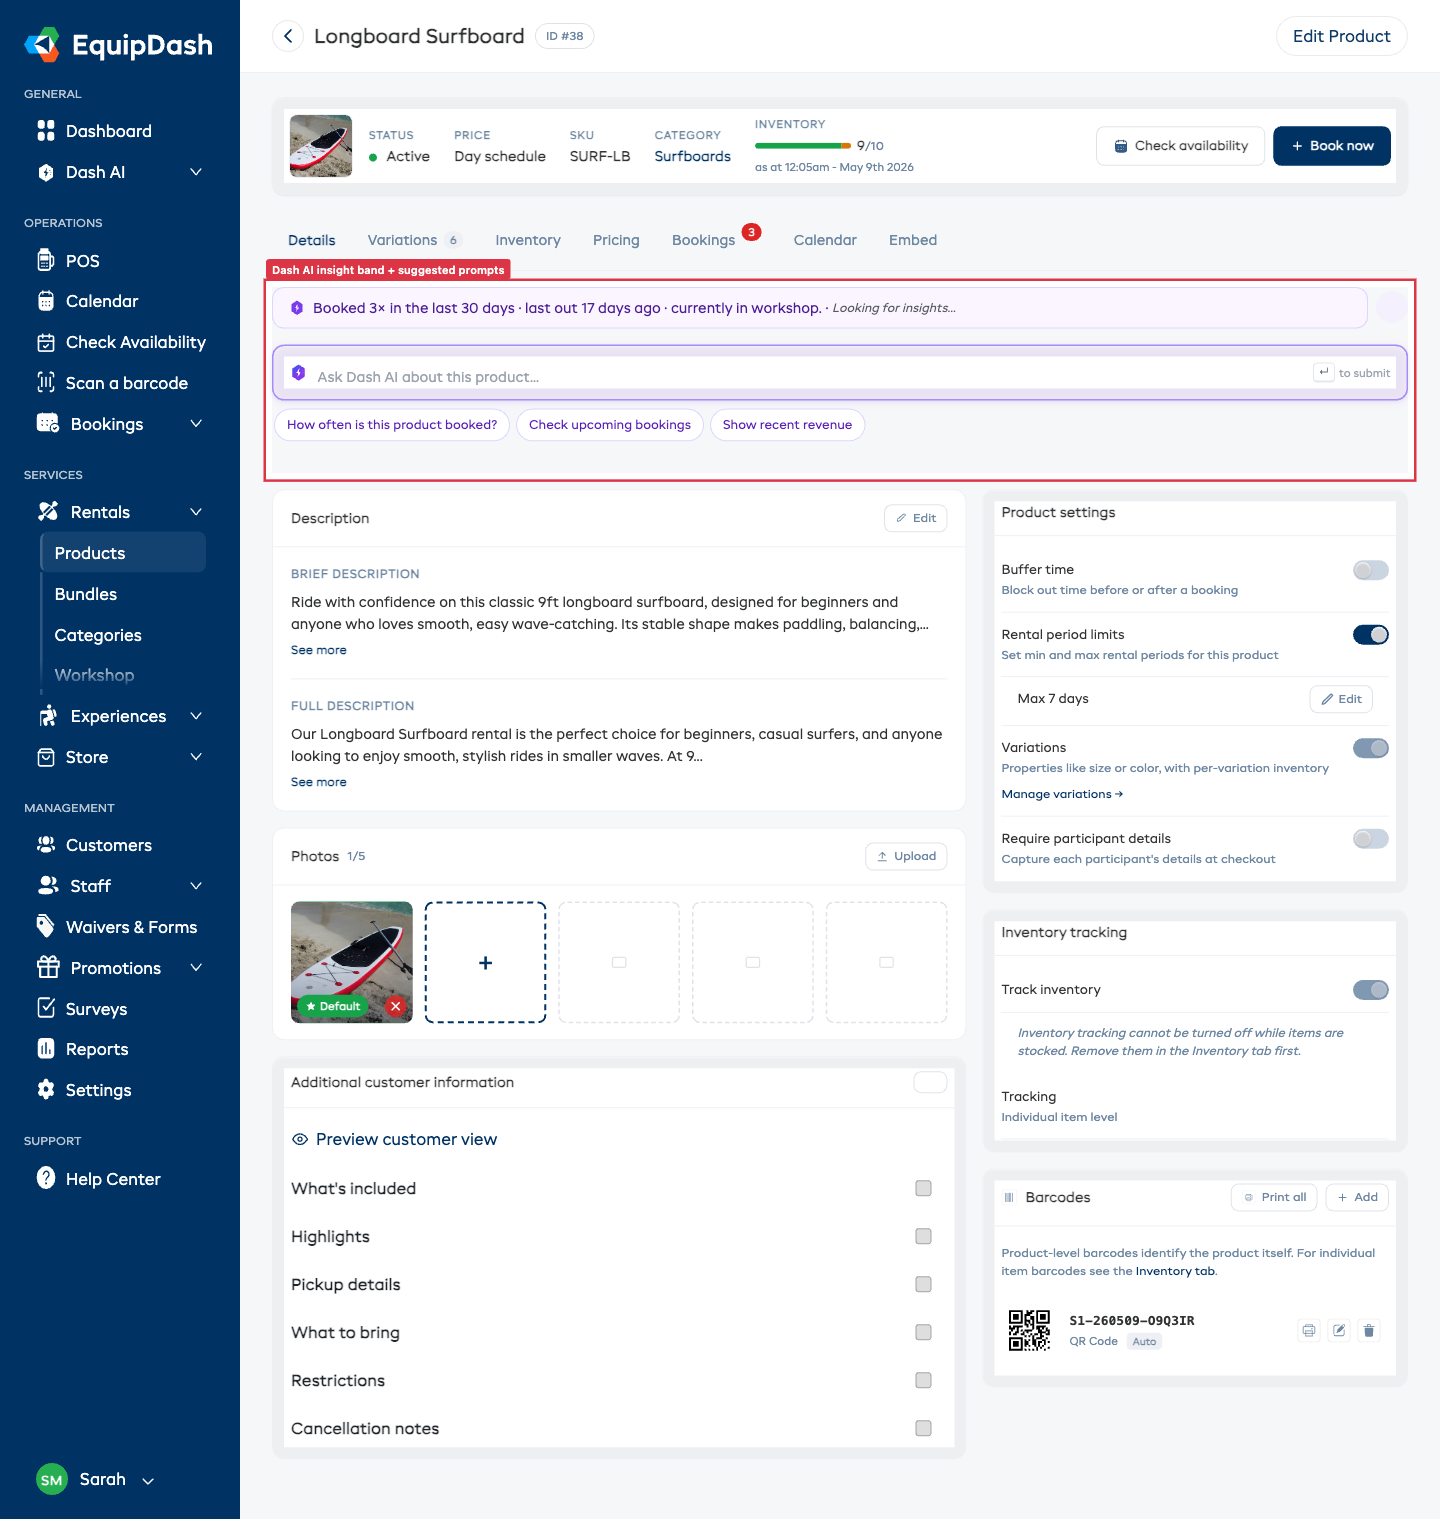
The brief description lives in the Description card on the Details tab of the product detail page. Click Edit in the top-right of the card to open the inline editor, then click the green AI Generate button if you want EquipDash to draft a brief description from the product name and details.
Good examples:
- "Professional-grade mountain bike for all trail levels"
- "Full wetsuit with thermal lining, available in all sizes"
- "Compact camping stove, perfect for backcountry trips"
Writing a Full Description
The Full description is the detailed product information that appears on the individual product page in the widget. Use this space to tell customers everything they need to know.
The full description lives in the same Description card on the Details tab. Click Edit to open the inline rich text editor, or click the green AI Generate button to have EquipDash write one for you.
The description editor supports the following formatting options:
- Normal style dropdown (for paragraph styling)
- Bold, Italic, and Underline
- Links
- Bullet lists and numbered lists
- Clear formatting
Tips for effective descriptions
- Lead with benefits -- Tell customers what the product will do for them, not just what it is.
- Include specifications -- Mention relevant details like dimensions, weight, materials, or what is included.
- Set expectations -- Note any requirements, like needing a car rack for a kayak or experience level recommendations.
- Keep it scannable -- Use short paragraphs and bullet points so customers can quickly find what they need.
How It Looks on the Widget
Once saved, your images and descriptions appear on the booking widget where customers browse your products. The default image shows in the product grid, and clicking into a product reveals all images in a gallery along with the full brief and description.
Related Guides
- Creating a Product -- Full product creation walkthrough.
- Managing Products -- Editing products after creation.
- Widget: Rentals -- How products appear on the booking widget.